70's Bling for my eBuild

Homebrew Talk - Beer, Wine, Mead, & Cider Brewing Discussion Forum

Help Support Homebrew Talk - Beer, Wine, Mead, & Cider Brewing Discussion Forum:

This site may earn a commission from merchant affiliate links, including eBay, Amazon, and others.

Bensiff

Well-Known Member
Joined
Mar 13, 2008
Messages
4,835
Reaction score
411
I kept telling Kickflip I would post some photos of my build so here it is. Its been really slow going having had my son born last June and now working on moving; but, I get a few hours here and there to work.

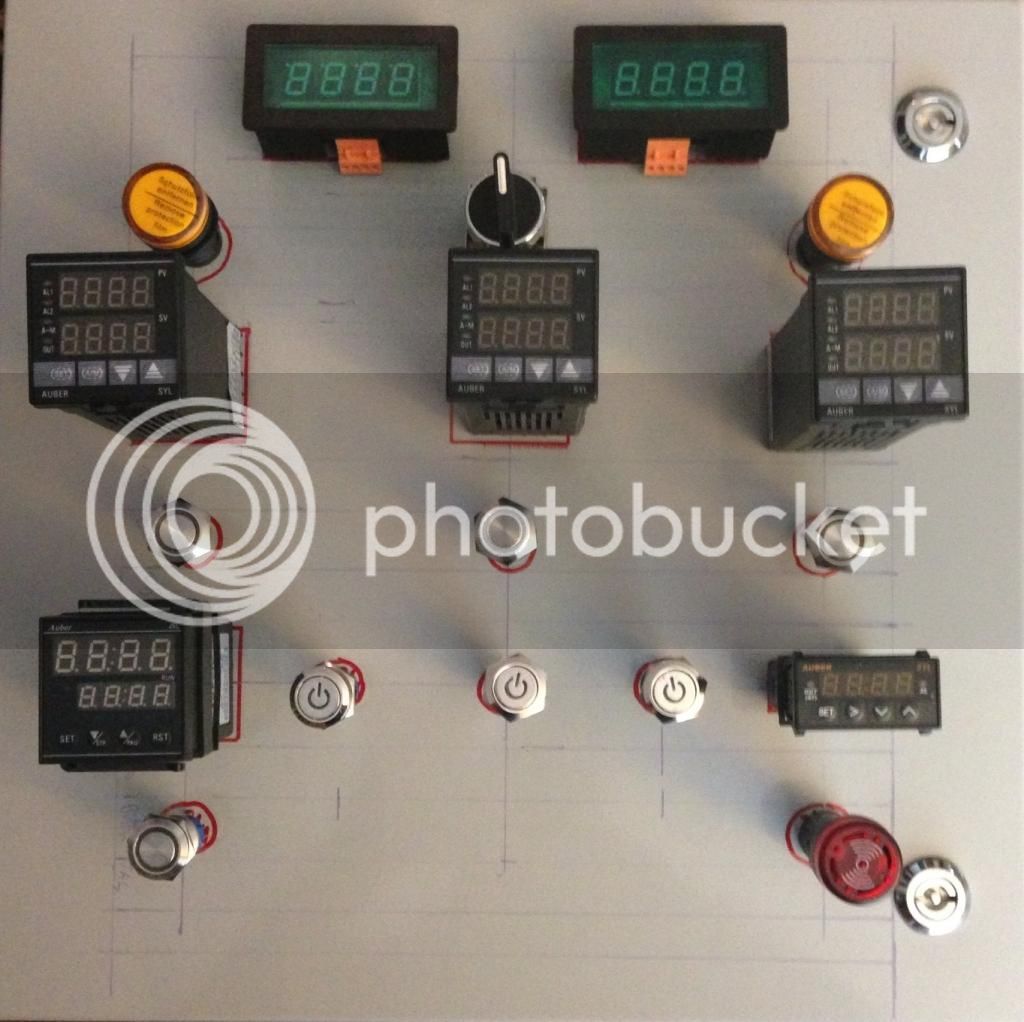
The panel...Kal inspired obviously

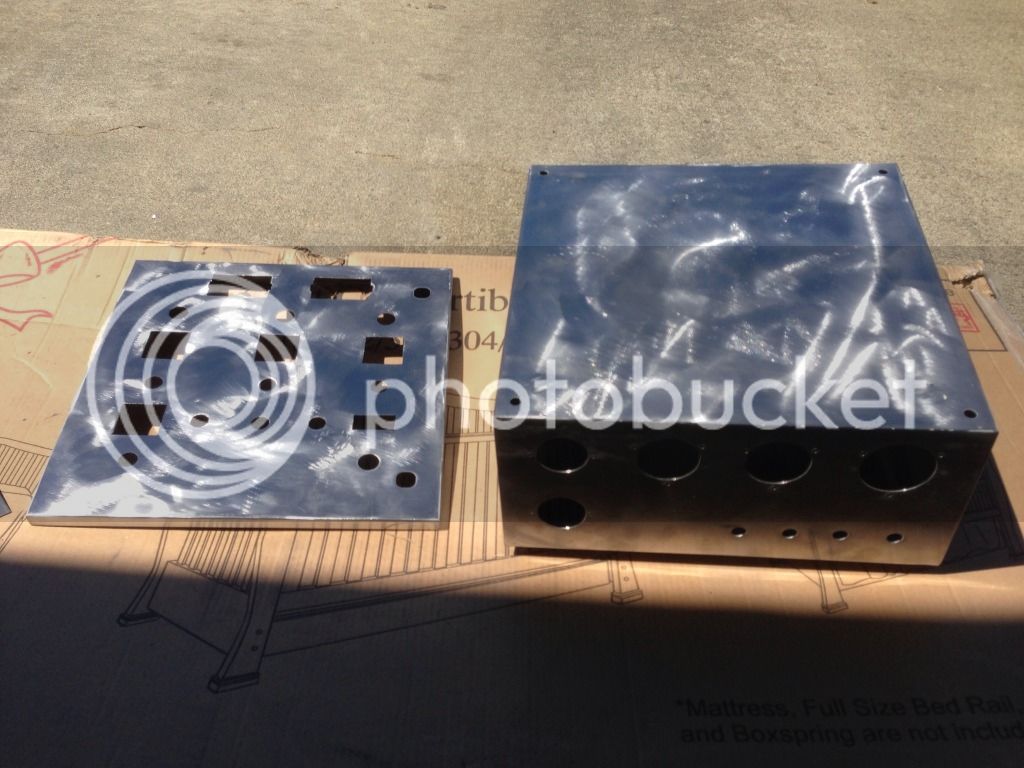
Getting ready to make the cuts:


Yup, a HF speed bit works just fine:


Manufacturer primer stripped, ready for some acid etch:


Makeshift paint booth, first coating of U-POL 8:


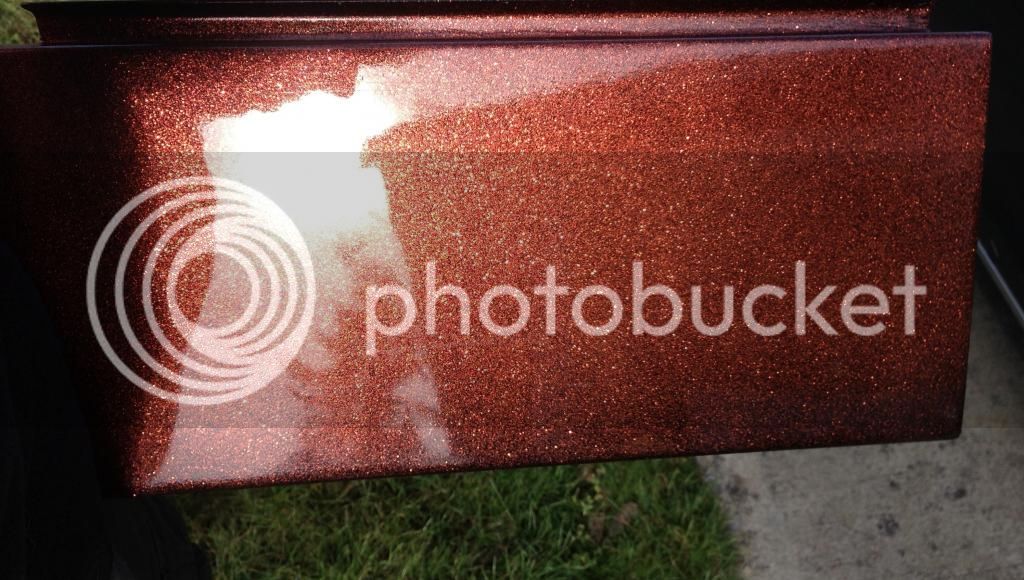
And now your 70's flashback, some good ol' metal flake...black base with copper metal flake:


Beginning to install:

 
Oh man those buttons are sleek!! I know you have way more pictures, keep them coming!
 
Holy crap i didnt see the other photos!! that paint job is so awesome!!!

Thanks...I wanted it to look like a nice effervescent beer. Metal flake doesn't look the best in pictures so those don't really do it justice. They also look flat without being in the sun so I put in a mini halogen bulb track light from IKEA to get it to sparkle in the garage. I'll try to get a photo of it this week and perhaps pics of the brewstand build.
 
I use to have a helmet that color. I would roll around the neighborhood on my Honda 50 like a real bad ace. It's a great color. Great job.
 
Ok, that is one radically awesome panel, but I have to ask: am I really seeing four PIDs - and if so, what are they all controlling?

Cheers!
 
day_trippr said:
Ok, that is one radically awesome panel, but I have to ask: am I really seeing four PIDs - and if so, what are they all controlling?

Cheers!

Yeah four PIDs and a timer. The fourth pid is aubers most basic, not there to control anything, just to monitor temps on the cold side of the counter flow chiller.
 
Groovy!

Actually, I had a Ford Ranger that same color. I called it "The Flying Turd"... then, later in life, I had a Chevy blazer that same color. Obviously, that turned into "The Flying Turd, Too".

Gorgeous work.
 
Groovy!

Actually, I had a Ford Ranger that same color. I called it "The Flying Turd"... then, later in life, I had a Chevy blazer that same color. Obviously, that turned into "The Flying Turd, Too".

Gorgeous work.

In highschool my buddy had one of those early 80's Civic hatchbacks painted brown...given our propensity to jump it, it was known as "The Flying S#!t"
 
Here it is powered up. I haven't done any programming yet. For some reason when I hit the alarm button the buzzer sounds, so the switch is getting constant juice for whatever reason. Hopefully that is a simple solution, such as not having the RTD plugged in or a setting on the PID instead of some wiring mistake...those switches are DC so are wired to a bank of small SSR's, I don't want to touch that mess again.


For some reason the iPhone app has decided it will only do a thumbnail even though it worked fine the other day. I suppose I have to agree with all the folks who only gave the Photobucket app 1.5 stars.
 
image-2628526111.jpg

Ok. Using the HBT app to upload instead of annoying photobucket.
 
I dislike flake, but for some reason it really looks great on that panel.

Lovely job so far.

Yeah nothing I would put on a car for sure. But, it has its place, race boats, bass boats, go-karts, and now, brewing control panels :).
 
Straight awesome. I'm not a shiny gal but this definitely interests me a bunch.
 
Son of a...

Great. Just great. Now I have to repaint my control panel. Thanks a lot, jerk.
 
Bensiff said:
Hopefully that is a simple solution, such as not having the RTD plugged in or a setting on the PID instead of some wiring mistake...those switches are DC so are wired to a bank of small SSR's, I don't want to touch that mess again.

It's more than likely this. You must have the RTD plugged in or the pid will alarm.
 
You need to put bowling alley wood on the floor and a disc ball with some black lights! That is a great looking paint job! Did you airbrush it or use a HVLP sprayer?
 
You need to put bowling alley wood on the floor and a disc ball with some black lights! That is a great looking paint job! Did you airbrush it or use a HVLP sprayer?

Maybe I'll hang that disco ball from the brewstand I'm building right now :).

Shot it with HF's "professional" HVLP...Since I'm a novice with HVLP I can't really say if the HG gun worked well or not, other than I'm happy pretty happy with the results. I wish the clear went on a little smoother; but, I really think that has more to do my ability and knowledge than anything. For the stand I am putting down high build instead of putting the base right over the acid etch and then I am going to add a little more reducer to the last few coats of clear and hopefully those two things will come together to get a better finish.
 
The guts...maybe there is a better way, but this is how I figured out how to get the DC switches to work, a bank of SSRs.


image-1311762414.jpg
 
Looks great man! Im scared to start wiring, Its not really a strength of mine! Wheres your rig?
 
Looks great man! Im scared to start wiring, Its not really a strength of mine! Wheres your rig?

Wiring isn't too bad. Wire one component at a time so you don't lose focus or get overwhelmed. Don't expect it to be perfect the first time either (I cooked two amp meters by screwing up my translation of really bad Chinese directions). I left a little extra in the wires going to the terminal blocks (I screwed them down bare wire initially) so that when I tidied everything up I didn't end up with wires that were too short. Where they were too long it was simple enough to cut them to length and toss on a proper connector. Anyway, it is a lot of work that requires focus; but, it comes together faster than you would think if you have the supplies and tools you need handy.

The stand, well, my time is pretty much 100% spoken for right now so it is so close to being done, yet so far away. I have it fully fabricated, test fit, and almost 100% sanded. Each kettle will sit on a square frame and attached to that via stainless quick pins that will go through the skirts of the kettles. That assembly is attached to the mainframe with some heavy duty ss boat hinges so each kettle will be easy to tip. The kettle frame assemblies have been shot with acid etch and high build. I just need to find the time to do the last bit of sanding on the main frame and then etch and prime. Then I need to hit everything with a scuffing pass and find a day that I can dedicate to putting down the actual paint.
 
Back
Top