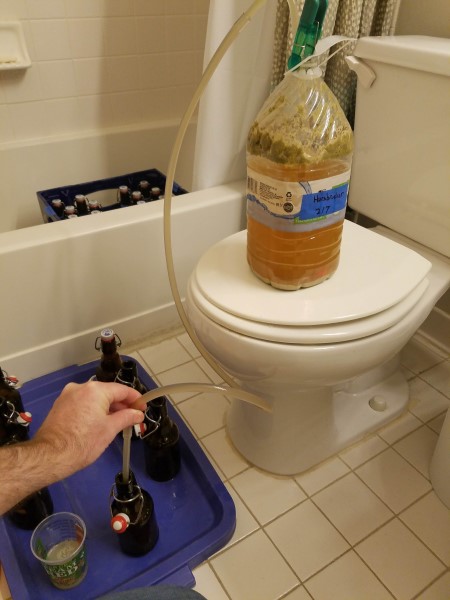
1-Gallon Brewers UNITE!

Homebrew Talk - Beer, Wine, Mead, & Cider Brewing Discussion Forum

Help Support Homebrew Talk - Beer, Wine, Mead, & Cider Brewing Discussion Forum:

This site may earn a commission from merchant affiliate links, including eBay, Amazon, and others.
Are those the fermenting lids that u dont need a airlock with?
I screwed up my last brew day. I planned a nice light lager, but had to do other things while I was getting the grain together and ended up adding 30% more base malt than intended. So I have a gallon, 1/3 gallon and 1 quart in fermenters to keep abv in the range I wanted. should still be a nice lager.
 
Hey folks!

Getting ready to pull the trigger and order my brewing setup to get this ball rolling, but I figured I'd ask here before I whip out the credit card -

Can anyone who uses the one gallon FerMonster attest to its quality?

Many of the reviews I've found are only initial opinions / observations, but they often speak to the flimsiness of the plastic. Given that it's going to cost me about $80 to buy two of them with spigots and stoppers after shipping, I'm a little wary of investing in something that's not going to last more than a handful of brews.

Also, has anyone tried the BrewDemon Baby? It seems perfect for our needs - one gallon brews with a bit more headspace than the FerMonster, without the whole glass shattering quality of the LBMB.

https://www.northernbrewer.com/prod...MIpMLvq8v85wIVGh6tBh1RnAkaEAQYBiABEgJwiPD_BwE

i have two of these. They are glass, and 1.4 gallons which allows room for fermentation. Two of these will not cost $80. I use them for mead. They are great.
 
i have two of these. They are glass, and 1.4 gallons which allows room for fermentation. Two of these will not cost $80. I use them for mead. They are great.

Even better, for an extra $5 get one with a spigot.

To reply to both of you at the same time: I want the siphonless LBMB. It's the perfect size, easy to clean, and I love the look of it anyway - but, it's not available in Canada, so I need to order it, and nobody who sells it offers any sort of insurance on international shipping. So, if it arrives broken, I'm just out of luck. If I could find them here, or even find someone who'd import it with some sort of security that I'm not paying for a box of sharp glass, I'd buy two of 'em in a heartbeat.

Considering the first two reviews on the page mention cracked units, I can't see that being a safe investment for me.

It is shipping to Canada that bumps the cost

The shipping for my FerMonster from within Canada is still $24. That's part of why the FerMonsters cost me close to $80 - $40 for the two FerMonsters, plus a spigot ($5x2) and stopper ($4.3x2) for each one, and I don't even really want them. I like the PET plastic so I'm not worried about shattering, but nobody - here on HBT or elsewhere - has encouraging things to say about the quality of the smaller variants.

It's looking more and more like I'm just going to buy a Mr. Beer kit from a LHBS entirely so I can get my hands on the 2 gallon LBK. I would rather something clear, but my options are limited, it seems.
 
Last edited:
Just my two cents.

If it were me and I was basing the purchase on my experiences with my 3G fermonster, I wouldn’t think twice on the 1G. I really love the 3G siphonless version. It does feel thin and flimsy, but I haven’t had issues with leaks or cracks after the dozen or so brews it’s held. The lid can be a major pain in the ass to twist off, though. Like whoa.
 
I want the siphonless LBMB. It's the perfect size, easy to clean, and I love the look of it anyway - but, it's not available in Canada, so I need to order it, and nobody who sells it offers any sort of insurance on international shipping. So, if it arrives broken, I'm just out of luck. If I could find them here, or even find someone who'd import it with some sort of security that I'm not paying for a box of sharp glass, I'd buy two of 'em in a heartbeat.

What about using two gallon food grade buckets? I brew small batches with a mix of LBMBs and 2 gal buckets and I get good results from either fermenter.
 
Are those the fermenting lids that u dont need a airlock with?
They are yes, made from foodsafe silicone. They seem to work like a baby bottle's teat, there is a cross cut in the top that the gas escapes from but it is small enough that nothing else can get in. I got them from wish.com took a month to get here, but I like using them for starters, small 1/2 gallon wine batches and to play around.
 
I don’t have the 1 gallon version, but I do have a couple of the ported 3 gallon versions. I will say the plastic is surprisingly thin and flimsy, but after 4 brew days I have not had any issues.

Same here. I picked up a pair of 3 gal Fermonsters about a year ago (well, I got one, and liked it enough to get a second one). At first I was turned off by the thin wall, but it really has not been an issue. I find that you can fairly easily lift them from the top (grabbing the rim around the lid) with minimal flexing. I recently picked up a 7 gal Fermonster.

That said, the Little Big Mouth Bubblers look tempting and I like the size over the 1 gal Fermonster.

Though I just had good luck with the two 3/4 gal batches I fermented in some 1 gal PET jugs that distilled water came in...$0.99 for 1 gal of water and a 1 gal fermenter is tempting too.

20200224_230142 - Copy.jpg
 
I have two Picos, a Model C and a S/Pro. Since I have started brewing manually, I have kicked the capacity from 1.36 gal to 1.5 gallon.
I find that I brew more and EXPERIMENT more with the smaller batches. I have ordered NB 5 gallon kits on sale and split the kits into 5 "servings" so to speak.
Most of the time I like the finished product, but every once in a while it is not what I expect. So a little research into the problem and I can make another batch.
It's a funny thing. Did y'all know that not great tasting beer that's FREE gets used up faster than great tasting beer that my neighbors don't know anything about!
Just sayin'.
 
I'm thinking about doing a split batch with one gallon to compare different yeasts.
Is there any reason why I shouldn't use this ikea 1 litre carafe to ferment the smaller batch.

(I would find a proper plug and add airlock of course) View attachment 668130

For micro batching, we regularly use ordinary 2L plastic water bottles filled up to the curve, with their lids left loose instead of an airlock. Not had a problem with them except there being not enough beer when they're very nice.
 
Can anyone recommend a budget friendly induction cooktop I can use for one gallon batches? I'm trying to keep all my brewing in the basement and not have to use the stove upstairs when I want to do a small batch. All of them that I've looked at only have 10 or so different power levels so I'm not sure how big of a a deal that would be when it comes to mash temperature.
 
Can anyone recommend a budget friendly induction cooktop I can use for one gallon batches? I'm trying to keep all my brewing in the basement and not have to use the stove upstairs when I want to do a small batch. All of them that I've looked at only have 10 or so different power levels so I'm not sure how big of a a deal that would be when it comes to mash temperature.
Check around at yard sales, flea markets, thrift stores, etc and look for the NuWave (insert precious metals here!) Personal Induction Cooktop.
There are cheap and they work quite well.
 
The 10 power levels are really fine, given the fact that you can't use electronically managed temp control. For example, this Avantco is only $45.

What I do is to dough in when the water is at mash temp (as opposed to a higher strike temperature). After doughing in, I set the cooktop for 140-160F (depends) and monitor the temp til it comes up to the desired rest temp, which takes just a couple of minutes usually.

From that point on, I drop the setting on the cooktop to minimum and monitor things with a Bluetooth thermometer. Typically, I will have to shut it off for 5 minutes a few times during an hour mash. Last time I did this, I targeted 154 as my rest temp, and kept the mash at 152-156 for the hour.

I do recirculate, which is pretty important if you're going to keep the burner on. Otherwise, just insulate the kettle and call it a day.
 
I've been kicking around this idea as well since moving the bulk of my brewing into the basement. I've always chilled using a cold water/ice bottle bath, but now have an immersion chiller. Haven't test it out on a small batch yet, but is there any worry of overkill while chilling?
 
IKEA has a good one for about $45. I bought mine at aldis a few weeks ago for $42. Works great
Can anyone recommend a budget friendly induction cooktop I can use for one gallon batches? I'm trying to keep all my brewing in the basement and not have to use the stove upstairs when I want to do a small batch. All of them that I've looked at only have 10 or so different power levels so I'm not sure how big of a a deal that would be when it comes to mash temperature.
 
...is there any worry of overkill while chilling?

An immersion chiller still takes time to bring a gallon of boiling wort down below 70F. It's certainly faster with a small batch, and wastes less water, but it is not going to blow your socks off. No need to worry about turning your wort to slush. :)
 
If you end up OVERchilling your wort, (assuming it's hooked up to a sink) you can also run some hot water through the immersion chiller it to bring it back up to pitching temp!
 
Ha, I guess I'm not sure what I was concerned about with my cobbled together process. Ive been doing fewer and fewer small stovetop batches anyway and I only have two more small batch recipes waiting to be brewed ( a dunkelweizen and a porter). I like my Mash&Boil set up too much.

Side note- My last lager (I think, unless I try the whole warm ferment thing) of the year is in the books. Small batch Munich Dunkel. I'm excited.
 
For any small batch brewers still struggling with minimizing trub and hops material in their small fermenters, I've recently found large-size reusable fine-mesh (100 micron or so) nut milk bags to be the perfect small-batch wort filter. Just hang it in the opening to your LBMB or Fermonster and let it filter damn near everything out as you transfer from your kettle. Lift it out and let it drain when done and be amazed at the lack of trub!
 
For any small batch brewers still struggling with minimizing trub and hops material in their small fermenters, I've recently found large-size reusable fine-mesh (100 micron or so) nut milk bags to be the perfect small-batch wort filter. Just hang it in the opening to your LBMB or Fermonster and let it filter damn near everything out as you transfer from your kettle. Lift it out and let it drain when done and be amazed at the lack of trub!
Funny, I have 3 one gallon batches planned over the next couple weeks and I was thinking of doing something similar.
 
For any small batch brewers still struggling with minimizing trub and hops material in their small fermenters, I've recently found large-size reusable fine-mesh (100 micron or so) nut milk bags to be the perfect small-batch wort filter.
1 gallon paint strainers bags work well. They are fine enough mesh to keep a paint spray gun from getting clogged and they have really small nozzles. I have used them for brewing and making nut milk. I think they are a lot cheaper than ones sold specifically as nut milk bags.
 
I've been using paint strainer bags for over a year and thought they did well, but it's a night and day difference between a nut milk bag and a paint strainer for only a few dollars more.
 
I used to make a lot of jams and used the ordinary cotton liners to separate solid matter from juice, but one day found some old sheer nylon net curtains in a charity shop. I cut them up into huge squares and hemmed them (you don't have to) and they are the strongest and most robust strainers. They take a ton of wringing and squeezing without breaking, they don't stain, don't hold the juice, and they dry in a flash.
 
I've recently found large-size reusable fine-mesh (100 micron or so) nut milk bags to be the perfect small-batch wort filter.

THAT'S quite clever! I've been whirlpooling as of very recently, but even a conservative quantity of whole cone hops limits that technique's usefulness...

And these puppies are just too big (my kettle has perhaps 7" of clearance for such a device)

Further, I used to use a funnel with inset filter, but the darned thing gets clogged very quickly due to the size of the tiny filter...this solves basically all of those problems! Quite elegantly, too!
 
I've been looking for a good stainless tea/hop filter, and there's just no market for a ~6" tall filter - it's way too much for tea, and too small for 5 gallon batches; but this may work, and I've just purchased this, so I'll let you know if I figure out a way to secure it!
 
I love One-Gal Brewing. Smaller batches mean I brew much more often than the Five-Galloners. In the two years I'm in the hobby I brewed like 75 diffrerent beers, learning a lot of techniques. I would't learn as much if I brewed larger batches.
 
I passed on the induction burner for now and bought a $30 sous vide on Amazon. I’ve done three batches with it so far and doing another today. Sampled the first batch last night and it was delicious!
 

Attachments

  • 31F35C05-38D8-4FE1-B98B-1034E2FC8ABF.jpeg
    31F35C05-38D8-4FE1-B98B-1034E2FC8ABF.jpeg
    2.1 MB · Views: 73
Last edited:
I passed on the induction burner for now and bought a $30 sous vide on Amazon. I’ve done three batches with it so far and doing another today. Sampled the first batch last night and it was delicious!

Nice! I've always been curious about using those for small mashes, so I'm very encouraged to hear it works

And hell, if you ever "upgrade" to a HERMS coil, you've got your dialed-in water heater right there, no need to regulate flow in order to regulate temp!
 
Nice! I've always been curious about using those for small mashes, so I'm very encouraged to hear it works

And hell, if you ever "upgrade" to a HERMS coil, you've got your dialed-in water heater right there, no need to regulate flow in order to regulate temp!

yeah, I brew my large batches with a grainfather and it works perfectly for heating the sparge water! Can’t beat it for $30.
 
I passed on the induction burner for now and bought a $30 sous vide on Amazon. I’ve done three batches with it so far and doing another today. Sampled the first batch last night and it was delicious!
Is there any way to inspect the heating element on the sous vide? I've thought about this but was concerned about the lifespan, circulating sticky wort through an element that was designed for water.
 
Yep just twist it off to expose the element. It’s been recommended to circulate a vinegar/water mix through to clean it after your done brewing.
 
Usually you just twist the lower cover and remove it to inspect the heating coil and the pump impeller.

Depends on the model of the Sous Vide unit. I have 2 where you can twist off the lower cover to inspect everything, and 1 where you cannot!

The ones I have where you can do that are Annova and Monoprice. The other is NutriChef, and it can only be disassembled by removing a couple of plastic pieces and then removing a couple of screws.

Note that I haven't used any of these for brewing yet. The Annova is the one I use in the kitchen, and the other 2 were bought specifically for brewing experiments. I'll probably NOT use the NutriChef one for brewing. I'm not a big fan of its construction compared to the other two.
 
I was lucky. I found a Polyscience Professional at a yard sale for fifty bucks. A quick disassembly, a few simple repairs and I have one of the best immersion circulators on the market.
Cleaning is a simple matter of circulating hot water with vinegar to remove scale.
BIAB with a permeable membrane to minimize grains clumping on the heating coil and the pump impeller and you have a wort making machine.
 
One of the simplest fermenters for 1 gallon is just a 2 gallon bucket with lid. You can easily drill a hole and attach your own spigot if you like.

Your homebrew shop should be able to sell you a slotted rubber grommet that converts the lid of any bucket to accept an airlock. You just drill a small hole in the lid and slip the rubber grommet into the hole. Then an airlock fits perfectly inside the grommet. These are sold as replacement grommets for the buckets they sell with pre-drilled lids in the homebrew shops. The grommet doesn’t cost much. Like this one:

https://www.keystonehomebrew.com/product/extra-grommet-for-bucket-lid-rubber/

You can also drill a hole in the lid to fit the small drilled rubber stoppers used for airlocks in a beer bottle, I think they are 1”. I use these when I’m making a starter in a beer bottle. Like this:

https://www.keystonehomebrew.com/product/rubber-stopper-2-drilled/

An airlock is still about a buck. (Don’t expect to also get the stopper in the picture.)

https://www.keystonehomebrew.com/product/airlock-3-piece/
 
Last edited:
Back
Top