Another BrewSteel: BadAss Brewstands

Homebrew Talk - Beer, Wine, Mead, & Cider Brewing Discussion Forum

Help Support Homebrew Talk - Beer, Wine, Mead, & Cider Brewing Discussion Forum:

This site may earn a commission from merchant affiliate links, including eBay, Amazon, and others.

horric29

Well-Known Member
Joined
Feb 18, 2011
Messages
122
Reaction score
0
Location
Lebanon
Hi All,
Figured I would start a new thread as I just placed an order with Kurt at BrewSteel with his BadAss Brewstands. I'll keep this thread updated as the process moves along.

So far Kurt has been INCREDIBLY helpful as I was starting off with only a single tier system in mind. I've been following the threads around from the Blichmann Top Tier systems to the Brewers Equipment threads. I was a bit leary about all of the hold-ups and issues mentioned in regards to Brewers Equipment so I started working with Kurt on my ideal setup.

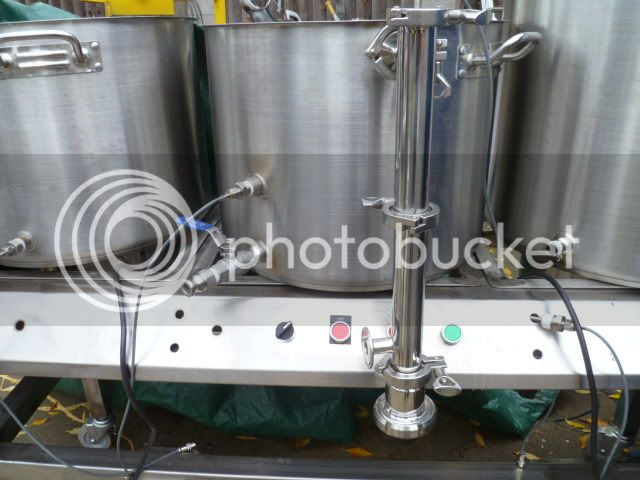
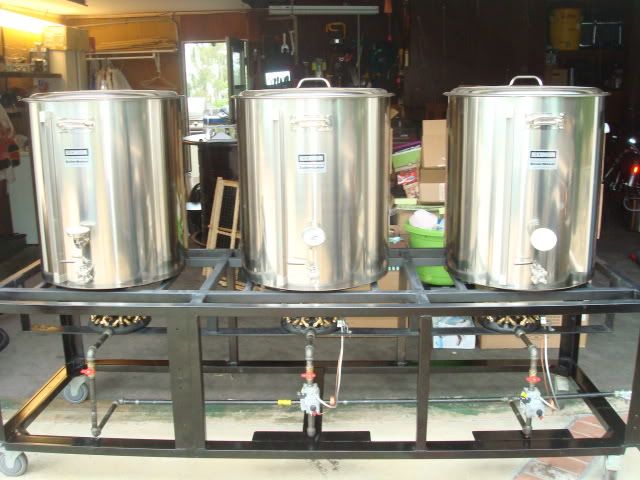
It's taken about 2 weeks with daily emails to come up with the final design but, we're going with a single tier, 2 15 gallon, 1 20 gallon kettle setup. Everything from a 120v RIMS system on the MLT, to water filtration from my well, a BCS control system, trub/hop filter, and a plate chiller. This will be a mixed system with Propane and the RIMS for the MLT. An all-electric system just isn't in the cards with my present property situation.

So stick here to see the progress as Kurt has promised pictures. He also provided an at latest delivery of November 23rd so keep it here! :rockin:
 
Forgot to mention, those two weeks were filled with page long emails from Kurt explaining away all my questions and options! Just wanted that clarification! :fro:
 
This sounds like what I have in mind for a brewstand. Would you be willing to share the price?
 
This sounds like what I have in mind for a brewstand. Would you be willing to share the price?

I would rather not, just in-case my wife is trolling the boards. LOL. Actually I'm not sure how to break it down for you. I sort of worked out a package deal with some additional items, fittings, and such. I'd get in touch with Kurt and check out what your looking for. I actually customized down to the fittings, style, burners, solenoids, etc. If you need the kettles to, I would say you're looking at around $4,000 the way I customized it, I figured it would be best to have them fit-out the kettles I was looking for, saves me time. I see on their website they have setups at around $1,350. Two 15 gallon and a 20 gallon kettle really run up the vast majority of the cost. I'm starting off fresh here from a simple extract operation. I figure if you're going to do it, do it right! I was consulting with a friend who's been doing All-Grain for years and has a very similair setup. Kurt and crew are great and talked me into and out of certain routes I was going to take. I can't say enough so far!
 
Update Time :)

Kurt has been sending me emails several times a week keeping me informed of the progress of my build. So here's where we are at... The steel is in, the kettles are in, and the BCS is in, along with the false bottom for the MLT. See some shiny pictures below:

kettleside.jpg


falsebottom.jpg


somestainless.jpg


bcs.jpg


So we've been talking about the design and I think we're heading in the direction of the following with the manual overrides, ignitor buttons, pump siwtches, etc in the panel like a propane grill:

https://www.homebrewtalk.com/f51/great-stainless-single-tier-begins-235801/index11.html#post2865505

From there he's going to have a NEMA housing with the BCS, ignition modules, etc. This is going to be quite interesting to see it come to life! Still incredibly impressed!
 
The kettles are all fitted out now per the update I recieved a few nights ago... Just awaiting a few more pieces I believe and we should start seeing some updates from the stand build...

Boil Kettle

boilkettle1.jpg


boilkettle2.jpg


Mash Tun

mt1.jpg


mt2.jpg


HLT

hlt2.jpg
 
Just recieved another update last night from Kurt... Seems that some of the welding work has been done on the stand. Attached are the pictures from the single-tier below...

p1010672.jpg


p1010673.jpg
 
Those kettles and stand look like crap, once you get them you should send them to me for proper disposal. In all seriousness, awesome man!!! I'm in the process of swapping out all my weldless stuff to welded fittings, one tig weld at a time.
 
The kettles aren't tig welded. They are swaged and soldered. We've been using the technique for awhile with great success.
 
Another update for the masses! Kurt finished up some drop-in burners over the weekend. These things look pretty sweet!

dropin.jpg


dropin1.jpg


dropin2.jpg
 
Kurt over at Brew Steel sent me another update around mid-week that I didn't get posted until today... There should be another update soon since I missed posting this last one... Check it out, he finished the basic fabrication of a control panel front similar to a large grill. I think there is another thread on here with something similar (I don't remember where it was! :-() Regardless, check out the pics and some pics of a pile of parts that arrived for the unit!

These updates drive me nuts and make me stir crazy just watching the thing come together! HAHA

stand1.jpg


stand2.jpg


components1.jpg


components2.jpg


fittings1.jpg


rims1.jpg
 
Update time!

It's been a bit of time since I updated last and this is in no way due to a lack of updates from Kurt. I've just been in and out of the state for the last few weeks.

So on the progress to date, he has the wort chillers installed, the pumps, burner ignitors, pump controls, etc. Everything will be labeled before it's shipped. He also ordered/gas valves and has installed one of the three. See the pic's below, it's coming along quite nicely! The BCS is also installed along with some of the relay's necessary.

There will probably be another update here in really short order as I havn't covered all my emails from being out yet... So far I would say money well spent!

Now, just trying to convince the wife to let me build a brew shed... HAHA... Or build a shed for the mowers and such so that I may consume the garage!

buttons1.jpg


buttons2.jpg


gasvalves.jpg


gasvalvesinstalled.jpg


wortchiller1.jpg


bcspanel.jpg
 
Wow! Super cool. You're going to have a lifetime setup. I hate to ask, well not really. What does something like this cost?
 
Wow! Super cool. You're going to have a lifetime setup. I hate to ask, well not really. What does something like this cost?

I threatened to give his stand away if he divulged the cost... :cross:

This system includes a stainless RIMS tube and trub filter from Brewers Hardware, a BCS 460 controller, hard plumbing, automated burner, 2 stage chiller, kettles...
around $5000 with far more features than you will find anywhere (manufacturers) at any price.

Wait until you see all the kettles, RIMS and stuff

Here's a teaser
P1030879.jpg

Contact us and tell us what we can build for you
 
Wow Rich, that is looking awesome. I can't wait to see it in person. Can't believe I didn't find this thread until today. I've missed so many updates.
 
Wow Rich, that is looking awesome. I can't wait to see it in person. Can't believe I didn't find this thread until today. I've missed so many updates.

I know... I've neglected you.... Damn you Ann Arbor, MI! (Sorry in advance to any locals of Ann Arbor!) :rockin:
 
i think this post is a more of advertisement for the guy making the stand than a up date of your stand...even though badass are a vendors on brew talk i think this post is more ad than a post...

. i made myself a cadillac brew stand
DSC02451.jpg
 
i think this post is a more of advertisement for the guy making the stand than a up date of your stand...even though badass are a vendors on brew talk i think this post is more ad than a post...

. i made myself a cadillac brew stand
DSC02451.jpg

No, it would be an update on my stand which is also on my website as it comes along... A place for my friends like Steve to follow along what's happening... Unless I missunderstood you...

And that is a pretty pimp stand! Agreed, where's the Cadillac symbol?
 
I had someone shoot me a message and ask about the delivery date which was supposed to be the 23rd... I forgot to mention that we negotiated another date because I added some requests to the build and Kurt came up with some additional ideas a few weeks back... No, I'm not upset about it as I asked for changes and approved some ideas he had... By the looks of it, I should have a nice Christmas present!
 
It's been a bit of time since I've posted last... I've been literally flying or driving all around the east coast. I think Kurt is probably thinking that I've fallen off the earth since I havn't been asking for updates. It's been the last thing on my mind. I caught a break in the action this morning so I figured I would shoot up a few shots that Kurt has sent me of the progress. She should be shipping out soon!

automanual.jpg


bcshousing.jpg


bcshousing2.jpg


bcshousing3.jpg


frontface.jpg


rims.jpg
 
I am impressed with the build. Thank you for sharing..

Onehoppyguy,

You really should get that power source for the BCS460 inside the box. There are many power options available for that controller. If in doubt, jump over to the BCS forums. It would clean it up a bit. Perhaps there is a reason to have the transformer on the outside of the box that I missed? I really like your temp probe connections.
 
So we are nearing the end as I noted once before. The stand for all intensive purposes seems to be done. Kurt at BrewSteel (| Home of BadAss) has, at this point, been doing leak testing and operational tests. He's making sure that she's ready to go upon her arrival in Pennsylvania from California. I'm not the most mechanically inclined person so I'm glad that he's doing this through the process. I luckily have friends to help out in these situations, youtube, and naturally Google! LOL... There really isn't much to comment on here except that she's going to be shipping across the country and I'm excited for it to arrive. There is always the issue that it's darn cold here in Pennsylvania from January through about March. It's really my ski season. I've been trying to talk the wife into allowing me to build a brew shed but, I think at the present time we are going to go with moving the wood working tools to another area, rigging up the propane Mr. Heater in the garage, and brewing in that location with the brew stand right outside the garage door on brew days... I'll be using my outside spigot and well water which is UV filtered and carbon filtered along with the second filtration on the brew stand. I've tested the water for bacteria, parasites, etc with your 2 week Lowes kit and all is perfect after UV and filtration! I just have to hope over the course of a brew day that I don't freeze the hose. I think that's where a bit of planning and waiting for a day with temps over 32 will help. Here are the latest pictures from Kurt, there were a ton more but, I'm on a bit of a time crunch for an update today. I meant to do this again a week ago but, that just dosn't work out...

In the meantime I think I'll start trying to figure out what to brew first... Besides water!

lookinggood.jpg


waterfiltration.jpg


doublechill.jpg


Powercord.jpg


RIMS.jpg
 
I forgot to mention if there is anything that you want to see that I havn't posted, let me know. I'm sure I have a picture somewhere along the build phase of things... :rockin:
 
Not a good idea using the gray "Air Hose" material for LP in hot areas, true LP hose is black and will have the letters "CGA" embedded or printed on the cover, and is rated 350 PSI not 300 like air hose. While both products are hoses there is a big difference in materials used and construction for fuel gas hose material. Where your hoses are run you would be better off with the metallic flex lines that wont soften or burn from radiant heat from operating burner.
 
That's...well.....Bad Ass!!

So...not counting what the setup cost...how much is shipping from CA to PA?:eek:

I'm in the early planning process of a stand. Every time I see pics like these I think I should drop it and call Brewsteel!
 
I forgot to mention if there is anything that you want to see that I havn't posted, let me know. I'm sure I have a picture somewhere along the build phase of things... :rockin:

I noticed the dual in-line plate chillers. Why 2 of them?
 
2 plate chillers:
Cold water is introduced into each chiller independently (in parallel), the wort travels from one chiller to the other (in series) and directly to the fermenter. It's fast and efficient.
 
That's...well.....Bad Ass!!

So...not counting what the setup cost...how much is shipping from CA to PA?:eek:

I'm in the early planning process of a stand. Every time I see pics like these I think I should drop it and call Brewsteel!

I couldn't tell you what the actual shipping cost is... I didn't recieve it yet... Soon enough... I asked Kurt to hang onto it for a week or two as I'm not going to be able to recieve it due to a commitment out of state... :drunk:
 
OneHoppyGuy said:
2 plate chillers:
Cold water is introduced into each chiller independently (in parallel), the wort travels from one chiller to the other (in series) and directly to the fermenter. It's fast and efficient.

So you split your cold water source to both chillers and run the wort from one to the other?

-=Jason=-
Sent from my HTC using Home Brew Talk
 
Jason - That's correct, we run the cold water up to the chiller and then a tee before the actual plumbing into the chiller. The wort is running from the BK through a BrewersHardware Trub filter, through the pump then to the chiller and out the the fermenter.

Deric and Rich - the actual shipping cost is $535. However, this cost includes three kettles and other equipment, the cost of packaging and crating (by a freight line). I'm not about to risk sending that much labor via UPS.
 
Not a good idea using the gray "Air Hose" material for LP in hot areas, true LP hose is black and will have the letters "CGA" embedded or printed on the cover, and is rated 350 PSI not 300 like air hose. While both products are hoses there is a big difference in materials used and construction for fuel gas hose material. Where your hoses are run you would be better off with the metallic flex lines that wont soften or burn from radiant heat from operating burner.

Kladue, I thought the metallic flex lines were used for low pressure propane only ? I don't see any Honeywell controllers on this system so assume it is all high pressure propane

(great build by the way, upset I found it so late into my build!)
 
So I just wanted to post a quick update here since a few have asked me where things stand. I was unfortunetly in and out of the country for quite a period of time on business which delayed the shipping since I wasn't here to recieve. The stand did come in about three weeks ago in a well packaged container.

That being said, I havn't fluid tested or gas tested the system as of yet but, did run into a few problems with the shipping. (which Kurt has helped to resolve at his point) First, two of the wheels were bend sideways, which in-turn ripped the welds right off of one of the wheels which makes the stand want to tip over. So unfortunetly, I have to take off a little bit from the bottom of each leg to put new 2x2 wheel inserts into the stand. It really crushed my heart just a bit. I havn't gotten to it but, the box with the parts to do so arrived two days ago from Kurt. There really wasn't/isn't another solution it would appear unless I had the welding tools/cutting gear to reattach the leg. Kurt let me know the inserts could hold up to 1200 lbs a piece I believe it was so I feel comfortable going that route... Cutting the 304 stainless could be a bit tricky but, I'll update once I get to that point...

I believe that damage and the damage to the ignitor which I'll get to in a minute was likely due to the shipping company stacking on top of my pallet. I think the pots, pumps, etc with some additional weight on top must have been too much for her to handle as far as the wheels are concerned....

The ignitor cap broke off, it can be glued on temporarily or held in place to ignite two of the burners that arn't on the Honeywell controller... So no worries there, and they are dirt cheap from what I've found on the net for an electronic ignitor that runs off a battery....

There were of course some loose fittings, what have you, that I expected to happen in the mail with so many buttons, gizmo's and gadgets... I'm going to have to give her a good polish too....

Pictures to come of course once I have all the other items sorted out!

Keep brewing! :rockin:
 
It's a hell of a lot cheaper to fix it myself than send it the whole way back across the country for repairs. Kurt has provided the parts in short order. I really have no complaints at the moment... He can't control what the shipping company did...

As I understand it, he's changed to the inserts on all his future stands. I'll be a bit upset if there are fluid or gas leak issues. I don't have the tools to take care of those sorts of things... Haha
 
Understood...

But none of that burden should fall on you, the customer, especially after spending that much coin. Surely it was insured and the shipping company will need to pay hefty claim, which should be relayed to you in some way. The fact that you'd have to go out and buy a replacement igniter cap or whatever on your own, no matter how cheap, is pretty ridiculous IMHO.
 

Latest posts

Back
Top