My Basement Bar renovation

Homebrew Talk - Beer, Wine, Mead, & Cider Brewing Discussion Forum

Help Support Homebrew Talk - Beer, Wine, Mead, & Cider Brewing Discussion Forum:

This site may earn a commission from merchant affiliate links, including eBay, Amazon, and others.

Bowtiebrewery

Well-Known Member
Joined
May 4, 2009
Messages
1,161
Reaction score
129
Location
Seymour
Well I've been wanting to do this for some time and finally have the opportunity to do so. I havnt been brewing much lately due to really unsanitary conditions in my basement area so I've finally decided to do a full remodel on my bar area. So without futher ado, here are the before pics and the conceptual model:

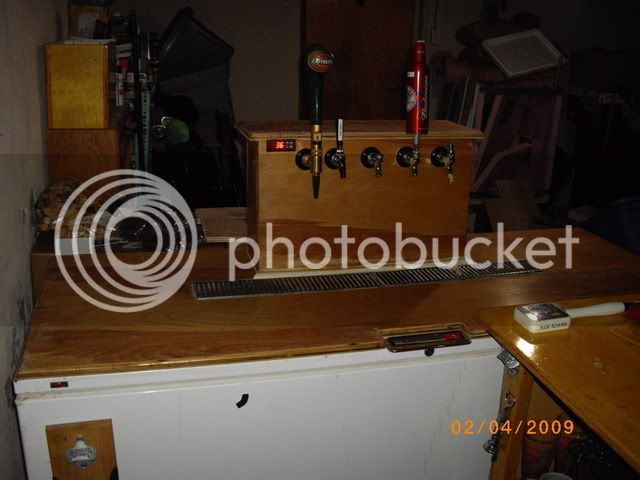
So originally my bar area was closed into a storage area that has no heat or anything:

IMGP0056.jpg


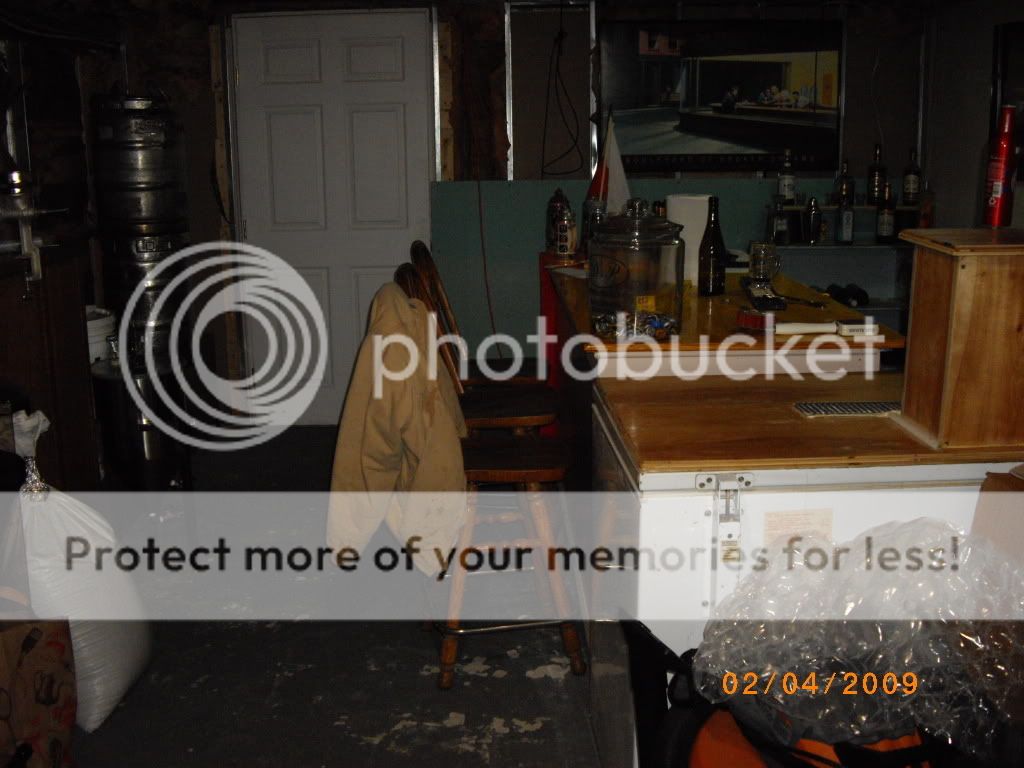
You can see in this picture the old door that led up into the garage:

IMGP0050.jpg


So this is what I did so far:

I blew out the wall that separated the bar and storage area from the main portion of the basement
001.jpg


Now you can see right into the bar area
006.jpg

002.jpg


You can see all the remnants of the original wall that was there (I hate metal studs with a passion!!!)

003.jpg


Framed in the new door area and the sliding door that will be the access for the new storage area
(Yes the door is hung upside down... I had to cut 1/2 inch off the door on both sides and as I was installing it I busted the post side of the wood forcing me to install it like that... I think it gives it character)
004.jpg


And here is the view out into the basement so now my bar patrons can sit at the bar or on the couch and watch the big screen. (I also have a Projector in the works as well.)

005.jpg
 
Here is the conceptual model shots that It should look like once I'm done...

View1.jpg

View2.jpg

View3.jpg


So yea thats the goal... the only problem with this whole build is the ceiling because as it stands right now this is a very low hung basment at 6' 9" from floor to rafter... Take away 1.5" due to the floor and drywall ceiling going in, and that puts me at 6' 7.5"
Thank God I don't have any uber tall friends...

Wish me luck guys.
 
Looks like a great plan.

I wish I knew how in the hell to make Sketchup look like that. My drawings always look like they were done by mentally challenged baboons.
 
Sketchup is very easy to use however it takes a little time and testing to get things exactly the way you want them... I have finally progressed into integrating models correctly as well as using accurate dimensions...
 
I only see one problem. In the second conceptual shot, you look a little flat.

I'm on a diet lol

Might be able to save some of that by using an epoxy floor instead of wood.


I was actually debating whether or not to put the Pergo flooring in or to just re-paint the floor and leave it as the concrete... which would probably make it a bit easier to clean and not worry about dinging kegs around... This is still something I really need to think about... I can get pergo for about $1 per sq ft so Its not a huge price concern for me. although I'm still trying to decide how to make the built in's for the wine cabinets.

Last night I framed out the concrete side of the wall in just under 3hrs last night which is pretty good since I'm doing it solo. And I am cuttign all my wood in the garage instead of downstairs... I used about 28 studs to get the job done so I'm glad that I bought some extra just in case... No bad cuts, just a lot more real estate to cover than I anticipated. Plus I like to double-stud in corners and end caps... Pictures to come tonight or tomorrow morning.
 
Looks like a great plan.

I wish I knew how in the hell to make Sketchup look like that. My drawings always look like they were done by mentally challenged baboons.

Well, if the keyboard fits..................

I was actually debating whether or not to put the Pergo flooring in or to just re-paint the floor and leave it as the concrete... which would probably make it a bit easier to clean and not worry about dinging kegs around... This is still something I really need to think about... I can get pergo for about $1 per sq ft so Its not a huge price concern for me. although I'm still trying to decide how to make the built in's for the wine cabinets.
Finishing the floor will look more, well, finished. If your basement floor is cold, an insulating layer will help. But if the floor is fairly warm, a painted floor with some throw rugs would be fine.
 
Pergo + Beer/liquid of any kind = eventual disaster. Especially the cheap stuff. If you do decide to install pergo make sure you glue the joints where there is any possibility of moisture from beer or water. For example, in a kitchen you should always glue the joints around the sink, fridge and dishwasher at least a couple feet out. If your concrete is in good shape you can do some awesome things with acid staining.
 
Unfortunately my concrete floor is not as nice as some of the one's I've seen on this board where they've don'e acid staining... plus its already been painted a bunch of times so using thinset is out of the question... I'm Thinking about getting a very very dark paint for the floor... Possibly ddep brown or even a lighter shade of black... I don't like the white/blue color that I have now at all.

Its a lot of things to decide on and I still have tons of drywall and electrical to do... Thank God my brother is electrically inclined... I have no clue how to do stuff...
 
Ok so here is the framing that was completed on Wednesday afternoon/night:

I made one critical mistake but I think I should be ok... I forgot to put down a moisture barrier between the wall and the studs... However, we've never had leaks from the foundation before and its never really damp down there... When it is though we run our dehumidifiers and we end up being a little dry sometimes down there.

FrontViewFraming001.jpg

FrontViewFraming002.jpg

FrontViewFraming003.jpg

FrontViewFraming004.jpg


Oh and just for fun... I have my starter going for my Doppelbock that I'll be brewing this weekend:
FrontViewFraming005.jpg
 
thats a good idea... How much did you spend and how much area did it cover... I've got some rather large pits though on this floor so it would look great in most area's and not so great in others I think...
 
it may take a bit of work but you can fill the pits with masonry or concrete patch if you prep it properly. As for the moisture barrier you could still install it in between your studs and seal it up with silicone. You'll want it there even if you are running the dehumidifier. Just because it seems dry doesn't mean there can't be a little mositure getting on your insulation breeding those little nasties behind your wall.
 
not sure how much dead space you have between the studs and the wall but you may be able to slide the plastic between the gap. Instead of cutting strips to go between the studs you could do 2 horizontal sheets that overlap an inch or so. With a little muscle and a prybar you could tweak the framing away from the wall so you don't have to do a ton of extra work sealing with the silicone. Just use duct tape to seal the 2 horizontal sheets together.

LUCKY!!!!
 
As I understand it, the ideal way to finish a basement is to use insulated panels that have a vapor barrier built in. Even though you don't get water in your basement the concrete will breathe and transmit the moisture in the ground surrounding your walls into the basement. The rule of equilibrium...since the concrete is porous and seperates an area of higher humidity and low humidity, it will continually breathe and transmit the moisture. Your problem is going to allow moisture to build up inside that wall and could create mold problem. Even if you insulate between your studs, it'll help, but not the greatest. Ideally a 1" rigid foam insulation with vapor barrier should be installed up against the concrete wall, then start studding. If you don't want to go that route, you could try applying a sealer to the walls and floor. Either would mean that you have to take down the studs and redo it all. I know it'll be a PITA, but right now is the EASIEST way of fixing it before you go any further.

Good luck and keep us posted with what you decide.
 
I did the epoxy in the garage, must say it makes a huge difference. Not only on appearance, but spills are a breeze to clean up. Even if its a fermenter thats blown and had most of the day to dry into a sticky mess, mops right up. A lot of other cool things you can do with concrete; staining, polishing, $$.
 
Keep in mind my recommendation is just my opinion, I don't want to make a project larger than YOU want it to be. I renovated my house recently and made a few short-cuts here and there that proved to be a PITA later...so I'm one of those guys that wants to do it right, the first time, and be done with it.

When I was looking into finishing mine, Understanding Basements and Renovating Existing Basements proved to be very informative.
 
thanks bud... I think what I am going to do is seal with the poly ... The walls were originally sealed then painted over... I don't think that I will re-seal them. I definitely don't want mold growing in my walls, and I plan on geting the poly ply tonight... I am just a little pissed at myself for studding and forgetting to do that... I've been really rushing around lately at home between night school and work and soccer, I've just been really really busy...

Ah... well anyway... I am glad that i posted these pics because it certainly has given me a lot of answers to questions I was eventually goign to ask...
 
thats a good idea... How much did you spend and how much area did it cover... I've got some rather large pits though on this floor so it would look great in most area's and not so great in others I think...

I do not remember the exact cost for the epoxy, but it was roughly $45 for one kit that covers 200 square feet. I used the Quikrete brand that was advertised for to use on multi-surfaces including indoors and basements. I also purchased the gloss sealer for a topcoat which gives it a nice shine and provides extra coverage. That was about $25 for a gallon, and I did 150 square feet and maybe used one quart to do two coats (total 300 square feet).

The biggest thing as far as application... make sure if the floor was painted previously to remove any loose paint, etc. I also suggest etching the floor (they call it part of their "bondlok system"-- Quikrete brand; I used another companies etcher though) as this provides superior adhesion, which means in the long run you will get more for your work and money.

Also be sure to use the recommended type of roller, so it does fill those low spots and things while applying it (of course filling them in first also helps).

The hard part with applying this is the preparation... just like doing a paint job on a car, the finished product will only be as good as the prep work.

Good luck. But I must say I am definitely pleased with the results.
 
Thanks, I definitely think this is the route I am going to go with the floor... I really like that Tan color and I think it will look fantastic on the floor.
 
thanks bud... I think what I am going to do is seal with the poly ... The walls were originally sealed then painted over... I don't think that I will re-seal them. I definitely don't want mold growing in my walls, and I plan on geting the poly ply tonight... I am just a little pissed at myself for studding and forgetting to do that... I've been really rushing around lately at home between night school and work and soccer, I've just been really really busy...

Ah... well anyway... I am glad that i posted these pics because it certainly has given me a lot of answers to questions I was eventually goign to ask...

Excellent decision. The time spent in putting up the poly will be well worth it one day when you eventually tear down the walls and the studs are filled with mold. Glad you like the epoxy floor idea too, that should give you another 1/2 inch or so of head room.
 
Just want to give you props on your sketchup skills. That app drives me batty and you seem to be a master at it!

You're doing a great job on your bar. Looking forward to more updates!
 
thanks for all the encouragement guys... Right now the project is at a crossroads... I am stuck waiting on my brother for wiring before I can go any further. So I ended up brewing a doppelbock yesterday to celebrate my lack of being able to do anything with my basement.

However I went out and purchased the poly and some of it is up... Its a ***** to get all that stuff up by yourself. I figure this week, I should have all the wiring in and ready for my brother to wire it after his honeymoon, as well as insulation up and going... I have to return my light fixtures, as my father, brother, and uncle all said that I should put recessed lighting in instead... so I will be doing that instead... Oh well.

Now I can put a few more lights in on dimmers. Also I changed the layout of the sketchup model... My poker table should fit in the bar if i move some stuff, so here is the new drawing.

BarwithTabletopview.jpg

BarwithTable.jpg
 
Just want to give you props on your sketchup skills. That app drives me batty and you seem to be a master at it!

You're doing a great job on your bar. Looking forward to more updates!

Thank you very much for the props! I actually hated it when i first started using it because it was so much different than Auto Cad. Then once I dumbed myself down a bit and relaxed with it, it became very easy to use... You will have no problem using it once you start using it every couple days.
 
What are the dimensions of your bar.

It looks shorter than standard bar height (it is shown as the same height as your table),

Also, you could gain some more real estate by making it narrower. your bar appears to be the same width as the door (36 inches i presume?). A 24" wide bar would be more than sufficient.

Also, I might consider recessed lighting to maximize head room.


SJlammer:
I don't believe I drew the bar to specs on the height... however the width is spot on for the chest freezer and the bar top...

I am actually going to put in recessed lighting after considering it with my fatehr and brother... of course this comes after I already bought the fixtures lol...

Ohio:

I was told that Acid staining could not be done on a previously painted floor as it takes on the characteristics of the concrete that it is soaking into. I would have to strip the floors and then stain it... I like the way it looks, just too much work to get that kind of thing done...

STATUS UPDATE
As of right now i went ahead and hung the moisture barrier behind the studs... what a PITA after i did the framing... oh well... precautions are a good thing right?

Drilled the holes in the studs for the wiring to go through and hung the boxes for the light switches.

I don't have a definite location on the outlets yet or have the wiring run (I havnt purchased it yet, but tonight I plan on going to home depot after my Soccer practice and returning the lights and picking up some recessed lights, wiring, and the trim kits for the lights...

Slowly but surely its coming together... I figure on Saturday I'll move the bar and chest freezer out of the building area, out of the way of things to get stuff done easier in there...
 
Its nice ^^^ however I don't think it will work for me in the best sense... I really need to get some of the hard stuff out of the way like boxing in the center joist and boxing in the two columns that will be showing...
 
Wow sorry that I did not post up in a while... I've been swamped with work, soccer, and my brother's wedding which happens to be tomorrow...

Any how this is what I did so far... Put up the hangars/joists for the boxing in of the main joist... ran my wires and wired up a few lights.

Last night i Committed myself to where I will locate the bar and placed recessed lights in their designated areas... 4 on the bar area and 2 in the open area... If I need more I will go ahead and get them, however I do not anticipate needing them...

I also determined that I will run two sets of switches in the bar to control the lights... One for the open area lights and one for the Bar area lights...

Also I went ahead and stretched some lines for an auxilary hook up line for my computer that will be integrated into the bar for the ultimate in control of music and video, which will be run through the existing amp and projector.

Also I ran all of the speaker wires to their proper locations and put up the moisture barrier...

All thats left to do is:

1.) Hook up the electrical to the panel
2.) remove all the crap to go to the dump
3.)Box in the pillars and stain the wood
4.) Insulate and sheet rock the walls
5.) Sheetrock the ceiling
6.) Triming
7.) Epoxy flooring covering
7.) Paint

Pictures will come soon.

Again sorry for the delay in posting... Like I said before... Im really busy.
 
Back
Top