
dflipse
Active Member
I can't thank many of the other members here enough for their informative posts, creative ideas, and careful documentation of their electric brewing projects. I've recently completed a 3000W e-kettle and toolbox control panel with portability in mind. That goal led to me using two 1500W elements, and feeding the whole thing with two separate household circuits. I don't think I've broken any real ground here, but if anyone has questions of any kind, I'd be happy to answer them.
Kal, especially, will see that many of the best elements of my project were stolen directly from him. When it came time to choose lights and switches, I had some others picked out, but I felt like I owed him the honor of copying "the look."
Apologies in advance for the iPhone pics. Didn't have the digital camera handy when I thought of taking the pictures.
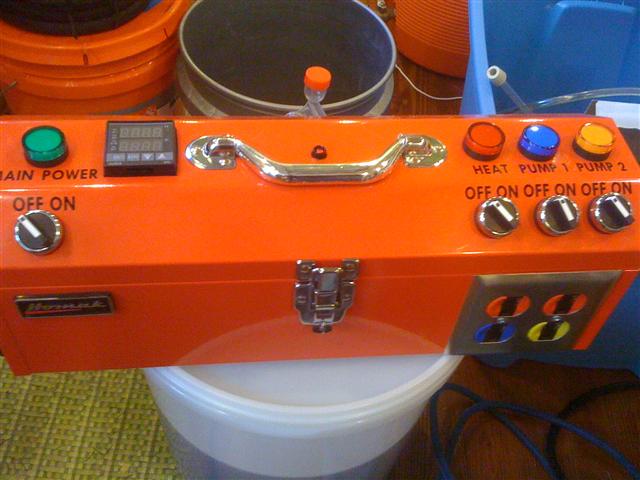
Toolbox control panel.
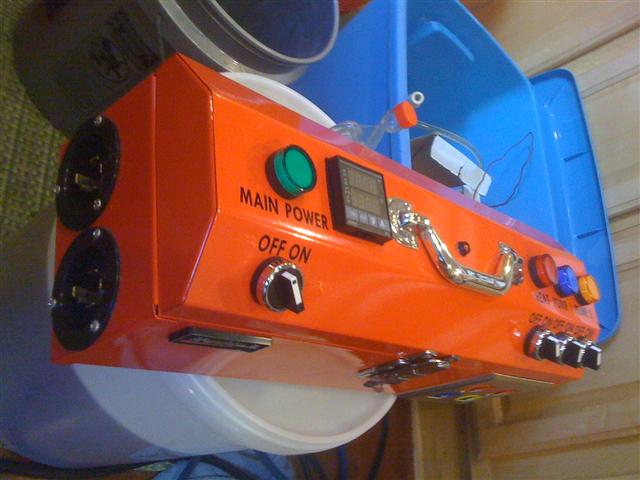
Power in side. Used those way oversized plugs, with recessed male locking outlets both due to availability and because they look kinda badass.
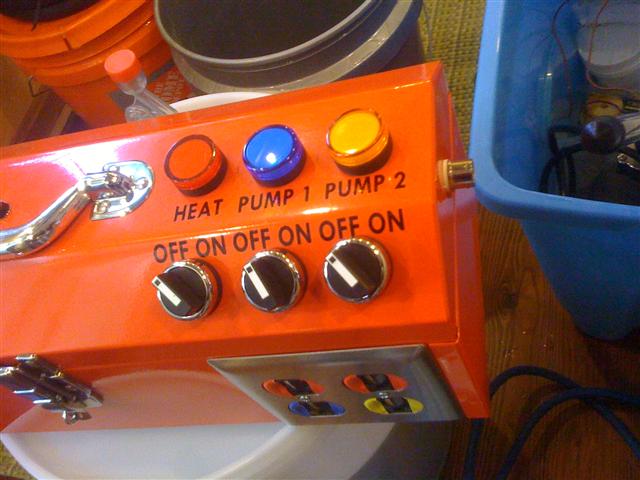
Power out side. The switches do line up, normally. I think I'd just been showing my brewing partner how they install, and I'd loosened that middle one. The outlets are color-coded with electrical tape, which felt like a temporary solution but now I kind of like.
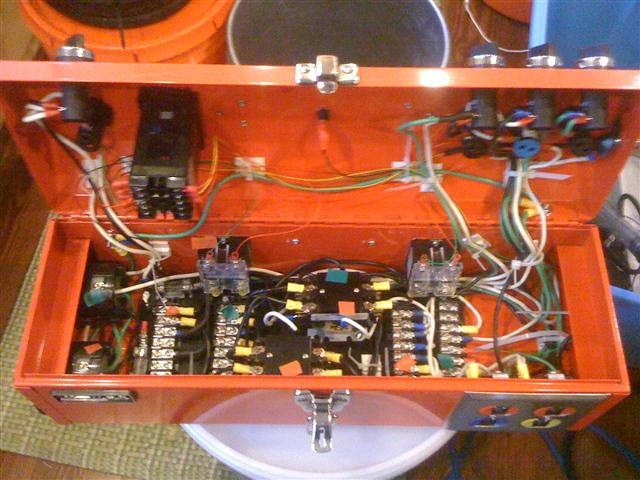
The guts. You can see little orange and green tags of electrical tape. Those were to help me keep the A and B circuits straight and separate as I wired the thing up.
Power comes in on the left, goes through one of the relays (controlled by the Main Power switch) in the middle, to the Hot bars on the left, then to the various bits. The second relay is controlled by the Heat switch, and allows power to the red outlets. Solid state relays are also in play, mounted on the back panel, and controlled by the PID.
The blue and yellow outlets are simply controlled through the corresponding switches. On the right, there is a Neutral bar for each circuit.
It's not the neatest wiring in the world, but it's good enough for government work. I also recognize that it's not as idiot proof as some of the best designs here, but I've been very pleased with the functionality and ease of use up to this point.
There is of course Ground Fault protection available. If not wherever I plug it in, I've got the portable (GFCI adapters.
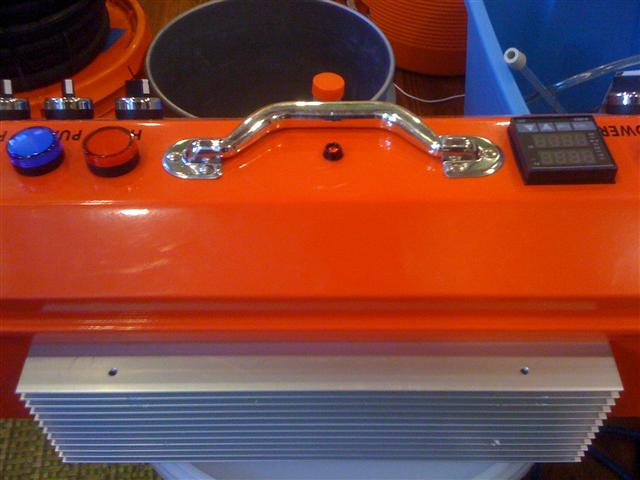
Oversized heat sink. Again, a combination of aesthetics and what was available to me.
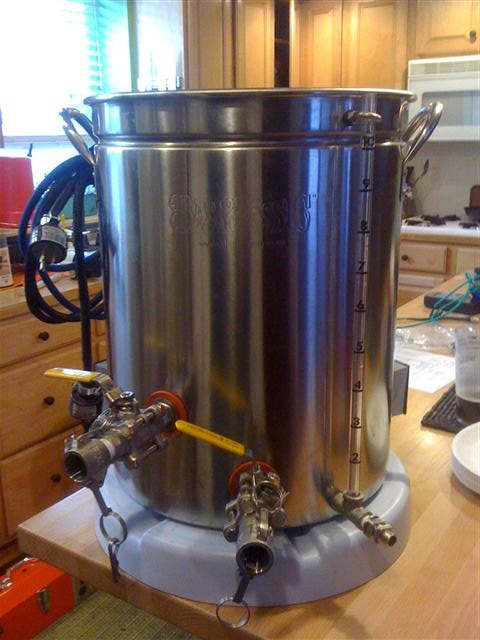
The kettle itself. A whole other project. Used the Bayou Classic 44qt from Amazon, and couldn't be happier with that choice, except that the fairly small diameter made getting good seals with the weldless fittings somewhat tedious. We're completely drip-free now through several brews, knock on wood. That's a Bobby M sight tee, Auber RTD, most other bits from Bargain Fittings.
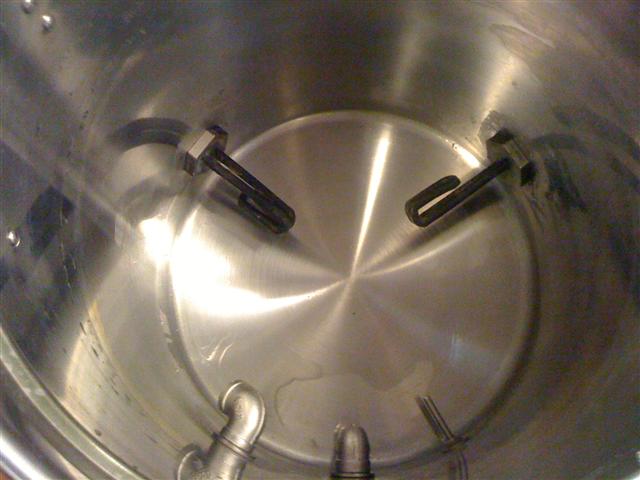
Post-cleanup. I just used a street elbow for my pickup tube and have been very happy with that. The return port is just a plain elbow. Those are two 1500W ELD elements from Plumbing Supply.
Kal, especially, will see that many of the best elements of my project were stolen directly from him. When it came time to choose lights and switches, I had some others picked out, but I felt like I owed him the honor of copying "the look."
Apologies in advance for the iPhone pics. Didn't have the digital camera handy when I thought of taking the pictures.
Toolbox control panel.
Power in side. Used those way oversized plugs, with recessed male locking outlets both due to availability and because they look kinda badass.
Power out side. The switches do line up, normally. I think I'd just been showing my brewing partner how they install, and I'd loosened that middle one. The outlets are color-coded with electrical tape, which felt like a temporary solution but now I kind of like.
The guts. You can see little orange and green tags of electrical tape. Those were to help me keep the A and B circuits straight and separate as I wired the thing up.
Power comes in on the left, goes through one of the relays (controlled by the Main Power switch) in the middle, to the Hot bars on the left, then to the various bits. The second relay is controlled by the Heat switch, and allows power to the red outlets. Solid state relays are also in play, mounted on the back panel, and controlled by the PID.
The blue and yellow outlets are simply controlled through the corresponding switches. On the right, there is a Neutral bar for each circuit.
It's not the neatest wiring in the world, but it's good enough for government work. I also recognize that it's not as idiot proof as some of the best designs here, but I've been very pleased with the functionality and ease of use up to this point.
There is of course Ground Fault protection available. If not wherever I plug it in, I've got the portable (GFCI adapters.
Oversized heat sink. Again, a combination of aesthetics and what was available to me.
The kettle itself. A whole other project. Used the Bayou Classic 44qt from Amazon, and couldn't be happier with that choice, except that the fairly small diameter made getting good seals with the weldless fittings somewhat tedious. We're completely drip-free now through several brews, knock on wood. That's a Bobby M sight tee, Auber RTD, most other bits from Bargain Fittings.
Post-cleanup. I just used a street elbow for my pickup tube and have been very happy with that. The return port is just a plain elbow. Those are two 1500W ELD elements from Plumbing Supply.
Last edited by a moderator:


