Speidel Braumeister (brewmaster)

Homebrew Talk - Beer, Wine, Mead, & Cider Brewing Discussion Forum

Help Support Homebrew Talk - Beer, Wine, Mead, & Cider Brewing Discussion Forum:

This site may earn a commission from merchant affiliate links, including eBay, Amazon, and others.
Started it up in manual mode. Heated water to 73c with pumps running and lid on.

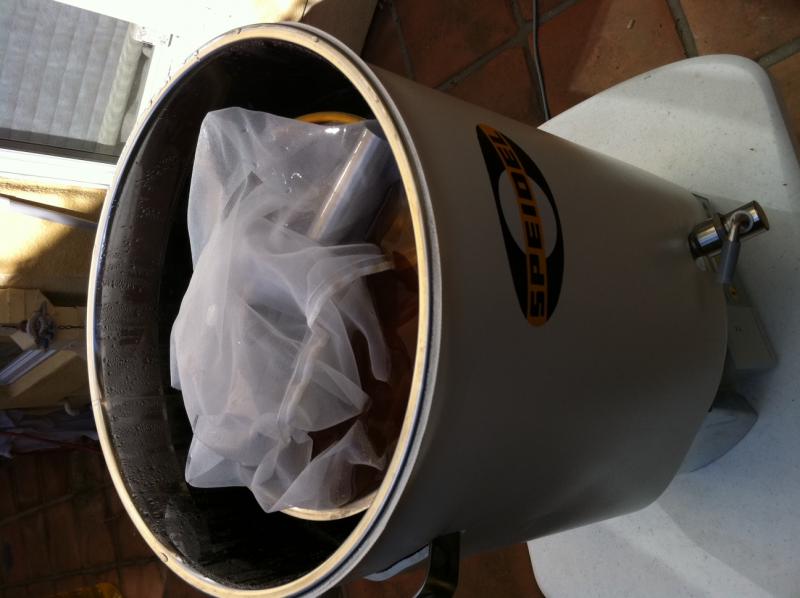
Added malt pipe, bottom sieve, cloth filter, screen filter.

Added grain. There was 8 gallons of water in the pot. I wasn't sure how much water I could add and still keep the grain bill inside the pipe so I stopped at 8. I added one gallon at a time until I reached this number. In the 50L unit this put the very bottom ring at about 5 gallons and the third ring from the bottom at about 7 1/2.

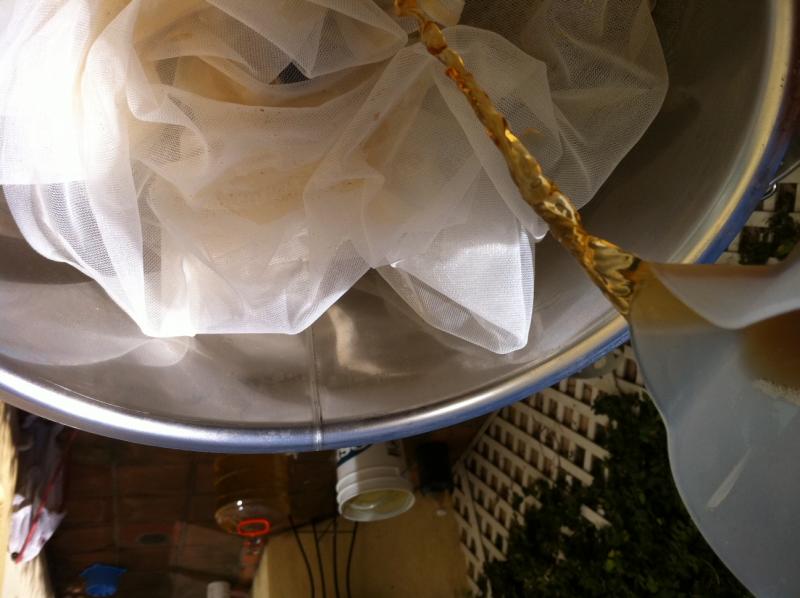
My grains didn't seem tohave enough water, so I drained some from the spigot and poured it back inside the malt pipe.

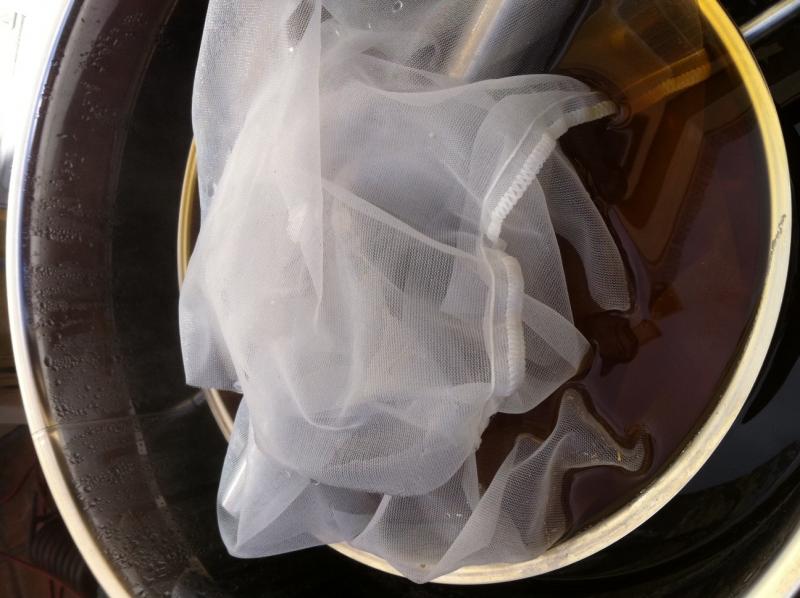
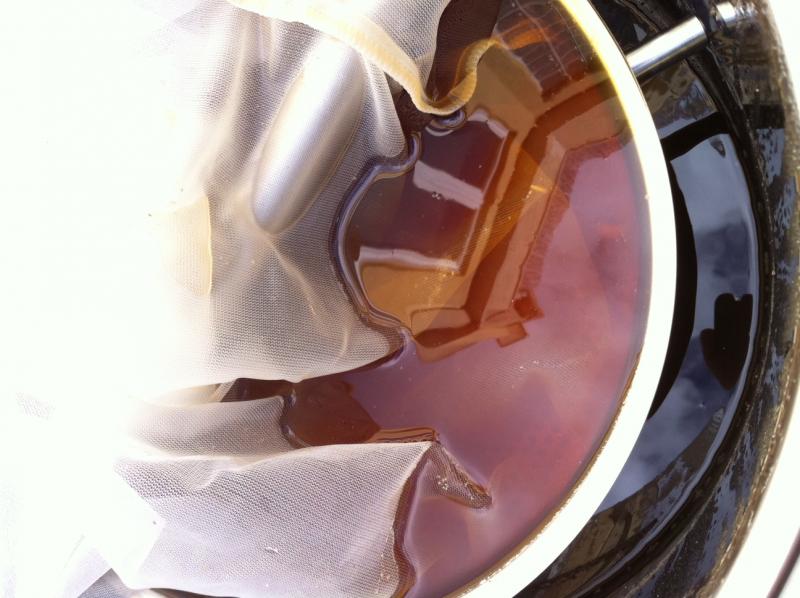
This was before the added water.


This was after.


Then I added the top cloth filter


Then the top sieve


Then the bar that holds the malt pipe down


Then the adapter vertical bar you need with the smaller malt pipe in the larger unit.


Then snugged it down with the wing nut


Then I turned the pump on and off several times to purge, set my temp to 67c for the mash and turned the pump on.


Added the lid and the collar and then waited for the temp to fall below 67c. Once this happened I turned the heating element on with the above mentioned set temp of 67c (152.6F).


This was after 30 minutes


And now I am 2 minutes away from my mash being over.
 
Brewed BM's Centennial Blonde. Guessed at my efficiency when creating the recipe in BeerTools Pro. Ended up hitting it dead on at 1.051. I adjusted the recipe to increase the ABV to just over 5% and the hops up 10 points to 31 IBU's. Had to adjust the grain bill due to no Vienna on hand and used WLP001 instead of Nottingham for the same reason. I know I changed a lot but it was his base recipe so giving credit where credit is due! :mug:

Centennial Blonde

10-A American Pale Ale
Author: BM/Rob
Date: 5/1/11

Size: 6.0 gal
Efficiency: 80.0%
Attenuation: 75.0%
Calories: 171.18 kcal per 12.0 fl oz

Original Gravity: 1.051 (1.045 - 1.060)
Terminal Gravity: 1.013 (1.010 - 1.015)
Color: 4.99 (5.0 - 14.0)
Alcohol: 5.06% (4.5% - 6.2%)
Bitterness: 31.3 (30.0 - 45.0)

Ingredients:
9.0 lb Canadian Craft Brewers Pale Malt
1.0 lb Cara-Pils
1.0 lb Crystal Malt 10°L
0.5 oz Centennial (8.8%) - added during boil, boiled 60.0 min
0.5 oz Centennial (8.8%) - added during boil, boiled 40.0 min
0.5 oz Cascade (5.4%) - added during boil, boiled 20 min
0.5 oz Cascade (5.4%) - added during boil, boiled 5.0 min
1.0 ea White Labs WLP001 California Ale


Notes
Mash at 152 for 60 minutes.

Added 8 gallons of water and using 5 gallon malt pipe. I had to pull some water from the tap of the unit and pour into the malt pipe to get a decent absorption, about 1 gallon in two additions. Next time try adding 9 gallons of strike water for the 5 gallon batch and MAX 11 pounds of grain. Could have gone to 12 pounds with 8 gallons if needed.

Added 1/2 gallon spring water to boil at start of boil.

Ended up with about 5 1/2 gallons or more in the pale. Next time start out with 8.5 gallons or so and don't add.

Results generated by BeerTools Pro 1.5.16
 
Congratulations on another brew well done!

However, something is not right if you couldn't program the unit to the mash temperature you wanted. It shouldn't be neccessary for you to do this manually.
It should accept 1 degree if you chose so. I think minecame programmed with a mash-in temperature of 30-something C.

I think you missed on the first programming step called "Mashing".
"Mashing" is badly translated from german and means dough in temperature or mash-in temperature.
Can be adjusted up and down with the arrows as all the other steps.
It is not considered a rest/phase by the machine but it won't accept any steps/phases lower than "Mashing".

So if you want your first rest at 62, set "Mashing" too at 62.

Yeah, their instructions leave a little to be desired. I know I have seen some better instructions somewhere on this. Even my local rep said he thought it wouldn't go lower. Seemed odd to me.

I want to be able to set the initial strike temp at 73 (163F). Then mash for 60 minutes at 66-67c (152F). Then Mash out at 77c (170F) for 10 minutes.

I know its painfully obvious but I cant (or won't) figure it out.
Hi guys,
Wayne here posting for the first time. I live in Santa Monica Ca and just did my first batch of heffe weisen this weekend. It went great and the numbers were spot on. I have the 20l, filled to 23 liters, then sparged with two liters I had previously heated up just to get some of the remaining sweet wort out of the grains. It is happily bubbling away in the fermenters now. After previously brewing on a brew magic, this was a pleasure. Still took about 4-5 hours because it was the first time but I think I can get it to 3, especially if I use a giant grain bag in the malt pipe. I used a dip tube similar to the one posted here and it will suck put every last drop if I want it to. I also used an immersion chiller with the pump running and it took about 18 minutes to get to 72 degrees. No problem with trub. Finally on the issue of not being able to set a mash temp lower then 70---that happened to me when I was doing a test, and then it occurred to me I had put water in the brumeister first. It won't set below the active temp when you do this. The next day, I tried again, this time setting all my temps and times(this was a strike of 38degrees) before the water was added. It worked as advertised, so to repeat, the only thing I would suggest is to make sure you plug it in and program all temps before adding the water.
 
Yeah, the translation is very poor. Both in the manual and in the machine.

You CAN NOT dough in on a higher temperature than the first phase. And why would you? Let the machine worry about the temperatures. It's good at it but can only work upwards.

Then if your first rest is 66C for 60 minutes your "Mashing" temperature can't be 73, it must be set at 66 or less. "Mashing" is the temperature where it beeps and ask you to fill in malt.

To program it it needs first to be in the mode it is just aafter connecting the power or after holding in both arrow keys for a while. The display looks like this:

Speidels Braumeister
temp xxxC


Then hold "Enter"

Display:
Prog mashing
set temp xxxC

This is where you decide the Dough in temperature. Use the up and down arrows until you come to 66 (or less), then hit henter.

-Now it asks for length of the first rest/phase. Use the arrows to select 60 minutes. hit enter.
-Do the same for the temperature; 66 C. Hit enter

Now it asks for duration and temp for the second phase. You want a 10 minutes mashout at 77. You want to save that for the fifth (and last) phase so set the second to zero minutes and 66 degrees. (66 because you have to put a number here and it can't be lower than the previous rest).

Do the same for the third and fourth phase

Now for the fifth you program your mashout of 77 degrees and 10 minutes.

The reason you want to reserve mashout for the last phase is because on this step the pump won't do pauses to not to disturb the grain bed during this last phase to aid in getting a clearer wort.
 
Thank you Yambour for another great set of images. You say you managed to estimate your efficiency when planning and achieved this during the brew, nice! It looks like you achieved 80% efficiency without a sparge of fresh water (looks like you just recirculated after lifting the malt pipe)? Is this correct?

Also thank you waynemill and Beefeater for the good instructions/clarification on the programming :)
 
davewaldo said:
Thank you Yambour for another great set of images. You say you managed to estimate your efficiency when planning and achieved this during the brew, nice! It looks like you achieved 80% efficiency without a sparge of fresh water (looks like you just recirculated after lifting the malt pipe)? Is this correct?

Also thank you waynemill and Beefeater for the good instructions/clarification on the programming :)

Yes Dave that is correct. I did it the same way with the 10 gallon batch and got 84%. I figured since this was a thicker mash, I would end up at a little lower efficiency and guessed right.

As far as the programming goes, thanks to all who chimed in on this. I will follow your instructions on the next brew. However, in my mind that is exactly how I tried to set the programing this time.

One more question. On the phases I thought you were supposed to leave the 5th phase set at zero?
 
Yeah, the translation is very poor. Both in the manual and in the machine.

You CAN NOT dough in on a higher temperature than the first phase. And why would you?

Just use to the "old" way of doing things. Strike temp at 165F, add grains that are 72F and it settles at 152F.

I will just set the mashing temp to 152F.
 
Looking good Yambor, can you tell me if you get much cloudiness/grain enter the wort after you lift the malt pipe and recirculate a few litres?

Cheers.
 
davewaldo said:
Looking good Yambor, can you tell me if you get much cloudiness/grain enter the wort after you lift the malt pipe and recirculate a few litres?

Cheers.

Thanks Dave. If you go back a few post you can see a picture I posted of what the wort looks like after raising the malt pipe. This is what the wort looks like on the first running. It is very clear. I do it primarily to rinse the grains a little and to get some of the grain that has sneaked thru the filter back into the grain bed.
 
Hi to everyone - what a fantastic thread - it just goes to show the limitless ingenuity of the brewer :)

My name is Des and I run Drachental Bier here in Austria. We have based our business on the Braumeister and so far things are going very well (2 yrs in business now).

Just a few observations from our 800+ brews ...

1. We use a length of 1" plastic drain tube to “distribute” the grain inside the malt tube rather then using a brew spoon. We use a vertical "stabbing" action to ensure that all the grain is evenly distributed rather than a stirring action. This action allows us to really feel any very slight density changes in the malt, which we found difficult when using the traditional stirring technique. Typically, we start by going all the way around the outside of the tube and then working inwards in a spiral action and then repeating. A secondary benefit of this method is that we can fill the grain in quickly and in one pour without having to use a "pour-stir-pour-stir" routine. Finally, this method reduces to almost zero the chances of disturbing the seal between malt tube and base - not a big issue, but careful placement of the malt tube inside the pump suctions greatly helps pump performance.

2. We experimented with many filters for the top and bottom plates and eventually discovered that a plastic mosquito net works very well. The net is designed to hang in doorways (rather than the very fine, over-bed, tent style) and is flexible but not as soft as a fabric. I think it may be injection molded as the weave does not fray at all – unlike so many fabrics. The size of the weave allows a strong flow during the mashing process without letting grains back into the wart during sparging. With regard to fixing the filter to the base plate, we used to stitch the net to the plate as per an earlier posting but this added time and complexity while making cleaning hard. What we have found is that by using our “stabbing pipe” we can push the net down over the central rod to securely locate the center of the net and then with a few taps the remainder of the net lays flat against the bottom plate. One note of caution: having installed the net you need to pour the malt in quite promptly as otherwise air bubbles form on the net and it starts to float up. Thankfully, by using the stabbing pipe approach we are able to pour our entire malt load in one go and this ensures that the net is held in place before problems arise! (another advantage of stabbing over stirring is that the net doesn’t get disturbed)

We hope to take delivery of a 200l BM in the next month and then I have some mods planned for the trusty 50l … More on that to follow ...

As a point of interest, we stop the mash after about 30 mins and rework the grain, this has allowed us to complete conversion in the minimum time which is helpful commercially but certainly isn’t a requirement of the Braumeister.

I’d be happy to try to answer questions if anyone has any!

Des
 
Hi to everyone - what a fantastic thread - it just goes to show the limitless ingenuity of the brewer :)

My name is Des and I run Drachental Bier here in Austria. We have based our business on the Braumeister and so far things are going very well (2 yrs in business now).

<snip>

I’d be happy to try to answer questions if anyone has any!

Des

Those are some great tips. You have -by far- the most experience brewing with a Braumeister of anyone I've read. The "distribution pipe" idea makes a lot of sense, both from the standpoint of getting the grain thoroughly mixed and not disturbing the lower screen.

I suppose the question I ought to ask, with 800 brews, is on the durability of the Braumeister? Have you had any breakdowns or replaced any parts?

(Also, I might mention that your English is great!)
 
Have any pics/video of your process? I'd be interested to see how your method works. Thanks for posting!
 
Hi all and thanks for the WELCOME ;)

Firstly, on the question of reliability, the only issue we have found so far was that a grain got stuck inside one of the rotors (impellers?) in one of the pumps which upset the magnetic "auto centering" feature. This led to some wear on one side of the rotor and then after removing the grain the rotor would "wobble" and make a nasty noise. I think replacement was about €20,- Otherwise a bulletproof system :) but I should say that we clean it very thoroughly EVERY brew - It's the lifeblood of our business!

As for the mesh, I used some I had hanging around but before entering a life in a brewery it looked a little like one of these:

http://cgi.ebay.com/Instant-Portabl...645?pt=LH_DefaultDomain_0&hash=item56426a2f55

Please note, I have nothing to do with this eBayer and only did a very quick search to give the idea and I'm not saying this is the correct product ...

Here is a close-up of the edge of one of our filters to give some idea of grid sizing:

mesh.jpg


As for
Have any pics/video of your process? I'd be interested to see how your method works.
I'm not sure if I understand which process you're referring to - can you clarify?

And, as for
(Also, I might mention that your English is great!)
I think we all have to be grateful for Google Translate! Oh, Ok, it’s a bust, I’m English but have lived in Austria for some time so haven’t completely forgotten the Queen’s English (ducks thrown tomatoes etc.) ;)

Looking forward to further interrogation !!
 
Thanks for joining us Drachental Des. It's great to have an experienced BM user here. You will probably regret it eventually because I'm sure we are going to bombard you with questions. The use of a pipe instead of a paddle sounds interesting. I've been using a mash paddle with a stab and twist motion to distribute the mash initially. Do you find better efficiency by stopping the mash and redistributing the grain bed? Thanks
 
The screen looks like nothing more than the nylon screen on our front porch.....d'oh! Not sure I ever would have thought of that.....
 
hfk2: I haven't seen much, if any, variation in efficiency, just in time to complete conversion. As for regretting “joining in”, the feeling so far is akin to sitting in a circle and standing up to say, “Hello, my name’s Des and I use a Braumeister” – A very liberating feeling :)

As for Rico567 not thinking of the door screen: if you don’t see everyday, household items as potential brewing aids, I think you need consider if brewing is really for you !! (I’m new here and hope my sense of humor won’t offend!)

Please ask anything about our brewing and if I can’t answer I’ll say ;)
 
Ahh, Tirol... I lived in Colorado and there are many 14k+ foot mountains in Colorado, and whenever we'd go for a trek in the mountains there was an old hiking song we used to sing about Tirol. I wish I could remember it now!
 
hfk2: I haven't seen much, if any, variation in efficiency, just in time to complete conversion. As for regretting “joining in”, the feeling so far is akin to sitting in a circle and standing up to say, “Hello, my name’s Des and I use a Braumeister” – A very liberating feeling :)


I know what you mean.. Ill go next. Hello, My name is kai I have a Braumeister and im addicted to brewing now because of it. they say the first step to recovery is accepting that your addicted. Now what if i dont want to kick this habit? lmao

i originally purchased this unit so that i could still brew even with my tight schedule. I find my self using the new found free time created by the Braumeister, to brew MORE!
 
Just a word of caution, before you go and brew with anything that is not rated for temp or food-grade, boil whatever it is in a pot of water for 30mins or so and taste the water to see if you can detect any off-flavors.

personally ill stick with my stainless mesh from a splatter screen. my wife is all coo coo about organics and against any type of plastic coming into contact with food at high heat. From what she says and she reads alot, thats a one way ticket to carcinogens in your food.
 
personally ill stick with my stainless mesh from a splatter screen. my wife is all coo coo about organics and against any type of plastic coming into contact with food at high heat. From what she says and she reads alot, thats a one way ticket to carcinogens in your food.

My wife is exactly the same. Good points. I'll stick with my stainless splash screen for now. I think I will buy a larger plash screen eventually and cut it back so its not missing those holes around the outer edge. Last time I did as suggested and added the cloth type filter first and then the splatter screen held that down nicely, but just don't know if that may choke the flow too much.
 
My wife is exactly the same. Good points. I'll stick with my stainless splash screen for now. I think I will buy a larger plash screen eventually and cut it back so its not missing those holes around the outer edge. Last time I did as suggested and added the cloth type filter first and then the splatter screen held that down nicely, but just don't know if that may choke the flow too much.

Didn't you get like 80% odd percent efficiency? I wouldn't worry about choking the flow too much at that point. ;)
 
Didn't you get like 80% odd percent efficiency? I wouldn't worry about choking the flow too much at that point. ;)

Cool. Yeah, 84% on the 10 gallon batch I think and 80 on the 5 with the new patented double filtration system!

Was just curious if too much restriction could cause pre-mature pump disruptous, commonly known as PMPD?
 
From what she says and she reads alot, thats a one way ticket to carcinogens in your food.

That's a point I never thought of :( I guess, just because I can't see or taste the effect it doesn't mean that it's not there ... Damm, now I'm walking around eyeing up splash guards and, frankly, getting some odd looks - Oh, the life of a braumeister is never easy :mug:

Seriously, though, thanks for the thought provoking input ...

A quick question for you guys - Have you experimented much with grind size variation? I ask because we "think" we have got the mix between enough to maximise the extraction vs so fine that we get tooooo much trub about right, but others experiance would be interesting ...
 
I think you missed on the first programming step called "Mashing".
"Mashing" is badly translated from german and means dough in temperature or mash-in temperature.
Can be adjusted up and down with the arrows as all the other steps.
It is not considered a rest/phase by the machine but it won't accept any steps/phases lower than "Mashing".

So if you want your first rest at 62, set "Mashing" too at 62.

Got it done right today! Thanks for the info. Also, if I wanted to pause in the middle of the mash to stir, I can do this by:

1. Press up/down arrows simultaneously.
2. Stir.
3. Press up arrow to resume?

Thanks.
 
Got it done right today! Thanks for the info. Also, if I wanted to pause in the middle of the mash to stir, I can do this by:

1. Press up/down arrows simultaneously.
2. Stir.
3. Press up arrow to resume?

Thanks.

Yes, I think that was the procedure. Good luck today!
 
Well, all went well. I made a Hopburst from the Aussie site. This means you add all your hops together, mix well, then add as the recipe calls (times and amounts). I ended up at 1.054 which was 83% efficiency, however I only recovered 9 gallons f finished product. So in the 2nd fermenter, I added 1 gallon of bottled spring water which dropped the OG to 1.042.

This recipe actually called for Glacier at the 5 minute mark but I didn't realize until I was measuring the hops out that my "Glacier" was actually "Galena". So I made the adjustments and used Galena instead. They smelled really nice so I'm sure no harm no foul.

I also ran out of standard 2 row so I had to make up the last 6 pounds with Maris Otter. :)

Hopburst APA #79 (Mix all hops, add as recipe)
10-A American Pale Ale
Author: Aussie HB
Date: 5/8/11

Size: 12.15 gal
Efficiency: 83.0%
Attenuation: 73.0%
Calories: 181.31 kcal per 12.0 fl oz

Original Gravity: 1.054 (1.045 - 1.060)
Terminal Gravity: 1.015 (1.010 - 1.015)
Color: 8.24 (5.0 - 14.0)
Alcohol: 5.2% (4.5% - 6.2%)
Bitterness: 36.7 (30.0 - 45.0)

Ingredients:
11.4 lb Standard 2-Row
6.1 lb Maris Otter Pale
2.0 lb Crystal Malt 20°L
2.0 lb Crystal Malt 10°L
1.0 lb Cara-Pils® Malt
2 ea Fermentis US-05 Safale US-05
2.5 oz Amarillo (7.1%) - added during boil, boiled 45 min
1.5 oz Cascade (6.93%) - added during boil, boiled 20 min
1.25 oz Galena (11.0%) - added during boil, boiled 5.0 min

Notes
Mix all hops together to blend. Then add as recipe calls for (times and amounts).

A=1.054
B= 1.042 (had to add a gallon of spring water to get to 5 gallons).

Results generated by BeerTools Pro 1.5.16
 
Hi guys,

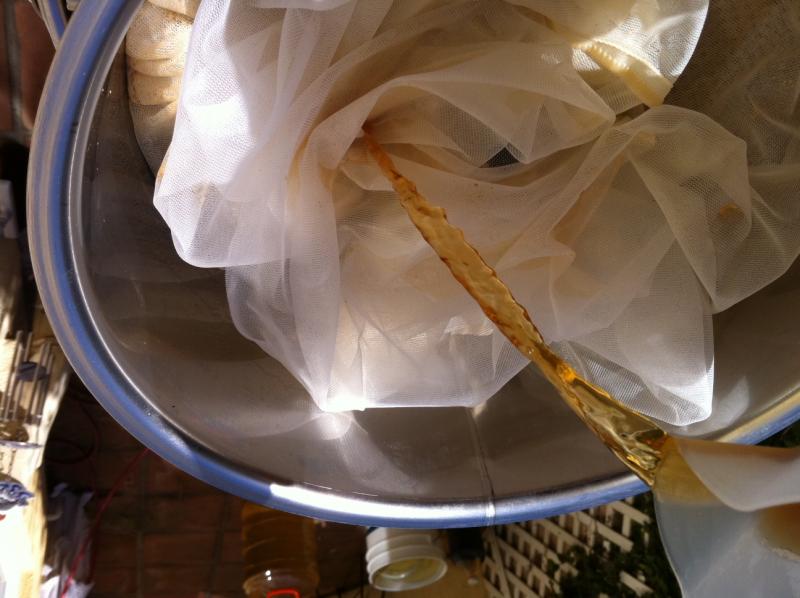
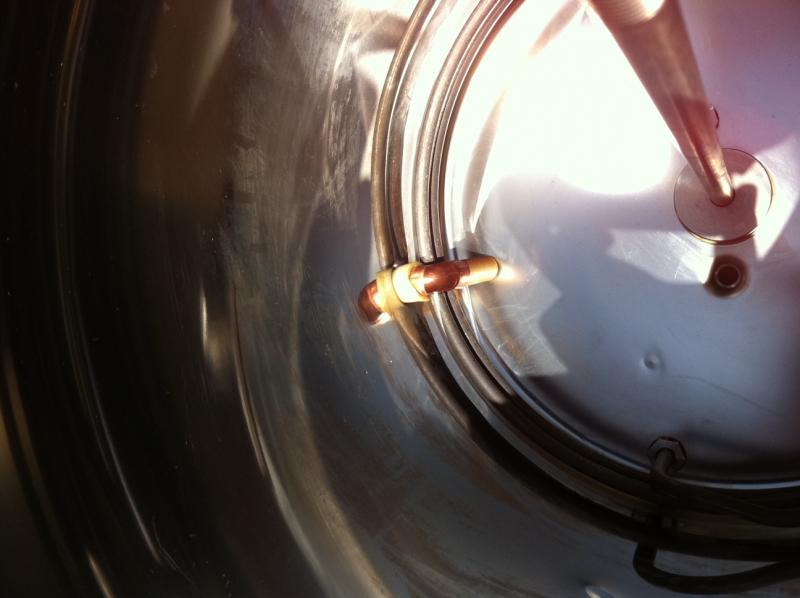
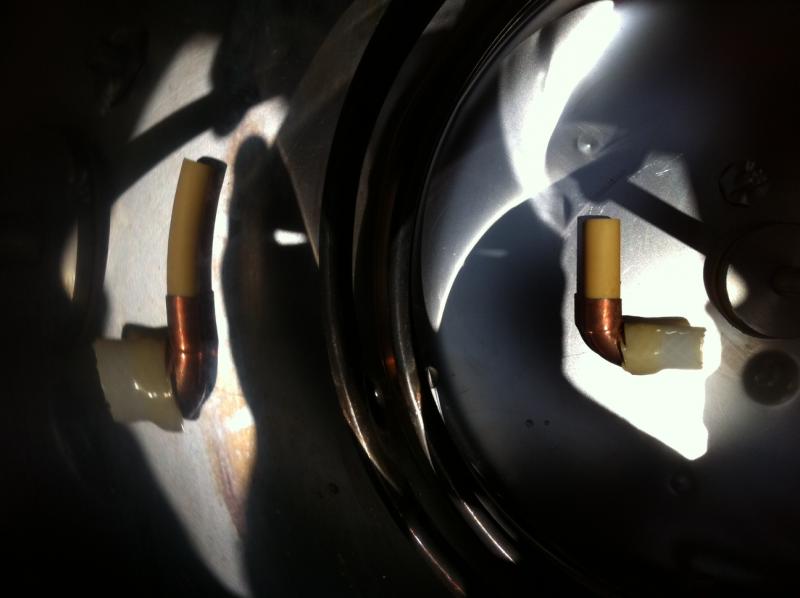
Today I did a fat tire clone that went pretty smoothly. I have been using a temperature correcting spectrometer to get gravities, but they seemed off so I really don't know what my efficiencies were. I will have to figure that out. I have attached some pictures below. I added 20 percent more base grain due to the no sparge, and I also got real lazy and used a grain bag purchased from my local home brew store. Basically I put in the malt pipe and the lower filter, then cut a small hole in the grain bag and put it in. Next I put in the grain, and the top filter, then just folded the top of the grain bag over. When I was finished, I just lifted out the grain bag and dumped into the trash and washed it later. I don't know if the bag affected efficiency, but the wort was crystal clear, so whoever tells you you can just get cloudy wort with this system is full of baloney. After the mashout, I recirculated a few pitcher fulls by just pouring it out of the spout and back on top of the malt pipe. it was already crystal clear, i just wanted to set up a little grain bed in the opposite direction as I poured about 2 liters of 168 degree water on top to get a little more sweet wort out of the grain. The last picture is of a cheapo drain tap I made based on the previous drawings. i just used one elbow and 2 pieces of silicone tubing. It barely clears the coil and may even touch a little but I have not noticed any problems and I can drain the kettle dry. Let me know if you have any questions,

best,

Wayne

1.jpg


2.jpg


3.jpg


4.jpg


5.jpg
 
Back
Top