Hi
I have moved the discussion in a specific thread form the thread dedicated to fermentation chamber peltier cooled since the two project, a part from cooling technology, have different solutions and development.
The idea is to use an immersion water chiller inside the conical fermenter and recirculate cold water. The cooling is provided by a peltier air-water heat exchanger using a technology for PC watercooling (overclocking CPU)
I have sourced a surplus COOLIT freezone that was made by a Canadian company. I got it from a surplus ebay auction

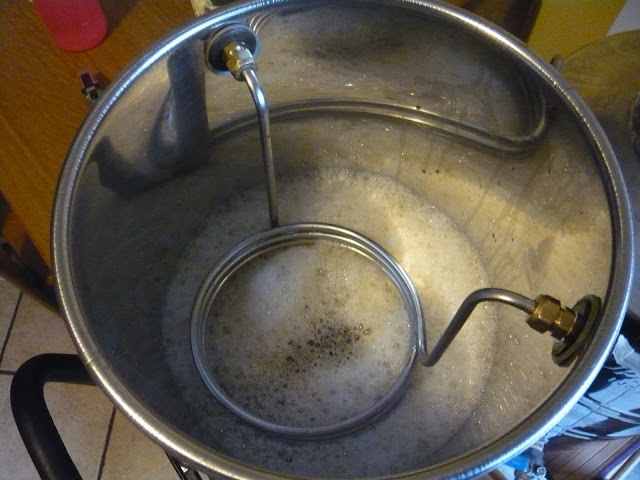
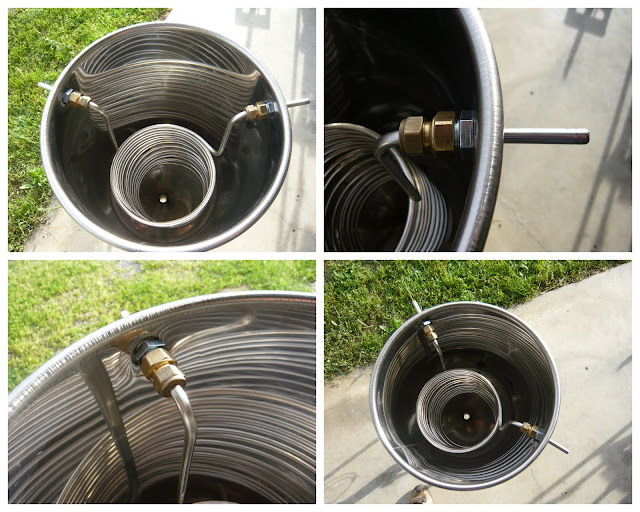
The basic principle is very simple the cool water is recirculated inside the conical fermenter via a stainless steal coil and is cooled by the peltier cells.
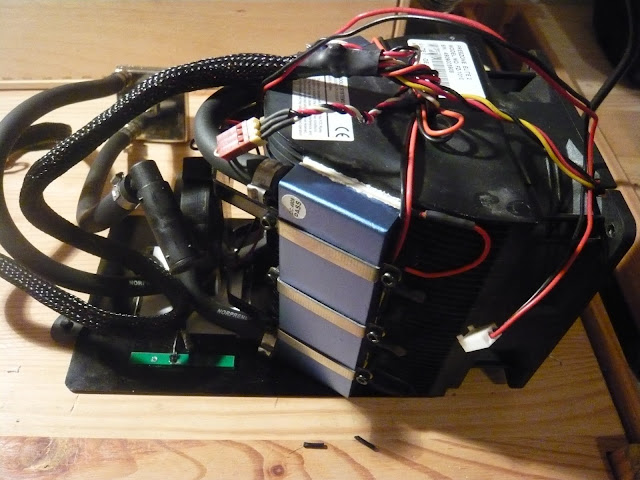
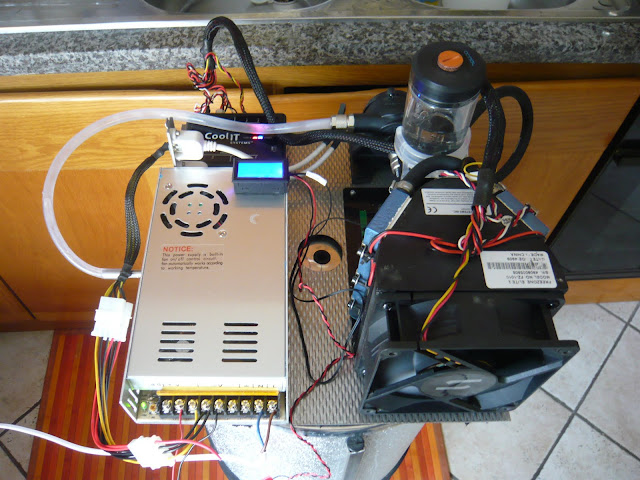
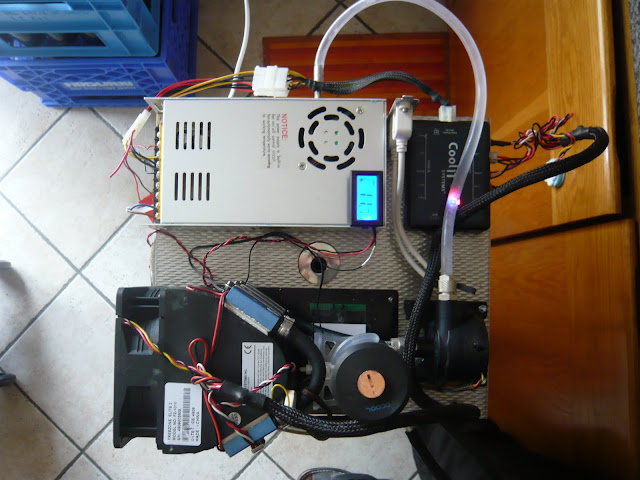
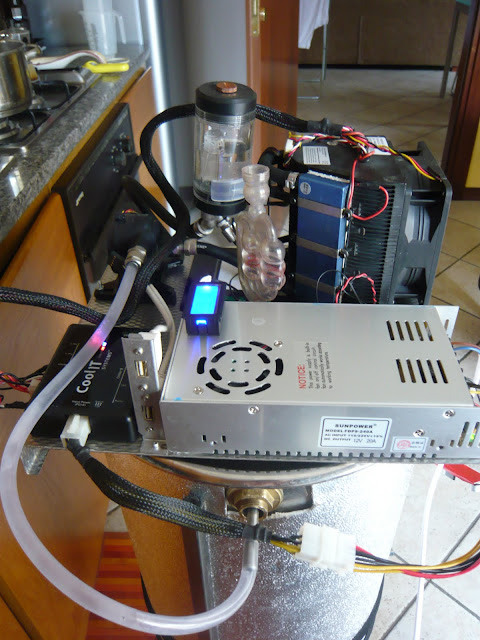
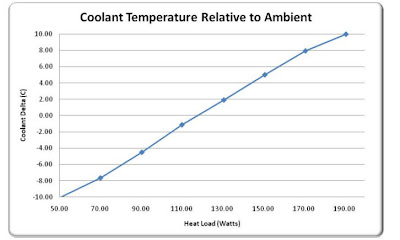
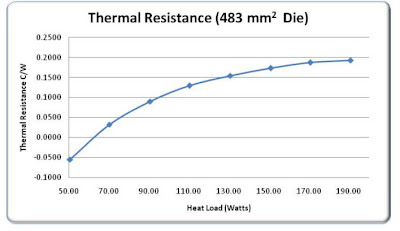
The coolIT exchanger is a very nice piece of engineering very compact, colplete with pump, peltier cells, reservoir, fan and it comes with a controller board that can control the power applied to the 6 cells and the speed of fun/pump according to set point and current measured temperature. So I expect that once the worth has reached the target temp the power will be adjusted in order to compensate just the heat produced by fermentation and loss of the system
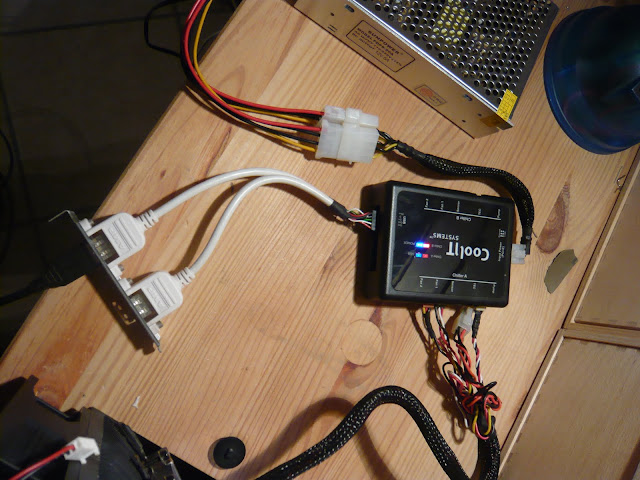
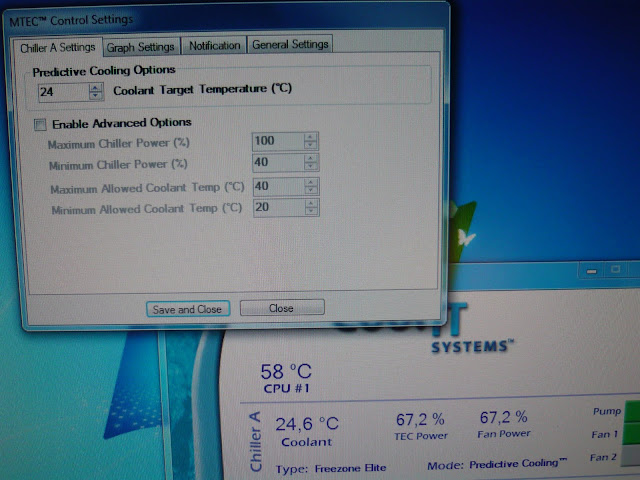
The unit can be controlled by software PC via USB but it can works also stand alone it is possible also to log temperature and power during the whole time !
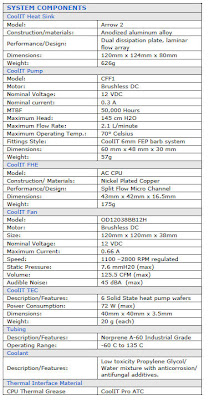
The stainless steel coil has a diameter of 20cm and an height of 30cm. The pipe is 8mm OD , 7mm ID. The terminal are 90degree bended in order to exit the side wall of the fermenter so all the coupling and fittings are external (safer !). Two compression fittings keeps the coil in the canter of the fermenter
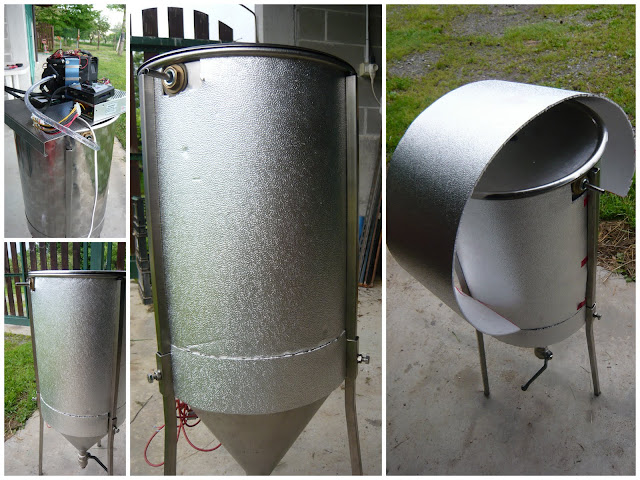
In order to avoid dispersion I have insulated the fermenter (both the side wall and the cone) using a foil of polistirolo and some neoprene.
Than after some trial I have substituted the original small 12V pump with a bigger one capable of 500l/h. The pump is a Thermaltake P500 pump and the fittings again comes from the PC modding / watercooling thecnology. Its very low noise with ceramic bearings for long term usage. Its compatible with high flow systems utilizing ID 6.4mm(1/4) and 9.5mm(3/8) tubing.
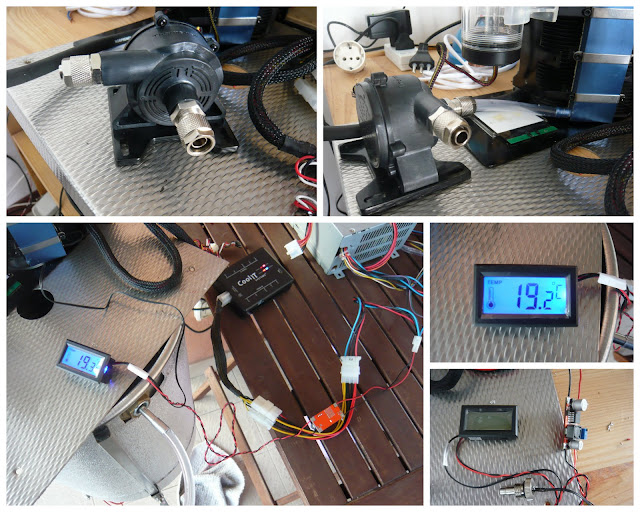
Last addition is a water reservoir..its very usefull when you fill the circuit and for eliminating bubble in the flow. Its very compact and transparent so you can se water flowing. It has 4 1/4 port one used for the inlet, one for the outlet , one for temperature sensor and the top one for refilling.

I have also added a small water temperature monitor with a sensor inside the reservoir. It is not connected to the control board that has its own sensor but is just to monitor the temp without connecting to the PC via USB. The small circuit in front of the thermometer is a DC-DC step down converter in order to have 5V supply form 12V main power supply.
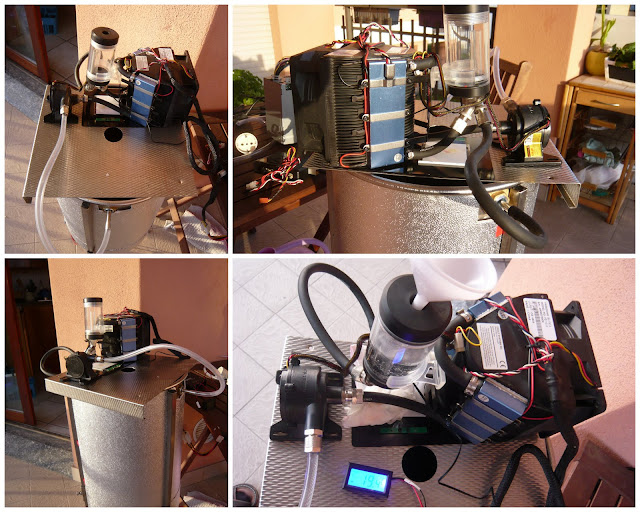

Here is the complete assembly. Up to now I have tested the fan, the controller and the water recirculation and it works fine very compact , low noise, easy to mange. In order to complete the test I need to connect a proper power supply (12V -150-200W0 and Im waiting for the delivery)
next post hopefully some results and experimental data
enjoy
Davide
I have moved the discussion in a specific thread form the thread dedicated to fermentation chamber peltier cooled since the two project, a part from cooling technology, have different solutions and development.
The idea is to use an immersion water chiller inside the conical fermenter and recirculate cold water. The cooling is provided by a peltier air-water heat exchanger using a technology for PC watercooling (overclocking CPU)
I have sourced a surplus COOLIT freezone that was made by a Canadian company. I got it from a surplus ebay auction
The basic principle is very simple the cool water is recirculated inside the conical fermenter via a stainless steal coil and is cooled by the peltier cells.
The coolIT exchanger is a very nice piece of engineering very compact, colplete with pump, peltier cells, reservoir, fan and it comes with a controller board that can control the power applied to the 6 cells and the speed of fun/pump according to set point and current measured temperature. So I expect that once the worth has reached the target temp the power will be adjusted in order to compensate just the heat produced by fermentation and loss of the system
The unit can be controlled by software PC via USB but it can works also stand alone it is possible also to log temperature and power during the whole time !
The stainless steel coil has a diameter of 20cm and an height of 30cm. The pipe is 8mm OD , 7mm ID. The terminal are 90degree bended in order to exit the side wall of the fermenter so all the coupling and fittings are external (safer !). Two compression fittings keeps the coil in the canter of the fermenter
In order to avoid dispersion I have insulated the fermenter (both the side wall and the cone) using a foil of polistirolo and some neoprene.
Than after some trial I have substituted the original small 12V pump with a bigger one capable of 500l/h. The pump is a Thermaltake P500 pump and the fittings again comes from the PC modding / watercooling thecnology. Its very low noise with ceramic bearings for long term usage. Its compatible with high flow systems utilizing ID 6.4mm(1/4) and 9.5mm(3/8) tubing.
Last addition is a water reservoir..its very usefull when you fill the circuit and for eliminating bubble in the flow. Its very compact and transparent so you can se water flowing. It has 4 1/4 port one used for the inlet, one for the outlet , one for temperature sensor and the top one for refilling.
I have also added a small water temperature monitor with a sensor inside the reservoir. It is not connected to the control board that has its own sensor but is just to monitor the temp without connecting to the PC via USB. The small circuit in front of the thermometer is a DC-DC step down converter in order to have 5V supply form 12V main power supply.
Here is the complete assembly. Up to now I have tested the fan, the controller and the water recirculation and it works fine very compact , low noise, easy to mange. In order to complete the test I need to connect a proper power supply (12V -150-200W0 and Im waiting for the delivery)
next post hopefully some results and experimental data
enjoy
Davide