Thanks again for the comments.
I need to add some conditioning vessels to my gear. I currently have 5) 6.5 gallon Mini-Brew conicals and a 6.5 gallon glass carboy. They are all full.
I have a friend who wants me to brew a special beer for the upcoming Frozen Dead Guy Days in Nederland.
http://www.nederlandchamber.org/events_fdgd-home.html
He and his neighbors are entering into the coffin race. I NEED to make a brew for this event. I am searching Craigslist to find some conditioning vessels. I think I have at least one found.
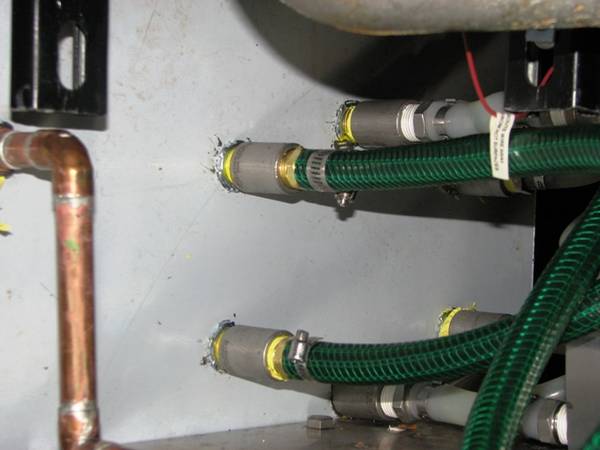
Anyway, after I secure the additional tankage to increase production to keep the pipeline filled, I will be changing all the disconnects over to stainless camlocks.
I have also been discussing an oxygenation system with Wayne of Bargain Fittings. Hopefully, all this will come together in the next month.

")