3 roller monster mill help

Homebrew Talk - Beer, Wine, Mead, & Cider Brewing Discussion Forum

Help Support Homebrew Talk - Beer, Wine, Mead, & Cider Brewing Discussion Forum:

This site may earn a commission from merchant affiliate links, including eBay, Amazon, and others.

KellyK

Well-Known Member
Joined
Jan 17, 2008
Messages
163
Reaction score
7
Ok, we must be too stupid to work this thing because it's been nothing but a problem since we got it. Anyone have trouble shooting suggestions for me. We have the 3 roller setup and the grain won't feed. It appears that the non driven roller on top is not spinning with the grain. We've set the gap to the largest possible on the bottom roller and that does nada. Running it with a 1/2 inch 7.8 amp Dewalt corded drill. Trying to mill in grain for tomorrow's brew day. Have an e-mail in to monster, but not sure how long it will take for their response.
 
Are you turning the mill in the right direction? That would be the first thing I would check. Be sure that the mill is mounted square and true with the side plates as nearly parallel as you can manage. Be sure that the non-driven rollers spin freely and are not gummed up on the ends between the side plates and the rollers. I would disassemble the entire unit and clean it thoroughly then re-assemble and give it another try. Blow it out with compressed air if you have any available.
 
Cat, yes turning the mill in the right direction. The mill is mounted on the base that was purchased with the mill so as far as I can tell it's square. All rollers spin freely and we have cleaned it out. The problem seems to be that the grain is not feeding between the top two rollers. These are not adjustable on this model.
 
Cat, yes turning the mill in the right direction. The mill is mounted on the base that was purchased with the mill so as far as I can tell it's square. All rollers spin freely and we have cleaned it out. The problem seems to be that the grain is not feeding between the top two rollers. These are not adjustable on this model.

Is there a way you can run the mill at a slower speed? Sometimes, running at high speeds can cause the grain to bounce off of the rollers instead of being drawn in. Maybe try pulsing the drill as a check and see if a slower speed makes any difference.
 
Tried that too, slow speed, fast speed, doesn't seem to make any difference.
 
I have exactly the same problem. Did you found any solution ?

The guy from Monster replied my exactly me same thing as someone wrote previously in this thread.

Tomorow, I'll give it a try with the "sqare" thing... even if my roller are already spinning freely, I'll disassemble everything and see what's going on.

If it doesn't work... maybe i'm spinning it to fast, but you tried it... so...

The "square" thing is kind of subtle. We sometimes assume that since it was mounted to a base at the factory that it should be good to go. Sometimes they aren't for one reason or another and not necessarily the mfg's fault. Could be banged around in shipping, dropped or otherwise knocked out of adjustment.

Here's a suggestion. Try loosening the screws a bit that attach the base to the mill. IIRC, the side plates are held in position by only the base. The slightly loosened screws will allow some play in the end plates and alleviate any binding. This is for a short test run. If this test improves the situation, then the "square" or end plate alignment needs attention. Sometimes, loosening all of the base screws and aligning the end plates can fix the probelm. Tighten the screws as you would lug nuts on a wheel. Tighten each screw partly and rotate until all are fully snugged down.

The binding can happen if there is not enough clearance between the end plates and the rollers, but it can also affect the axle pins in their bushings.

When using a heavy corded drill, it's best to support it somehow rather than just letting it hang from the roller axle drive pin. The weight of the drill motor can sort of "tweak" the mill frame enough to cause binding.

So, to "square" it up means make sure the side plates are parallel and even. The test run with screws loosened up just a bit will tell you a lot.

I've often thought that a very thin Teflon washer over the axle pins between the rollers and the end plates might be a worthwhile mod. It would be very cheap to try.

I almost forgot. If it turns out that binding is the problem, you might try drilling the holes in the base a little larger. This will allow for more adjustment "play" if needed. The holes could have been drilled slightly off.
 
What about the nuts used to attach the hopper ? Sometimes, the nuts holes are not perfectly aligned. Do you think it could "unsquare" the base of the mill ?
 
Cat, yes turning the mill in the right direction.

I know I'm asking the obvious, but because it's worth asking again... Are you sure? Did you try spinning it in the opposite direction?

My crankandstein 3d acted the same way until I reversed polarity on the motor, and I was confident that I was spinning in the right direction before that.:drunk:
 
I know I'm asking the obvious, but because it's worth asking again... Are you sure? Did you try spinning it in the opposite direction?

My crankandstein 3d acted the same way until I reversed polarity on the motor, and I was confident that I was spinning in the right direction before that.:drunk:

By way of disclaimer, we use a 3 roller Crankenstein and not the other mill.

Do you have the grain fed into the mill before you engage the DeWalt clockwise (we use the same setup BTW with the exception of the mill manuf). You need to have grain in the hopper/mill before you engage the drill attached to the roller. If the answer is "yes" then give the side of the hopper a good whack to make certain that it is feeding into the mill (sometimes the grain can get stuck in the hopper). If this also does not solve the problem, take the grain out of the mill, blow the mill clean with compressed air and start again. You should be OK by the end of this if you need to take things this far.
 
once the grain is in the hopper turn the non driven roller by hand so it grips the grain then once you start the drill friction takes over for you, its the initial bite that tends to be the problem (at least with my mill)
 
By way of update, we resolved our problem with help from an engineer friend. Yes, the mill was going in the correct direction and it was squre. The problem appears to have been that we were not setting the gap spacing on the mill correctly. Apparently if the mill is not spaced correctly on both sides (so thus even all the way across) even a little bit off will bind it up. At least for us the key was getting help from a friend who had the appropriate gap measurement tool and actually knew how to use it.

I would also note that the mill does need to be turning before the grain is in it in order for things to work properly.
 
once the grain is in the hopper turn the non driven roller by hand so it grips the grain then once you start the drill friction takes over for you, its the initial bite that tends to be the problem (at least with my mill)

That's exactly how I solved my problem buy turning the roller manually and then everything starts milling !

But, this is very not how I was immaginating my perfect mill !

Also, the mill jam whatever I pour the grain when it's rolling or not.
 
I would also note that the mill does need to be turning before the grain is in it in order for things to work properly.[/QUOTE]

We always have our drill attached and the grain in the hopper before we begin to mill and 99.9% of the time it has worked flawlessly. Just add a few pounds, give the drill a slight pull to engage the rollers and off you go. Adding malt to the mill when it is engaged usually results in malt all over the room. Much easier the other way, but hey, if it works for you go for it.

I have never changed the factory gap settings. The mill works great at the default setting (can't even recall what it is) and our efficiency is very good so we see no need to change anything.
 
I've always just dumped the grain in the hopper, then started my MM. I've never had a problem with it not feeding, but my gap may be kinda large. I've never measured it. The crush looks good and my efficiency is good too, so I don't worry too much about it.

100_0668.JPG


100_0669.JPG
 
Maybe there is a difference between the operation of the MM vs. the Crankenstein (what we use) but as I stated, we always add the grain first then engage the rollers (drill). We use a primitive milling setup (mill and hopper directly over the 5 gal mill bucket on the floor) and I would need a second person to feed the grain into the hopper while I controlled the speed of the drill (which is really the key but that is another subject all together). Not going to contort myself into pouring grain into the hopper and firing up the drill all at once - a disaster waiting to happen.
 
before I bought the 3 roller MM, I had an older 2 roller mill which didn't bind up like my new one. It took some effort, but I found that it has to be up to speed before dropping any grain in it to properly get the other two rollers spinning..
 
My understanding with the MM and Crankenstein was they were business partners that had a falling out and the designs are similar if not identical. me and gabe have the convienence of table mounted mills so we can dump the grain before or after the mill is turned on. this helps when you brew alone. whatever works for you and gets the results you need.
 
My understanding with the MM and Crankenstein was they were business partners that had a falling out and the designs are similar if not identical. me and gabe have the convienence of table mounted mills so we can dump the grain before or after the mill is turned on. this helps when you brew alone. whatever works for you and gets the results you need.

*I'm Gabe, btw..
 
My gap is set to 0.055" and it works perfectly. I milled down a piece of 0.062" SS plate with a 0.055" "tongue" almost the width of the rollers then I insert that into the gap then adjust the set screws so the rollers are kissing the tongue perfectly then I snug them up. Since I did this, it has worked perfectly.

Before I did this, the MM3-2.0 was troublesome and sometimes did not spin. I still think my Barley Crusher had a better crush though.
 
My hopper on my MM-3 holds about 25 pounds of grain. I too have had this trouble. What I found was that if I fill the hopper first I get this problem. I have an old 1/2" low rpm drill that I can't start before dumping in my grain. I just add a couple scoops and hit the drill. If it won't turn, I just reverse the drill a little by hand and hit the trigger and it catches every time. My gap is set @ .030 and I condition the grain. The crush I get is fantastic. I can't imagine a mill being any better than the Monster Mill. I also make sure I clean it up ever so often and add a bit of lube I got from Monster to the bushings. The dust that comes out of it when I clean it is unreal. Wish I had a motorized table for it. I think if I could run the mill before dumping the grain there would never be an issue.
 
Ok, my setting is perfectly "square". The spacing between the roller is in the default position. When I mounted the hopper, it didn't modified the "square" of the mill base. The 3 rollers spin freely. Bad news, I was out of grain to give it a try :(
 
My hopper on my MM-3 holds about 25 pounds of grain. I too have had this trouble. What I found was that if I fill the hopper first I get this problem. I have an old 1/2" low rpm drill that I can't start before dumping in my grain. I just add a couple scoops and hit the drill. If it won't turn, I just reverse the drill a little by hand and hit the trigger and it catches every time. My gap is set @ .030 and I condition the grain. The crush I get is fantastic. I can't imagine a mill being any better than the Monster Mill. I also make sure I clean it up ever so often and add a bit of lube I got from Monster to the bushings. The dust that comes out of it when I clean it is unreal. Wish I had a motorized table for it. I think if I could run the mill before dumping the grain there would never be an issue.

I have seen this "high static pressure/resistance issue" stated numerous times on HBT and there really is a simple remedy.

I have an MM3 and drive with a corded craftsman high-torque drill but it would bind under the same scenarios many here state (loading the hopper before starting)

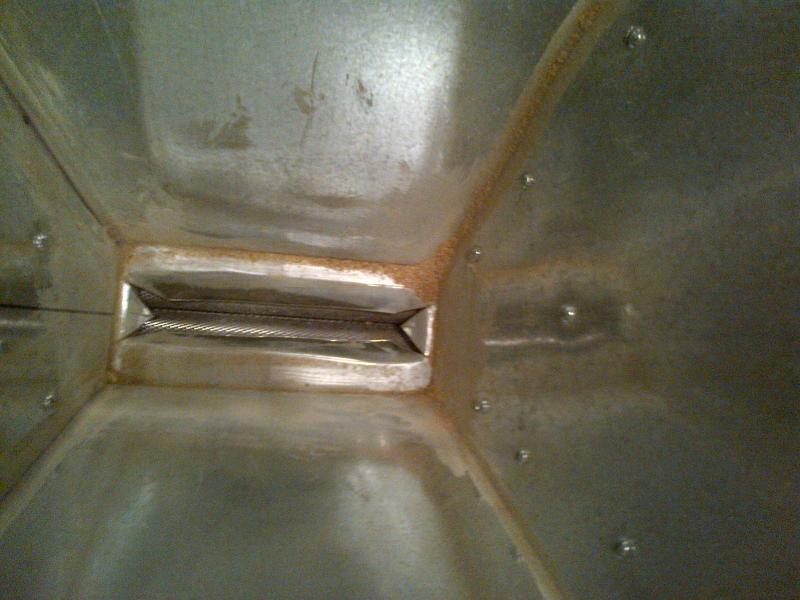
The simple remedy is to fashion a feed chute out of sheet metal (HVAC ductwork metal at the box store works fine) and slip it between the base of the hopper and the gap between the top 2 rollers. You are reducing the static pressure against the rollers by doing this.

I crush conditioned malt at ~25mil and have not had an issue since this change and have crushed as much as 35 pounds in this hopper that was all added prior to starting the rollers.
 
The simple remedy is to fashion a feed chute out of sheet metal (HVAC ductwork metal at the box store works fine) and slip it between the base of the hopper and the gap between the top 2 rollers. You are reducing the static pressure against the rollers by doing this.

I may have too large of an opening at the bottom of my hopper. Looking down through the top of my hopper you can see about half of each of the top rolls. I think this would be a good idea. I was thinking of making the opening about half of this width. More like looking down and see just more than the gap space. Not that I've had a lot of trouble with this, but I've found the drill having more trouble since I've tightend the gap and conditioned the malt. Maybe they have a pic on Monster that will show their opening they use feeding the mill.
 
I may have too large of an opening at the bottom of my hopper. Looking down through the top of my hopper you can see about half of each of the top rolls. I think this would be a good idea. I was thinking of making the opening about half of this width. More like looking down and see just more than the gap space. Not that I've had a lot of trouble with this, but I've found the drill having more trouble since I've tightend the gap and conditioned the malt. Maybe they have a pic on Monster that will show their opening they use feeding the mill.

Like I said, mine was custom, but I see a lot less than half the width of each roller. Perhaps I can get a picture tonight and post. You aren't going to starve the mill by reducing the gap and you will minimize "deflection loss" (just made that one up!) that occurs by grain bouncing or feeding past the outside of the rollers and not being crushed at all. That's my observation, at least.
 
Like I said, mine was custom, but I see a lot less than half the width of each roller. Perhaps I can get a picture tonight and post. You aren't going to starve the mill by reducing the gap and you will minimize "deflection loss" (just made that one up!) that occurs by grain bouncing or feeding past the outside of the rollers and not being crushed at all. That's my observation, at least.

I looked on the Monster site and I do have my opening too wide. I agree with you on the deflection loss. I think I will make me an insert out of some ducting sheet I have here. Thanks for the info! When I bought my mill Monster didn't offer the hopper. Their new hopper can hold 39 pounds, mine only will hold 25. :(
 
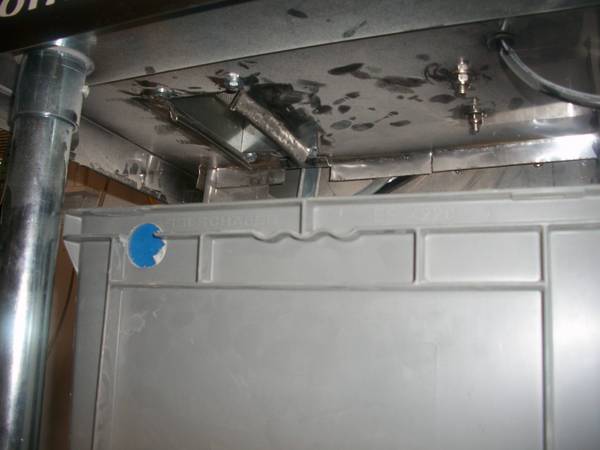
Here is a crappy pic for reference. Let me know if you have any questions. No issues since isntallation with binding when crushing grain bills up to 35 pounds.

IMG-20110722-00003.jpg
 
Sticking is caused by the idler (non driven) rollers not spinning freely. A couple different things can cause the idlers not to spin freely. First, take off the hopper. Loosen the four bolts holding the mill to the base. You need to make sure that all the rollers spin completely freely. When you run your hand across them quickly, they should spin with no binding, and keep spinning for a while. If they don't spin freely with the mill loosened from the base, then there could be gunk in the bushings. Clean it up. Next, push the frames together to minimize the endplay on the rollers, and then bolt one frame down completely. Next move the other end of the mill around and feel for the center of the freeplay. Put the other frame in the center of this freeplay, and snug down the bolts. Check your spinning again. It should spin as freely as before. Slowly tighten the frame, checking the spin of the rollers all along, making sure that they don't bind as you tighten them. When its bolted down, check your spin. NO binding, freewheeling is what you should see. Also check your endgap. If you slide all the rollers up against one frame, then the space between the end of the roller, and the other frame should be small. Think less than a small barley kernel. You don't want grain getting between the ends of the rollers, and the frames, as this is another cause of binding. If grain gets down in there when you're milling, it will bind up the rollers. Make sure the little triangles are installed in the corners of the hopper, as this will assist in keeping the grain away from the ends of the rollers.

Next check your gap. On the 3-roller mills, the gap needs to be set such that the area between all the rollers is MAXimized. If you think about it, you can set the same gap with the knobs in two different positions. Think of two circles that intersect, there are two points where they cross. Put the bottom adjustable roller in the lowest most position, 6, o'clock, on both ends. Looking at the mill from the drive shaft end, the drive shaft should be on the left side of the mill. You need to turn the knob on that end from the 6 o'clock position clockwise to set the gap you want. From the other end, you should turn it CCW. This will make the bottom roller as far away from the top idler as possible. You need to make sure that you set the gap this way so that the mill feed properly. If the ends are not set the same, the idler will bind. ALSO, don't set the gap wider than 0.045". You're wasting your time at a gap wider than that, and the mill might not feed properly, if it's bigger than that. I recommend you start at 0.040", and leave it there, or work slightly smaller.

Before you re-install the hopper, make a small mark with a permanent sharpie on the knob, and on the frames that line up, so that you know where 0.040" is on your mill. All milling is going to happen very close to here. This way, you can remove, and re-install the thumbscrews, and know that the knobs haven't moved, and you can always go back to 0.040" Then re-install your hopper. IF the holes that hold the hopper down don't line up with the holes in the top of the mill, (they may be tight), you may have to enlarge them slightly on the inside edge. If you really minimize the endgap on the rollers, this area can be tight. You can also just bolt down one end of the hopper, as two holes on one end will always line up.

Give this a whirl, and if you are still having problems, or have a question, please let me know.

Thanks

~~fred francis
Monster Brewing Hardware
 
Next check your gap. On the 3-roller mills, the gap needs to be set such that the area between all the rollers is MAXimized. If you think about it, you can set the same gap with the knobs in two different positions. Think of two circles that intersect, there are two points where they cross. Put the bottom adjustable roller in the lowest most position, 6, o'clock, on both ends. Looking at the mill from the drive shaft end, the drive shaft should be on the left side of the mill. You need to turn the knob on that end from the 6 o'clock position clockwise to set the gap you want. From the other end, you should turn it CCW. This will make the bottom roller as far away from the top idler as possible. You need to make sure that you set the gap this way so that the mill feed properly. If the ends are not set the same, the idler will bind. ALSO, don't set the gap wider than 0.045". You're wasting your time at a gap wider than that, and the mill might not feed properly, if it's bigger than that. I recommend you start at 0.040", and leave it there, or work slightly smaller.

Before you re-install the hopper, make a small mark with a permanent sharpie on the knob, and on the frames that line up, so that you know where 0.040" is on your mill. All milling is going to happen very close to here. This way, you can remove, and re-install the thumbscrews, and know that the knobs haven't moved, and you can always go back to 0.040"

Good information. I have my gap set at 0.055" (I have an MM3-2.0 with hardened rollers) and it is working well with a nice crush, even too fine with some grains as I'm seeing some flour. I'm reluctant to go with a tighter gap to be honest.

I'll try it tighter but I'm not sure it will be any better than what I'm getting now. Are we talking about the same mills? It sounds like it but just to be sure...
 
I know this is an old thread, but I have had trouble with my mill since I got it. However, I finally figured out what the problem is. On MY setup, the hopper with extension, presses down on the idler roller and binds it. I know this because I have a high torque drill that I use for mixing concrete, so the if the hopper hits the drive roller, it is either worn down now or moves out of the way.

Everything spins freely with the hopper off. Then, if I put the hopper on and tighten it to the mill, idler roller doesn't spin easily. Getting the drill going first has no affect and no grain gets crushed. If I loosen the hopper slightly on the side of the idler roller and get the drill going first, crushes like a charm. However, if I stop the drill at any point (even if just a little grain in there), the hopper binds the idler again. It will also bind it if I put the grain in first--before starting the drill--even with the hopper loosened.

There is another small flaw with the mill. (I do some industrial design work...hahaha.) There should be some really shallow, #10 tapped holes on the sides--at the top and the bottom. Even though this makes it take longer to remove the hopper, it would keep the dust from coming out around the sides.

I think my solution is to slightly grind the edge of the hopper down that goes across the length of the idler...maybe 0.03125" (1/32)" or so--not a lot. My worry is that I'm not sure how much to grind it down to alleviate the problem. I don't want to grind and then totally install (over and over) just to get it to work. I'd shim the hopper with nylon washers (wafer thin) right under where the bolts on the top (idler side), but then that would leave a gap for grain dust to come out. I made a really nice malt mill stand, so I would like to keep the top from being covered with a **** ton of dust.
 
Back
Top