klyph
Well-Known Member
Oh man, those bricks propping up all your precious brew.
Brewing on the edge! Extreme brewing!
Brewing on the edge! Extreme brewing!

Oh man, those bricks propping up all your precious brew.
That was the first thing i noticed too... nothing like a scalding pot of liquid waiting to be tipped over.
Has anyone else created any wood frame rigs/stands or taken any pics in the last few months?
Morning wood...
Almost done with mine.
Just need to silver solder a ground point on the kettle.
Run hose for return on the kettle and mash tun.
Should get some calibration in this week and first brew on it next weekend!!!

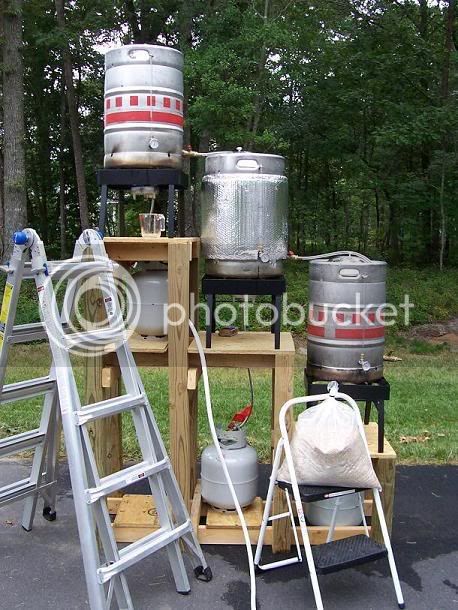
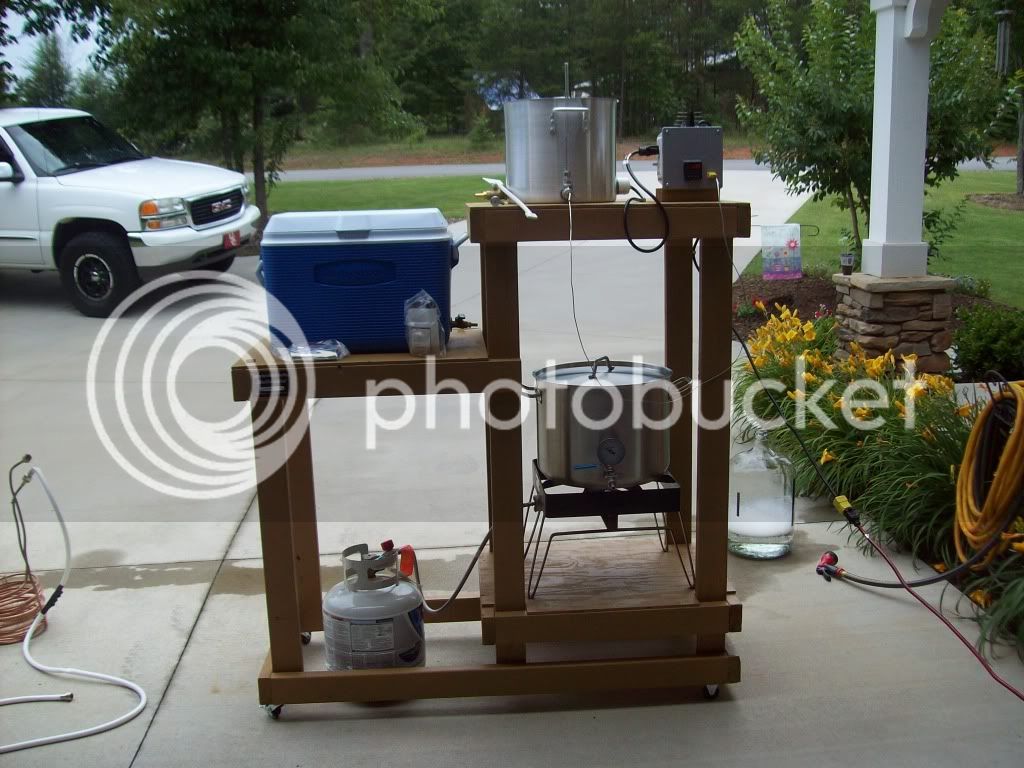
In this picture the burner is right next to the propane tank. It that a problem? Could a piece of wood or something be put in between the burner and the tank? Would that cause any problems?
a piece of wood would probably shield the tank from burner heat, especially if the heat is all the way up and there is any breeze in the right(wrong?) direction. but the wood would possibly catch on fire, better than the tank heating up. i think i would engineer some kind of windscreen of two layers of thin sheet metal that is easily replaceable if it gets warped.
Better yet, can you just move the tank?
I would also keep an eye on the wooden frame where it adjacent to the burners.
Yes, I think a piece of sheet metal might work. Why would I want it to be two layers?
maybe that's just overkill, but two layers would create an insulating airspace. i've had plastic and paint melted/blistered from the flame when my 185kbtu burner was cranked up. i've also had a thin sheet metal windscreen warped and melted.
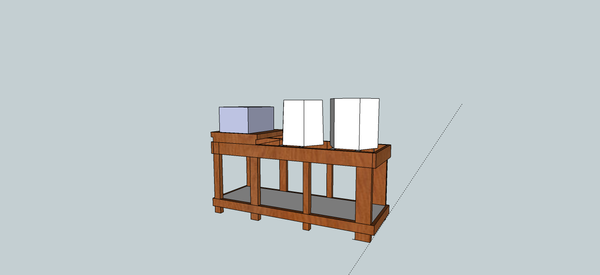
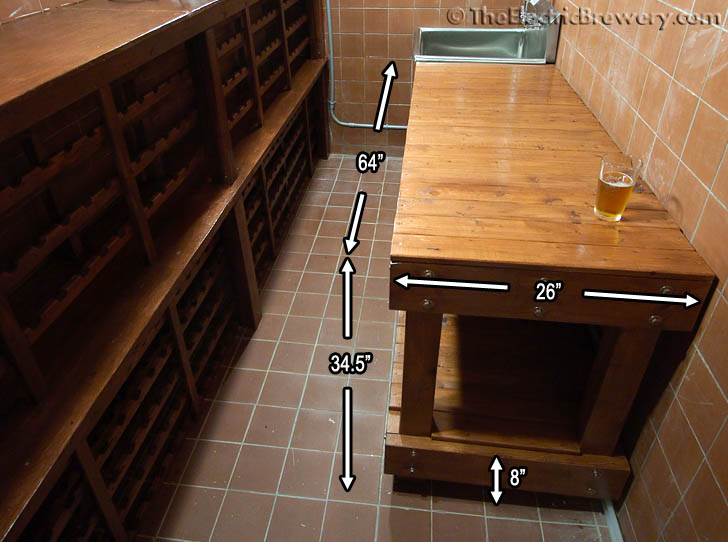
The portion of the rig under the MLT is an Ikea table I'll be build off of...
To be honest, I would be timid to use IKEA furniture to support that kind of weight , around water, and around any kind of flame. Let alone all 3!
That is not wood, it is wood dust glued together.
Brilliant! I have one the previous owner of my house left. My build just got cheaperrecycled bed frames


Question though - what hardware would you recommend to build with? Deck screws, lag bolts, combination of the two, simple wood screws?
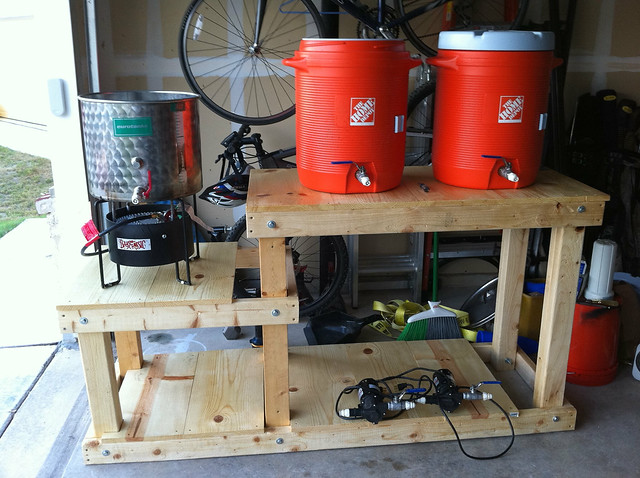
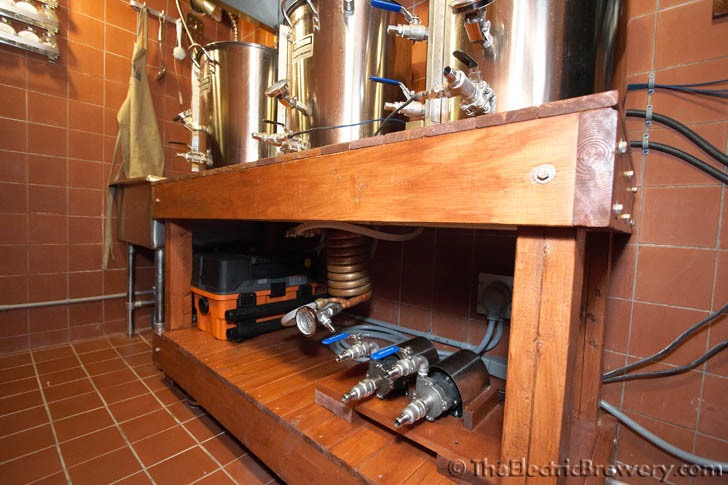
here is an updated image with the switches, pumps and casters mounted up. i cut 6" off the legs to accommodate the casters, i'm not very tall
Do you have any problems with priming your pumps with them mounted so high relative to your intake? Looks to me that it might not prime too well with that configuration.
TB
ScottSA thats a great looking setup. I would love to build something like that someday. Looks simple but I am sure it saves you a lot of work. I just need to verse myself in the ways of all grain and learn what a HLT is. Oh yeah, and I should probably sell the apt and get a house first!
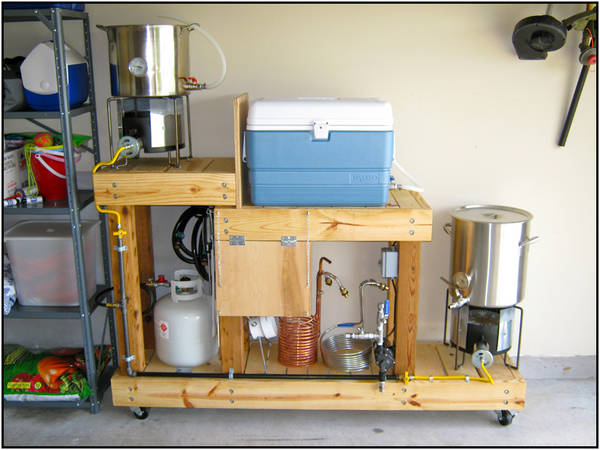
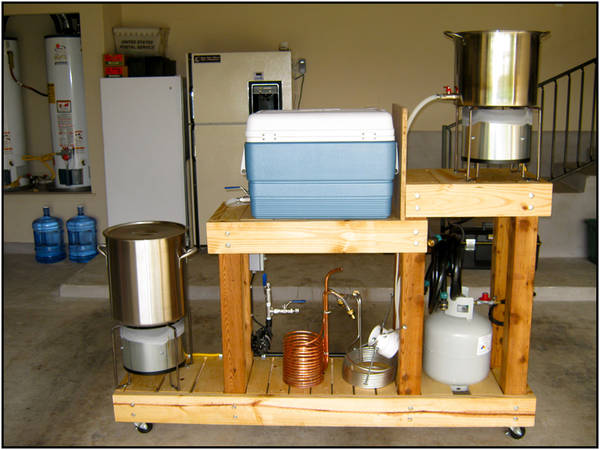

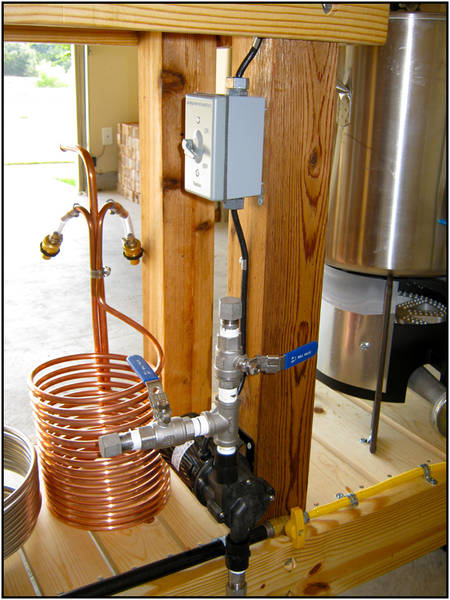
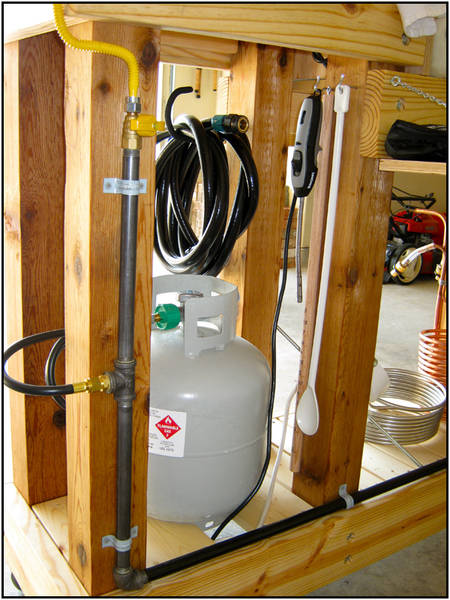
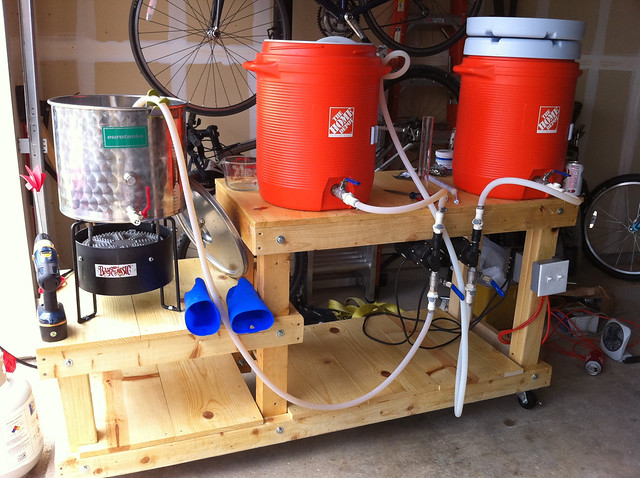
Here are some photos of my wooden brew rig. I finished it back in February, have brewed half a dozen batches on it so far and I'm incredibly pleased with it.
It's a pretty straight forward design. I added some galvanized flashing to the burners to serve as wind guards which allows me to run the burners at a lower intensity without risk of them getting blown out on windy days.
The dual outputs from the pump allow me to whirlpool at then end of the boil while I am chilling then simply close one valve and open another in order to transfer into the carboy when pitching temperature is reached.
The HLT serves as the pre-chiller tank once I am done heating sparge water which is nice and convenient.
I know lots of folks worry about the safety of a wooden brew rig but the amount of heat needed to cause a 2X6 to spontaneously combust is far beyond the temperatures generated by the indirect heat of your typical propane burner. Sure the wood gets hot, but not too hot to touch (even right next to the burner) and I have not seen any sign of scorching, nor do I expect to.
Front View
Rear View
Shelf Detail
Pump Detail
Propane Detail
http://http://i300.photobucket.com/albums/nn37/rkjones84/048.jpg
here is mine, what yal think? works great for my batch sparge brewing.

Enter your email address to join: