240v eBrutus 20

Homebrew Talk - Beer, Wine, Mead, & Cider Brewing Discussion Forum

Help Support Homebrew Talk - Beer, Wine, Mead, & Cider Brewing Discussion Forum:

This site may earn a commission from merchant affiliate links, including eBay, Amazon, and others.

iijakii

Well-Known Member
Joined
Jun 14, 2010
Messages
6,083
Reaction score
1,868
Location
Portland-ish, OR
Guess I should start a build thread. First I'd like to thank JKarp, PJ, Ischavio, Kal, BobbyM and many others for answering a lot of dumb questions. Couldn't have even began to think about undertaking this without PJ's diagrams or Kal's website.

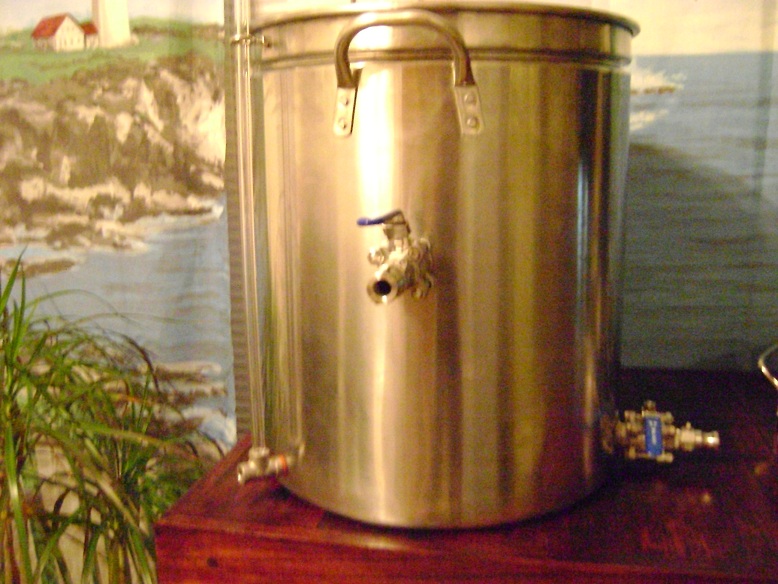
What started this all was seeing JKarps's Countertop Brutus20. I wanted it. But, I wanted a larger size. PJ helped me with the idea of using the spa-panel and dryer-outlet for a 240v 30amp power source. Giggity. The build kept morphing a bit after seeing Kal's website et cetera. My simple CB20 idea turned into something else... with a much bigger cost :p. For those of you unfamiliar with the Brutus 20 concept it's a two-vessel full volume, no sparge system which I will be recirculating during the entire mash. I'm hoping I get ~75% efficiency like JKarp and others, but if I don't I plan on just mashing 1-2 gallons shy of total volume and doing a psuedo cold-water batch sparge to rinse some of them sugar goodnesses.

First I started building a brewstand. I was wanting to keep it simple with one pump, but I wanted it to look nice. I looked into modifying a stainless table, but basically don't have any welding skills or fancy tools.

hvHRT.jpg


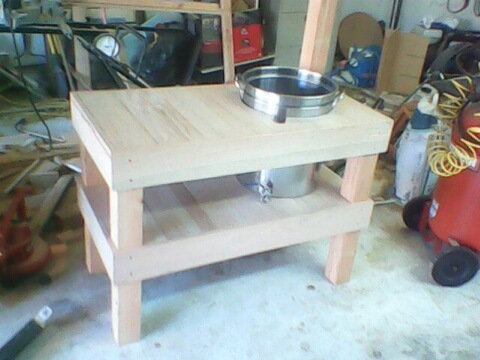
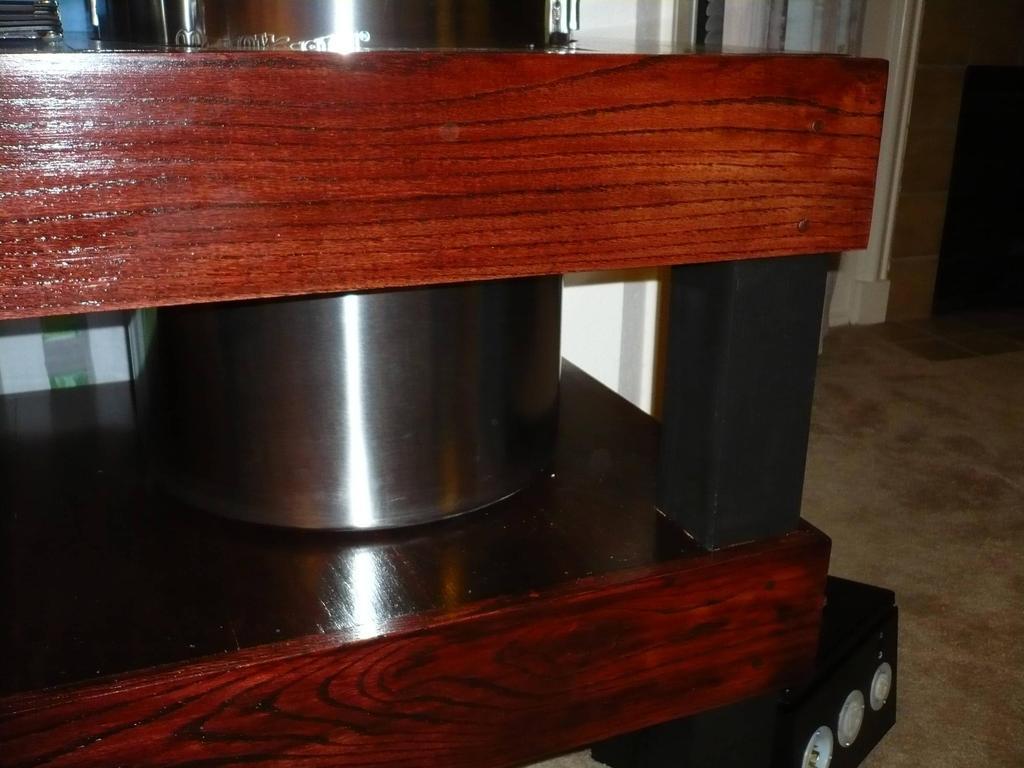
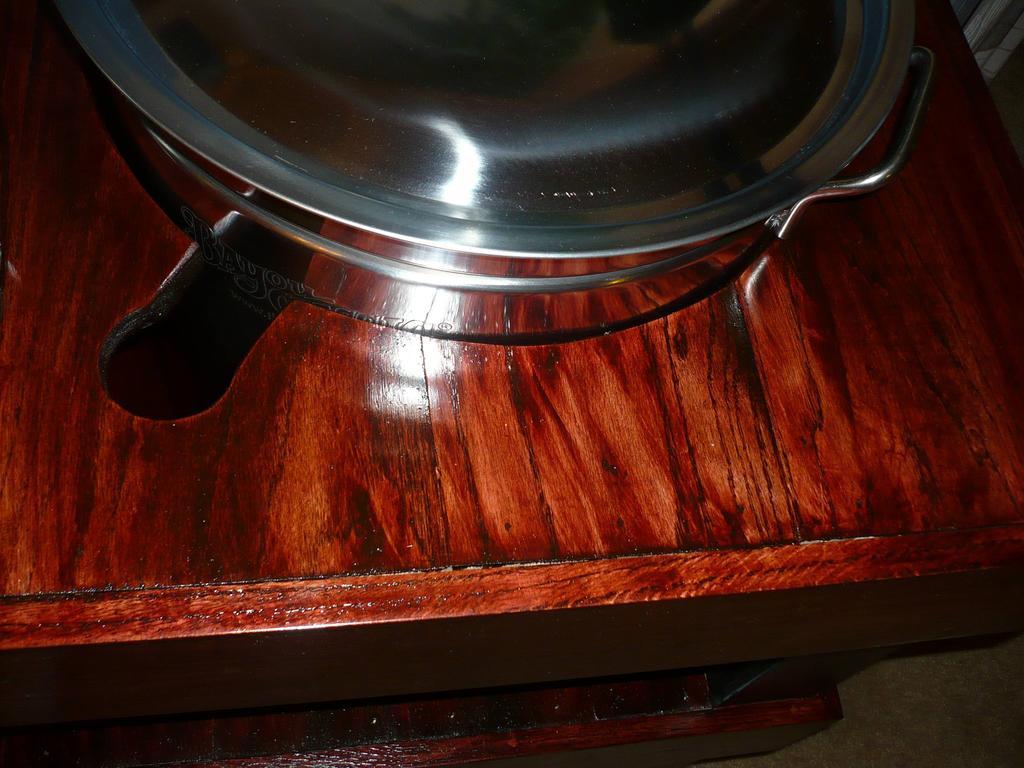
What I did was make mitred collars with 1x6 and then attach them to the 4x4s. Once I did that I attached 2v4s on the insides of the 1x6s for a brace to attach the table top since I was wanting it flush. Worked pretty well. There's a few gaps but I don't have access to a table saw nor planar so oh well.

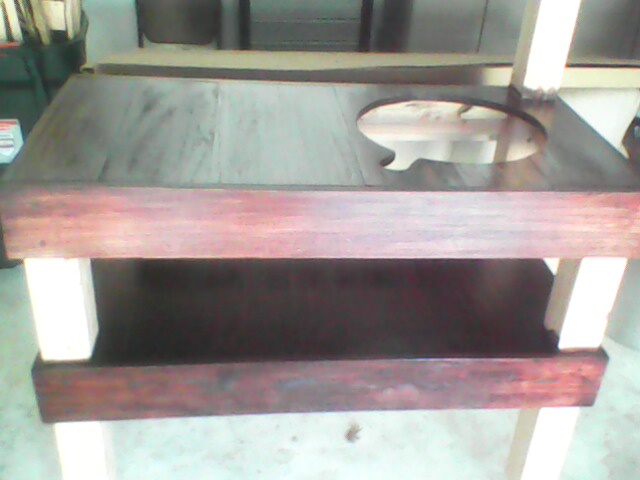
Used Red Mahogany stain, and am going to polyurethane it this weekend. Will be painting the legs black. The one raised leg, by the way, is so I can attach the control-panel with a swinging TV wall mount.

3mnCM.jpg


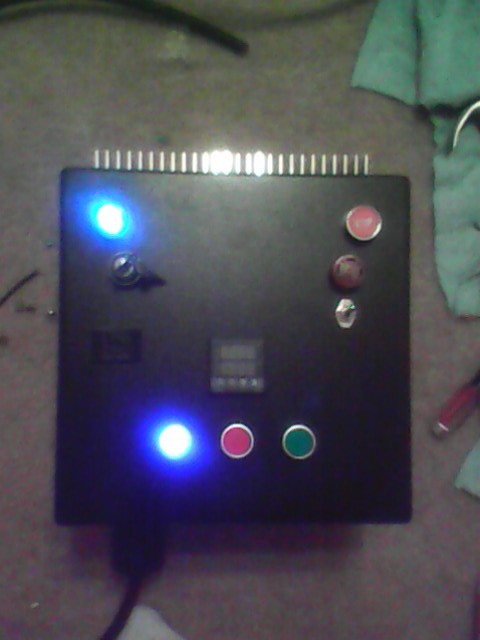
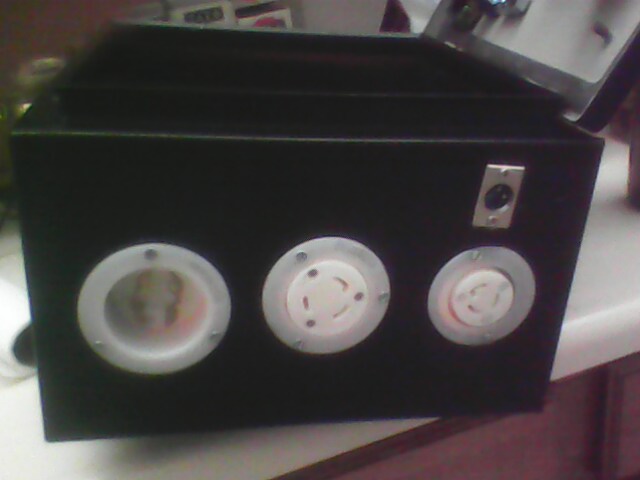
Got the panel face and three receptacles cut at a waterjet facility for $70. Cheaper than buying holesaws...

KiNuo.jpg


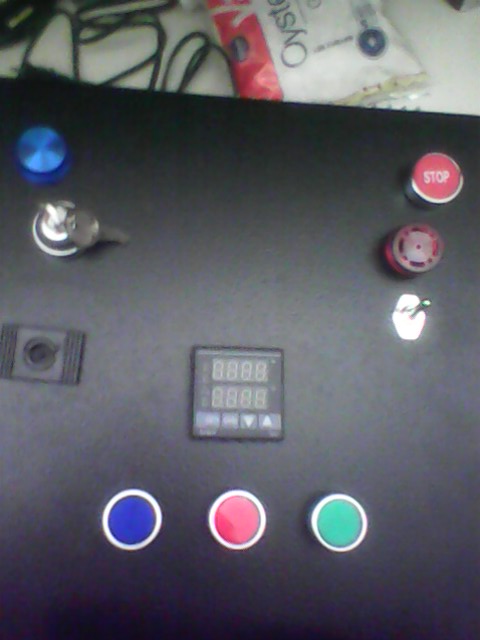
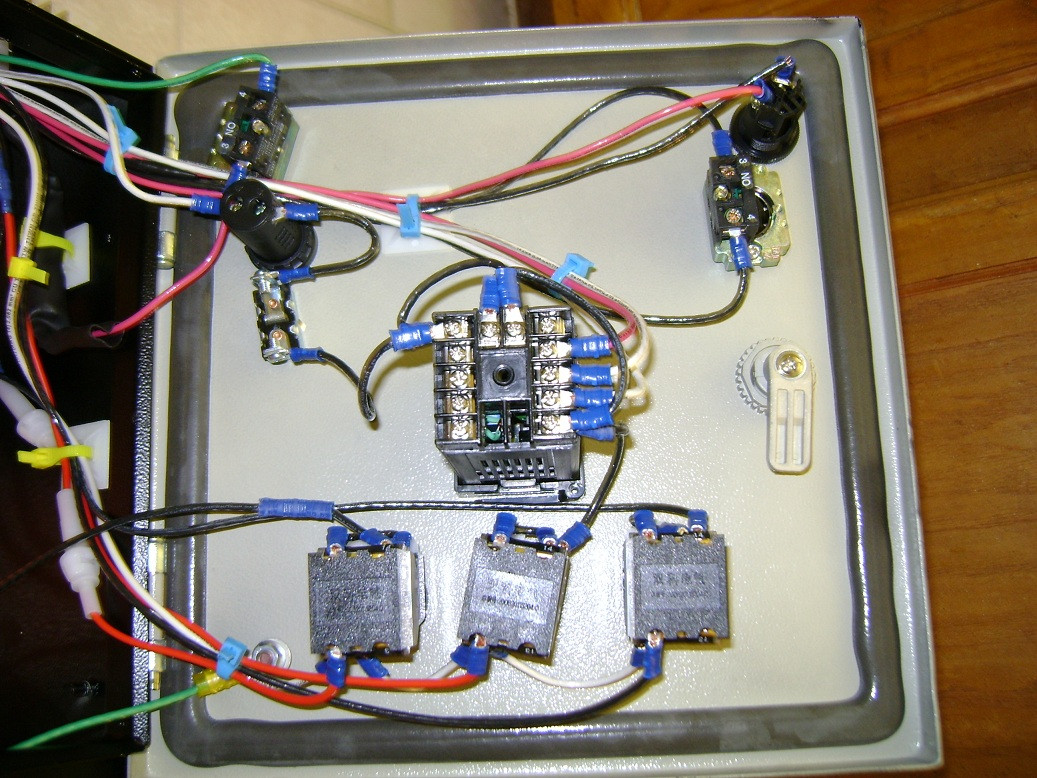
Keyed-switch is the power on-off; and power indicator LED above it. Then there's a momentary push-button ESTOP, alarm and toggle to turn the alarm off. The three bottom push-buttons are for PID, Pump and Element power.

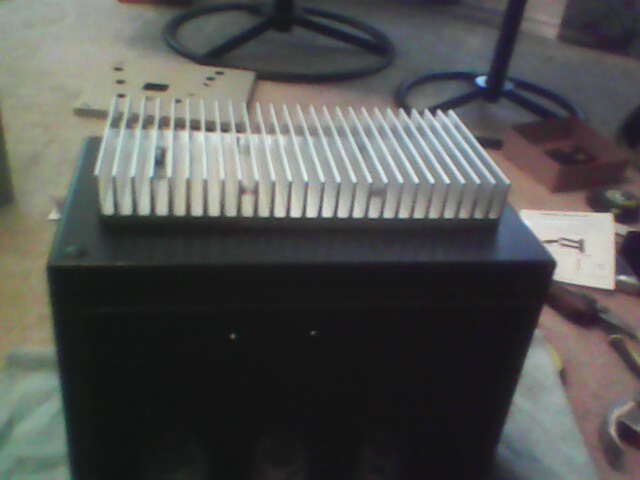
Here's the main thing with my build I'm unhappy with so far: the heatsink. I didn't have a drive long enough to drill down through the fins, so I did it from the bottom side. Well, I suck at drilling holes apparently and two of them didn't align well. The screw heads get stuck on the fins and don't go down all the way. A bit of an eye sore.

11PRa.jpgp


Then the other mishap is the XLR panelmount here being a bit crooked. I blame dull drillbits and tough metal but maybe it's me just being a rookie and not using my punch enough.

AMNdg.jpg


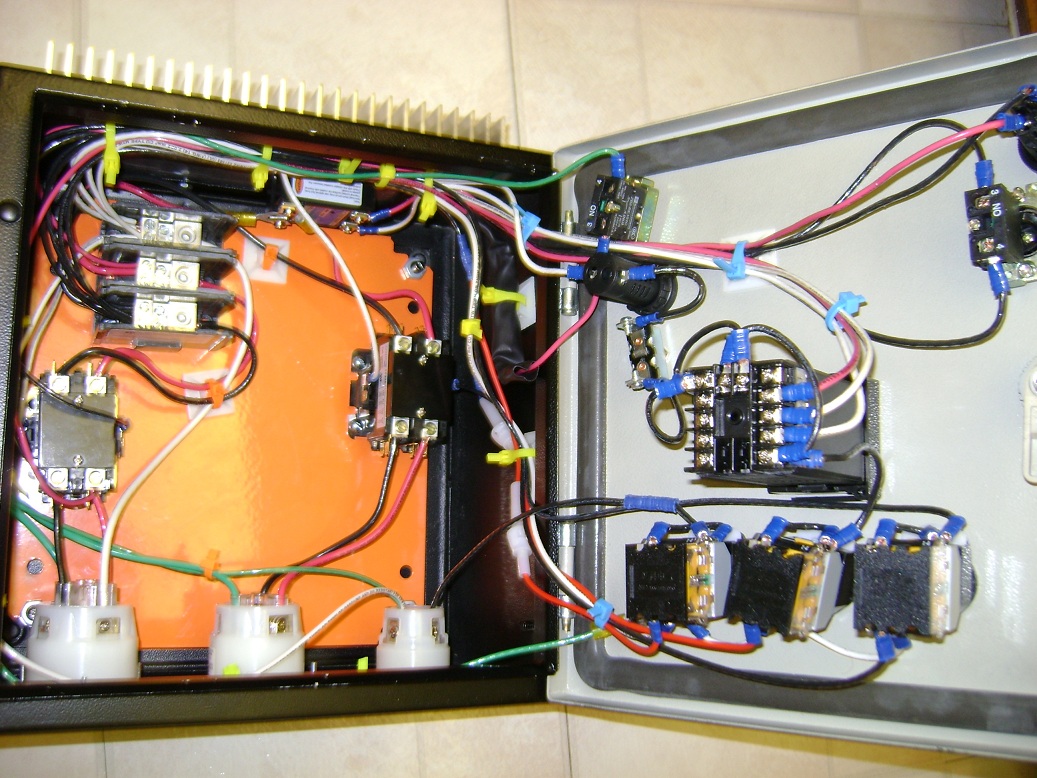
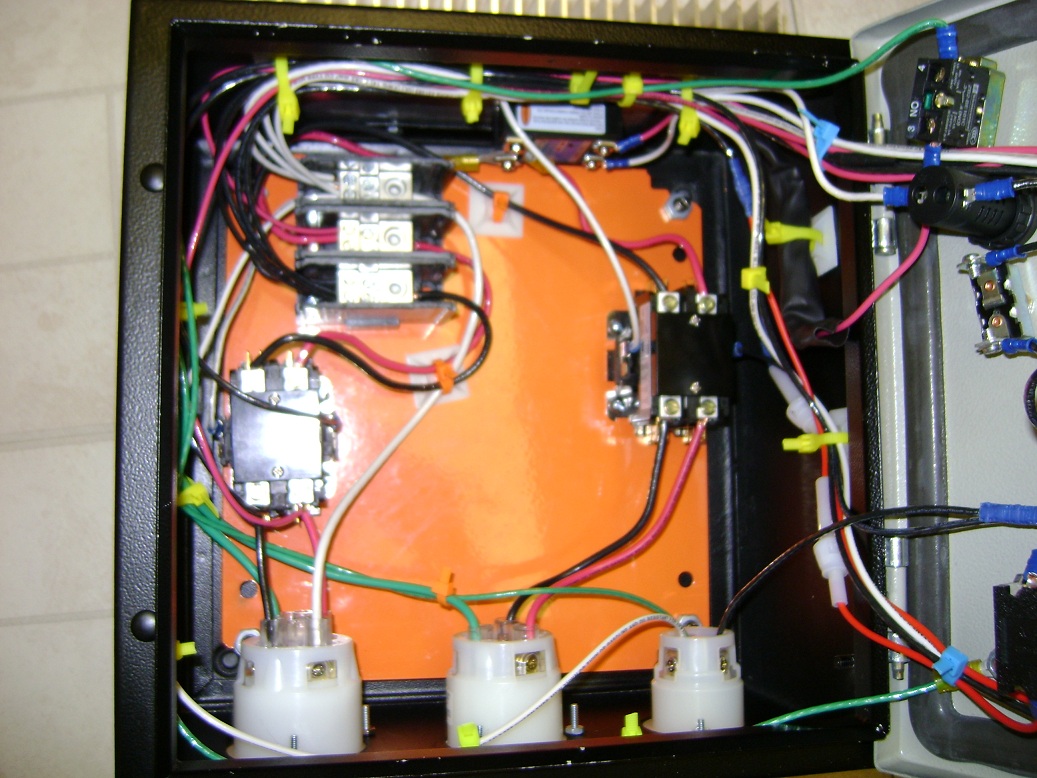
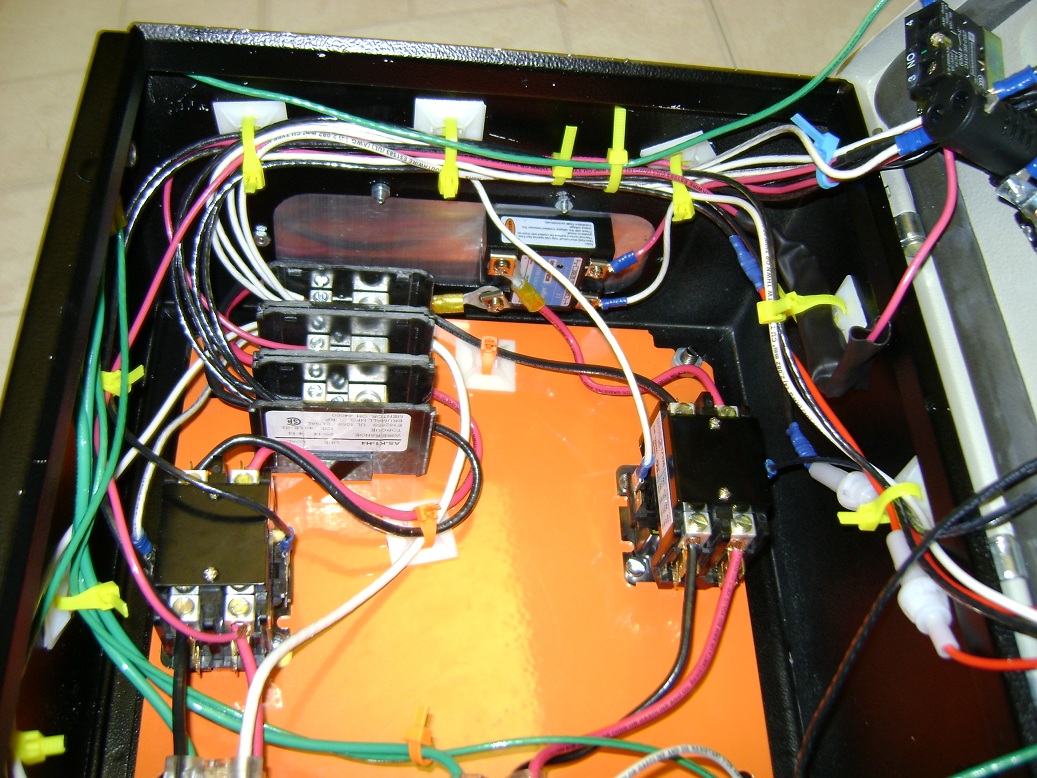
I guess that's about it. Maybe I should have waited til I was finished to make the thread. I'm currently about 40% finished with wiring. I actually ran out of 14ga black so I'm writing this post instead of working now.

EKu4d.jpg


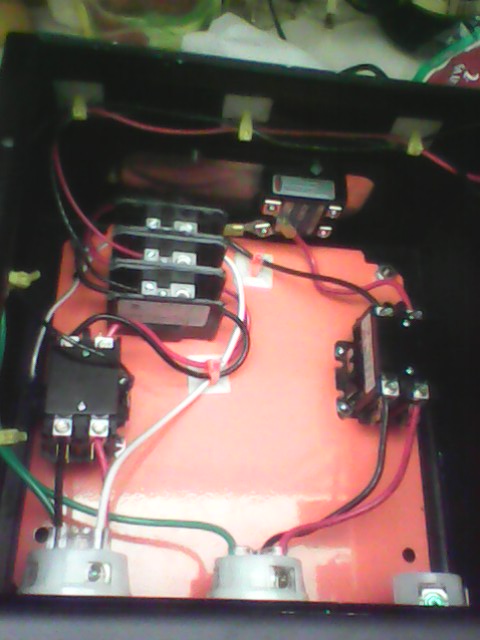
Made a wiring mistake that I caught pretty early. I had the key-switch which works the contactor coil being powered from the distro blocks which are post-contactor. Don't have enough wire to fix it tonight though. Frustrating.
 
We just finished this exact build and brewed on it for the first time on Monday. You are going to love it
 
Yeah, I just posted a thread yesterday, not sure how to link it here, but it is titled"Our New Electric Toy". Any help I can give, let me know
 
Whelp. Guess that's about all, folks. Hopefully I have time tomorrow or Sunday to build power and turn 'er on. Still have the RTD panel mount to do. I kind of ****ed up the other trying to solder for the first time ever, lol.


TV1op.jpg

tFuqK.jpg

fwZlj.jpg

r37YH.jpg
[/spoiler]
 
zeVTd.jpg


Started freaking out and wondering why the rest wouldn't turn on until I remembered I still need to go buy two fuses, lol CIRCUITS HOW DO THEY WORK


Just need to get the XLR panel mount in the mail and solder it without ruining it this time, lol. Then the panel is 100% done and I just have pot-work to do.

I had my power-indicator light flicker for a bit. I knew that the crimp on one line wasn't perfect (saw some copper strands break off when I bent the end to fit into the light), so I cut that off and redid it right. Still flickered at first when I started up, then it went bright and has been solid since. Maybe it was just the LED acting funky for a few seconds? I traced all the lines and it looks good.

I need to learn how to use my multimeter and test everything before I hook up the element and draw 25amps.
 
Last edited by a moderator:
Debating on if I want to put tags on it or not. I'm leaning towards no, but I'm not sure. I don't think I'll ever forget that the left button is the element and the right is the pump, but I guess it's possible. I think it'll make it look cluttered. Also debating on if I'd want to put a Power On-Off tag if I decide to go the tag route. The key is pretty self explanatory.

I think tags on the larger (Kal) panels are awesome, but leaning towards a no on mine.
 
Also need to do some research on a chiller. I want to mount a plater chiller to my stand. But water here in Texas gets to like a solid 85F I'm guessing during the summer. Don't really want to do a prechiller or anything since I'm brewing inside of an apartment and don't want to buy ice or get all messy.

Hoping I can just get to 80F while whirlpooling for like 15mins or so and then transfer to carboy and stick in ferm. freezer for an hour or something before pitching. Anyone actually reading this thread in the southern states and can give me some advice?
 
Hey Ij, your brewery looks awesome! I really like the wooden stand. got any pics of the stand fully setup? What's your mashtun like? Also what's your batch size? Where are you going to run this? Did you need to run new wiring in your wall?

For cooling, without a prechiller yeah your best bet is probably to get close then cool it for a couple hours in your ferm fridge.
I would not recommend using a plate chiller if you are going to recirculate it back into the kettle. For recirc I really would use a counterflow. For reasons of clogging/difficult cleaning. I know you didn't want to setup a prechiller, so I think that's the best use of your water if you're going to run it to waste. You can just trickle it once it gets below 100, and let it cool down slower with the lid on.
Another option is having a bucket or cooler of ice water and circulate it with a pump through your chiller after getting below 130 or so, but that would take up as much room as a prechiller.

Cheers and good luck with the brewing. That no-sparge style is going to get you some really delicious wort!
 
I put the second coat of poly on today, will paint the legs black tomorrow and bring it over to my place Tuesday and mount the panel. I'll grab some pics then. Was building the table at my Dad's garage and he was gone all last week on business so progress has been slow.

I've read a lot on plate chillers and clogging. I'll have to see what kind of hop/break filter I could get away with in my kettle due to the element. I'm wanting to mount the element as low as possible since I'm using a 15gal kettle and will mainly be doing ~6 gallon batches. But then again a lot of people say a simple hop spider is all you need.

For my mash tun I'm just using that pot pictured above with a Jaybird SS false-botton and a loc-line for recirculating. I haven't really begun to work on my pots. Hopefully I can finish most of that this week or next.

I'm going to run this in my apartment's dining room area. I kind of have it turned into a mini-brewery with a ferm. freezer and keezer already. There's a bay of windows I'm hoping I can open for ventilation and be fine. If not I have built the power-cord plenty long enough and will roll it outside onto my patio. I really hope I don't have to though. I did not have to run any wire. I'm using a dryer-outlet as my power source which is 30 amp. I used PJ's idea of a $50 spa-panel from Home Depot for GFCI protection. Simply plug that into the dryer-wall outlet and my 10/4 cable into that and I'm capable of powering my panel and 5500W element.

I started out doing a classic 3-vessel setup and went to BIAB afterwards due to simplicity, which I loved despite a few efficiency issues. I had thought about making a 3-vessel setup again but decided 2-vessel would be better for my apartment. I have no doubt it will be great. I know my picture-taking and documenting hasn't been the best but if anyone has questions I'd love to answer them. I started out on this project knowing ABSOLUTELY NOTHING. Hell, half a year ago I had trouble wiring a doorbell and now I've got a completely badass control panel. Anyone can do this with all the great help on this site.
 
Terrible camera phone pics of the paint today. I'll be bringing it back to my place tomorrow or Wed and will get some proper photos then.

0204121958.jpg


0204121958001.jpg


Used an enamel semi-gloss. It came out quite flat instead of semi-gloss, but I still like it a lot. Maybe once all dried and cured it'll look a little glossy. First time ever using enamel paint. It was very different from typical interior-wall paints I have used before. I like the enamel a lot.
 
Really like you're table. Our systems are going to be very similar. How did you cut the hole for your kettle. Here's a crappy iPad picture of my stand in it's current state.

image-199361836.jpg
 
I've thought about it. It might be a good idea really but I was originally trying to stay away from HERMS coils. I liked the simplicity of JKarps direct "fire" nature and think HERMS coils are more suited for 3-vessel systems. Whether that's true or not I don't think I'll be going that route.

Edit: A big reason also is that I'll be in an apartment for the forseeable future and these damn things never have decent ice makers. Although I could do frozen-water bottles, but ehh.

I second your preference towards the direct heat/no coil. I built a ditches with keggles, and I prefer the action of the brutus 20, and would just opt for cfc or plate chilling.
A Herms system that uses the HLT for heat source is not an effective method of step mashing for one reason, while the direct fire recirc most certainly is.
During chilling with a closed circuit double heat exchanger, its a pain in the ace to fully utilize because of the ice that it eats. I'd prefer to prechill a water source and run water to waste or to a cleaning reservoir.

I guess its all about developing a good system though.

Btw liking your wood! :drunk:
 
Bringing the table home today, mounting panel.
There's a guy on Kal's forums that's graciously lending me his Greenlee 1 1/4" punch for the element. I'll just do the 1/2"ers with my stepbit - that's no problem.
Getting my pump today, Dudadiesel 30 plate ordered today.

Pretty pumped. Not sure where that guy is shipping the punch from, but maybe I'll get it on Friday and be able to finish my kettles this weekend. Is that really all that's left? Feels a bit... surreal. Oh, still waiting on my XLR panel mount to get here, won't get it until Tuesday. Need to learn how to solder right and not ruin this one, lol!

Also, do you guys have any ideas on something I could put under the stand to protect from spills? Only thing I can think of is an office-chair rolly-mat. But they're a bit expensive, so if that's the only option I'll just lay down a damn towel when I'm brewing.
 
Did you do anything to insulate the pot from the wood? Great looking build -- I really like the recessed kettle layout. Can't wait to see it finished :D
 
I had a very complete parts/price list through about the half-way mark. I was wanting to log everything really well, but decided it'd be a good idea to trick myself and not actually know I spent a ridiculous amount of money on this. :p

Let me know if you have any other questions.
 
Haha I know what you mean. This was going to be my "small" system. I think it's going to cost me more than my single tier, 3 vessel propane setup!
 
Thinking I'm going to mount my pump under the bottom shelf, hidden, and have two camlocks on that horizontal 1x6. Got the idea from people using pump toolboxes. Any thoughts?

The 1x6 is no problem, but the 2x4 I have behind it acting as a shelf-brace is going to make it a pain. Will have to bore it out without touching the 1x6.

edit: maybe a better idea, just put the two camlocks going vertical in the shelf, instead of the faceboard. I'll have to think about if that'd effect the bottom-pot draining though. Might put a half-inch raise/bend in it.
 
Trying to find a cork mat for under the pot. The pots are nearly 16". All I can find are 12" diameter ones. Which, probably would be sturdy still, but I'm wary of buying one and heaving it wobbly/tip potential. Maybe can find a silicone mat or something.
 
All holes done except the element. I dont have a wrench big enough though so the valves are still a bit loose, heh. Gotta borrow one from my Dad tomorrow.

Also, man, I had SUCH a hard time aligning my wort return on the boil kettle. On one side of the bulkhead it's a valve, on the other it's a 90* elbow leading to a whirlpool tube. I don't know what I was doing wrong, but getting the valve upright and the elbow to the left was difficult. Eventually I just manhandled it and probably overtightened and maybe crushed the o-ring. I have extras incase though so 0 ****s given.
 
Overview of BK. Far left is the sightglass. I still need to calibrate and put the volume stickers on. Then there's the wort-return and the bottom valve is wort-out.
5VNjx.jpg


Whirlpool (wort-in) fitting and RTD probe.

72xDn.jpg


Side pickup diptube in the BK. Need to shorten it a quarter-half inch or so.

eilD8.jpg


RTD probe connected to sightglass T:

llH40.jpg


Distance between BK and MT is quite short, going to be pretty lol having camlocks that close. (still need a washer, so MT camlock isn't tightened)

DDIDd.jpg


Mash tun. False bottom and a loc-line sparge arm. Baller status.

BJjrr.jpg
 
Your work is very nice! It's all looking handsome. Like your view too, are you going to surround your brewing area in an awesome blanket fort? :D

So you have your MT below the BK? So the pump will be pulling out of the mash. Any reason you wanted that over using gravity for the mash, and the pump for pushing back into the mash?
 
I debated briefly on putting the MT up top. I've seen a few threads where people got stuck sparges they attributed to pumping from the mash, but most people don't have a problem. With the false bottom I'm not worried about it.

Main reason is that wort-return and sight-glass would have been pretty tricky with the BK in the hole.

And yeah I think I need to buy some less ridiculous curtains lol, those were the perfect price... free.

That makes sense. B. Kabouter's simple brewery runs like this, so I'm sure it will work fine for you. You can stick a mash easily even without a pump if you run it for long fast.
 
Spent about two hours tonight playing with mounting the pump hidden on the bottom, and then having two camlocks on the face. Couldn't do it right without some custom pipe or a lot of experimenting with nipple lengths. Would have been costly.

So, mounted on the shelf.
 
Using the holesaw on 2-gang outlet box is damn near impossible without a drill press it seems. Going to go to my Dad's tomorrow since I don't really have any clamps here. Hopefully that will do the trick. Also, I have decided shrink-wrap and expandable sleeving are my arch nemesis. My temp probes aren't too great.
 
Letting it run on auto tune. When I first plugged it in the RTD was switching between 70, 71, 72 continuously changing about 3 times per 5 seconds. Hopefully this tunes it.
 
Don't have my other thermometer handy, but the PID/RTD have to be off by a solid 50F. Raised the FilT parameter and that took care of the continuous swing. Guess I'll try a second auto tune.
 
Ok I kicked it over to manual mode and it's at 198 according to the PID and not boiling yet, looks about right bubble wise. I'm not sure if it's just the element or because this is my first boil indoors. I could have sworn when the PID said 150 that it was about to boil. Maybe I've just never noticed the steam rising when I was outdoors on propane. Plus the bubbles coming off the element almost look like a very soft boil.

Stream of conscious right now but maybe it will help someone else like me :shrug:


Edit: 205 F right now and it's definitely boiling around the element but not the rest of the pot. PID might be quite accurate.

Edit2: Moderate boil at 208, 209 is showing a pretty good boil. 210F is a solid boil.

Guess I need to replace my battery on my $40 thermowerks (not a thermapen) and see what mash temps are like.
 
Back
Top