Bottling Tips for the Homebrewer

Homebrew Talk - Beer, Wine, Mead, & Cider Brewing Discussion Forum

Help Support Homebrew Talk - Beer, Wine, Mead, & Cider Brewing Discussion Forum:

This site may earn a commission from merchant affiliate links, including eBay, Amazon, and others.
well the actual head is comprised of proteins and CO2. An over-carbonated beer doesn't necessarily mean big head and vice versa. Head and foam stability have more to do with the proteins. If it is over carbonated, the carbonation should escape fast, leaving the beer and going into the head space. If you have a lot of proteins, they will capture the CO2 and not let it escape, resulting in a foam that lasts longer. Using carapils or a little wheat accomplished this task. I also find that finer CO2 from kegging is easier to trap, stays in the foam, and makes for a more stable head.

Thanks for clarifying that. The brew I was speaking of, was just great, great tasting, good fizz, and tons of head(it lasted a while, too). I wouldn't change a thing.
 
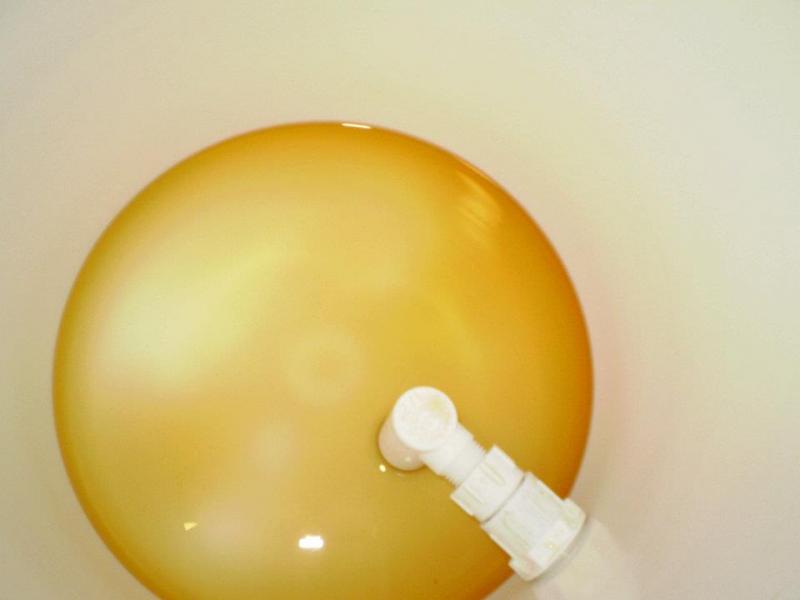
The key is to rotate the spigot so it points up, leaving the outlet from the spigot higher than the air pocket and giving it some place to go, then opening the spigot up to let it escape, then closing everything up once it is primed so air can't get back in.


When I was reading this a LOL'ed as this is almost like Beerfest the movie with the German Boot. The secret is to rotate the boot to get rid of the bubble :).


If you havnt seen Beerfest it is a great movie. Def more younger type movie but good movie non the less.

BTW this is a great thread. Getting ready to do my first batch here shortly. This website has been instrumental in information gathering. Thank you to HomeBrewTalk!
 
This thread is awesome, thanks for it! Just did my 3rd bottling day, and OMG it was so much better than the others.

Never underestimate the power of gadgets. Switched to Starsan, got an auto-siphon, a bottling wand, and a vinator. Sooooo much better...
 
Well, I guess this thread helped make up my mind as well. I have already purchased a 3/4" pvc elbow and the parts to make the DIY bottle tree. I will use them in a couple of weeks. Next on the "to get list" is an auto-siphon and vinator. I might have to add some star-san as well. Thanks for all of the great advice!
 
Knocked out a batch last night more or less using Revvy's sticky as a checklist. Huge help and thank you!
 
I did my first bottling day on my first-ever brew today. This was a very helpful thread, although I wore a few ounces at the end of the bottling while tipping the bottling bucket (and catching the bottling bucket after it slipped off my impromptu wedge) for the last few bottles. I think a bottom pick-up is in order but the partially spilled bottle was a perfect excuse to give it a taste. For room-temperature un-carbonated beer it was excellent! I'm going to have to lock up the capped bottles and give away the key for a few weeks!!
 
Fantastic thread!

Here is an outline of my bottling process:
1) Star San + H20 in my bottling bucket (about 6g)
2) Soak all parts of 45-bottle drying tree and additional gear required for bottling (wand, tubes, auto-siphon, etc) in the SS bucket
3) Start H20 + priming sugar boil
4) Remove tree parts from SS H20 and assemble
5) Remove remaining bottling gear from bucket with Star San and place in one of those big, grey kitchen tub things along w/ about a gallon of the Star San H20 to keep things sanitized
6) Fully immerse as many bottle as possible in bucket w/ SS H20 for X min
7) Take those bottles out, place on tree
8) Repeat 6 and 7 for as many bottles as you have
9) Pour remaining SS H20 from bottling bucket into the grey bin
9) Cool the priming sugar H20 in ice bath while racking beer w/ auto-siphon to bottling bucket
10) Set up the bottling bucket and wand w/ (3'') length of tubing between spigot and want (as recommended by Revvy) on the counter over my open dish washer door
11) Bottle
12) Cap
13) Win

The nice thing about this is that, since I normally bottle at least 2 batches of beer (hey, I have everything out already!) I can just dump the SS H20 back into the bottling bucket from the grey bin, let sit and dump back into the bin, and I'm ready to rack the next batch.

Also, if you're bottling 2 batches, do all the priming sugar + H20 boiling at once and divide it up between batches.

Another thing I do is have the fermenting buckets sit in the place at which you'll be doing the racking (at least) overnight. That way, you bring the bottling bucket TO the fermenting bucket(s) to do your transfer. No moving fermenting bucket = less crud in the bottling bucket.

I have an old, large coffee table in my basement (The Man Brewery(tm)) on which all 4 fermenting buckets sit which makes this cake.

Again, thanks for the ideas everyone!
 
Couple questions. . . how much is a good amount of head space, and if I use a bigger bottle(1L) should I have more or less or the same head space?

Also, what is a good temperature for bottle conditioning?

Thanks!
 
Couple questions. . . how much is a good amount of head space, and if I use a bigger bottle(1L) should I have more or less or the same head space?

Also, what is a good temperature for bottle conditioning?

Thanks!

A good temp is about 10 degrees warmer than you fermented. This will not shock the yeast, and shouldn't be warm enough to put the yeast into hyperdrive and explode your bottles. I stick them in a part of my house that doesn't get good circulation, next to the furnace for instance, and it's usually a little warmer.

As for the head space, you want the same ratio, so as the bottles get bigger so should the head space. This isn't as easy to explain. When the bottle pressurizes the co2 the yeast creates comes into equilibrium within the liquid and the headspace. This means that if you take a bottle filled 80% of the way and 50% of the way, pressurize them with the same amount of co2, the beer would actually be at 2 different carbonation levels. Not only does the head space take up more of the co2, but the more space, the weaker the pressure, as it dilutes over space. The lower pressure will allow less absorption by the beer in the bottle. I believe what texts say is 3/4 to 1 inch below the lip for 12 oz bottles. I shoot by eye and its fine, but when I first bottled I gave my grolsch bottles way to much head space and they were flattish.
 
Ok, I usually fill my grolsche a bit under an inch. I have a few bigger bottles so I will just play around with different levels. Maybe start at 1.25 inches.

Thanks!
 
Ok, I usually fill my grolsche a bit under an inch. I have a few bigger bottles so I will just play around with different levels. Maybe start at 1.25 inches.

Thanks!

i fill it anywhere between where the top of the label or bottom is. some labels are worn off, but it;s usually the lower middle part of the neck.
 
1. An inch of headspace is fine, about the amount left by a bottling wand.

2. 70°F or more. I have to leave the bottled beer upstairs in our house for a few weeks, because the basement where it'll be stored is too cool for proper conditioning.
 
For those of you that compete frequently in competitions, what is the proper fill level in 12 oz bottles? How far down from the top of the bottle? 1/4 inch, 1/2 inch, 1 inch or 2 inches?
 
For those of you that compete frequently in competitions, what is the proper fill level in 12 oz bottles? How far down from the top of the bottle? 1/4 inch, 1/2 inch, 1 inch or 2 inches?

Don't you use a bottling wand to fill your beer? It's made to set the proper amount of head space in bottles, no matter what sized bottles. You fill the bottle til it starts to over flow and pull the wand out, the displacement from the wand sets the headspace. Which is around 1.25 inches iirc.
 
Sorry to post and not add anything to the thread, but I just wanted to thank Revvy for this thread. Everything I had read about bottling thus far made it seem like bottling was the worst thing ever. Attaching the bottling wand to the spigot made bottling super easy. Thanks!
 
Have to say thank you for this post. I went through this post a day before bottling for the first time and found so many really good ideas. Thank you guys for making my first home bottling effort almost completely perfect. No back strain, no mess and no wasted beer, except for.....

My second bottle I felt I wasn't was capping as well as I should. I pressed down and popped the neck of the bottle right off. Dammitt. Had to pour out one beer. Other than that I had about 2 tablespoons of spilt brew on the dishwasher door.

The actual bottling took around 30 minutes for 50 bottles. But again, it wouldn't have gone so well without so many of you guys contributing such good ideas to this forum. I took a little here and a little there and ended up excited about bottling again. It turned out to be fun, rather than a chore. thanks.
 
Lgilmore, glad this thread helped. Don't stress the broken necked bottle, every not and then one will do that. More than likely a flaw in the bottle.

30 minutes? Was that including sanitizing the bottles? Or just filling them? If you can do everything from boiling your priming solution, through bottle sanitization to capping your last cap, I want YOUR system. You got me beat! :mug:
 
No the 30 was the bottling and capping. I did a two step sanitizing. I had already cleaned the bottles when delabling. This time I hooked up a inner bottle washer to the sink next to the dishwasher. Gave the bottles a good inside wash then finished in the dishwasher for another rinse and hot dry.

I liked your idea of raising the bottling bucket up higher and using the spring loaded filler right off the on/off valve on the bucket. So I was able to sit comfortably and fill bottles perfectly and then set them off on another counter without having to strain or twist. The counter space held a case and a half of filled bottles.

I did the siphon assist like you and another person pointed out. I went the plumbing parts at home depot. Spent like a buck fifty for a hose adapter and elbow that sat great in the bucket, other than cleaning really good, just had to screw it on and go. It left about an ounce of beer in the bucket.

If you went from prep to finish maybe two hours. I try to get everything set up to need before I start the process. the process took 30 minutes. The other time was setting up and cleaning up, which while part of the activity, really isn't the activity it's self.

Again, thanks for the great ideas. Bottling didn't turn out to be a chore or something just to get through. I also cold crashed my secondary and had a little left over that wouldn't quite fill another bottle. So I filled up a glass, held it up to the light, smelled the brew , admired the color and gave it a taste. Even though not carbonated yet, a nice smooth Irish Red Ale. If carbonated now, already drinkable. I plan on opening the bottles up when my kids come home for thanksgiving so 4 weeks in the bottles should be just about right.

Thanks again.
 
Just got through reading all of the pages in one day....

I have been brewing for a decent amount of time now, but I have never bottled. I went straight to kegging since I already owned a few old-school keggerators. Now I have moved into an apartment and my whole brewing system has been altered. One change is that I am now bottling.

I love the idea of the dip-tube on the bottling bucket. That was the most puzzling part of looking at the bottling setup. I think I am going to try the 3/4" PVC... One thought/question. I have read a few posts of people loosing siphon when the level gets to the spigot. Are people using Teflon tape of the threads when installing the PVC elbow?
 
Yes, I made a dip tube for my bottling bucket out of a 3/4" PVC 90deg elbow. I think it cost $0.39 at Lowe's and threads right onto the tail piece of the bottling spigot. It couldn't be simpler. Check out my gallery for a poorly done schematic and/or PM me and I'll verify the part number. Or do what I did and bring the spigot with you to Lowe's and see what threads onto it. When I fill bottles with this I am usually left with about 2 or 3 oz. of beer in the bucket.

:mug:
Thanks for the tip Reevy and Brian. I screwed the female 3/4 90 degree PVC to the spigot and worked like a charm. Mine left 6 oz liquid, I can live with that, no more tipping. Thanks guys
 
My second bottle I felt I wasn't was capping as well as I should. I pressed down and popped the neck of the bottle right off. Dammitt. Had to pour out one beer. Other than that I had about 2 tablespoons of spilt brew on the dishwasher door.
QUOTE]

This happened to me on my second brew. We decided to call ourselves Broken Neck Brewing Company
 
"Are people using Teflon tape of the threads when installing the PVC elbow?"

I used a combination of parts to make mine work great. I took the spigot with me to home depot. With mine the threads were more like a garden hose than a plumbing one. So I found a attachment that was designed female female of different sizes. The one side screwed onto the spigot and the other side took a male elbow piece and fit perfectly inside my bucket. No need to tape. Cost? under two bucks.

beer bucket.jpg
 
Just got through reading all of the pages in one day....

darn. took me two.
on to the point....

i don't use a vinator, i want to get one, but other expansions to the brewery always seem to come first.
i just run my bottling line backwards, kinda.

i have the bottlign bucked directly in front of me on the counter. I'm on a barstool, dishwasher to my right, clean but not sanitized bottles to me left (in cases)
bottling bucket gets filled with a gallon or so of starsan. install bottling wand. put autosiphon in starsan and fill spray bottle with starsan using autosiphon (sanitizing the inside of the autosiphon) spray the dishwasher racks with starsan. grab a bottle from the case with my left hand, and start filling it with the bottling wand. grab the filling bottle with my right, and grab another empty with my left. take the 1/3-1/2 full bottle off the wand, and put the empty on. dumb the fuller bottle back into the bottling bucket (swirling it while i go) once it is empty, i put it in the dishwasher, and the process repeats. once the all the bottles are sanitized, i spray them all down for good measure, as well as the counter and the outside of the autosiphon. swirl and dump the bottling bucket, rack, and bottle.
 
I wanted to say "Thanks" for the great thread!!!

I have been brewing for a decent amount of time, but I finally bottled for the first time tonight. This thread put me on the right page and kept me there the entire way through bottling.
 
Great thread, I just finished bottling my first batch. I've very glad I read through this thread first.

I ended up using most of the methods and tips laid out here. I bought a Vinator, skipped the drying tree and put the sanitized bottles in the dishwasher racks to dry instead. I used the bottle wand directly connected to the spigot over the dishwasher. I made a diptube with a 90 degree pvc elbow which worked great, pulled all but a couple ounces.

Bottling went smoothly SWMBO helped by capping. Now I just have to wait a few weeks before I can enjoy. I'm not skipping a beat with the brewing, I started a stout a week ago and an Apfelwein today in the fermenter I freed up from bottling.
 
Has anyone had problems with infections using this system (with the spigot)? My LHBS strongly recommends against using the spigot, but I absolutely lament bottling with a autosiphon.
 
Has anyone had problems with infections using this system (with the spigot)? My LHBS strongly recommends against using the spigot, but I absolutely lament bottling with a autosiphon.

If you clean and sanitize the "system" should be no more risky or not then using the traditional hose between spigot and wand OR siphon and bottle wand.

If bottling spigots were so terrible to use, then we wouldn't use them...
 
Has anyone had problems with infections using this system (with the spigot)? My LHBS strongly recommends against using the spigot, but I absolutely lament bottling with a autosiphon.

Did your LHBS happen to mention WHY they find the spigot so objectionable?
 
Revvy said:
If you clean and sanitize the "system" should be no more risky or not then using the traditional hose between spigot and wand OR siphon and bottle wand.

If bottling spigots were so terrible to use, then we wouldn't use them...

That's what I was thinking, but they said there are a lot of nooks and crannies in the spigot that makes it harder to clean properly...basically, you can't take it all the way apart.

I'm wondering if they just tell everyone this in case they are the type that doesn't clean/sanitize very well or in a timely manner. Kind of a "better safe than sorry" policy
 
Revvy said:
The wonderful thing about starsan, and oxyclean for that matter, is the foaming bubbles can get into most nooks and crannies.

Yeah, I figure there are thousands on this forum and this thread is 3 years old with only good comments...I'm probably safe.

Thanks guys
 
That's what I was thinking, but they said there are a lot of nooks and crannies in the spigot that makes it harder to clean properly...basically, you can't take it all the way apart.

I'm wondering if they just tell everyone this in case they are the type that doesn't clean/sanitize very well or in a timely manner. Kind of a "better safe than sorry" policy

i don't know about yours, but the "valve" on mine just pulls straight out. [i don't take advantage of that often, i just run a bunch of starsan thru while sanitizing bottles and figure the starsan will get anywhere the beer will.]
 
Has anyone had problems with infections using this system (with the spigot)? My LHBS strongly recommends against using the spigot, but I absolutely lament bottling with a autosiphon.

When I bottled I always used a bottling wand plugged into a spigot on my bucket, never had an infected bottle.

Like pretty much every phase of brewing, it's all about scrupulous sanitation...

Cheers!
 
Here's a question--the info in this thread states that

1. a dunkelweizen should be carbed to 3.5-4.8 volumes CO2.
2. a standard bottle can only take 3 volumes.

Is an undercarbed DW still tasty? Has anyone carbed at higher levels? I've got one in primary now and am trying to decide what to do with it (kegging not an option). Thanks!
 
Well I just wanted to say thanks to Revvy for all of the great tips in bottling. It used to take me atleast 2 hours with my old setup and I always hated "bottling day" for just that reason. Last night I got it all done in just over an hour. If you bottle then I think the best investments you can make are the Jet Carboy Bottle Washer along with the Vinator. You can find them just about anywhere and boy does bottling day move along so much easier/faster with just those two things. Also, making my own dip tube has allowed me to get atleast 3-4 more 12oz bottles filled each batch. So thanks again Revvy, great stuff!!

Bottle Washer
Jet Carboy and Bottle Washer Company

Vinator
Vinator Bottle Rinser : Northern Brewer

:mug:
 
Oh and I almost forgot.... attaching my bottling wand directly to the spigot of my bottling bucket has saved my back plenty of aches and pains!!
 
Back
Top