The full Monti

Homebrew Talk - Beer, Wine, Mead, & Cider Brewing Discussion Forum

Help Support Homebrew Talk - Beer, Wine, Mead, & Cider Brewing Discussion Forum:

This site may earn a commission from merchant affiliate links, including eBay, Amazon, and others.
Looking great as usual Monti.

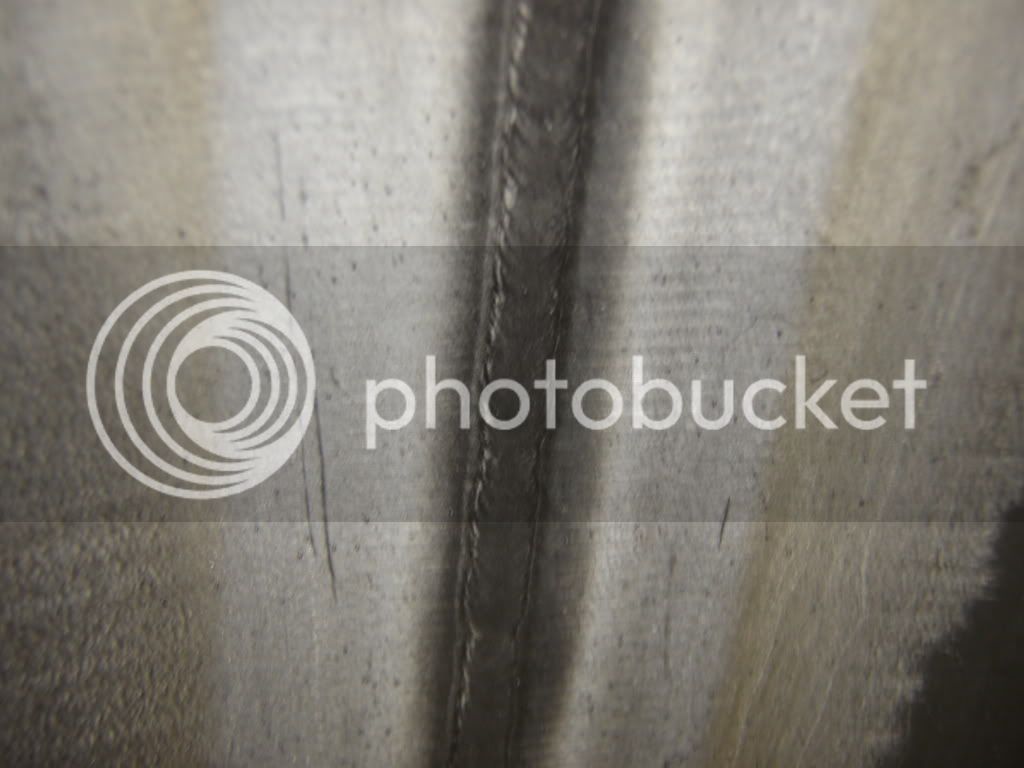
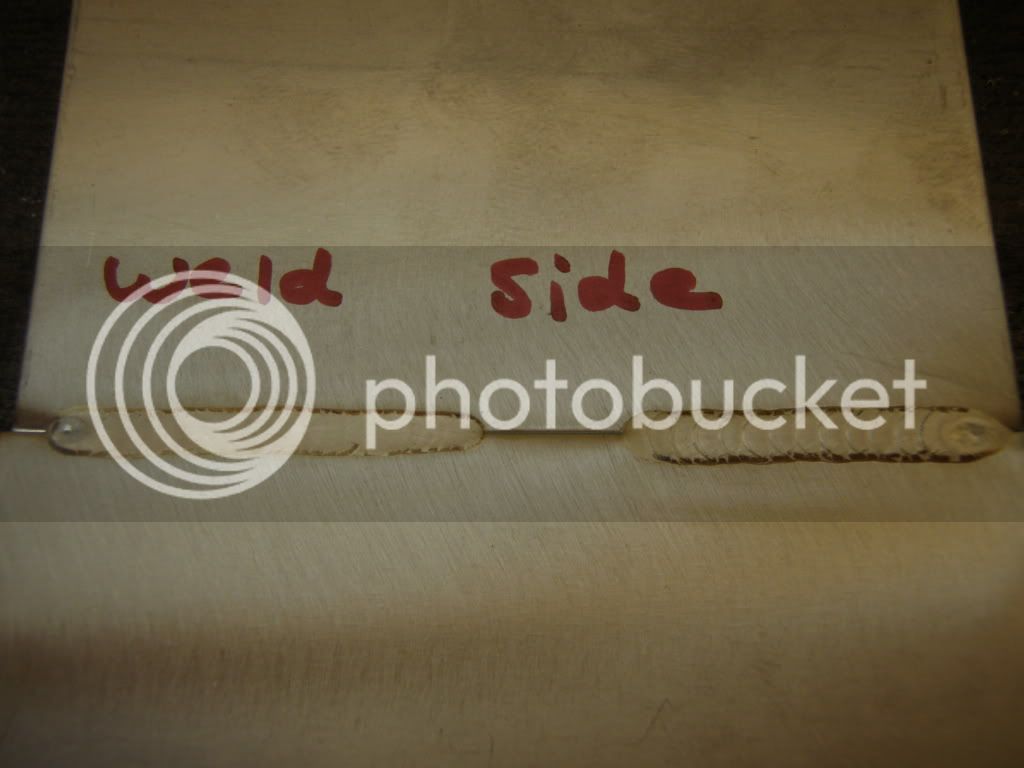
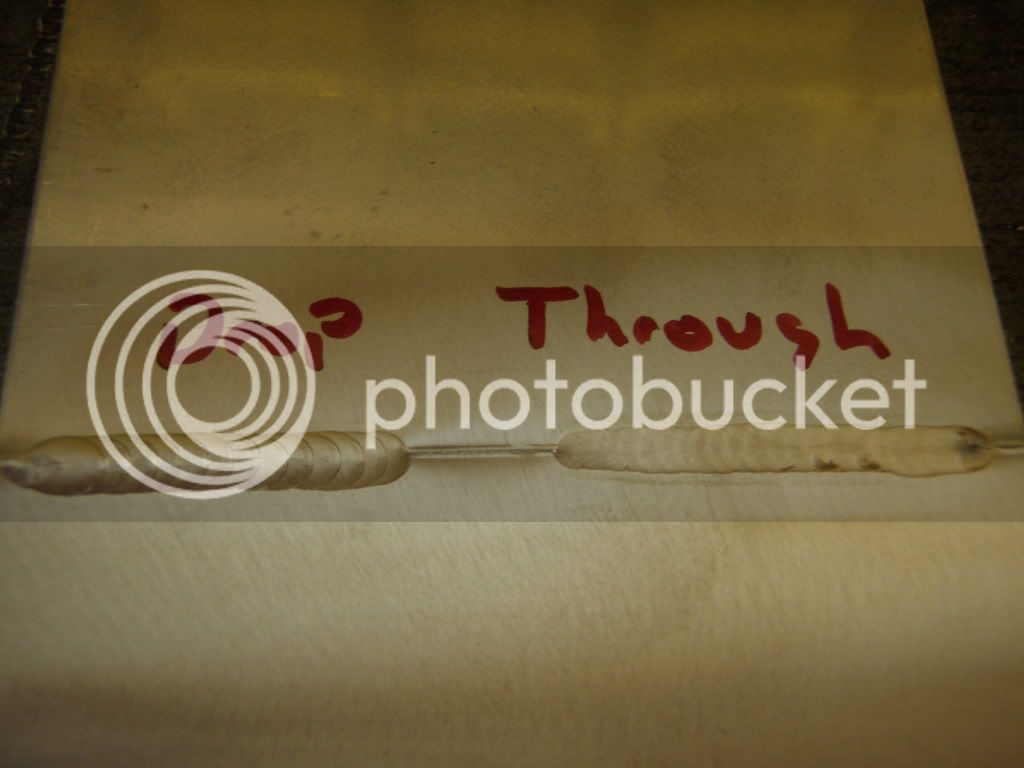
How do you keep the inside of the welds looking so great?


How do you mean??

Those welds have been plannished. That's why they are really flat. Or are you in reference to color?
 
So if I've got this right, you'll have your heating element in the base of your boil kettle supplying pressurized steam to the inner boil pot and have a line out to other jacketed kettles?
 
So if I've got this right, you'll have your heating element in the base of your boil kettle supplying pressurized steam to the inner boil pot and have a line out to other jacketed kettles?


Yes, that's my plan........Only, there wont be other jacketed kettles. It will be steam injection into the liquid.
 
Good luck with the electric build, I will be interested to see how this works out with a 6Kw element.


Hey man,

How you been?

You don't think 6K is enough? If it's not I'll yard the element and run the flash boiler into it there.:D
 
Yes, that's my plan........Only, there wont be other jacketed kettles. It will be steam injection into the liquid.

AH! Thats cool. How are you going to regulate water going into the "electric steam generator" to replenish the steam lost into the boil?
 
AH! Thats cool. How are you going to regulate water going into the "electric steam generator" to replenish the steam lost into the boil?

The boil wont be injected. It will have the jacket. Only the mash and the heating of the water on the fly will be injected.
 
Only the mash and the heating of the water on the fly will be injected.

Are you going to have an injection port hard plumbed into the MLT and HLT?
 
Are you going to have an injection port hard plumbed into the MLT and HLT?


I wont have a HLT, since I will heat the water on the fly. I will only have two vessels. Yes it will be injected via a T modeled after Kladue's design. I have a SS screen mesh that I welded to 1/4" SS tubing. That will be where the steam enters the flow of either water or wort....to or from the mash.
 
Holy $hit Monti! You da Man! I would work in your shop any day of the week. I vote you remake the whole thing out of stock bar as big as the keg. LOL I want to see something in titanium, otherwise you are just a hack. ;)

My God man, you are going to have a diamond band and the rest of us pukes are going to just have a brass ring.

[Godcode]GreenMonti is the fabrication messiah [/Godcode]


LOL.:mug:

What's happening man!!

You have no idea how many times and how much time I have spent thinking of doing some titanium in the build. The cyclone separator, the condenser when I was doing that steam power, on and on. I'm planning on building a sterling engine just for kicks and its gonna use titanium. I already have the parts for the displacer piston in Ti. Just have to weld them up.
 
How do you mean??

Those welds have been plannished. That's why they are really flat. Or are you in reference to color?


Here is a better example.

P1010221.jpg


This one looks untouched. Kind of hard to tell from this distance, but it looks like a pretty nice finish inside. Do you backgas on all stainless welds?
 
Here is a better example.

This one looks untouched. Kind of hard to tell from this distance, but it looks like a pretty nice finish inside. Do you backgas on all stainless welds?


Yes, I back gas ALL my welds 100%. I used a purge like I showed OhioEd how to build. Only this one is just a long rectangle. I clamped it to the back of the cylinder and welded it up. This is the weld with out being cleaned after welding. This has been smashed from the planish. This is the drop through side.
P1010229.jpg
 
I'm trying to get a handle on stainless. I'd like to be able to hard plumb my brewery with welded Tri's. So I need to be able to weld them up and count on a sanitary finish inside. I know about back gassing and have done that welding fittings in my Kegglels. Just thinking about tubing and other items.

Sorry don't mean to de rail your thread.
 
Graig

Looking better than ever keep up the good work and keep us informed.

Woodie40

Thanks Woodie.:mug:

I'm trying to get a handle on stainless. I'd like to be able to hard plumb my brewery with welded Tri's. So I need to be able to weld them up and count on a sanitary finish inside. I know about back gassing and have done that welding fittings in my Kegglels. Just thinking about tubing and other items.

Sorry don't mean to de rail your thread.

No worries. I don't think of it as a de-railing at all.

By planish I mean. I squished the weld between two rollers and a whole lot of pressure to get rid of the bead height. This way, when I re-rolled the cylinder to make it round after welding, the weld wouldn't get in the way. Think of an english wheel on steroids.

What I mean by "this is the drop through side". Is, when I welded the seam up. I punched all the way through the material just like a sanitary weld. The drop through side would be the inside of the weld. IE..the inside of a pipe. The drop through side of my weld had the purge block up against it. If you were doing a piece of pipe, the purge would be flowing through the pipe your welding.

One of the tricks with doing a sanitary weld is to have a very nice fit between the two parts. No gaps is the best. I'll do up some pics for you of how I like to purge out pipes. What size plumbing are you thinking of?
 
GreenMonti, the 6KW element should work out for boil and step steam injection into the wort. For instant strike water heating it looks like it will handle up to about .375 GPM flow at 110 degree rise.
 
OMG, and kladue! Two dudes I have mechanical "wet dreams" about. If you two got Yuri's head melded to your bodies the world would be in real trouble. One word comes to mind... Mastermind! LOL. Damn I love these threads!
 
Thanks Monti, Plainishing makes sense now. Unfortunately I don't have the capability to do that, so I'll have to figure out other ways to get by. I'll have to check on exact ID's for my tubing, whatever is available in stainless that will butt up to a Tri. But somewhere a bit over 1/2" ID is what I'm thinking.

I have some pieces I picked up from the scrap yard, I'll have to cut the Tri off one and weld it back to see what happens. I figured on back gassing, just not sure if there is more to it than that to get a nice sanitary weld.


Don't get me wrong. Planishing is not part of the sanitary weld process.

I only planished my weld because I rolled the material. I didn't want the weld to get in the way and I didn't want to grind it down yet. I did that work at work...when no one was looking.:D I had to opt for the more quick way.

In order to practice sanitary welding. You don't need to cut up tri-clovers. Just pieces of tube will do the trick. Fit them together as nice as you can, (no gaps) then fill the tube with argon and give it a few mins to purge out. Then you can weld away. Weld kinda on the hot side so you melt all the way through the tube. By having the gas on the inside, you will get a weld bead on the inside of the tube as well as the outside. You can just use masking tape on the ends of the tube to contain the gas. A small hole on one end so the gas has a place to exit, and the gas inlet on the other. A gas difuser and standing the tube on end so the exit is up, will help BIG time in how well the tube purges out.

A little tip for you. If you use a hose clamp for the size tubing your welding. You can put holes in the clamp. This will allow you to hold the two pieces of tubing together and still be able to tack weld the two together once purged.
 
GreenMonti, the 6KW element should work out for boil and step steam injection into the wort. For instant strike water heating it looks like it will handle up to about .375 GPM flow at 110 degree rise.

Thanks Kladue. I just hope I don't loose too much in the transfer. I'm using .050" thick sheet stock for the inner liner. With electric elements being 80-90% efficient.....I'm running on the hairy edge. If not too small. Its gonna be interesting. I hope I don't need to add another element.:drunk:
 
The 6 Kw element will get the job done in the step and boil modes, it will be just a bit slower in strike water heating though. The only advice I would give on the electric method is that element control needs to be pressure based to maintain 5-10 psi, temperature based control will not respond soon enough to be safe. The steam pressure will probably drop quite a bit as water is added to the boiler, then rise a bit when the steam flow is stopped when ending a step injection before controls respond.
For comparison the SS boiler in the automated system is delivering about 13.2 KW in the strike water heating mode, and around 8.8 KW in steam injection wort heating mode during previous testing. This is based on strike water flow rate of .75 GPM and 120 degree temperature rise, and 1 GPM wort flow rate and 60 degree temperature rise. With accurate flow measurement and inlet/outlet temperature measuring with the PLC system, these should be reasonably accurate numbers, not a SWAG.


Thank you Kladue. I had originally planed on pressure controls. That makes me feel a whole lot better that you feel the same way.:D I;m not sure why, but I just felt it would be more accurate to use pressure controls. Now I have to find one that is pretty sensitive so my heat doesn't fluctuate very much.
 
Thanks Monti, Plainishing makes sense now. Unfortunately I don't have the capability to do that, so I'll have to figure out other ways to get by. I'll have to check on exact ID's for my tubing, whatever is available in stainless that will butt up to a Tri. But somewhere a bit over 1/2" ID is what I'm thinking.

I have some pieces I picked up from the scrap yard, I'll have to cut the Tri off one and weld it back to see what happens. I figured on back gassing, just not sure if there is more to it than that to get a nice sanitary weld.


Ok RonRock,

As promised, a couple pics to help you a bit.

This is 1" SS tubing with the appropriate size hose clamp. I've cut out some of the clamp with a dremel tool's cut off wheel,
P1010231.jpg


This is 1" SS tubing that I hand ground square, and added a slight bevel too. Things are a lot more visible in pics this way.
P1010232.jpg


Now, when you put both pieces of tubing together. You use the modded hose clamp to hold things together. You can tack the parts together through the holes in the hose clamp.
P1010233.jpg


These next pics are purely for illistrative purposes only. I used sheet stock to show the weld of a sanitary (purged weld) since tubing would be hard to photograph. I did two welds, one with filler wire and one without filler (aka autogenous). The smooth looking weld is the one with out any filler wire. With a good solid purge there will be no color or very little color on the weld on either side. You weld the joint hot enough to punch all the way through the material at hand, to achieve a complete weld all the way through the material in one pass. Weld side being the side I welded it from. Drop through being the side that would be the inside of a piece of tubing.
P1010234.jpg

P1010235.jpg
 
Back
Top