JonBrew..
I'll just unload some info on you, but have been using this little system for about 6 months now and it is still working very well.
Pros:
-5l mini kegs are 1.3 gallons and are an easy alternative to bottle condtioning
-Can force carbonate on tap system
-Good for 2-5 gallons batch sizes
-Provide about 10 pints are keg
-Fit in a little tabletop mini fridge, and can fit on a bartop
Cons:
-If your friends drink more than a few, you need more than a few mini kegs
-Might find yourself swapping kegs out more than you thought
-A little bit more tedious to clean
-Probably costs as much as a 5 gallon corny keg set-up
Parts list:
-4 (1/2 inch) plastic,brass or stainless barbed fittings (~2 bucks per for brass)
-2 (1/2 inch) plastic,brass or stainless T fittings (~7 bucks per for brass)
-2 (2-3 foot) 5/8 inch vinyl (food grade? probably doesn't matter though) (~10-12 bucks a roll)
-1 (about 4-X feet) 1/2 inch vinyl for gas-in line (4-10 bucks)
- A gas splitter (1/2 inch barbed t fitting) (~3-4 bucks)
-2 tap assemblys (~40-50 a tap)
-1 Co2 canister (do your homework on this one, but anything under 50 bucks for a shell is a steel for a 5lb canister)
-1 regulator (preferably dual gauge ~30-70 where you get it)
- A bunch of hose clamps (50 cents a piece)
- 2 line out 1/2 inch brass fittings (gotta get creative with this one, goal is to let beer out and keep the gas in, will explain more later)
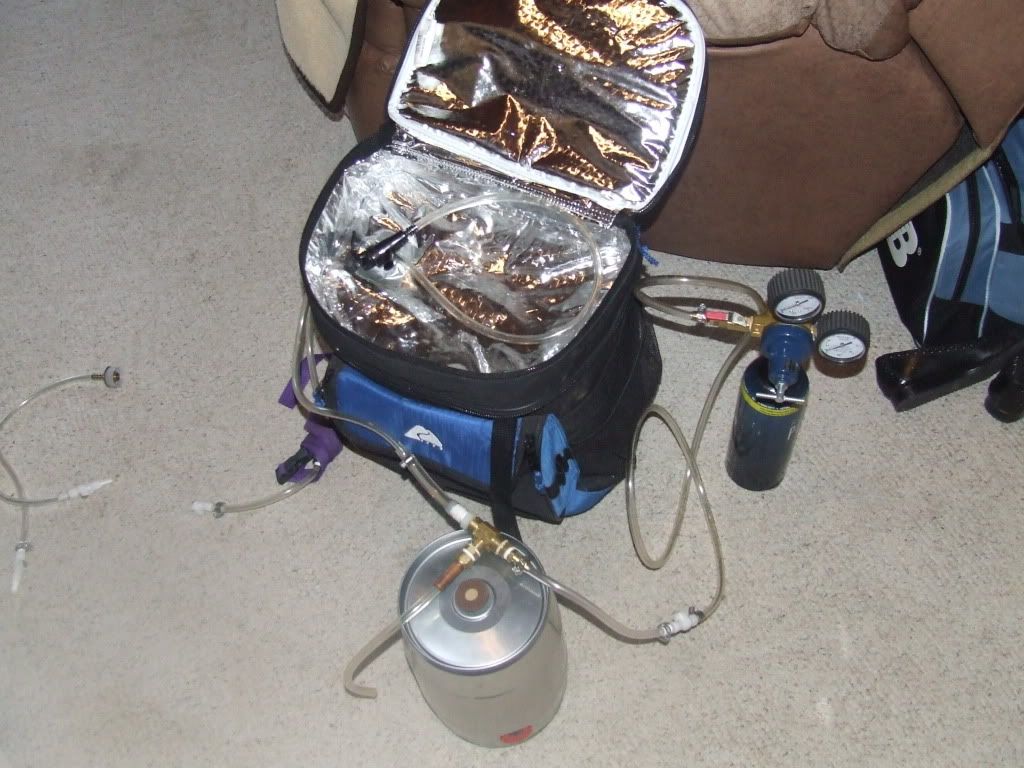
1st step: Gas In
Running some vinyl tubing from a gas canister of any size (paintball tank to 5lb tank work i hear) to the line in side of the T fitting. This will take a little bit of playing around to make fit and may require some fitting then pulling apart a couple times. 1/2 inch vinyl tubing connects pretty well with the regulator's threaded fittings pretty snuggly, i used a hose clamp just in case.

(Image 4 on attachments)
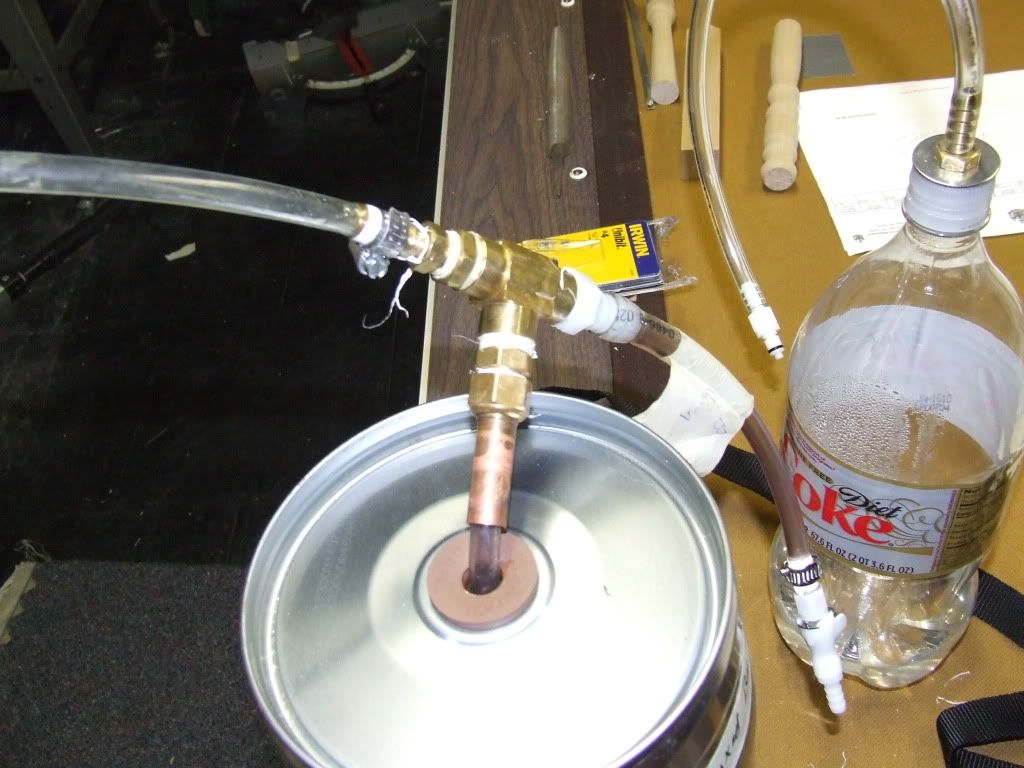
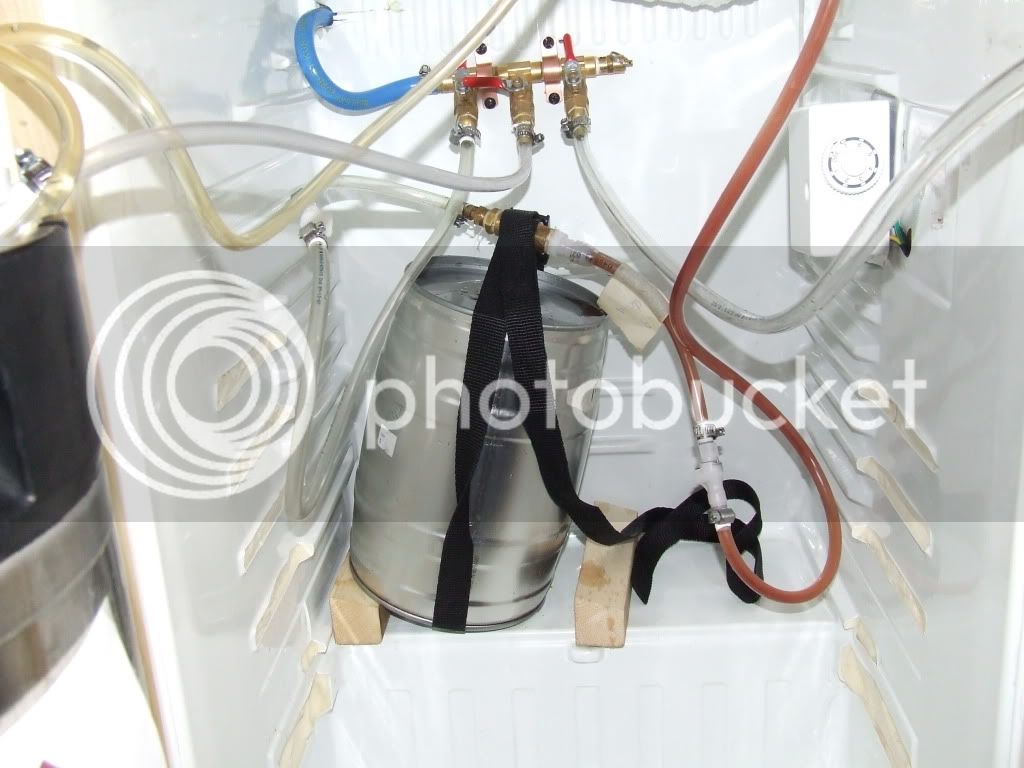
Step 2: The T fitting, gas in and liquid out
The image will pretty much explain the gist of it. The key here is to let the gas come in through one vinyl line from the tank. Your other vinyl line (beer out) will slide through the brass fitting inserted into the rubber bung on the top of your 5l mini keg. The bottom of it (beer line out) will extend to the bottom of the keg to the barbed fitting on your tap assembly. The image has blue dots showing that the gas will envelope the whole T fitting, but a barrier will prevent the gas exiting by constricting the space around your beer line-out.
Basically the pressure of the co2 will push the beer to the bottom of the keg where the only exit point is the beer-line out --> to the tap assembly.

Attachment image 3
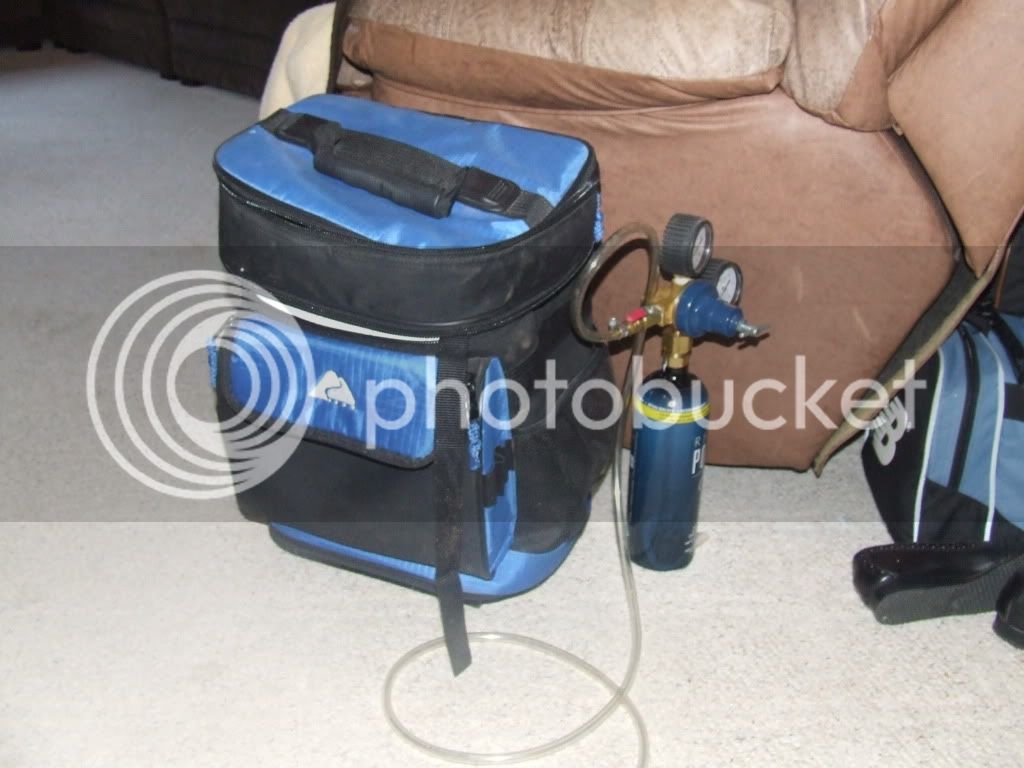
Step 3: Tap Assembly in fridge door
ALWAYS ALWAYS ALWAYS be careful where you put a screw in a fridge. There are simple tests (IE corn starch) to figure out where the freon lines are in the fridge. Puncture these and your project is worth nothing! Using a 1 inch drill bit, i drilled some holes for the tap assemblys, and the assemblys provided all the washers and nuts to hold the tap onto the fridge door. The vinyl beer out line connects to a stainless fitting on back of the tap.
Side note: Do not let any brass make extensive contact with the beer due to the lead content that is found in brass. Ever since the dawning of man, people know that lead just does some crappy stuff to your body. Since my brass fittings are only in contact with the gas, i hypothesize that the long term effects won't be much worse than a couple big macs.

Attachment image 2
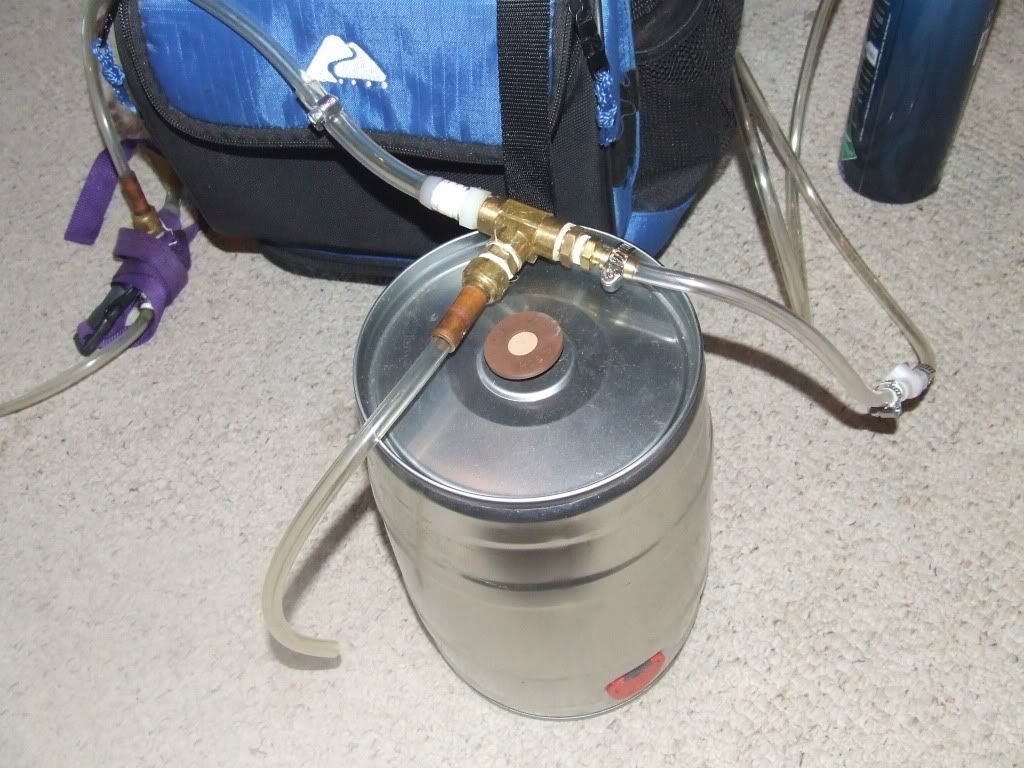
Last step 4: Tap assembly on exterior of fridge door
Tap assemblys are pretty self eplanatory, but check it out. Give her a full yank and let the beer flow. These tap assemblys always require an extensive interior cleaning due to all the nooks and crannys that bacteria can hang out in. Don't be the lazy guy serving diacetyl bombs due to nasty tap lines.

Attachment image 1
Not sure how the images will show, i'm pretty new to the site. Hope this all helps though. Cheers to the little kegs!