After several months of planning and building, I just completed my eBIAB build. Last night I was able to bring 7 gallons of water to a boil and experienced no faults or leaks, so I am considering the build portion complete!
Much-deserved thanks go out to Kal, P-J, and the countless others who have shared their experiences on this site. It is your selfless sharing that benefits the community and makes it what it is. Thank you!
Phase 1: Power
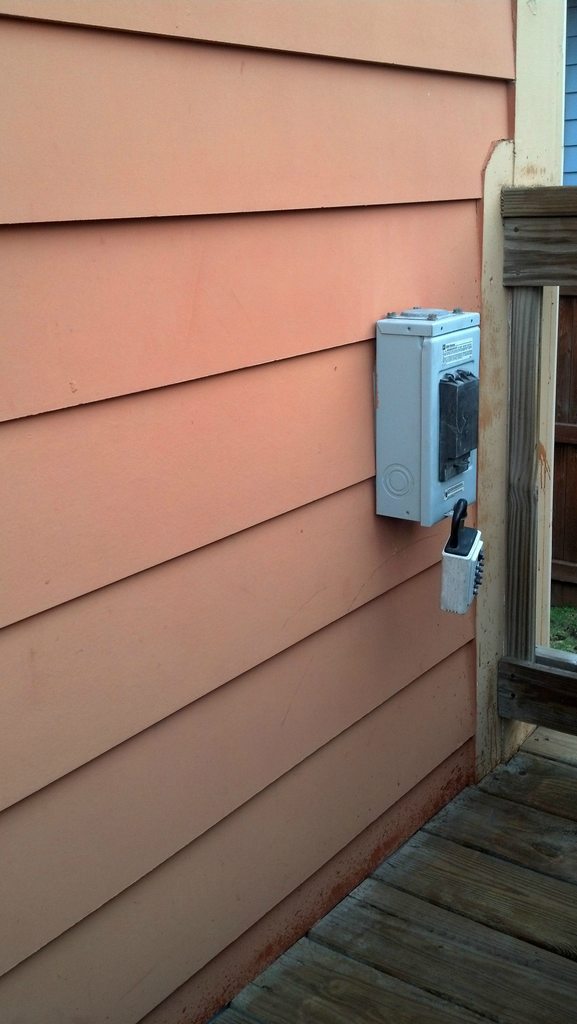
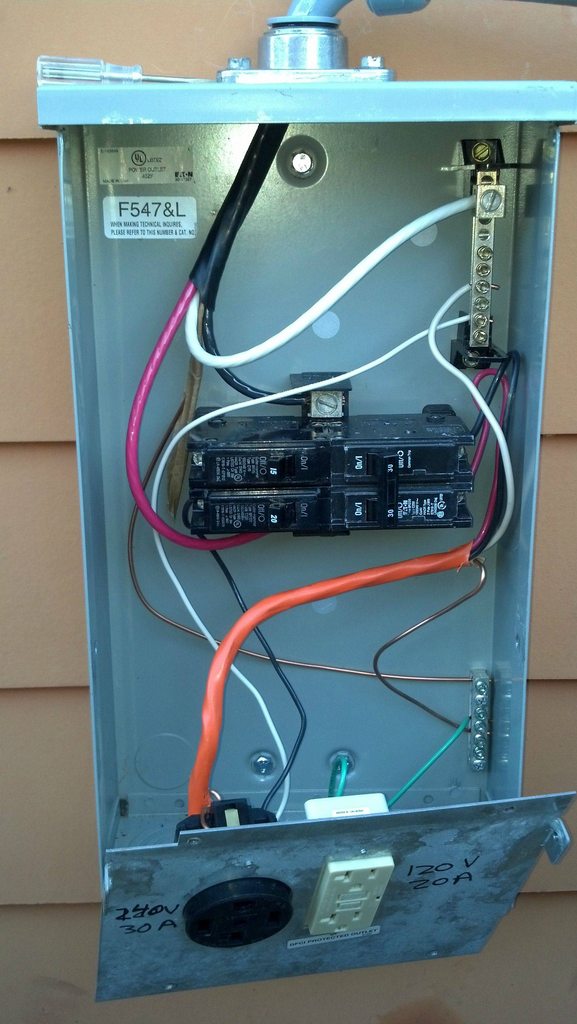
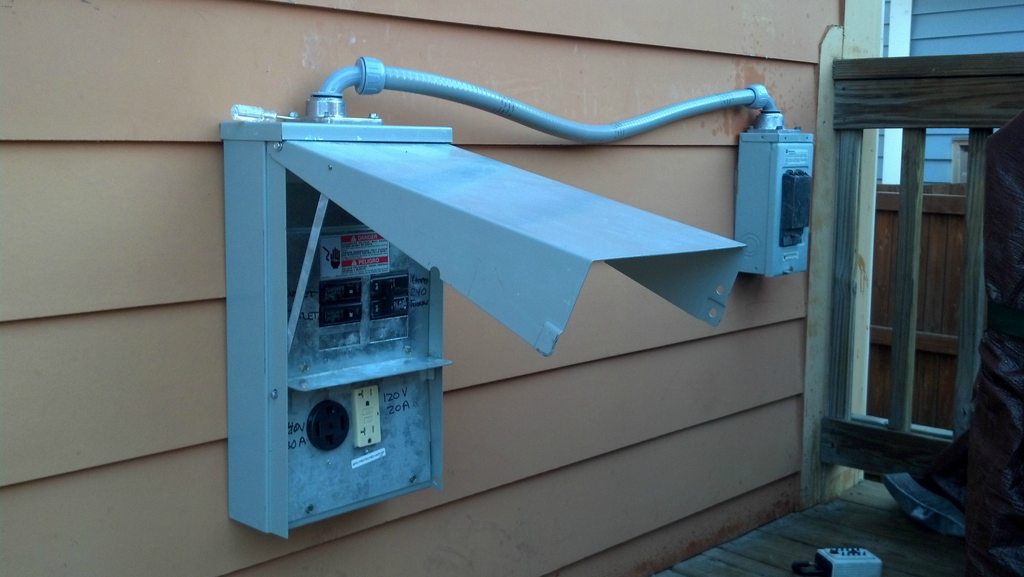
My home already had a 50amp breaker in the panel which ran to a 50amp GFCI installed on my deck for a spa --- this is going to be too easy. I re-purposed a panel from a recent barn renovation for my power. Running 6awg solid core cable from GFCI to panel, where I split into 3 breakers - a 30amp 240V for kettle, a 20amp 120V for auxiliary needs (lights, radio), and a spare 15amp 120V for future needs.
Existing Spa GFCI Before
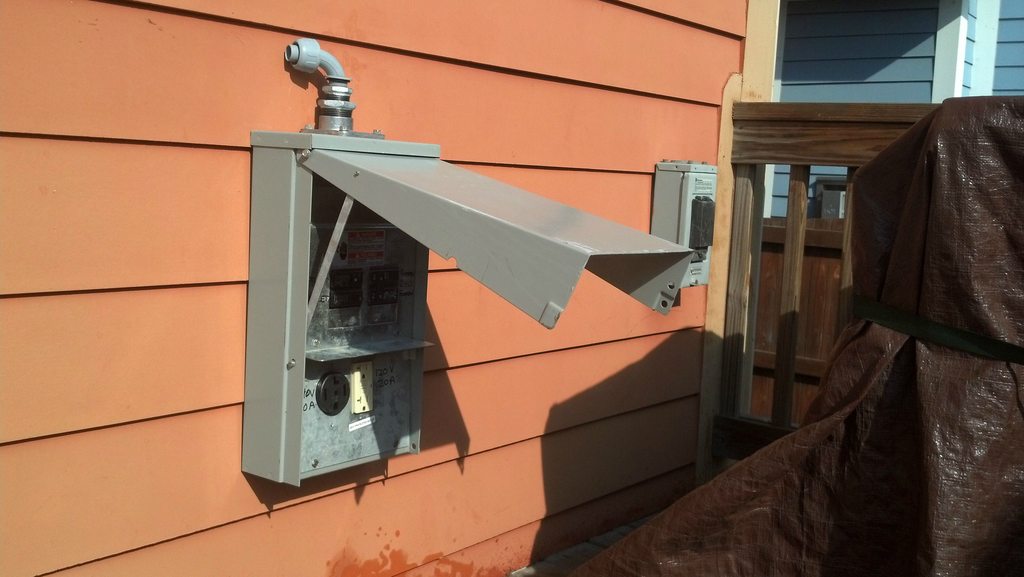
Installing additional panel to add plugs
Panel wiring final
Running 6awg cable in conduit -- what a pain... I was right up against the minimum bend radius on this cable, and it was NOT an easy feat to run this..
Phase 2: Control Panel
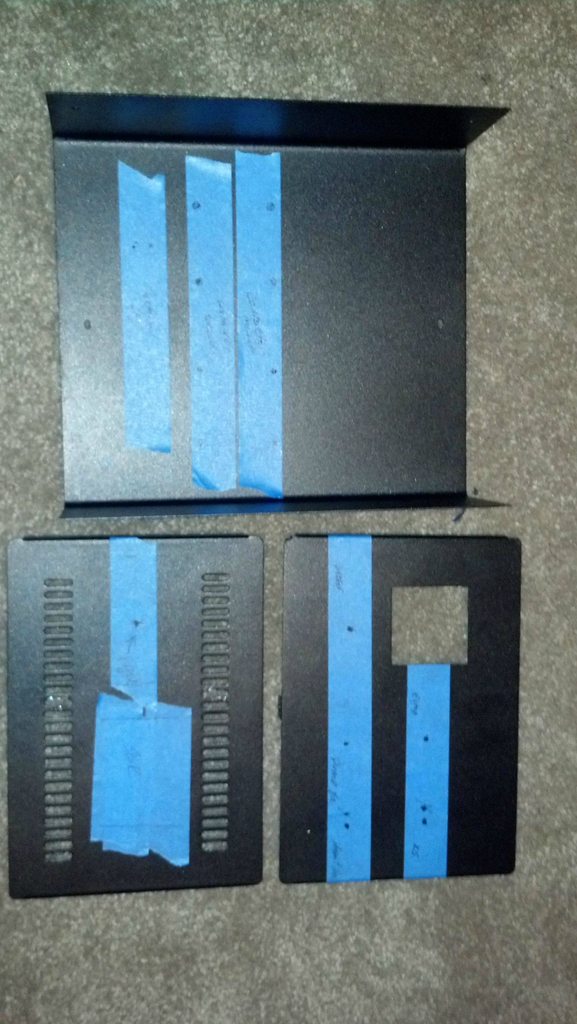
I knew I wanted to do a single element BIAB with pump capability, so I scoured HBT and found P-J's diagram titled "Auberin-wiring1-a4-5500w-BIAB-30d6". I modified this to include a master key switch and contactor, a buzzer, and removed the PID push-button. I still need to add a SPST switch for a buzzer disable -- whoops. I worked off the PBOX16 from Auber. For those who are wondering how long this takes, I probably did the panel in 20 hours including part procurement (2 hours), drilling (3 hours), installing (1 hour), and wiring and testing (10 hours) with the remainder of the time spent on miscellaneous tasks (trips to Lowes, marveling at my progress, reading on HBT).
Taped off layout for drilling
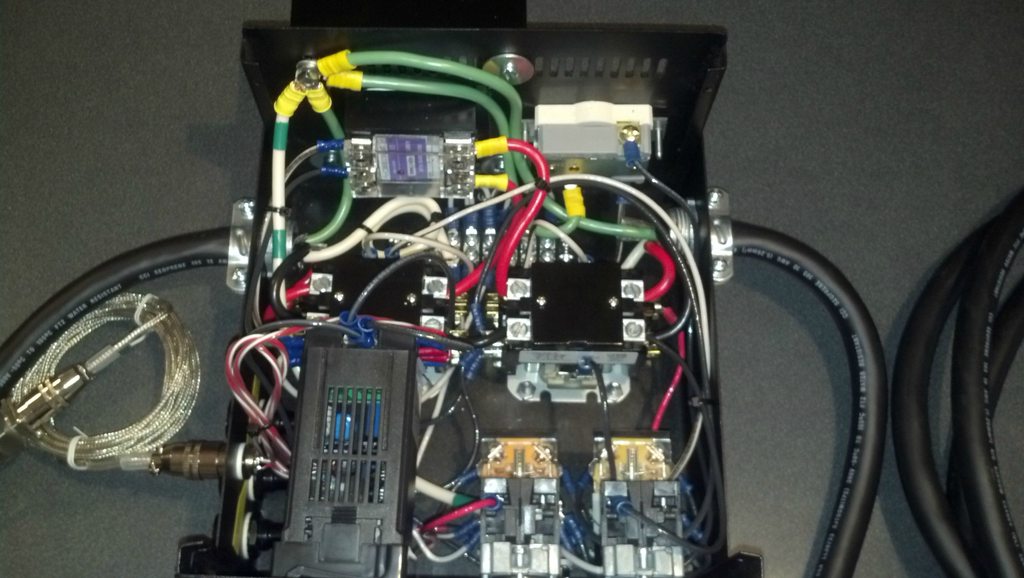
[]i]All components installed - Inside[/i]
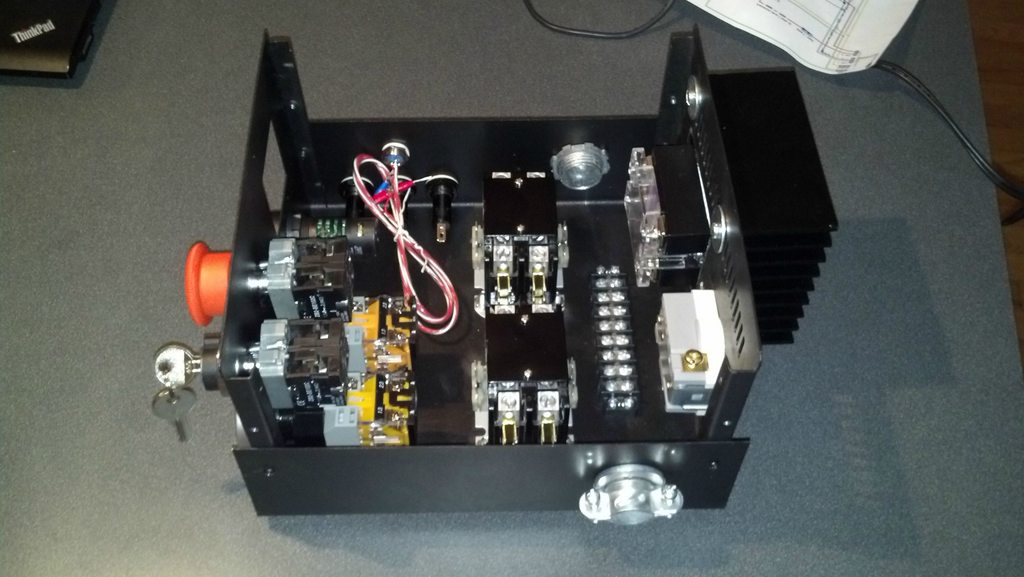
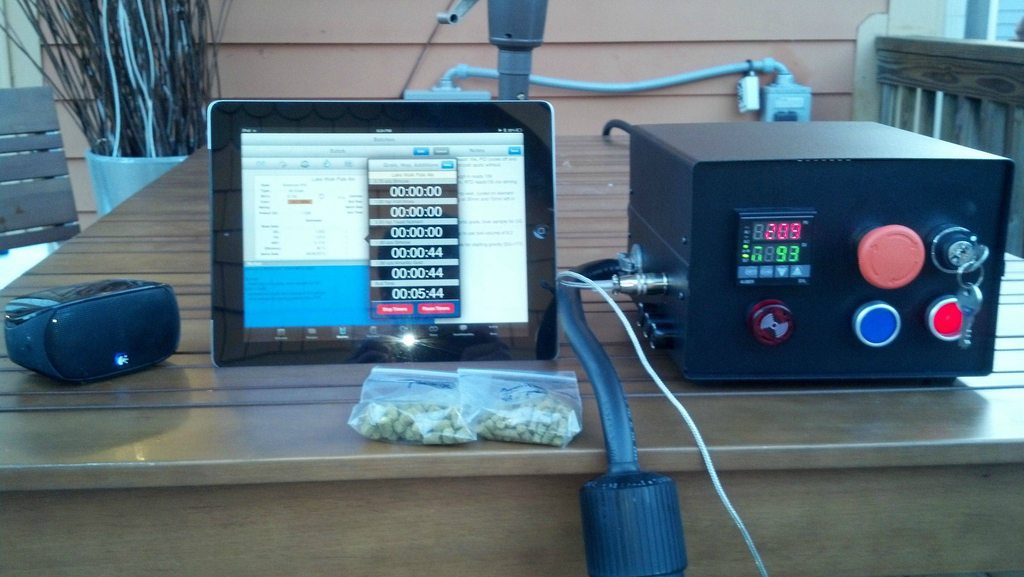
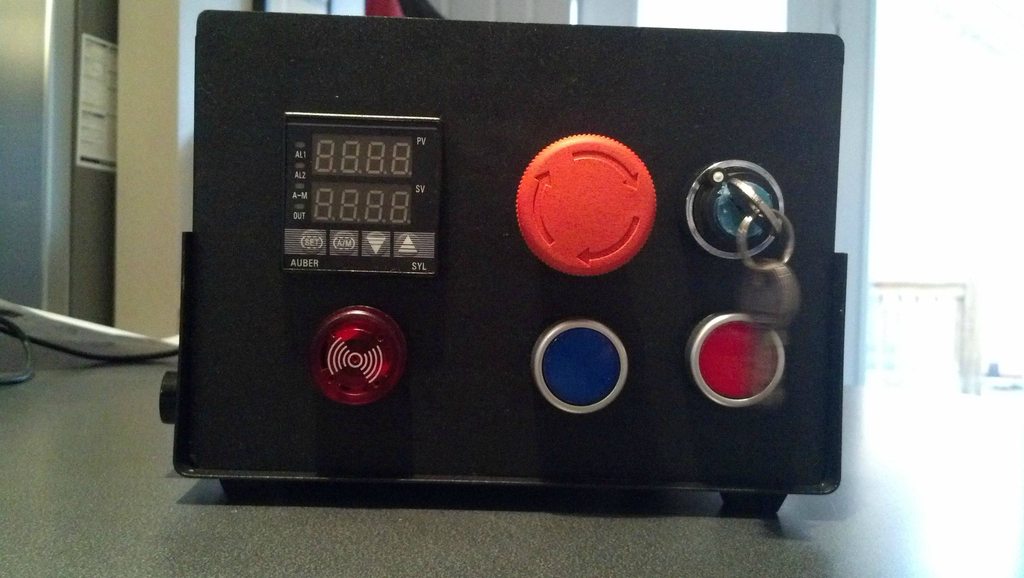
All components installed - Front
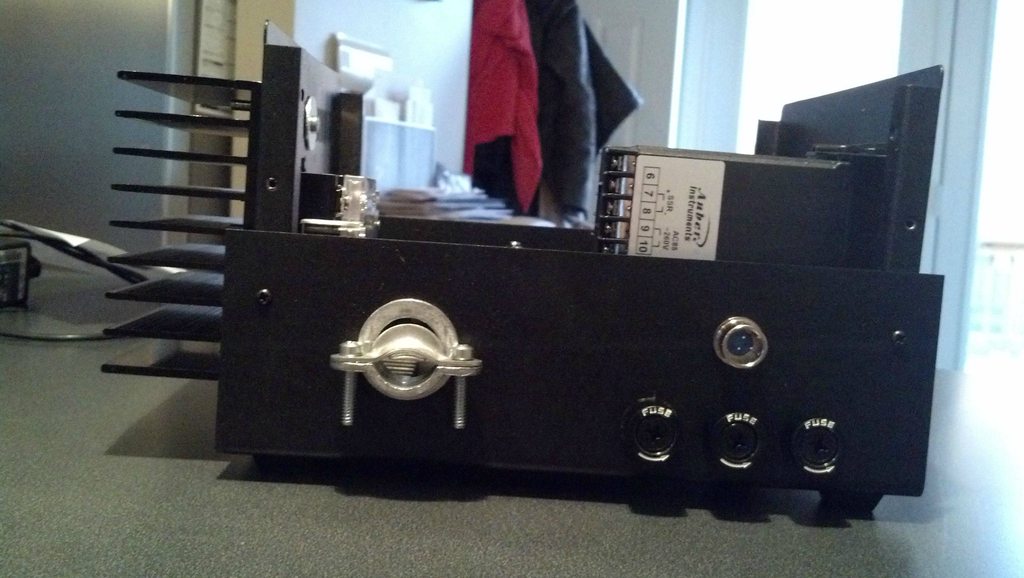
All components installed - Side
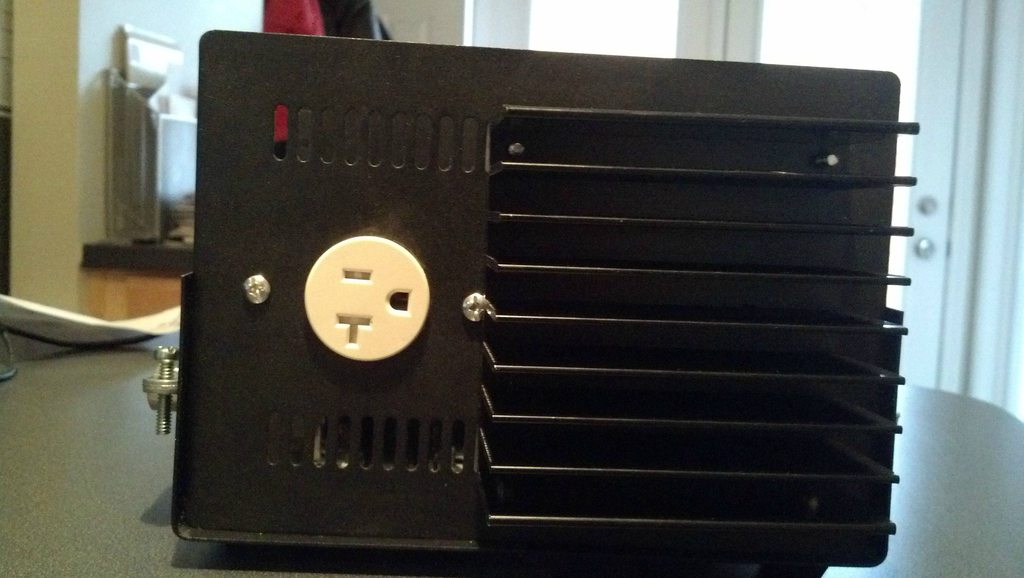
All components installed - Back
Wiring done
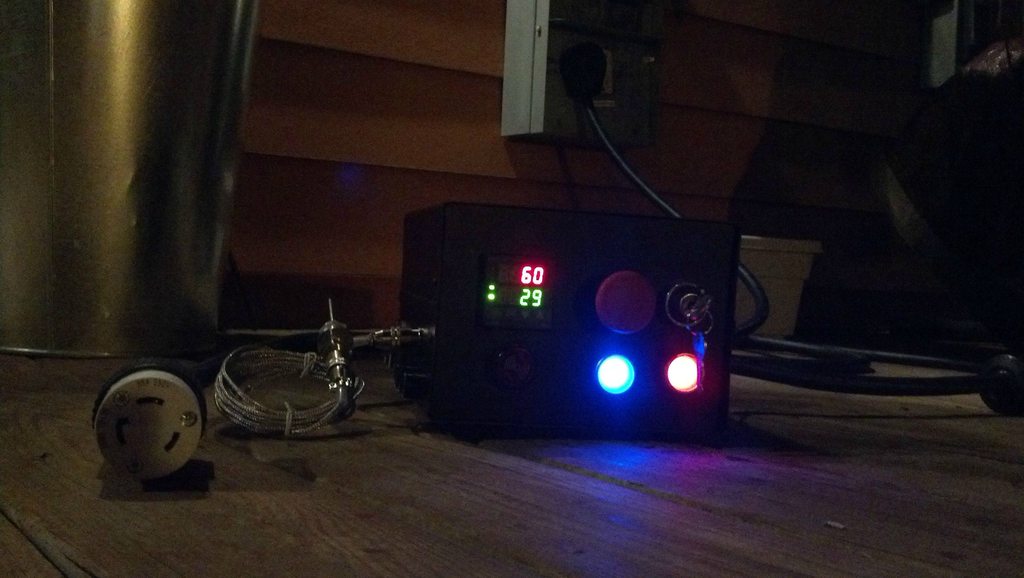
First "EUREKA!" moment
Unexpected Phase 3: Brew Kettle
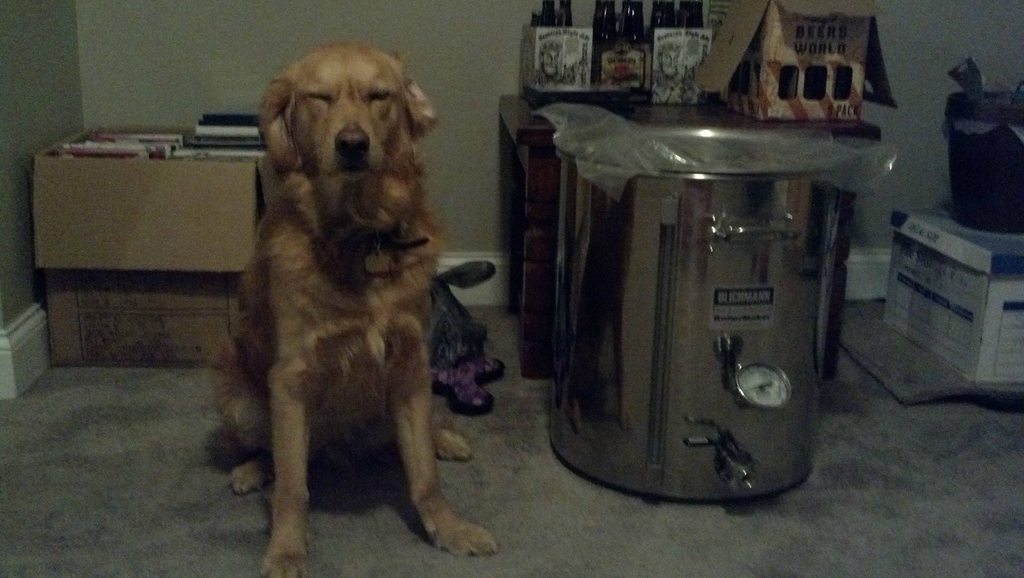
I was planning to use a 20 gallon Blichmann as my kettle, but I was planning to wait a few weeks/months to curb the wave of spending. That idea went out the window when I was at my LHBS and casually asked if they had any SD1 kettles. Sure enough, they had one in stock, so I took her home for $380. This purchase expedited my build for sure -- I was hoping to be brewing by 4th of July, and I am now on track to brew for Memorial Day!
New kettle
Golden retriever included as a size reference...
Phase 4: Heating Element
Nothing much to contribute here. I followed Kal's instructions line-by-line. My one "lesson learned" here is the importance of a drill press--- drilling the hole in the 2 gang box is near impossible without a press.. Easily the most frustrating part of the build.
Otherwise, I used the Greenlee punch to do the hole in the kettle and the cover, and it cut through like pudding. Very easy. The rest of the heating element build and installation was quite straight-forward.
Key design flaw discovered
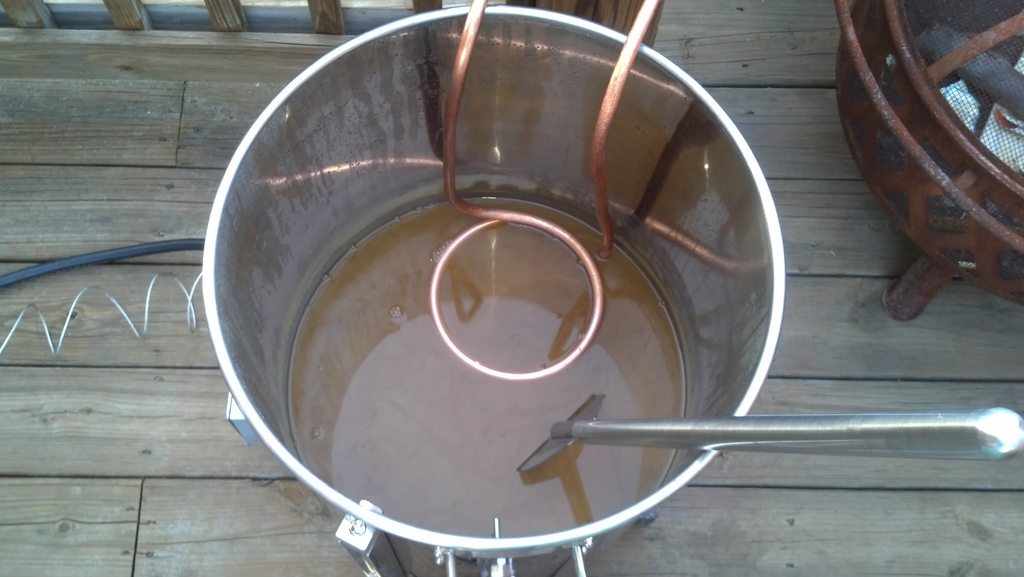
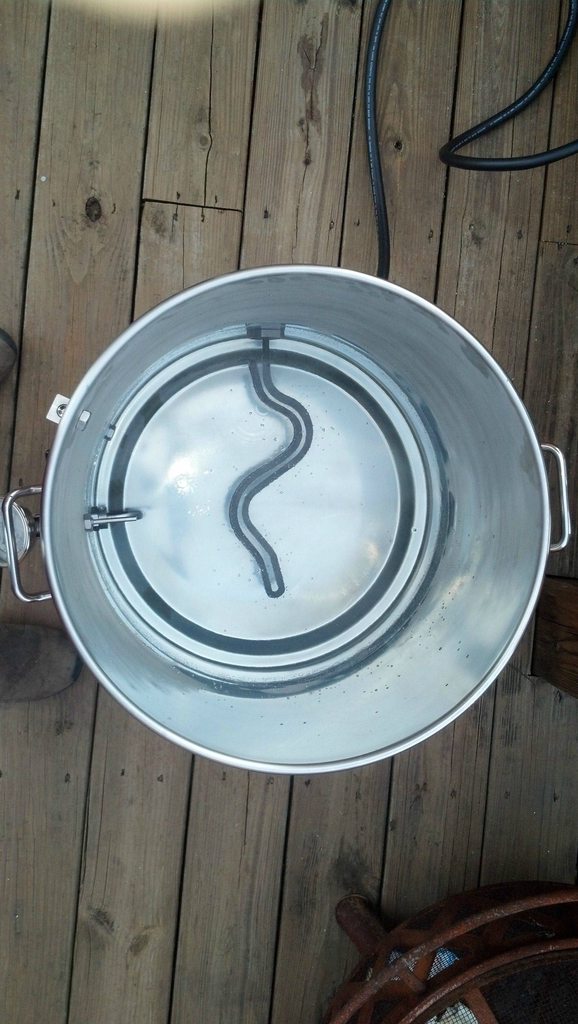
I bought a 20 gallon kettle to enable 5 and 10 gallon BIAB batches. I discovered a critical design flaw during my initial heating test --- with 7 gallons of water in the kettle, there is only 1.5-2" of space above the element. This is not enough space to hang a bag without it sitting on the element. My new plan is to employ a "Brew in a Basket" technique -- I am looking to procure a 8" diameter stainless basket that can hang in the space between the element and kettle wall during the mash. An unplanned change, but I don't think I would have done anything different had I realize this ahead of time.
Question: Does anyone recommend a certain mesh size to do this? People seem to use 300-400 for hops, so maybe 200? Any advise in this area is appreciated
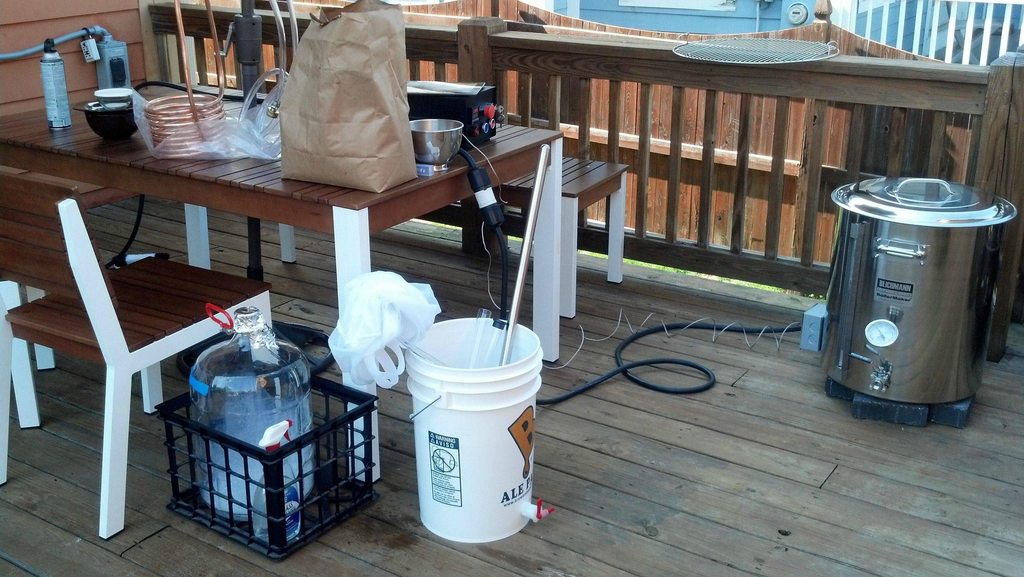
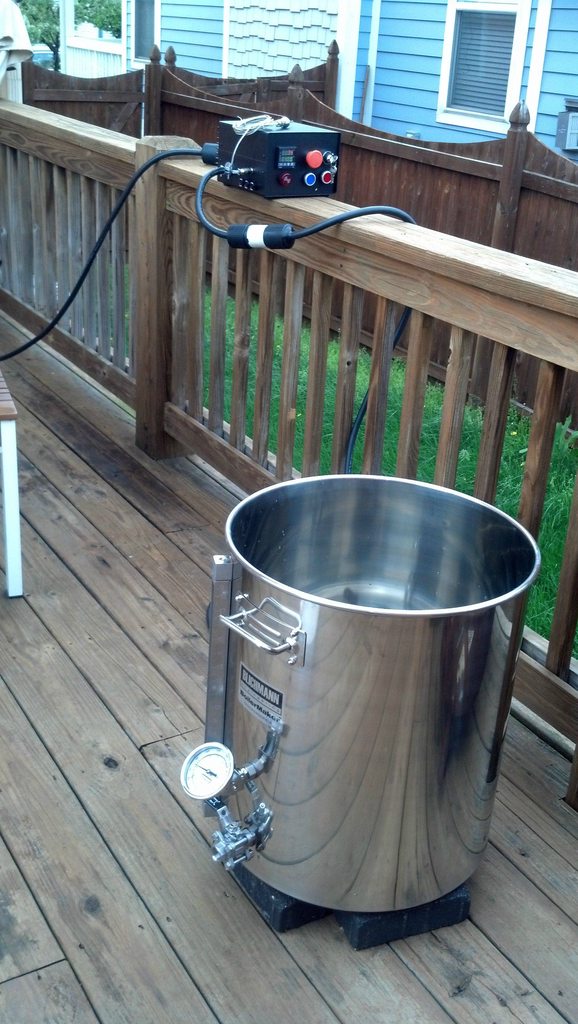
Full unit
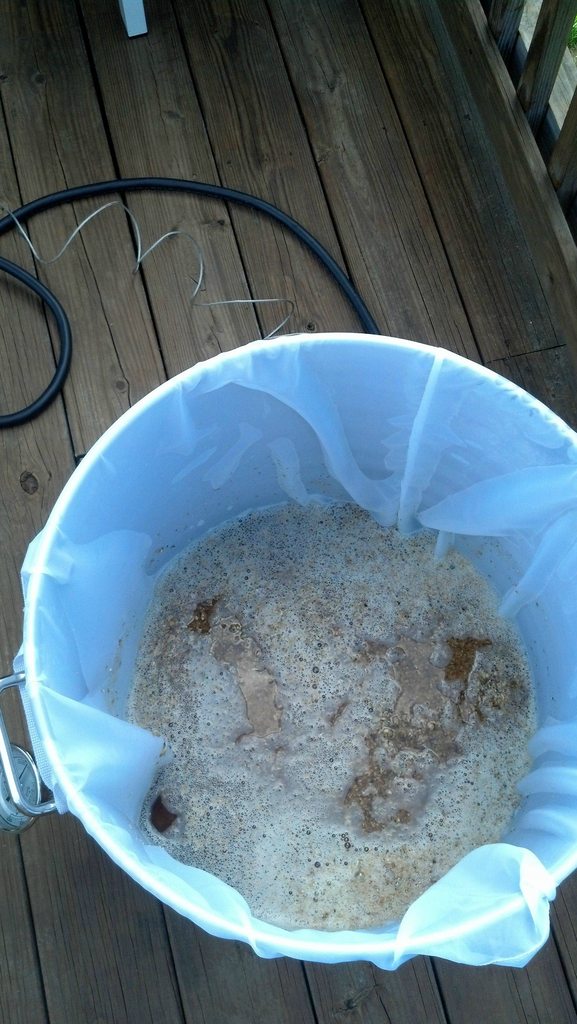
No room for bag
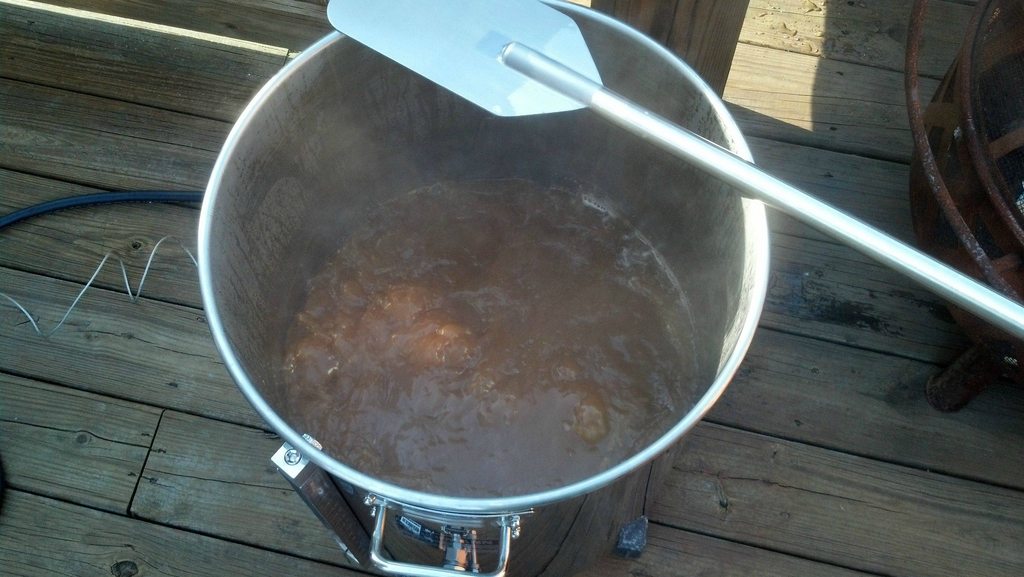
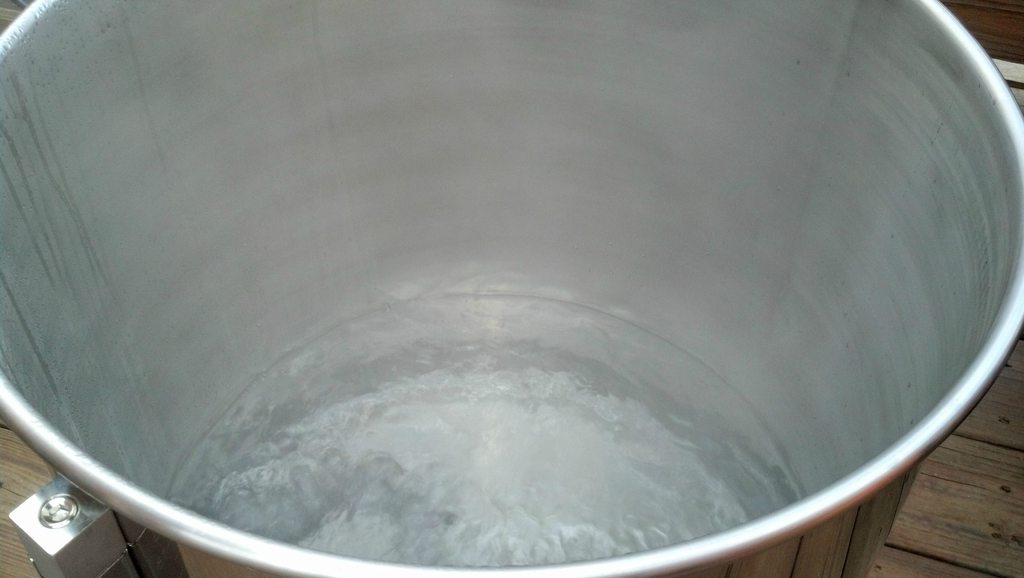
At least we are boiling!
What's Left? Mainly accessories...
- Grain basket
- Greenlee 9/16" punch to install temperature probe
- CFC (planning to gravity feed at first), tubing, fittings
- Planning to add pump for recirc and cooling later on
Much-deserved thanks go out to Kal, P-J, and the countless others who have shared their experiences on this site. It is your selfless sharing that benefits the community and makes it what it is. Thank you!
Phase 1: Power
My home already had a 50amp breaker in the panel which ran to a 50amp GFCI installed on my deck for a spa --- this is going to be too easy. I re-purposed a panel from a recent barn renovation for my power. Running 6awg solid core cable from GFCI to panel, where I split into 3 breakers - a 30amp 240V for kettle, a 20amp 120V for auxiliary needs (lights, radio), and a spare 15amp 120V for future needs.
Existing Spa GFCI Before
Installing additional panel to add plugs
Panel wiring final
Running 6awg cable in conduit -- what a pain... I was right up against the minimum bend radius on this cable, and it was NOT an easy feat to run this..
Phase 2: Control Panel
I knew I wanted to do a single element BIAB with pump capability, so I scoured HBT and found P-J's diagram titled "Auberin-wiring1-a4-5500w-BIAB-30d6". I modified this to include a master key switch and contactor, a buzzer, and removed the PID push-button. I still need to add a SPST switch for a buzzer disable -- whoops. I worked off the PBOX16 from Auber. For those who are wondering how long this takes, I probably did the panel in 20 hours including part procurement (2 hours), drilling (3 hours), installing (1 hour), and wiring and testing (10 hours) with the remainder of the time spent on miscellaneous tasks (trips to Lowes, marveling at my progress, reading on HBT).
Taped off layout for drilling
[]i]All components installed - Inside[/i]
All components installed - Front
All components installed - Side
All components installed - Back
Wiring done
First "EUREKA!" moment
Unexpected Phase 3: Brew Kettle
I was planning to use a 20 gallon Blichmann as my kettle, but I was planning to wait a few weeks/months to curb the wave of spending. That idea went out the window when I was at my LHBS and casually asked if they had any SD1 kettles. Sure enough, they had one in stock, so I took her home for $380. This purchase expedited my build for sure -- I was hoping to be brewing by 4th of July, and I am now on track to brew for Memorial Day!
New kettle
Golden retriever included as a size reference...
Phase 4: Heating Element
Nothing much to contribute here. I followed Kal's instructions line-by-line. My one "lesson learned" here is the importance of a drill press--- drilling the hole in the 2 gang box is near impossible without a press.. Easily the most frustrating part of the build.
Otherwise, I used the Greenlee punch to do the hole in the kettle and the cover, and it cut through like pudding. Very easy. The rest of the heating element build and installation was quite straight-forward.
Key design flaw discovered
I bought a 20 gallon kettle to enable 5 and 10 gallon BIAB batches. I discovered a critical design flaw during my initial heating test --- with 7 gallons of water in the kettle, there is only 1.5-2" of space above the element. This is not enough space to hang a bag without it sitting on the element. My new plan is to employ a "Brew in a Basket" technique -- I am looking to procure a 8" diameter stainless basket that can hang in the space between the element and kettle wall during the mash. An unplanned change, but I don't think I would have done anything different had I realize this ahead of time.
Question: Does anyone recommend a certain mesh size to do this? People seem to use 300-400 for hops, so maybe 200? Any advise in this area is appreciated
Full unit
No room for bag
At least we are boiling!
What's Left? Mainly accessories...
- Grain basket
- Greenlee 9/16" punch to install temperature probe
- CFC (planning to gravity feed at first), tubing, fittings
- Planning to add pump for recirc and cooling later on