kal
Well-Known Member
I'm not sure which of these two RTD temperature sensors to order to put in my Blichmann 20 gallon HLT, MLT, and BK. I want to go weldless.
Liquid tight RTD temperature sensor, 4 probe, M16x 1.5 metric thread
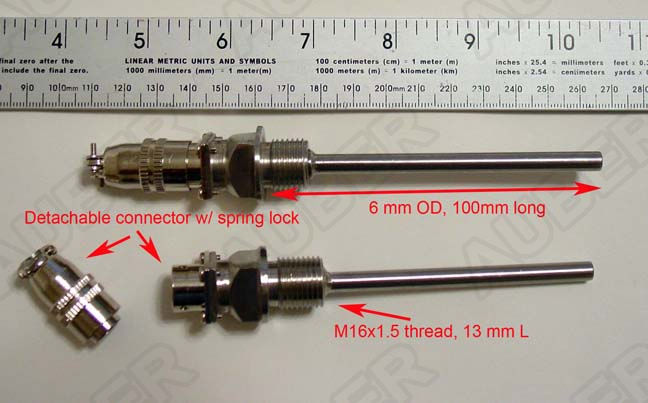
Link: Liquid tight RTD temperature sensor, 4 probe [PT100-L100] - $32.55 : auberins.com, Temperature control solutions for home and industry
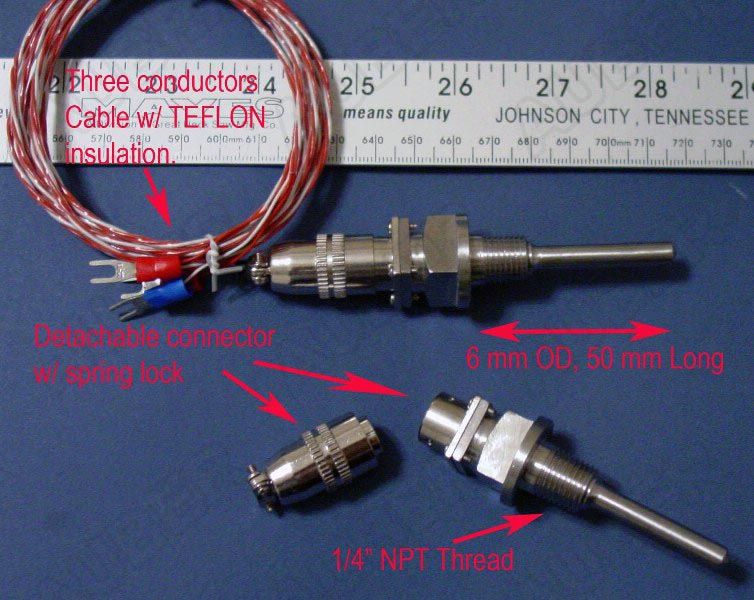
Liquid tight RTD temperature sensor, 4 probe, 1/4" NPT thread
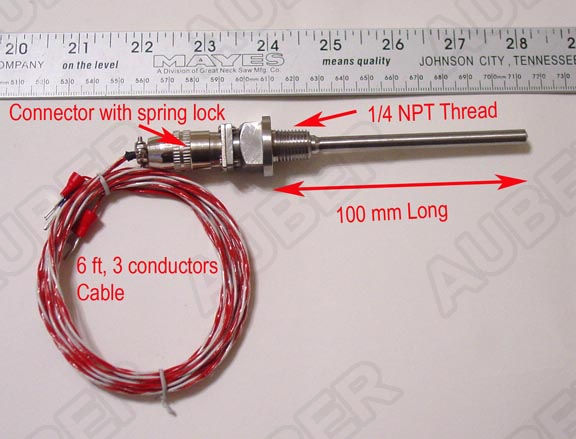
Link: Liquid tight RTD sensor, 2 probe, NPT Thread [PT100-L50NPT] - $29.95 : auberins.com, Temperature control solutions for home and industry
The only difference seems the metric vs imperial threading. Correct? Which would you use?
4" is better than then 2" probes because it gets you farther into the pot correct?
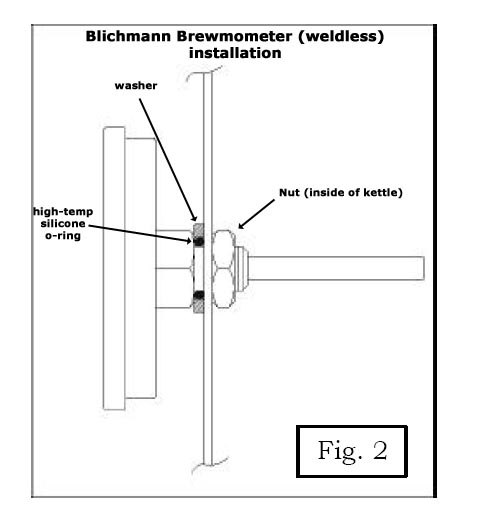
I want to go weldness so I'm assuming all I need to add is a stainless nut and high temp silicone o-ring , and washer after I've punched the holes in the pots? Where can I get this nut/o-ring/washer?
Thanks guys.
Kal
Liquid tight RTD temperature sensor, 4 probe, M16x 1.5 metric thread
Link: Liquid tight RTD temperature sensor, 4 probe [PT100-L100] - $32.55 : auberins.com, Temperature control solutions for home and industry
Liquid tight RTD temperature sensor, 4 probe, 1/4" NPT thread
Link: Liquid tight RTD sensor, 2 probe, NPT Thread [PT100-L50NPT] - $29.95 : auberins.com, Temperature control solutions for home and industry
The only difference seems the metric vs imperial threading. Correct? Which would you use?
4" is better than then 2" probes because it gets you farther into the pot correct?
I want to go weldness so I'm assuming all I need to add is a stainless nut and high temp silicone o-ring , and washer after I've punched the holes in the pots? Where can I get this nut/o-ring/washer?
Thanks guys.
Kal
")