You are using an out of date browser. It may not display this or other websites correctly.
You should upgrade or use an alternative browser.
You should upgrade or use an alternative browser.
Brooklyn Brew Shop Everyday IPA Kit Tips
- Thread starter BlakeL
- Start date

Help Support Homebrew Talk - Beer, Wine, Mead, & Cider Brewing Discussion Forum:
This site may earn a commission from merchant affiliate
links, including eBay, Amazon, and others.
I just bottled my first BBS recipe from their book -- the Spring Lager. It was in the fermenter for three weeks. My batch came up just slightly short of one gallon -- roughly 16 to 24 oz less than a full gallon. I used 3 tablespoons of honey for carbonation, which is the amount called for in the recipe. Checking some of the online priming calculators, this seems like more than the recommended amount of honey for a CO2 volume of 3.0, which is rather high. Taking that into consideration, plus the fact I bottled slightly less than 1 full gallon of beer, should I be concerned about potential bottle bombs from over-carbonation?
MTate37
Well-Known Member
I just bottled my first BBS recipe from their book -- the Spring Lager. It was in the fermenter for three weeks. My batch came up just slightly short of one gallon -- roughly 16 to 24 oz less than a full gallon. I used 3 tablespoons of honey for carbonation, which is the amount called for in the recipe. Checking some of the online priming calculators, this seems like more than the recommended amount of honey for a CO2 volume of 3.0, which is rather high. Taking that into consideration, plus the fact I bottled slightly less than 1 full gallon of beer, should I be concerned about potential bottle bombs from over-carbonation?
I did the same thing with a couple of the BBS recipes before I found the online calculators. The Cranberry Wheat came out way overcarbed, but I didn't have any issues with bombs.
To be safe stick the bottles in a plastic bin or something that will keep shards of glad from flying all over the place. You should be fine though.
When you pour the beer pour into a room temp glass. It can also help to wet the glass before pouring to try to avoid excessive head.
MedBrewer
Well-Known Member
- Joined
- Oct 19, 2012
- Messages
- 194
- Reaction score
- 14
I bottle all my 1 gallon brews with about 2-2 1/4 tbs honey or maple syrup depending on the recipe. Bbs says 3 tbs but the very first kit I made ever from them and bottled with 3 tbs was way over carbed for my liking. Even 2.5 tbs is good but 3 is too much imho
Thanks guys. I'll cut back on the honey next time. Most of the BBS beers I've seen in online videos, like on YouTube, seem to be over-carbed. Maybe BBS is looking for that result because many first-time brewers see a big, foamy head as the sign of a successful brew.
Has anyone tried agave syrup in place of honey? The folks at BBS told me it's a direct substitute -- 3 tablespoons of agave in place of 3 tablespoons of honey. In comparing ingredient labels, it looks like agave syrup has slightly less sugar than honey.
Until now, I've used corn sugar for carbonation, measured by weight according to recommendations from the online priming calculators. Generally, the results have been good.
Calichusetts
Well-Known Member
3 Tablespoons might be good for a FULL gallon, but your not usually getting that into a bottling bucket. 2 to 2.5 is what I've been using for honey, maple syrup and agave.
I always guesstimate when I'm adding honey or maple syrup to the BBS recipes. I convert them to thee gallon most times and add a bit less than three tbs per gallon. I've done 6 of their recipes so far and all have turned out pretty awesome!
Regarding using paint strainers and ss strainers.. Consider panty hose. My wife will get a hole in hers and tosses them. I have a seemingly endless supply of them for hop sacks and liners for my 2G cooler mash tun. Just toss them in the wash and rinse well. Cut off the legs and use. If there is a hole in the foot area.. just tie a big knot in that and you're golden. It works well because the fineness of the weave for keeping a lot of the larger hop particles and / or grain particles out of the wort.
Sounds weird.. but it works.
Sounds weird.. but it works.
Rookie question. First batch with the Everyday IPA. How deep should I put the thermometer provided with the kit into the mash to take readings? If I put it all the way to the bottom, I get readings above 180. If I put just the tip in, it's closer to the range they call for. Any tips? Is exact temp at this stage crucial?
Thunder_Chicken
Well-Known Member
Rookie question. First batch with the Everyday IPA. How deep should I put the thermometer provided with the kit into the mash to take readings? If I put it all the way to the bottom, I get readings above 180. If I put just the tip in, it's closer to the range they call for. Any tips? Is exact temp at this stage crucial?
Stir the mash up a bit and then take a reading near the center. Also, if your oven has a warm capability, just stick your entire mash pot in the oven at 145 or 150F. Holds mash temperature nicely without applying the burner. Much more uniform too.
Thunder_Chicken said:Stir the mash up a bit and then take a reading near the center. Also, if your oven has a warm capability, just stick your entire mash pot in the oven at 145 or 150F. Holds mash temperature nicely without applying the burner. Much more uniform too.
Man- wish I would have thought of that! Great idea!
Calichusetts
Well-Known Member
Stir the mash up a bit and then take a reading near the center. Also, if your oven has a warm capability, just stick your entire mash pot in the oven at 145 or 150F. Holds mash temperature nicely without applying the burner. Much more uniform too.
This is the best way. I only have a warm setting (170) so preheat then turn it off when I stick the mash in. Holds amazing. Can't believe I used to check on the mash every minute or so...stir...heat...stir...off burner...stir....warm burner...etc. So much more time now and so much more relaxing
Thunder_Chicken
Well-Known Member
This is the best way. I only have a warm setting (170) so preheat then turn it off when I stick the mash in. Holds amazing. Can't believe I used to check on the mash every minute or so...stir...heat...stir...off burner...stir....warm burner...etc. So much more time now and so much more relaxing
Not that I doubt you, but my warm feature defaults at 170 too, but I can lower it to 145. If your range has a digital readout, try that.
I just cracked my first bottle of Everyday IPA after 3 weeks bottle conditioning. I had my doubts as when I tasted the beer at bottling it tasted very thin. I also primed with 2 tbs of honey to avoid over carbing. Well I'm pleased to report that it had perfect carbonation with a nice head and the taste was very good and beer was as clear as a commercially filtered beer. Just the right amount of hops to malt; not overly hoppy.
Thunder_Chicken
Well-Known Member
One thing about priming with honey - the gravity of honey is variable and depends on the source (if store bought) or season (if you buy from a farm stand). You might consider using a priming calculator with a weighed amount of table sugar. Weigh the sugar, don't go by volume. Small kitchen digital scales are cheap and work well enough for this.
I find the BBS kits EXTREMELY expensive. The ingredient kit that came in the BBS kit turned out well.. but, you can replicate the ingredient portion for way less than half the price if you get the ingredients at a LHBS. The caveat there is that you split the hops needed out of the "bulk" packages to save for the next batches. Same with yeast. I only use about 1/3 of the yeast pack per batch. Another nice thing is that you know you are getting fresh ingredients and can crush the grains at the LHBS. If they don't have a crusher or you want to buy in more bulk w/o crushing.. just crush at home using a zip lock bag and a rolling pin. You don't want flour.. just crack the grains.
I find the BBS kits EXTREMELY expensive. The ingredient kit that came in the BBS kit turned out well.. but, you can replicate the ingredient portion for way less than half the price if you get the ingredients at a LHBS. The caveat there is that you split the hops needed out of the "bulk" packages to save for the next batches. Same with yeast. I only use about 1/3 of the yeast pack per batch. Another nice thing is that you know you are getting fresh ingredients and can crush the grains at the LHBS. If they don't have a crusher or you want to buy in more bulk w/o crushing.. just crush at home using a zip lock bag and a rolling pin. You don't want flour.. just crack the grains.
I agree.. they are more expensive than piecing your own together... but you have to look at it from the perspective of the gift giver... it all comes in a neat and tiny box... they have good reviews because they work... they can be purchased from a very well run website at Brooklynbrewshop.com or from Amazon.com.... or at trusted retailers like Whole Foods.
The cost of 40 dollars also isn't viewed as that much for most people buying presents.
I'm already picking up a few things here and there to make my next brews easier... and I'll start piecing together recipes as I get more into it. For now, I'll probably brew a few 1 gallon extract recipes from NorthernBrewer.... some more all grain from BBS... and also try some BIAB to see what works best for me.
bford.. I'm only referring to the ingredient kits.. not the overall kit with jug, etc. That isn't bad.. but, the ingredient kits are, like.. $18 plus shipping.. That is close to what I pay to put my ingredients together to brew 5g of an APA… all grain, of course. So, theoretically, you could buy a 5g AG kit and split it.. Five one gal kits for about $20.
That's what I meant… Only the ingredient kit.. Sorry if I didn't make that clear.
That's what I meant… Only the ingredient kit.. Sorry if I didn't make that clear.
bford.. I'm only referring to the ingredient kits.. not the overall kit with jug, etc. That isn't bad.. but, the ingredient kits are, like.. $18 plus shipping.. That is close to what I pay to put my ingredients together to brew 5g of an APA all grain, of course. So, theoretically, you could buy a 5g AG kit and split it.. Five one gal kits for about $20.
That's what I meant Only the ingredient kit.. Sorry if I didn't make that clear.
And I agree with you there also!
I also received their recipe book.... so in the future I plan on buying the ingredients individually.. and I plan on brewing two gallon batches.. should come out less than their put together kits.
Thanks!
I find the BBS kits EXTREMELY expensive. The ingredient kit that came in the BBS kit turned out well.. but, you can replicate the ingredient portion for way less than half the price if you get the ingredients at a LHBS. The caveat there is that you split the hops needed out of the "bulk" packages to save for the next batches. Same with yeast. I only use about 1/3 of the yeast pack per batch. Another nice thing is that you know you are getting fresh ingredients and can crush the grains at the LHBS. If they don't have a crusher or you want to buy in more bulk w/o crushing.. just crush at home using a zip lock bag and a rolling pin. You don't want flour.. just crack the grains.
In looking around the interwebs I can definitely see this. I am making my everday IPA from the BBS kit today, then buying mixes/recipes etc. somewhere else going forward...
VG:cross:
Hi all! New here. Just finished doing the Everyday IPA. When I poured into the carboy, I had just over half a gallon and filled the rest with water, per the directions. Hopefully it turns out well. Here is a pic about 20 minutes after putting the tube into the sanitized water, used a bottle since it was easier then the bowl
Now from my reading, let it sit in bottles for an extra week or two?
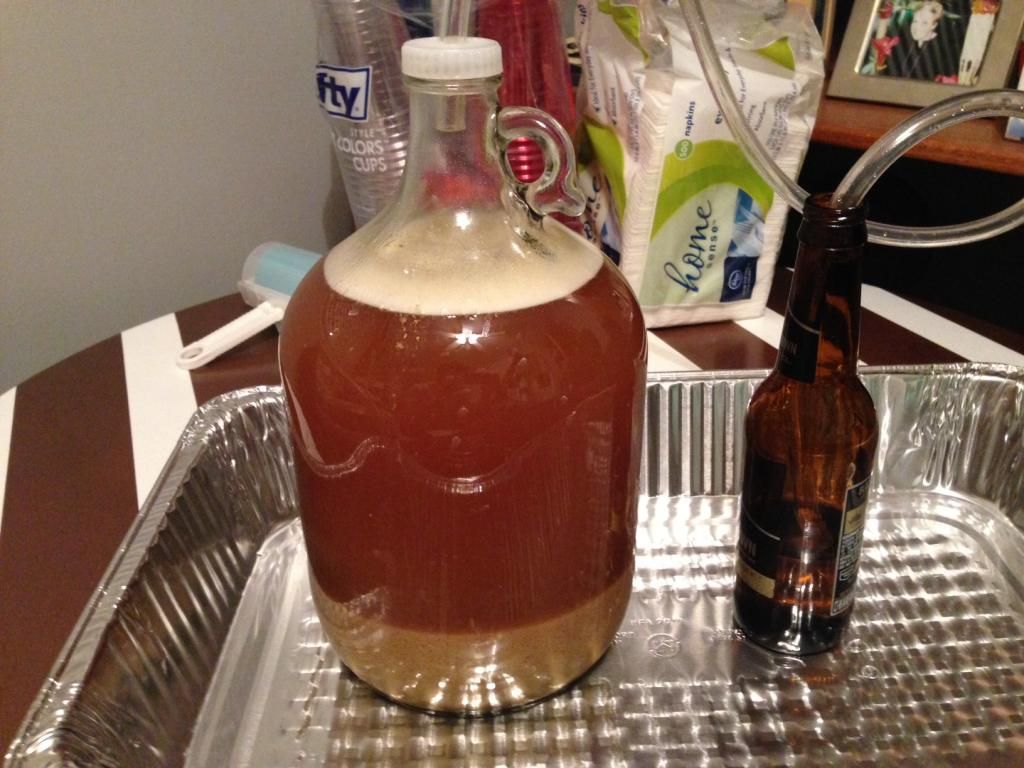
Now from my reading, let it sit in bottles for an extra week or two?

MedBrewer
Well-Known Member
- Joined
- Oct 19, 2012
- Messages
- 194
- Reaction score
- 14
Looks great! You want to let it sit 2 weeks or 3, until fermentation has stopped. So no more bubbles inside the one gallon fermentation jug. I usually let it sit for 3 weeks. In the mean time you could try different IPAs or wait a week and start another one gal batch so that soon you have a continual beer producing hobby
Good evening all! I'm glad to join the forum!
I had some questions about my first brew and Id thought Id just add on to this post. I'm glad I found this thread, its already helped a bunch!
So anyways, My wife got me one of those "craft a brew" 1 gal kits for Christmas. However, I'm not a fan of the wheat beer ingredients that came with it, so I got the BBS Chesnut Ale 1 gal kit I found at bed Bath and Beyond.
I brewed the kit on New Years and I'm pretty sure it worked out just fine. I got the normal highly-active fermentation for the first day or two and then just some bubbling and I changed to the airlock from the blowoff tube.
I went about 2.5 weeks at around 65F, and not much else seemed to happen..just the small amount of bubbles around the edge. I was thinking it was time to bottle but I noticed some debris and stuff floating around, and found this thread in the Forum. I read somewhere in here to let the temp rise, so I let it get up to 70-72 or so, and now I'm seeing quite a bit of bubble activity. I'm going to let this go for a few days or until it subsides.
So what do you guys think? I did get a hydrometer in the mail today, but its one of the bigger test tubes and I don't want to waste too much out of the small batch. Ill wait until it subsides, and then maybe try. Also, do you recommend a cold crash and up here in the northern climes is it okay to cold crash it outside? Forecast is for high 20's - Low 30's, and ill cover it with a box to keep the light out.
Thanks!
Mike
Calichusetts
Well-Known Member
Good evening all! I'm glad to join the forum!
I had some questions about my first brew and Id thought Id just add on to this post. I'm glad I found this thread, its already helped a bunch!
So anyways, My wife got me one of those "craft a brew" 1 gal kits for Christmas. However, I'm not a fan of the wheat beer ingredients that came with it, so I got the BBS Chesnut Ale 1 gal kit I found at bed Bath and Beyond.
I brewed the kit on New Years and I'm pretty sure it worked out just fine. I got the normal highly-active fermentation for the first day or two and then just some bubbling and I changed to the airlock from the blowoff tube.
I went about 2.5 weeks at around 65F, and not much else seemed to happen..just the small amount of bubbles around the edge. I was thinking it was time to bottle but I noticed some debris and stuff floating around, and found this thread in the Forum. I read somewhere in here to let the temp rise, so I let it get up to 70-72 or so, and now I'm seeing quite a bit of bubble activity. I'm going to let this go for a few days or until it subsides.
So what do you guys think? I did get a hydrometer in the mail today, but its one of the bigger test tubes and I don't want to waste too much out of the small batch. Ill wait until it subsides, and then maybe try. Also, do you recommend a cold crash and up here in the northern climes is it okay to cold crash it outside? Forecast is for high 20's - Low 30's, and ill cover it with a box to keep the light out.
Thanks!
Mike
You will want to put the blow-off tube back on for a cold crash. The drop in temp will create a vacuum and suck the liquid out of your airlock. Its not a major issue but one that can be avoided. I completely understand not wanting to use a hydrometer on a 1 gallon batch. You could always take a reading at bottling time and gently add it back.
Phoenix7801
Well-Known Member
I brewed and carboyed my EIPA late Tuesday evening and it took about 18 hours for the fermentation to get rocking and rolling (2 bubbles/second). I had to replenish the sanitizer that was connected to the blowoff because it got cloudy. However, the bubbling has subsided to where I'm not seeing it anymore. I've seen enough threads on here that pretty much say "Just because its not bubbling doesn't mean its not fermenting" and I can dig that. But considering that its not kicking up krausen anymore, should I switch to the airlock now?
Stigy
Well-Known Member
- Joined
- Dec 10, 2012
- Messages
- 171
- Reaction score
- 10
I brewed and carboyed my EIPA late Tuesday evening and it took about 18 hours for the fermentation to get rocking and rolling (2 bubbles/second). I had to replenish the sanitizer that was connected to the blowoff because it got cloudy. However, the bubbling has subsided to where I'm not seeing it anymore. I've seen enough threads on here that pretty much say "Just because its not bubbling doesn't mean its not fermenting" and I can dig that. But considering that its not kicking up krausen anymore, should I switch to the airlock now?
Honestly I would say to wait the recommended 2-3 days until you switch to the airlock. I did mine a few hours before 72 hours and so far so good.
Just my opinion though.
Phoenix7801
Well-Known Member
Cool. Tonight will be 72 hours. Last night I checked and could still see some tiny bubbling in the fermentor so no big deal.
Kingbogart
Well-Known Member
- Joined
- Nov 18, 2013
- Messages
- 212
- Reaction score
- 37
I read somewhere in here to let the temp rise, so I let it get up to 70-72 or so, and now I'm seeing quite a bit of bubble activity. I'm going to let this go for a few days or until it subsides.
Mike
Just for reference, warmer beer is unable to keep as much CO2 in solution. Since you went for a cooler temp to a warmer one, you're likely seeing off-gassing as a side effect of that change in equilibrium. It doesn't necessarily mean you are done fermenting, but will contribute to the bubbles.
Just for reference, warmer beer is unable to keep as much CO2 in solution. Since you went for a cooler temp to a warmer one, you're likely seeing off-gassing as a side effect of that change in equilibrium. It doesn't necessarily mean you are done fermenting, but will contribute to the bubbles.
Thanks!
Its been going for a few days now, and there is still quite a bit of bubbling in the liquid going on, and the there doesn't seem to be as much debris in it. It has even lightened up a bit to more a golden color than the darker color. I'm thinking this is the "finishing" and I may be ready to bottle soon...maybe Sunday?
Thanks again!
Hey everyone!
Sent from my SAMSUNG-SGH-I747 using Home Brew mobile app
Hey again!
Anyways, I finally bottled my 1 gal batch of chestnut ale. I got a hydrometer and decided to take a reading and it looked like it was at 1.012 or so, and I'm pretty sure it tasted like beer! It had been 3.5 weeks in the fermenter, so I decided it was done and time to bottle!
I thought I had the process of bottling down, but it still seemed to be pretty difficult and I'm sure it will get better with practice. The most difficult part IMO was needing an extra set of hands while starting the siphon and when filling and switching the bottles while holding the racking cane at the right height without it getting in the trub etc. I chose to go directly from the fermenter to the bottles, as I got some of the Fizz Drops from NB. I also had a bottling wand with the spring-valve and that seemed to make it easier.
I managed to fill 6 16oz Groelsch-type bottles; I think without the hydrometer reading I could have made seven as I had about a half bottle filled before sucking the trub. I don't think 96 ounces is too bad for my first gallon batch.
So I think I did pretty good for my first batch being an all grain (I'll update in a few weeks when I crack the first bottle.) I have a 1 Gal "Dead Ringer" kit from NB that I'm going to try next, I definitely think I'll have an easier time getting the process down.
Thanks again for all the advice and keeping this thread going!
Mike
Phoenix7801
Well-Known Member
Installed the airlock. I know it says to fill up the airlock to the line with sanitizer but there isn't a line shown on it. I just filled it up halfway and hope for the best. Still seeing some bubbles in the wort just no big bubbles gurgling in the airlock. Oh well. Its difficult being patient.
Installed the airlock. I know it says to fill up the airlock to the line with sanitizer but there isn't a line shown on it. I just filled it up halfway and hope for the best. Still seeing some bubbles in the wort just no big bubbles gurgling in the airlock. Oh well. Its difficult being patient.
Looks good! Dont forget to put the cap on the airlock, if you havent yet get one of those fermometer strips to monitor the ferementation temp...keep it around 68 - 70 or so. Find a dark area with constant temp,
let it go and relax!
Sent from my SAMSUNG-SGH-I747 using Home Brew mobile app
Phoenix7801
Well-Known Member
Anybody who has brewed the Everyday IPA: About how fast was the noticeable fermentation and does it finish its fermentation early? One week later the airlock isn't gurgling and there doesn't seem to be very much activity in the jug. The temperature had been around these last couple of days. I'd take a gravity reading but if its not done yet I don't want to waste potential beer.
Calichusetts
Well-Known Member
Anybody who has brewed the Everyday IPA: About how fast was the noticeable fermentation and does it finish its fermentation early? One week later the airlock isn't gurgling and there doesn't seem to be very much activity in the jug. The temperature had been around these last couple of days. I'd take a gravity reading but if its not done yet I don't want to waste potential beer.
This is normal. The majority, and sometimes full fermentation can occur in the first few days. Give it a few more days to a week and the beer should be cleaned up and ready to bottle.
ElJefeBrews
Well-Known Member
- Joined
- Sep 16, 2013
- Messages
- 7,777
- Reaction score
- 130
Anybody who has brewed the Everyday IPA: About how fast was the noticeable fermentation and does it finish its fermentation early? One week later the airlock isn't gurgling and there doesn't seem to be very much activity in the jug. The temperature had been around these last couple of days. I'd take a gravity reading but if its not done yet I don't want to waste potential beer.
Im brewing 1 gallon and noticeable fermentation is usually done within the first few days. You will still see little bubbling going on in the fermenter because the yeast are cleaning up the byproducts they made and getting at the last of the fermentable sugars. You'll notice your beer will smell like green apples at this point because the byproducts aren't cleaned up yet. Also, as long as you clean and sanitize all your hydrometer reading equipment properly, you can just pour your sample back in the fermenter. I've never had a problem doing that
Sent from my SPH-L710 using Home Brew mobile app
BrassBraBrewing
New Member
- Joined
- Feb 1, 2014
- Messages
- 2
- Reaction score
- 0
We got a Brooklyn Brew Shop Everyday IPA kit for Christmas and a Chocolate Maple Porter refill. We were super-excited about the idea of home brewing but more than a little nervous about getting started without having more instruction than BBSs online videos.
Last weekend, we hit the jackpot: A local brewing supply store was holding a free workshop. We attended, not realizing that it would be an *actual* all-grain home brewing demonstration. Three and a half hours later, we knew a LOT more maybe just enough to be dangerous. A little high from all the delicious smells (and tastes from our hosts homebrew samples), we supplemented our BBS kit with a few purchases: a biggish brewing bag, a couple 2-gallon plastic tubs, a big bucket, a couple airlocks, an extra 1-gallon glass carboy, a nice metal thermometer, some Star-San, and an auto-siphon oh, and bottle caps and a capper.
Sunday morning, we got up and started brewing! We re-read the BBS directions and reviewed our notes from the demo and combined them as best we could. We modified the BBS instructions to make it a BIAB recipe and followed all the temperature recommendations our supply-store-host had offered, which were a little more clear that the BBS info. Our first batch (that Everyday IPA) was in one of our 2-gallon buckets (fitted with an airlock) just 4 ½ hours later. Not bad for our first time! We started the second batch right away a little over 4 hours after that, our second batch was next to the first.
Now what? Were stuck and heres why.
Our brew-shop host suggested that the brew should remain undisturbed in the plastic bucket for two weeks; after that, we should (carefully!) siphon it into a secondary vessel our gallon carboy where it should stay for another two weeks. Finally, we should bottle it leaving it alone for another two weeks before tasting it.
We have been reading A LOT during the past week, and we have learned of all the controversy surrounding secondary vessels. As newbies, we dont really know what to do next. How concerned should we be about the possibility (probability?) of our plastic buckets not being air-tight? Or should we be more worried about aerating the brew during transferring it into a secondary vessel? How long should each of these stages be? I realize that these are hotly debated topics but we sure would love some advice. What move should we make next?
Im thirsty, dang it!
Ive been brewing just a year now and love the BBS recipes. So far, everyone has tasted great! Plus, they are easy to modify and make your own!
I've never transferred to secondary because I don't want to risk infection and it's a pain! Most of the time people transfer to have a more clear beer, but, letting it sit a week or two longer will let everything settle.
I'd recommend letting the beer sit at least 21 days at a minimum before bottle time. It's hard to wait but I think a month in primary is good followed by a month in bottle.
I'd also suggest you guys go buy stuff for a five gallon set up now. It's fun.
Sent from my iPad using Home Brew
Similar threads
- Replies
- 2
- Views
- 274
- Replies
- 1
- Views
- 516
- Replies
- 2
- Views
- 146