
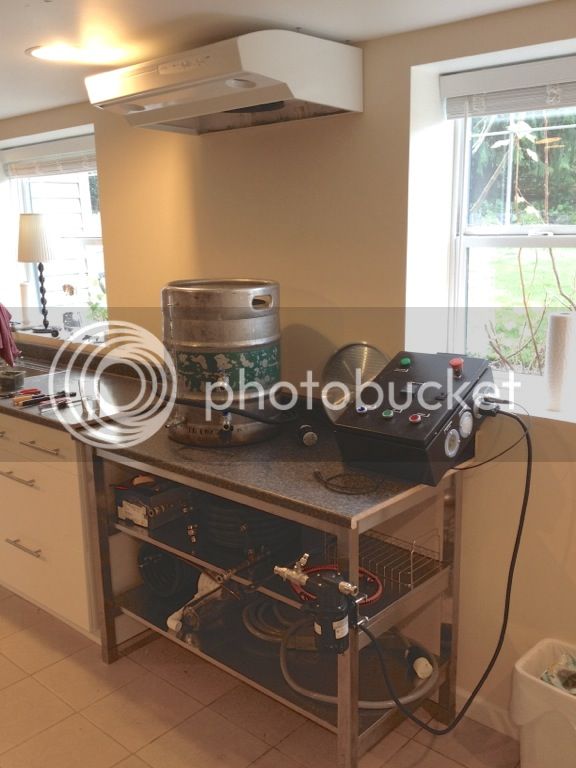
It took about a year to piece together all the various parts, build the controls, and modify my existing system. It now consists of a 13.2 US Gallon (50 liter) 240V e-biab keggle, PID temperature control, pump, and homemade CFC.
The biggest beer Ive made to date had a grist of 25lbs (11.3kg) with 8.5 gallons (31.2L) of strike water. Almost zero headroom in the pot during the mash.
Special thanks to HBT member PJ for the wiring diagram and to Kal for his awesome resource - www.theelectricberwery.com. I couldnt have built this without their knowledge sharing. I tried to buy things through Kals affiliate links on his website so he got a little in return for his online instruction manual. In the spirit of HBT I thought Id share my project.
PROS:
Ability to brew in my basement instead of outside or in my garage.
PID temperature control, I can set the strike temp and turn my back on it while I prep grain and it holds mash temps without external input.
No more dealing with propane tanks.
Fast heating w/5500w element on 6 gallon batches.
Pump allows for a recirculating mash that keeps the temperature in a narrow band. Also lets me whirlpool while chilling.
Quieter, the loudest thing is my exhaust fan.
CONS:
Initial cost
Lost the ability for a pulley system to hoist the grain bag. Now its manual and when I pull out the bag I get some spillage when the bag pushes against the edge of the keggle. Pretty minor irritant.
Wiring Diagram from PJ
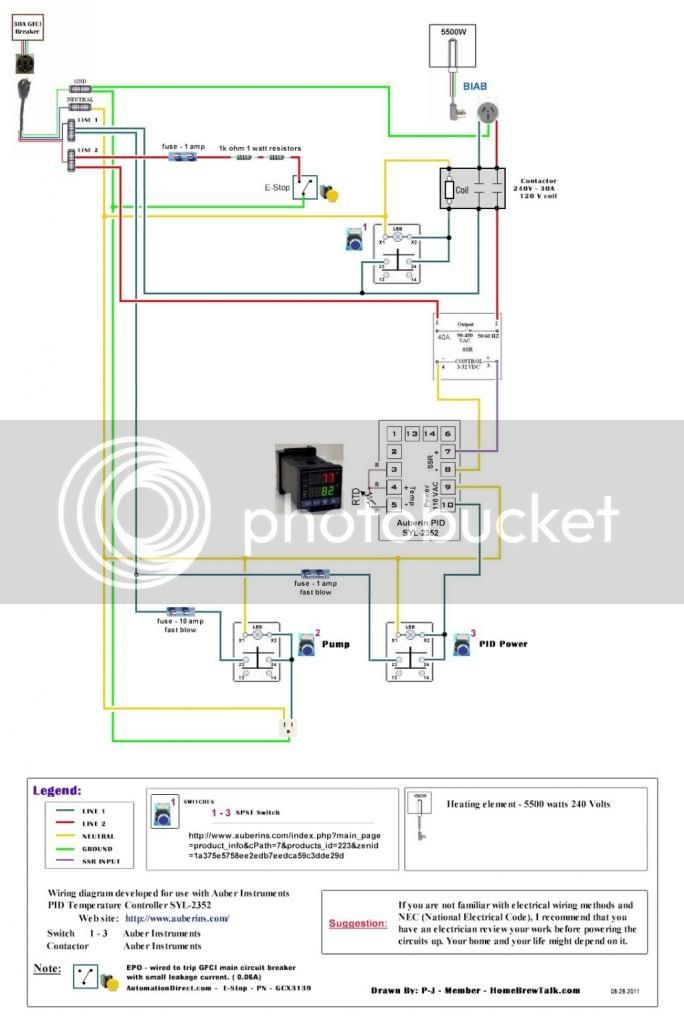
I did one modification that isnt reflected in the drawing. I added an indicator light that turns on when theres energy in the box. The light is just wired from one of the hot lines with a return to neutral on the terminal block.
Bill of Materials
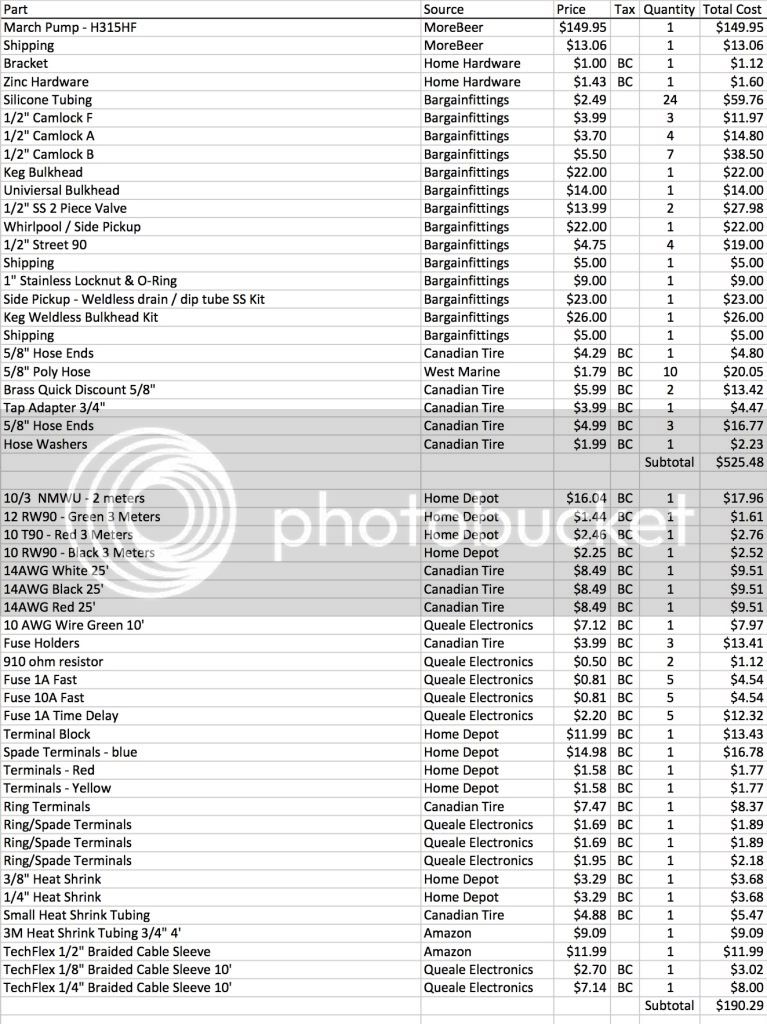
Buying the stuff over 12 months made it feel less expensive but it sure adds up. For those considering converting to electric keep an eye on your budget because things blow up fast. Until I totaled it all up I would have said it cost me about a thousand dollars for this build but obviously it cost a lot more. The CAD / USD have been around par for a while so that total is a good approximation in either currency.
Shipping direct to Canada is expensive and I got things shipped on quick notice when work would bring me to the lower 48.
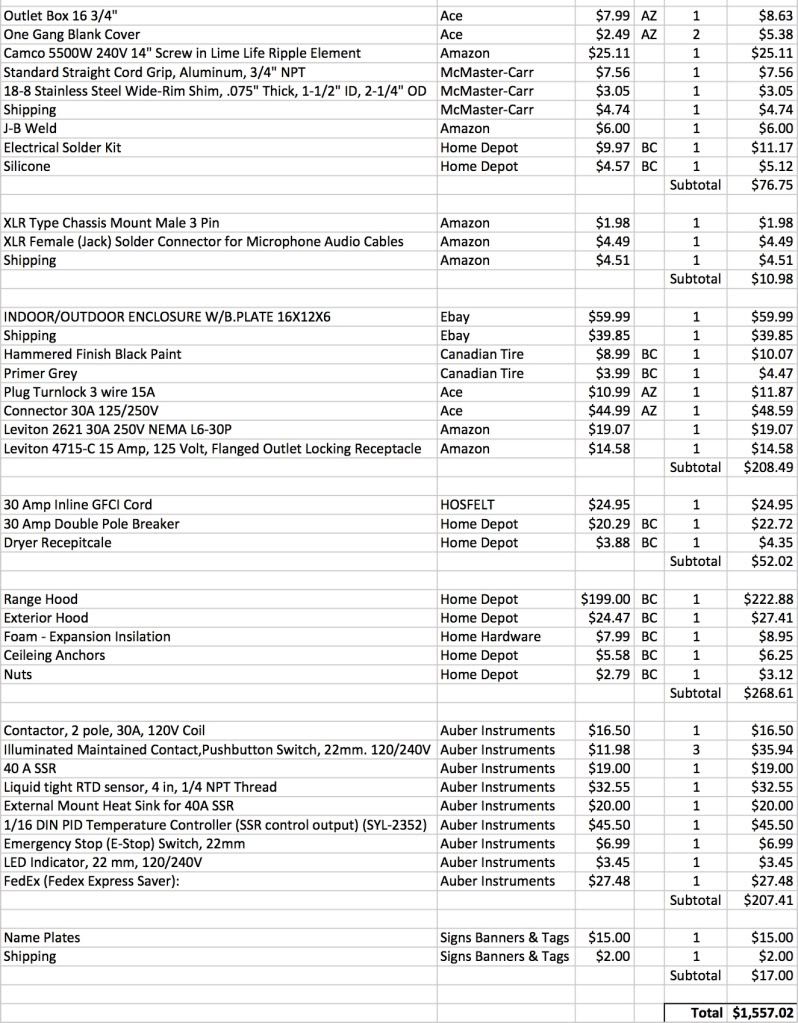
The range hood was more expensive then the inline vortex fans but I dont plan on living in the house forever and the brewery space is actually designed for a stove/range. Ill leave behind the range hood and Ive got above stove cabinets ready to go. The previous owner pre-installed 240V so it was the logical place to locate my brewery. In addition to installing the range hood, I downgraded the circuit from 40 to 30 amps.
A little background on my system
After getting kicked off the kitchen stove and banished to the garage I bought a turkey fryer setup.
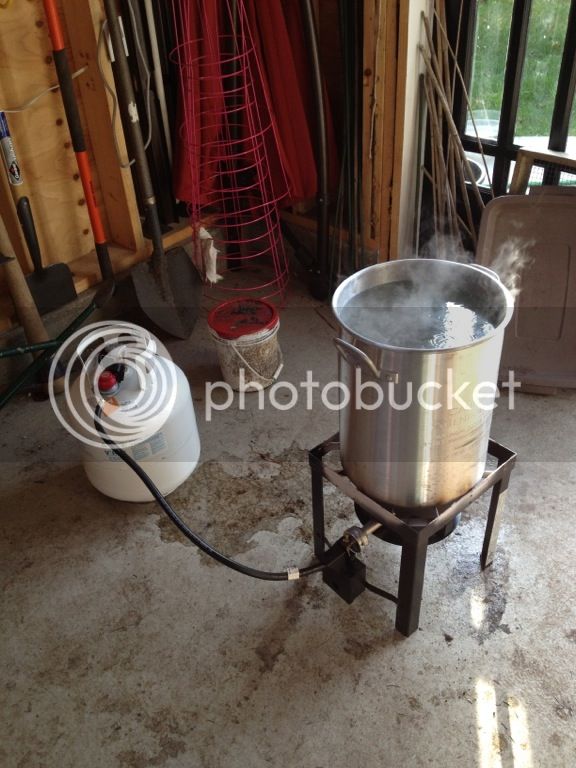
Then I sourced a used keg off craigslist and put it on the propane burner in the garage.
Build Process
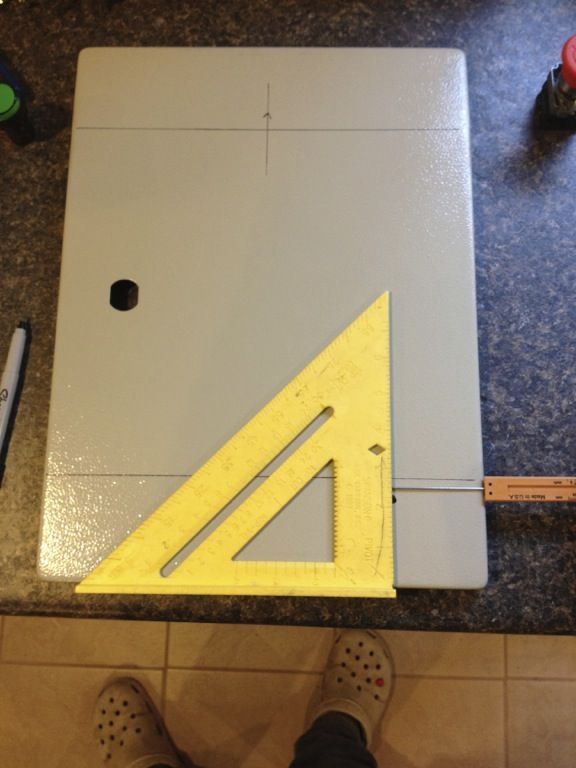
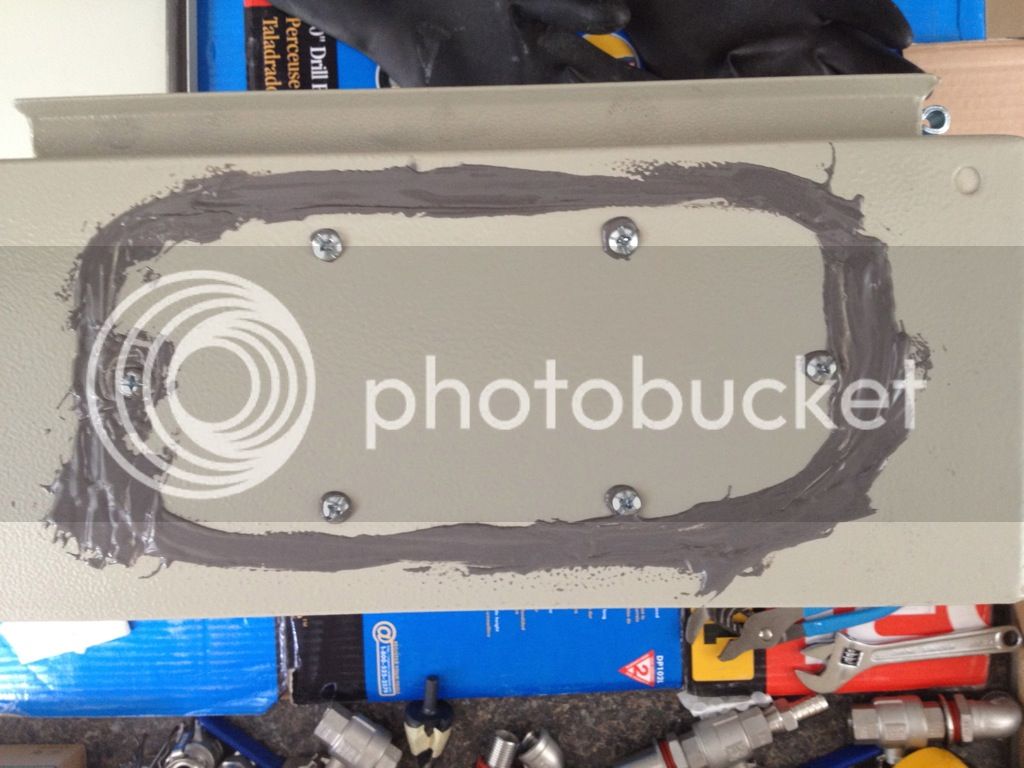
Early on I decided to fortify the control box and I really liked the look of Kals system. My knowledge of electrical systems was dangerously novice. I could replace an electrical outlet and change a light fixture, but I knew nothing of the underlying principals and really had no understanding of what I was doing. For better or worse I decided to learn more on a DIY project that mixes 240v and lots of hot water. I put the controls in a NIMA 4 rated box and spent extra money on receptacles and cords. If anything it gives piece of mind.
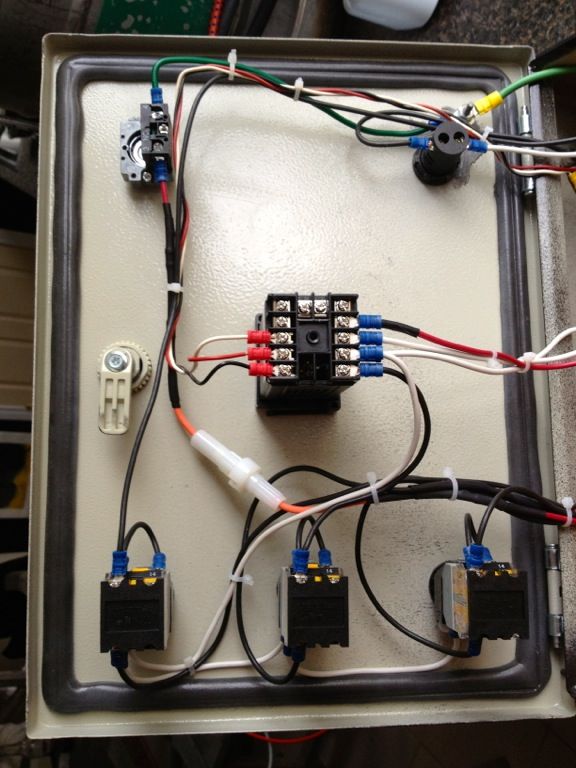
The control box is 16 x 12 x 6 and its the right size for the components inside. Notice the weak illumination on two of the push buttons.
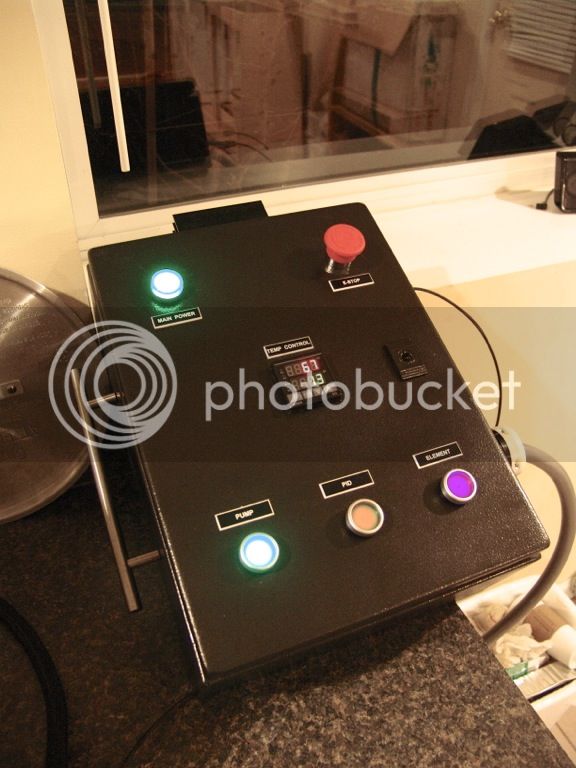
I went with components from Auber Instruments, including the push button switches. They work fine but are dimly illuminated when on. The blue one is fine but the other two are weak. If I did it again Id use the stand alone LED lights like the one on the top left hand corner of the control box. I put that one in to remind me the box is energized.
I followed Kals design for the control box and modified the setup to control a single electric element and pump.
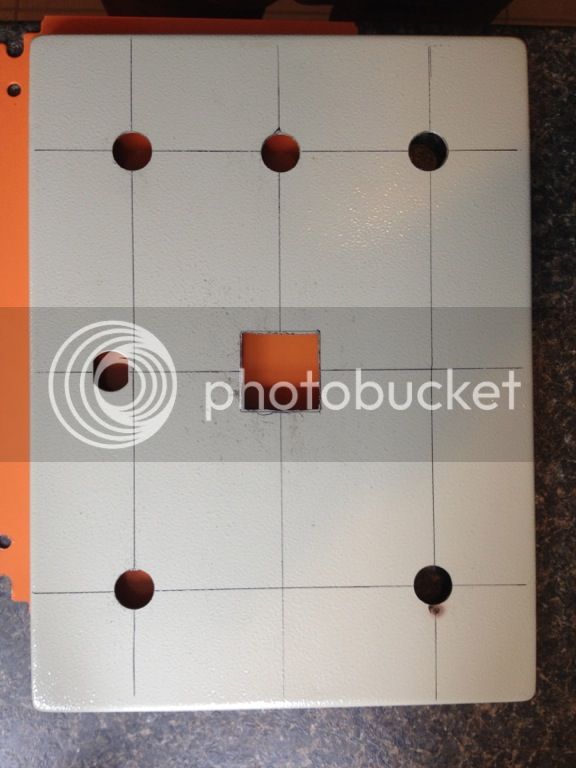
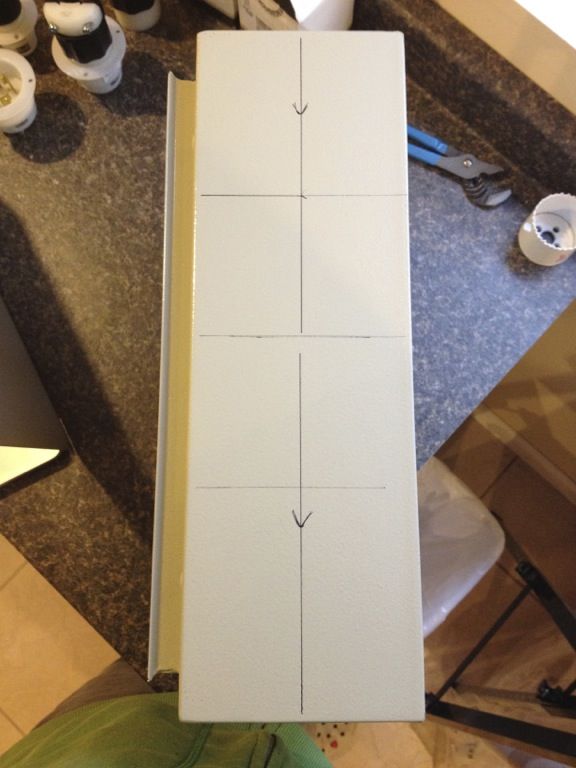
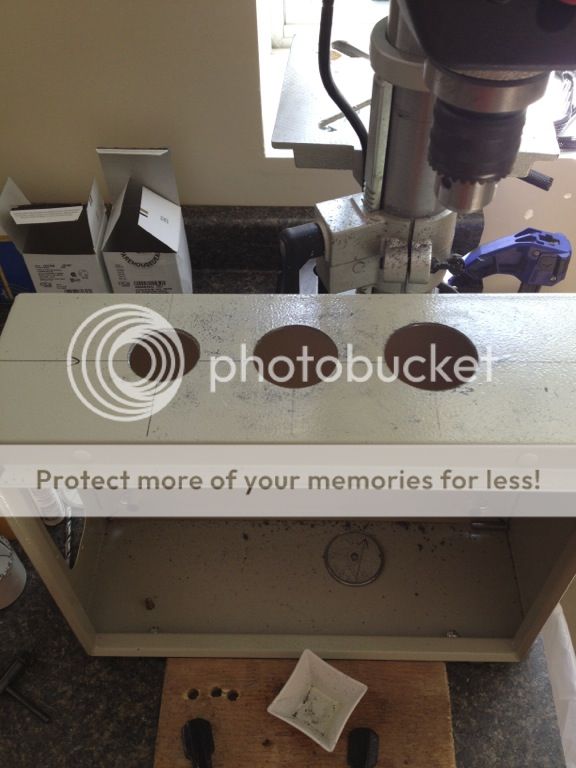
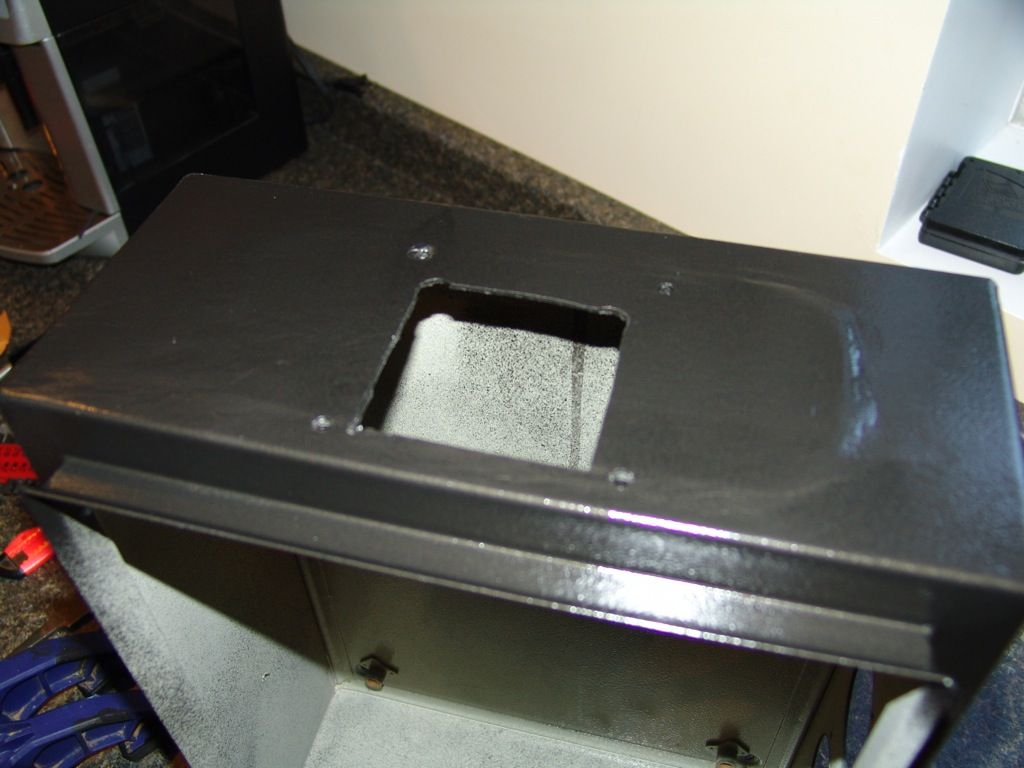
I got my hands on a set of hole saws, a step bit, and hole punch for all the holes that needed cutting.
The heat sink ends up on this side.
Moved the ground on the door.
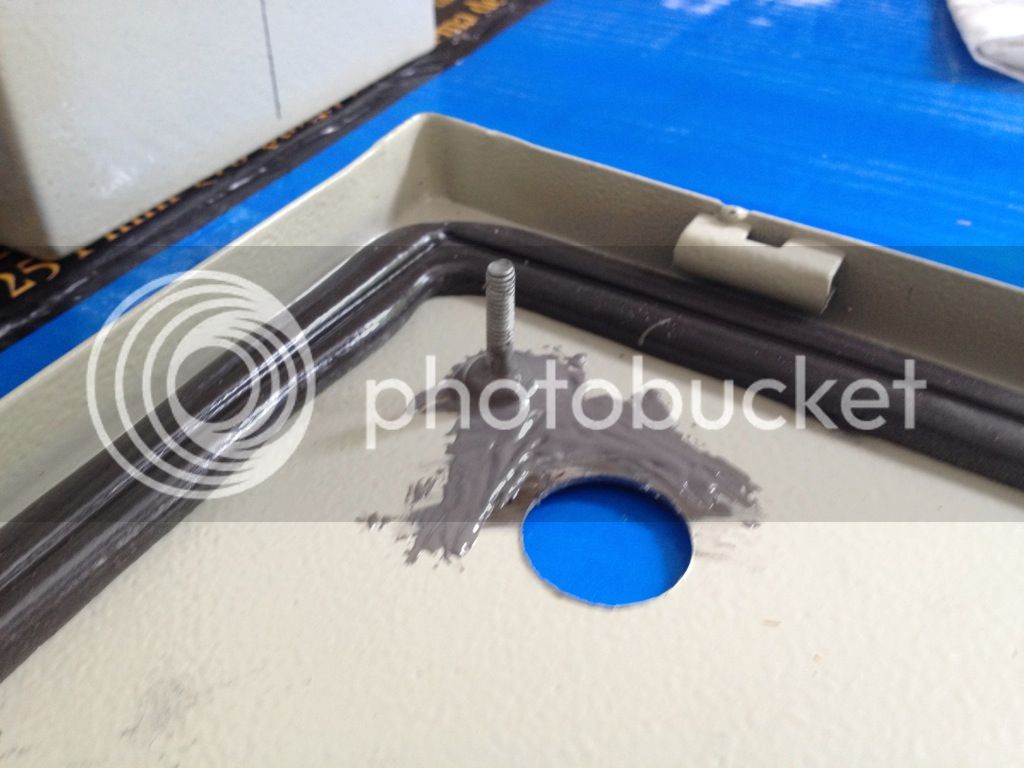
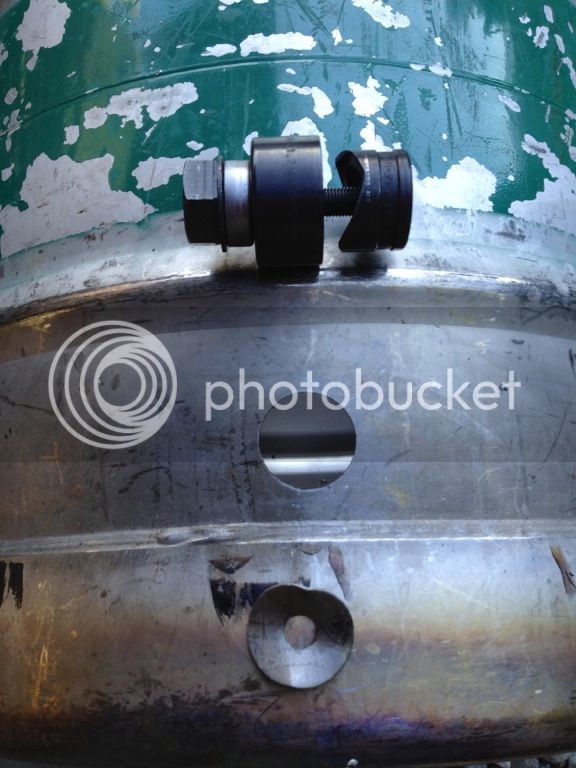
Extra grounding lug on kettle, just below the element housing.
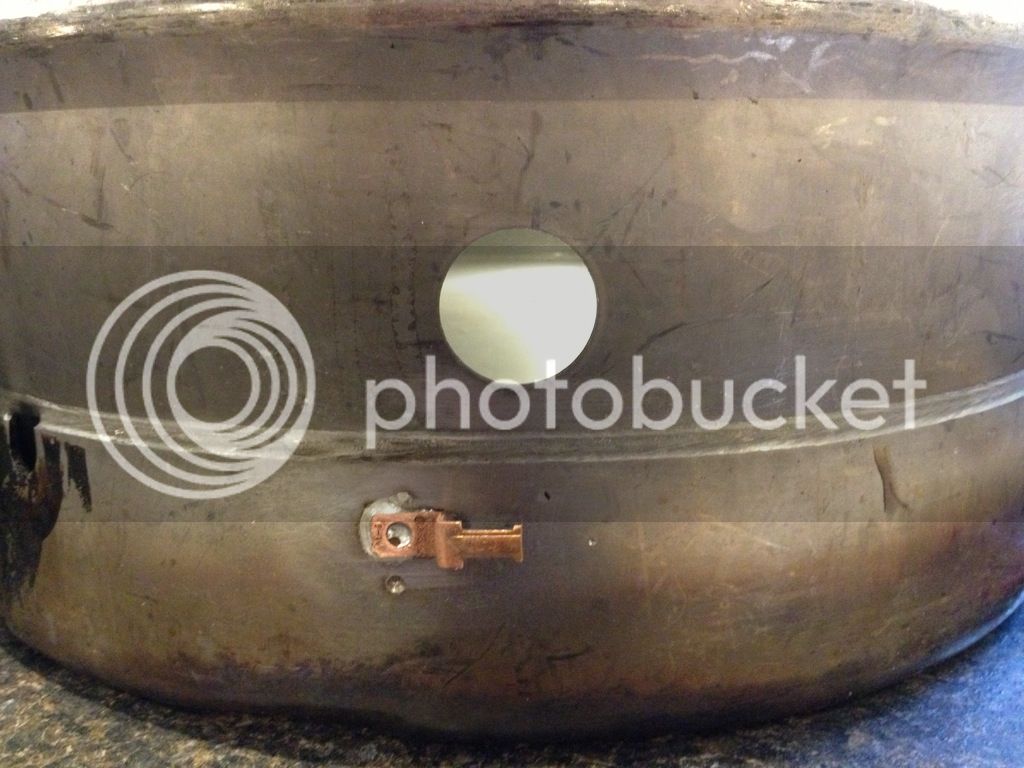
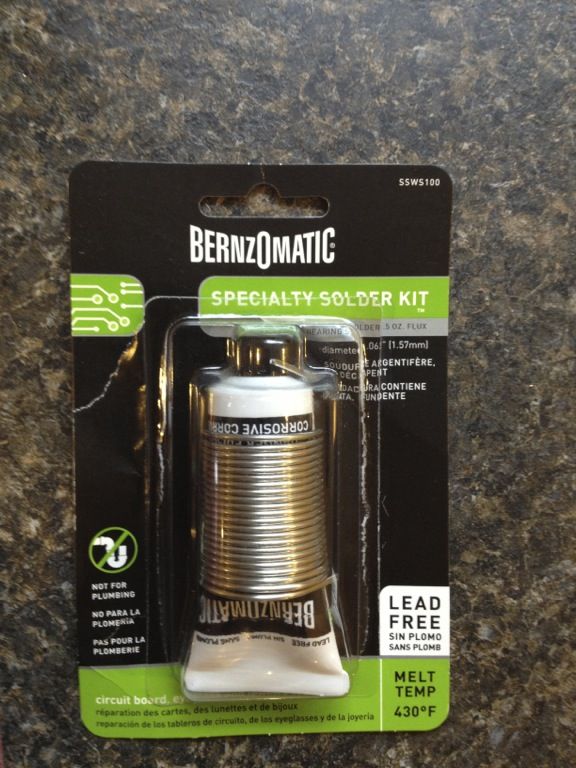
Solder used for ground lug / stainless steel bond. Worked great the first time.
Tapping the screw holes for the receptacles.

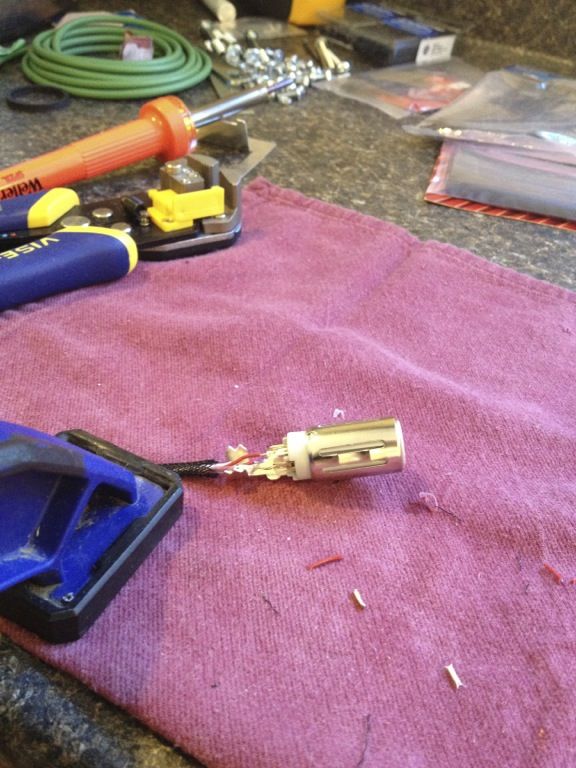
Re-soldering the temp probe wire to the XLR jack. First time one wire came lose and I got the orAL 343 error code on the PID.
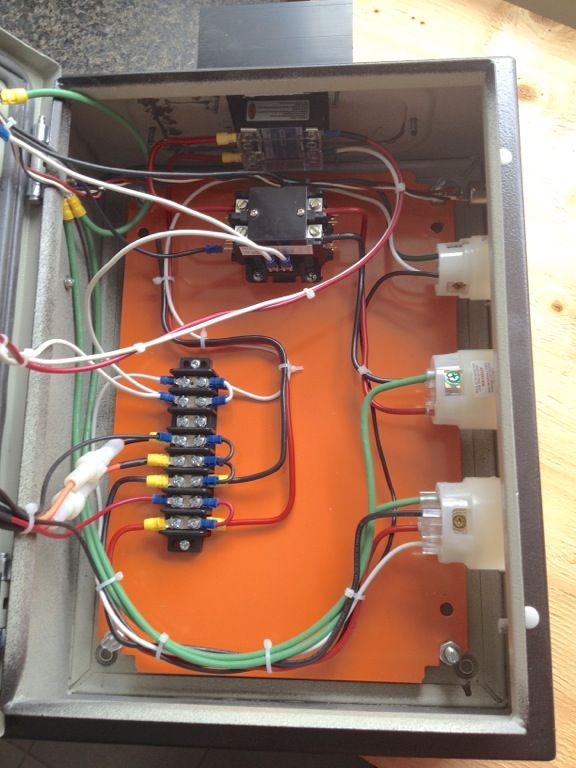
Start of the control box wiring.
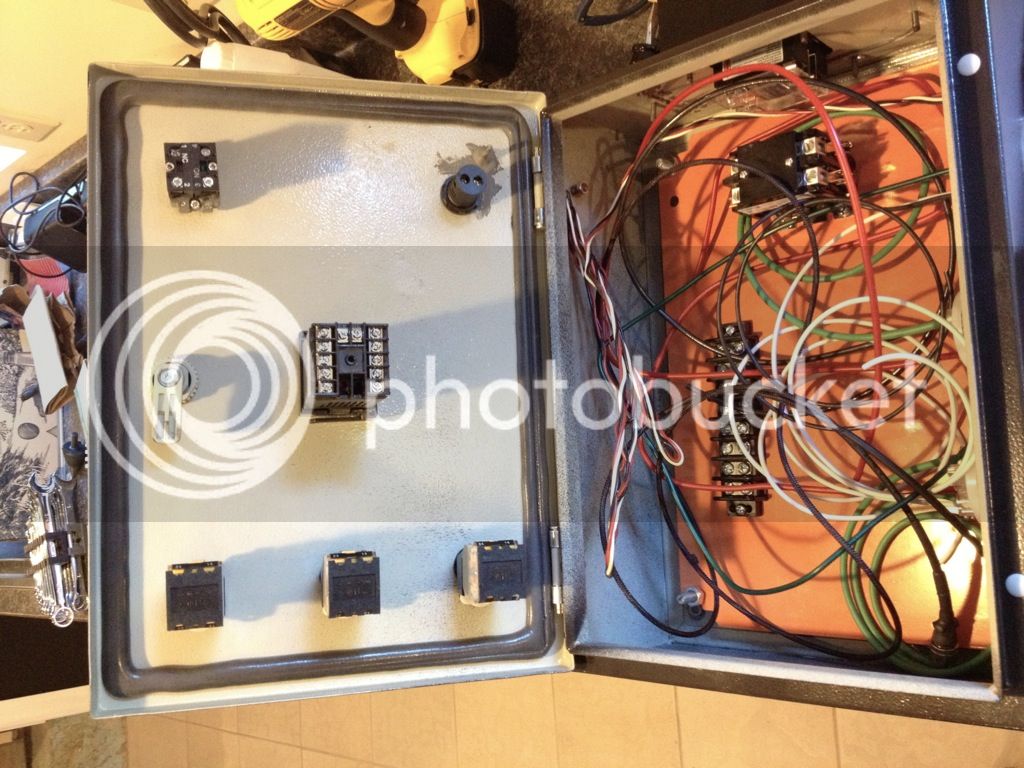
Finished Control Box wiring.
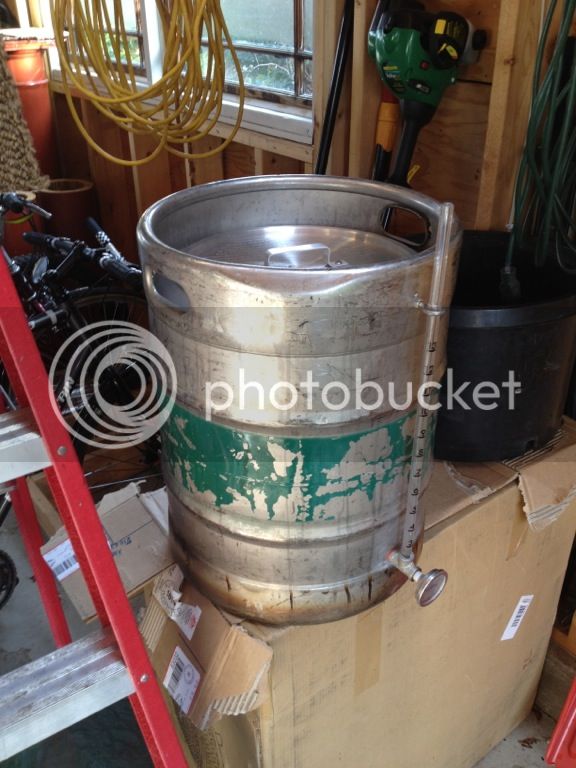
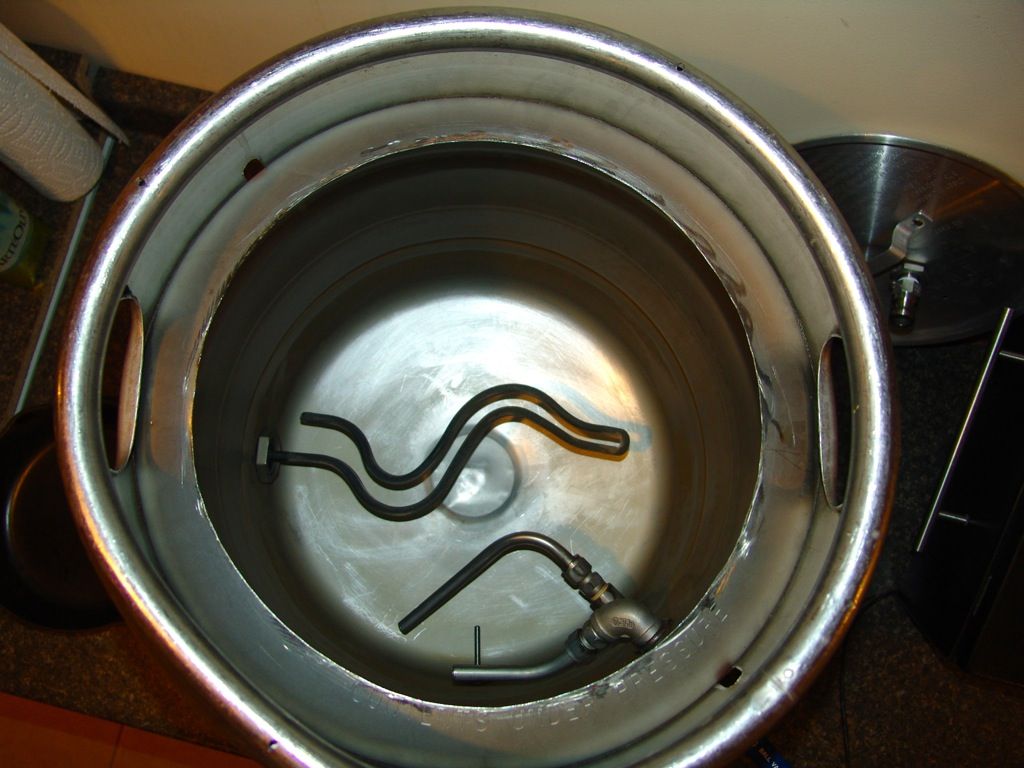
Finished keggle with element, side pickup, and whirlpool fitting.
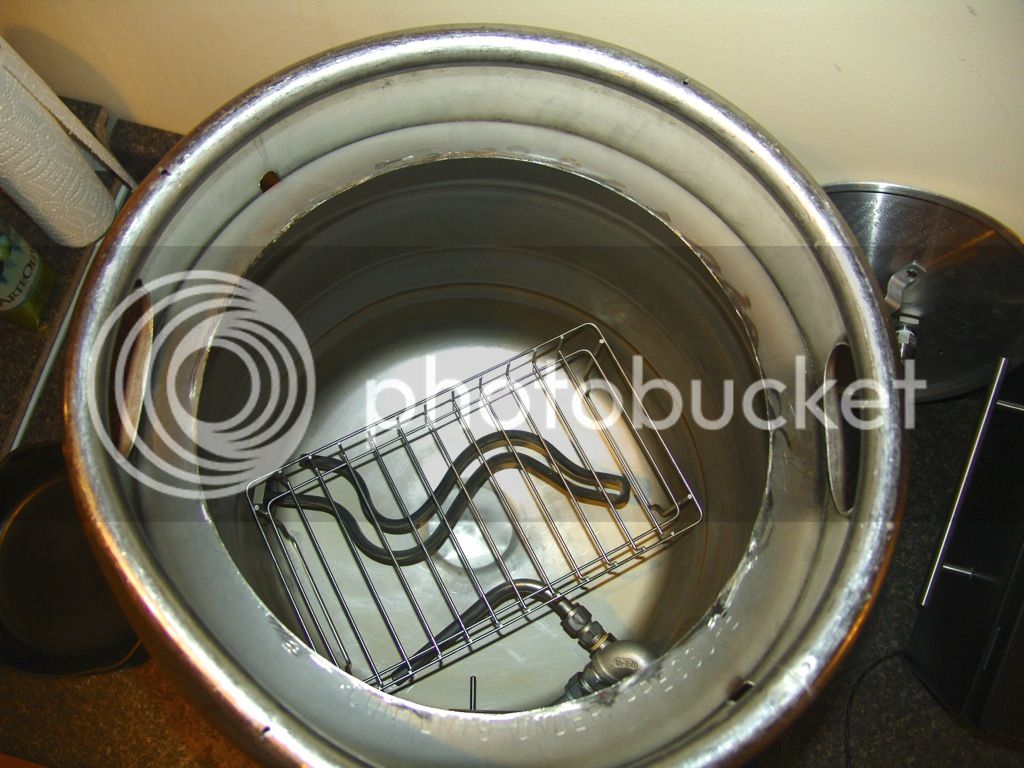
Scavenged a chromed rack that fits in the keggle and sits about an inch above the element. I use the rack during the mash to keep the bag off the element. Before I found the rack the bag would sit on the element and when Id try to heat the mash the whole bag would burp and jump and clog the dip tube. Using the rack solved all those problems and I can recirculate and heat without issue.
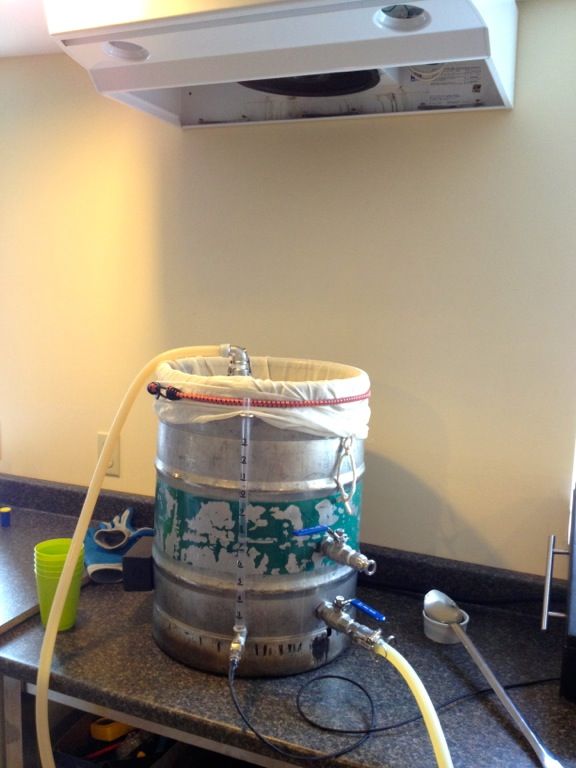
During a mash. You can see the element housing on the left and the two ball values. Temp probe goes into the bottom of the site glass. Recirculated wort trickles in from the top and out through the side pickup.
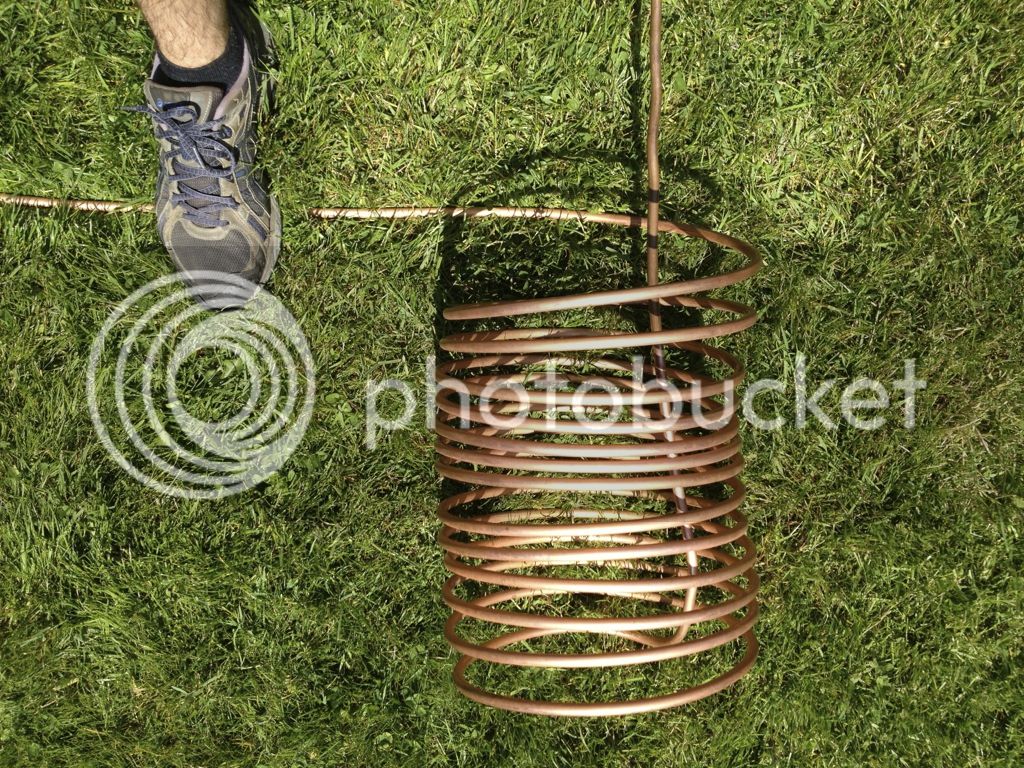
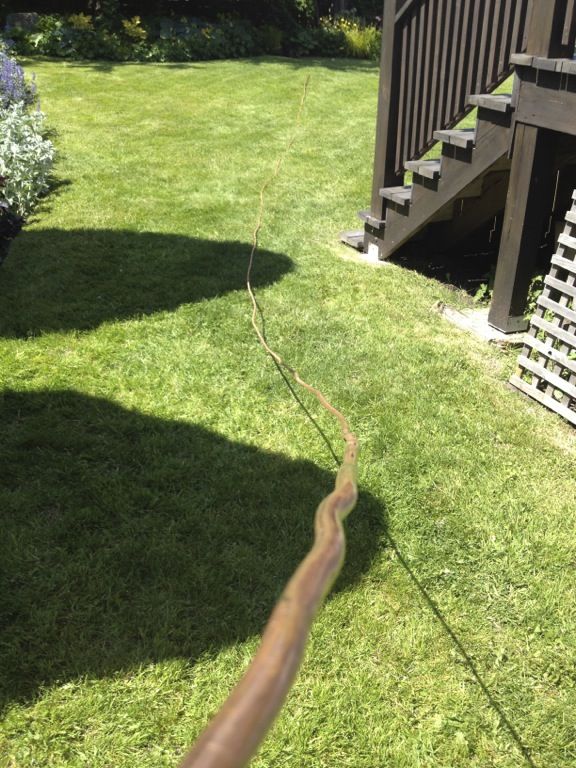
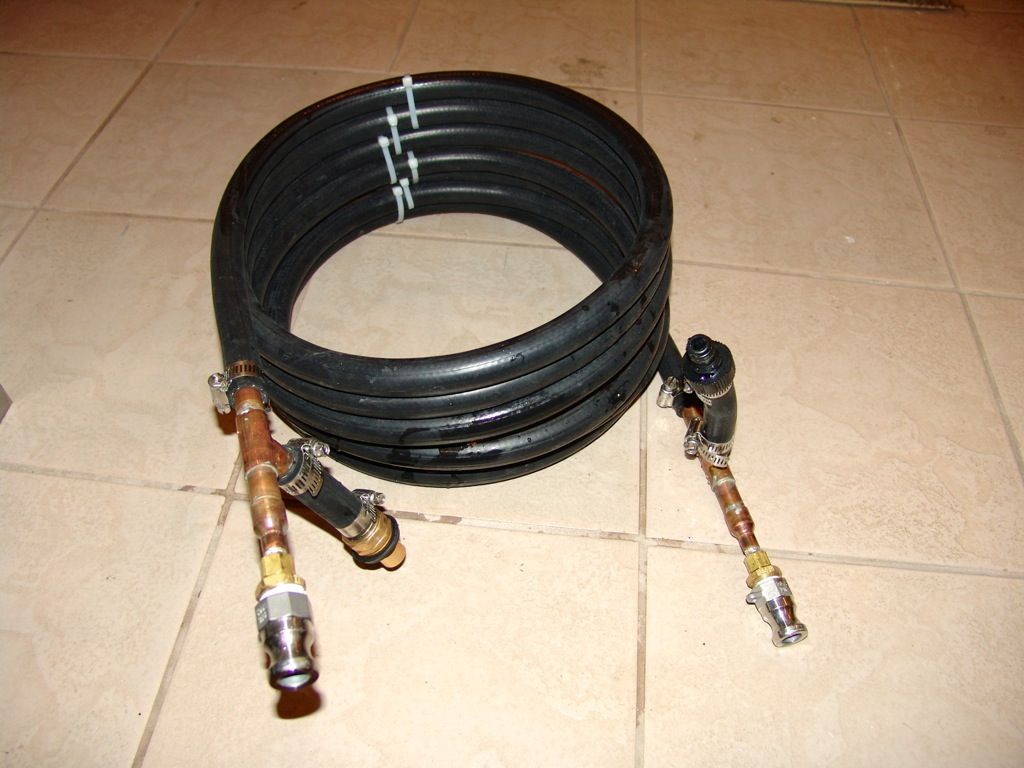
Cannibalized my immersion chiller and turned it into two 25ft counter flow chillers.

My setup is user friendly and easy to brew on. Ive had no second thoughts about the switch from propane to electric.
The biggest beer Ive made to date had a grist of 25lbs (11.3kg) with 8.5 gallons (31.2L) of strike water. Almost zero headroom in the pot during the mash.
Special thanks to HBT member PJ for the wiring diagram and to Kal for his awesome resource - www.theelectricberwery.com. I couldnt have built this without their knowledge sharing. I tried to buy things through Kals affiliate links on his website so he got a little in return for his online instruction manual. In the spirit of HBT I thought Id share my project.
PROS:
Ability to brew in my basement instead of outside or in my garage.
PID temperature control, I can set the strike temp and turn my back on it while I prep grain and it holds mash temps without external input.
No more dealing with propane tanks.
Fast heating w/5500w element on 6 gallon batches.
Pump allows for a recirculating mash that keeps the temperature in a narrow band. Also lets me whirlpool while chilling.
Quieter, the loudest thing is my exhaust fan.
CONS:
Initial cost
Lost the ability for a pulley system to hoist the grain bag. Now its manual and when I pull out the bag I get some spillage when the bag pushes against the edge of the keggle. Pretty minor irritant.
Wiring Diagram from PJ
I did one modification that isnt reflected in the drawing. I added an indicator light that turns on when theres energy in the box. The light is just wired from one of the hot lines with a return to neutral on the terminal block.
Bill of Materials
Buying the stuff over 12 months made it feel less expensive but it sure adds up. For those considering converting to electric keep an eye on your budget because things blow up fast. Until I totaled it all up I would have said it cost me about a thousand dollars for this build but obviously it cost a lot more. The CAD / USD have been around par for a while so that total is a good approximation in either currency.
Shipping direct to Canada is expensive and I got things shipped on quick notice when work would bring me to the lower 48.
The range hood was more expensive then the inline vortex fans but I dont plan on living in the house forever and the brewery space is actually designed for a stove/range. Ill leave behind the range hood and Ive got above stove cabinets ready to go. The previous owner pre-installed 240V so it was the logical place to locate my brewery. In addition to installing the range hood, I downgraded the circuit from 40 to 30 amps.
A little background on my system
After getting kicked off the kitchen stove and banished to the garage I bought a turkey fryer setup.
Then I sourced a used keg off craigslist and put it on the propane burner in the garage.
Build Process
Early on I decided to fortify the control box and I really liked the look of Kals system. My knowledge of electrical systems was dangerously novice. I could replace an electrical outlet and change a light fixture, but I knew nothing of the underlying principals and really had no understanding of what I was doing. For better or worse I decided to learn more on a DIY project that mixes 240v and lots of hot water. I put the controls in a NIMA 4 rated box and spent extra money on receptacles and cords. If anything it gives piece of mind.
The control box is 16 x 12 x 6 and its the right size for the components inside. Notice the weak illumination on two of the push buttons.
I went with components from Auber Instruments, including the push button switches. They work fine but are dimly illuminated when on. The blue one is fine but the other two are weak. If I did it again Id use the stand alone LED lights like the one on the top left hand corner of the control box. I put that one in to remind me the box is energized.
I followed Kals design for the control box and modified the setup to control a single electric element and pump.
I got my hands on a set of hole saws, a step bit, and hole punch for all the holes that needed cutting.
The heat sink ends up on this side.
Moved the ground on the door.
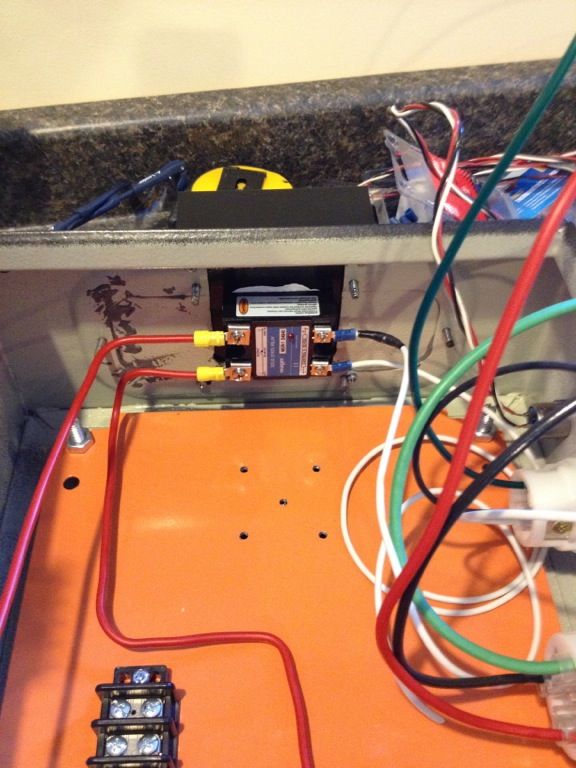
Extra grounding lug on kettle, just below the element housing.
Solder used for ground lug / stainless steel bond. Worked great the first time.
Tapping the screw holes for the receptacles.
Re-soldering the temp probe wire to the XLR jack. First time one wire came lose and I got the orAL 343 error code on the PID.
Start of the control box wiring.
Finished Control Box wiring.
Finished keggle with element, side pickup, and whirlpool fitting.
Scavenged a chromed rack that fits in the keggle and sits about an inch above the element. I use the rack during the mash to keep the bag off the element. Before I found the rack the bag would sit on the element and when Id try to heat the mash the whole bag would burp and jump and clog the dip tube. Using the rack solved all those problems and I can recirculate and heat without issue.
During a mash. You can see the element housing on the left and the two ball values. Temp probe goes into the bottom of the site glass. Recirculated wort trickles in from the top and out through the side pickup.
Cannibalized my immersion chiller and turned it into two 25ft counter flow chillers.
My setup is user friendly and easy to brew on. Ive had no second thoughts about the switch from propane to electric.

