bigljd
Well-Known Member
After tons of help and ideas from P-J, Ischiavo, Kal’s website, and all of the other builds shared on this site, my build is underway!
To start, here’s the diagram I’m using for the wiring. It started as a P-J diagram but I've significantly modified it to add in 2 contactors to control current to the elements. I also threw in a 240v LED to indicate when the control panel is live.
EDIT 11/26/11: IF YOU WANT TO SKIP TO THE BIG FINISH, CLICK HERE
EDIT 7/7/12: CLICK HERE TO SEE THE UPGRADES I MADE TO THE HLT AND CONTROL PANEL
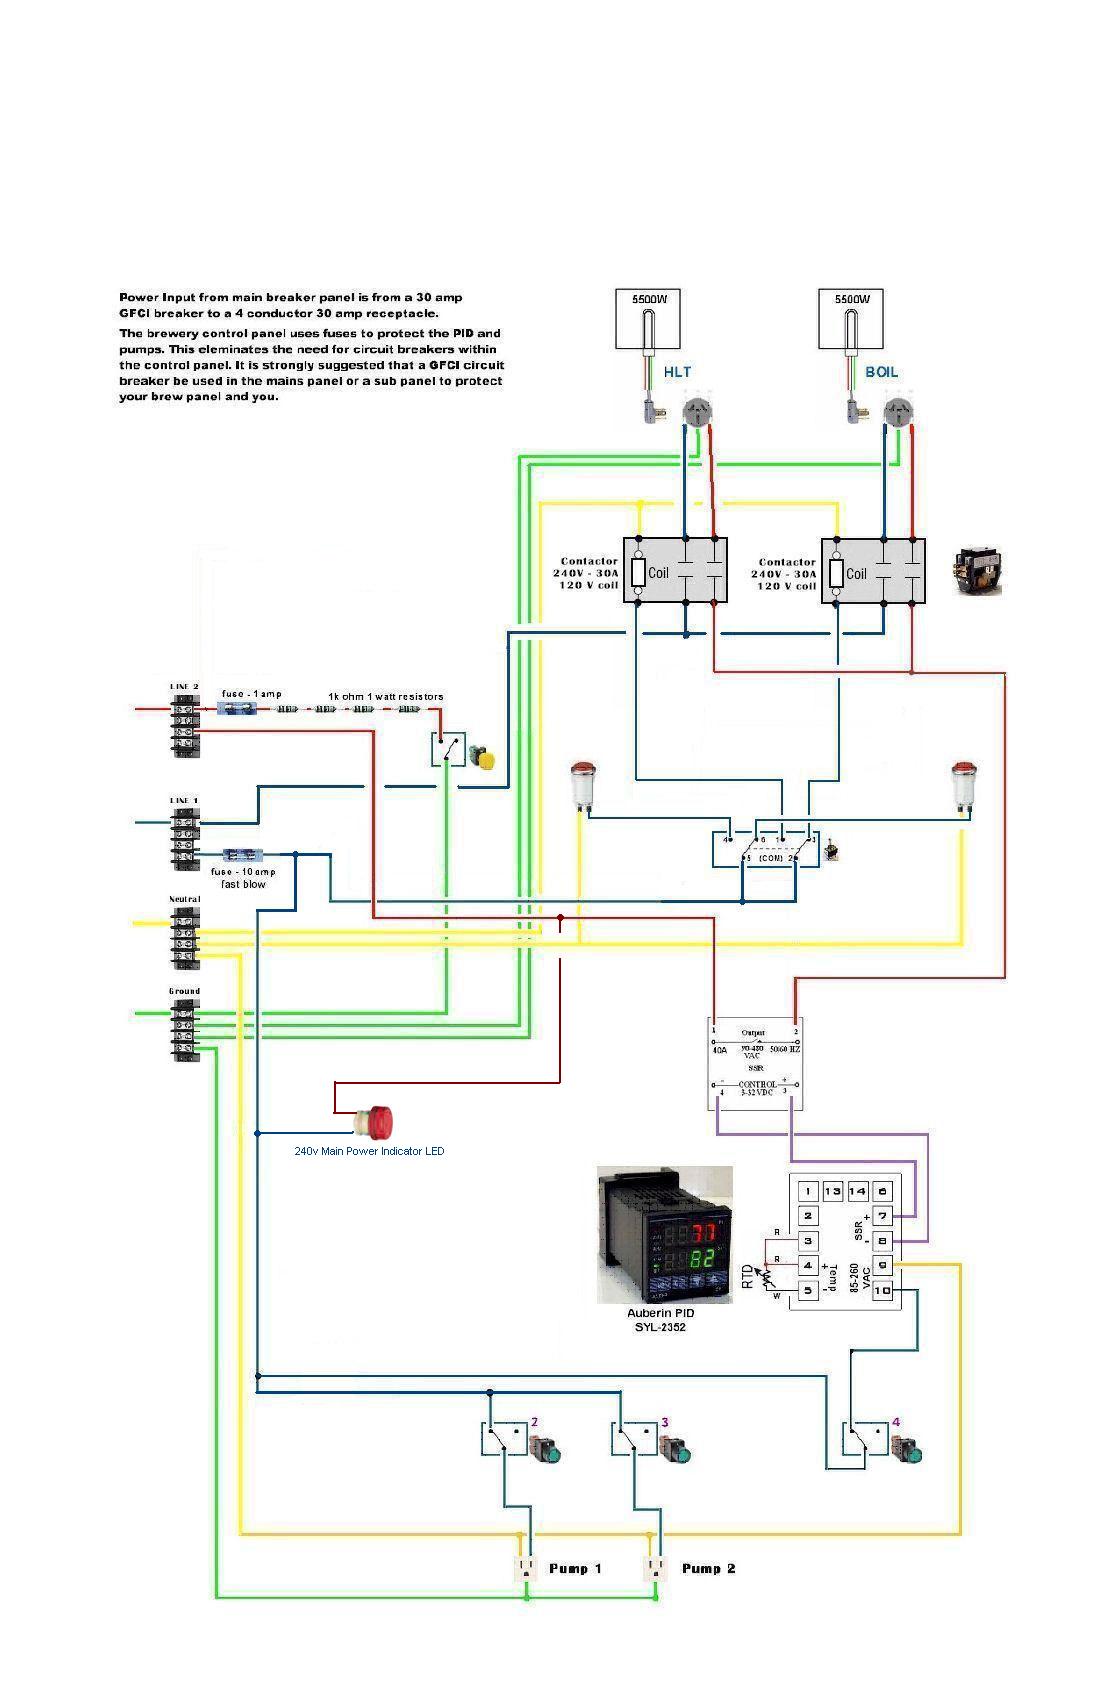
The 120v circuit in the diagram uses 14g wire and is protected by a 10 amp fuse. The element load uses 10g wire and is protected upstream from the control panel by a 30 amp 2 pole breaker in the home’s main breaker panel.
I’m going to use 80 ft of 10/3 with ground UF cable plugged into a 4 prong 30 amp receptacle mounted next to the home’s main breaker panel to run power out to a spa panel in the brew shed. The spa panel will provide GFCI protection to the e-brewery, and the e-brewery control panel will be hard wired into the spa panel with 10/3 with ground romex inside the shed.
You can read more here about wiring up the receptacle:
https://www.homebrewtalk.com/f170/how-connect-spa-panel-full-breaker-box-276680/
Here are some pictures of my build as it progresses:
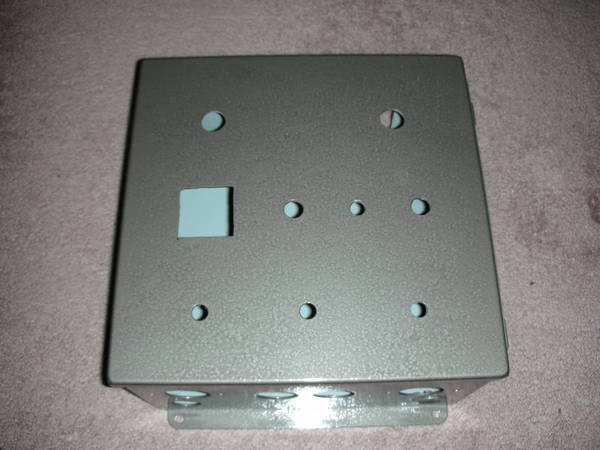
My used Hoffman 12x12x6 enclosure that I won in an Ebay auction for $26 plus $13 shipping:


I drilled/cut out the holes and painted it with some Rustoleum hammertone finish:
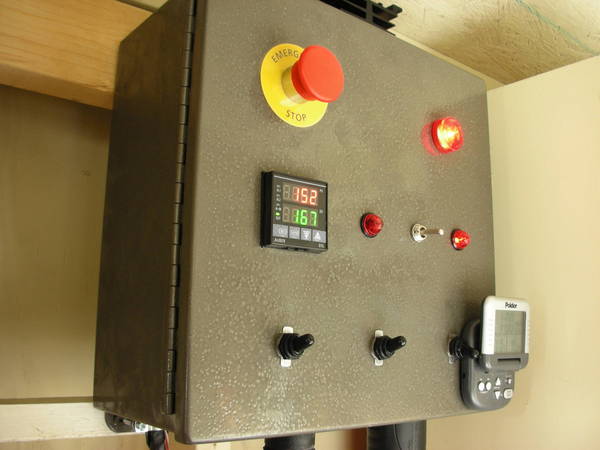
Here’s the control panel with the most of the components test fitted (later I did swap locations of the E-Stop and Main Power LED):

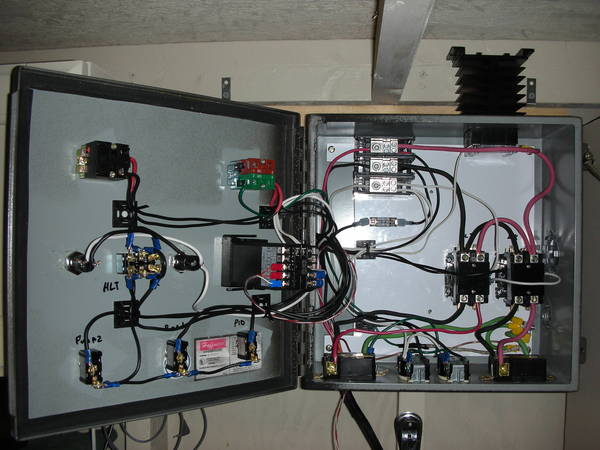
And here it is partially wired up. The SSR/Heat sink will go into the rectangular hole cut on the right hand side of the picture:

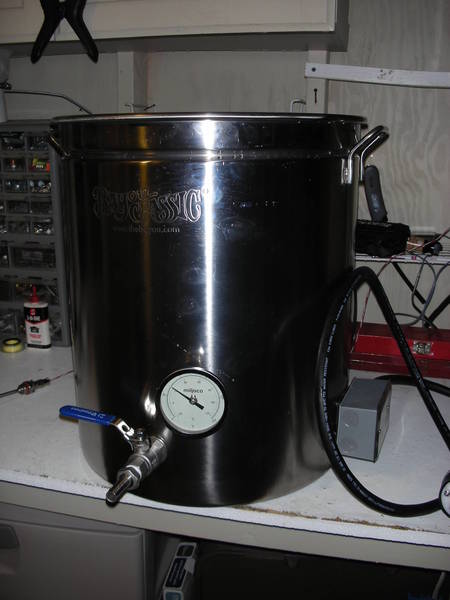
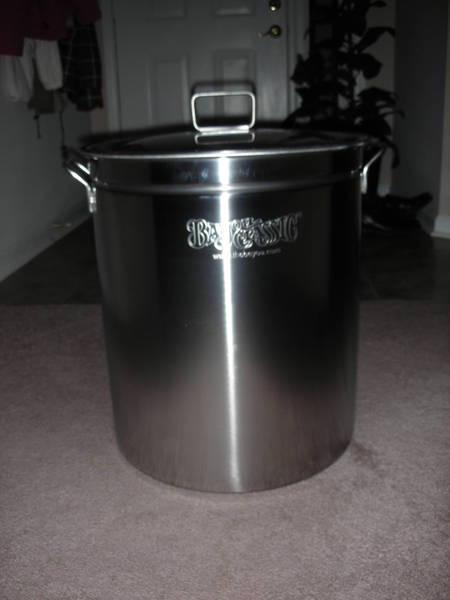
And here’s my shiny new 62 qt Bayou Classic kettle that will become my boil kettle. The keggle I’m using now will become my HLT.
Feedback on the wiring diagram and setup is encouraged. I hope to finish wiring it over the next couple days so I can start testing it and maybe do a test brew on it this weekend if I can get the elements drilled and wired up by then.
I’ll update this with new pictures as I make more progress.
Thanks,
Larry
To start, here’s the diagram I’m using for the wiring. It started as a P-J diagram but I've significantly modified it to add in 2 contactors to control current to the elements. I also threw in a 240v LED to indicate when the control panel is live.
EDIT 11/26/11: IF YOU WANT TO SKIP TO THE BIG FINISH, CLICK HERE
EDIT 7/7/12: CLICK HERE TO SEE THE UPGRADES I MADE TO THE HLT AND CONTROL PANEL
The 120v circuit in the diagram uses 14g wire and is protected by a 10 amp fuse. The element load uses 10g wire and is protected upstream from the control panel by a 30 amp 2 pole breaker in the home’s main breaker panel.
I’m going to use 80 ft of 10/3 with ground UF cable plugged into a 4 prong 30 amp receptacle mounted next to the home’s main breaker panel to run power out to a spa panel in the brew shed. The spa panel will provide GFCI protection to the e-brewery, and the e-brewery control panel will be hard wired into the spa panel with 10/3 with ground romex inside the shed.
You can read more here about wiring up the receptacle:
https://www.homebrewtalk.com/f170/how-connect-spa-panel-full-breaker-box-276680/
Here are some pictures of my build as it progresses:
My used Hoffman 12x12x6 enclosure that I won in an Ebay auction for $26 plus $13 shipping:
I drilled/cut out the holes and painted it with some Rustoleum hammertone finish:
Here’s the control panel with the most of the components test fitted (later I did swap locations of the E-Stop and Main Power LED):
And here it is partially wired up. The SSR/Heat sink will go into the rectangular hole cut on the right hand side of the picture:
And here’s my shiny new 62 qt Bayou Classic kettle that will become my boil kettle. The keggle I’m using now will become my HLT.
Feedback on the wiring diagram and setup is encouraged. I hope to finish wiring it over the next couple days so I can start testing it and maybe do a test brew on it this weekend if I can get the elements drilled and wired up by then.
I’ll update this with new pictures as I make more progress.
Thanks,
Larry
")