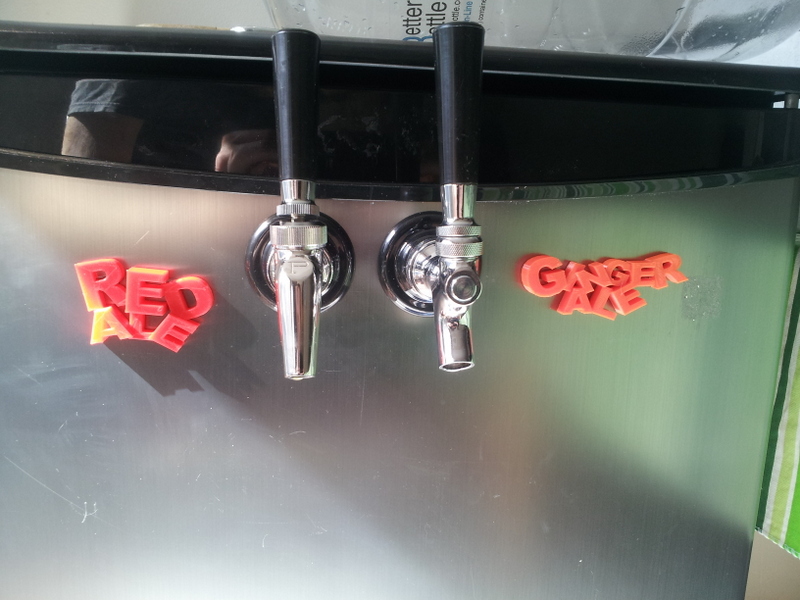
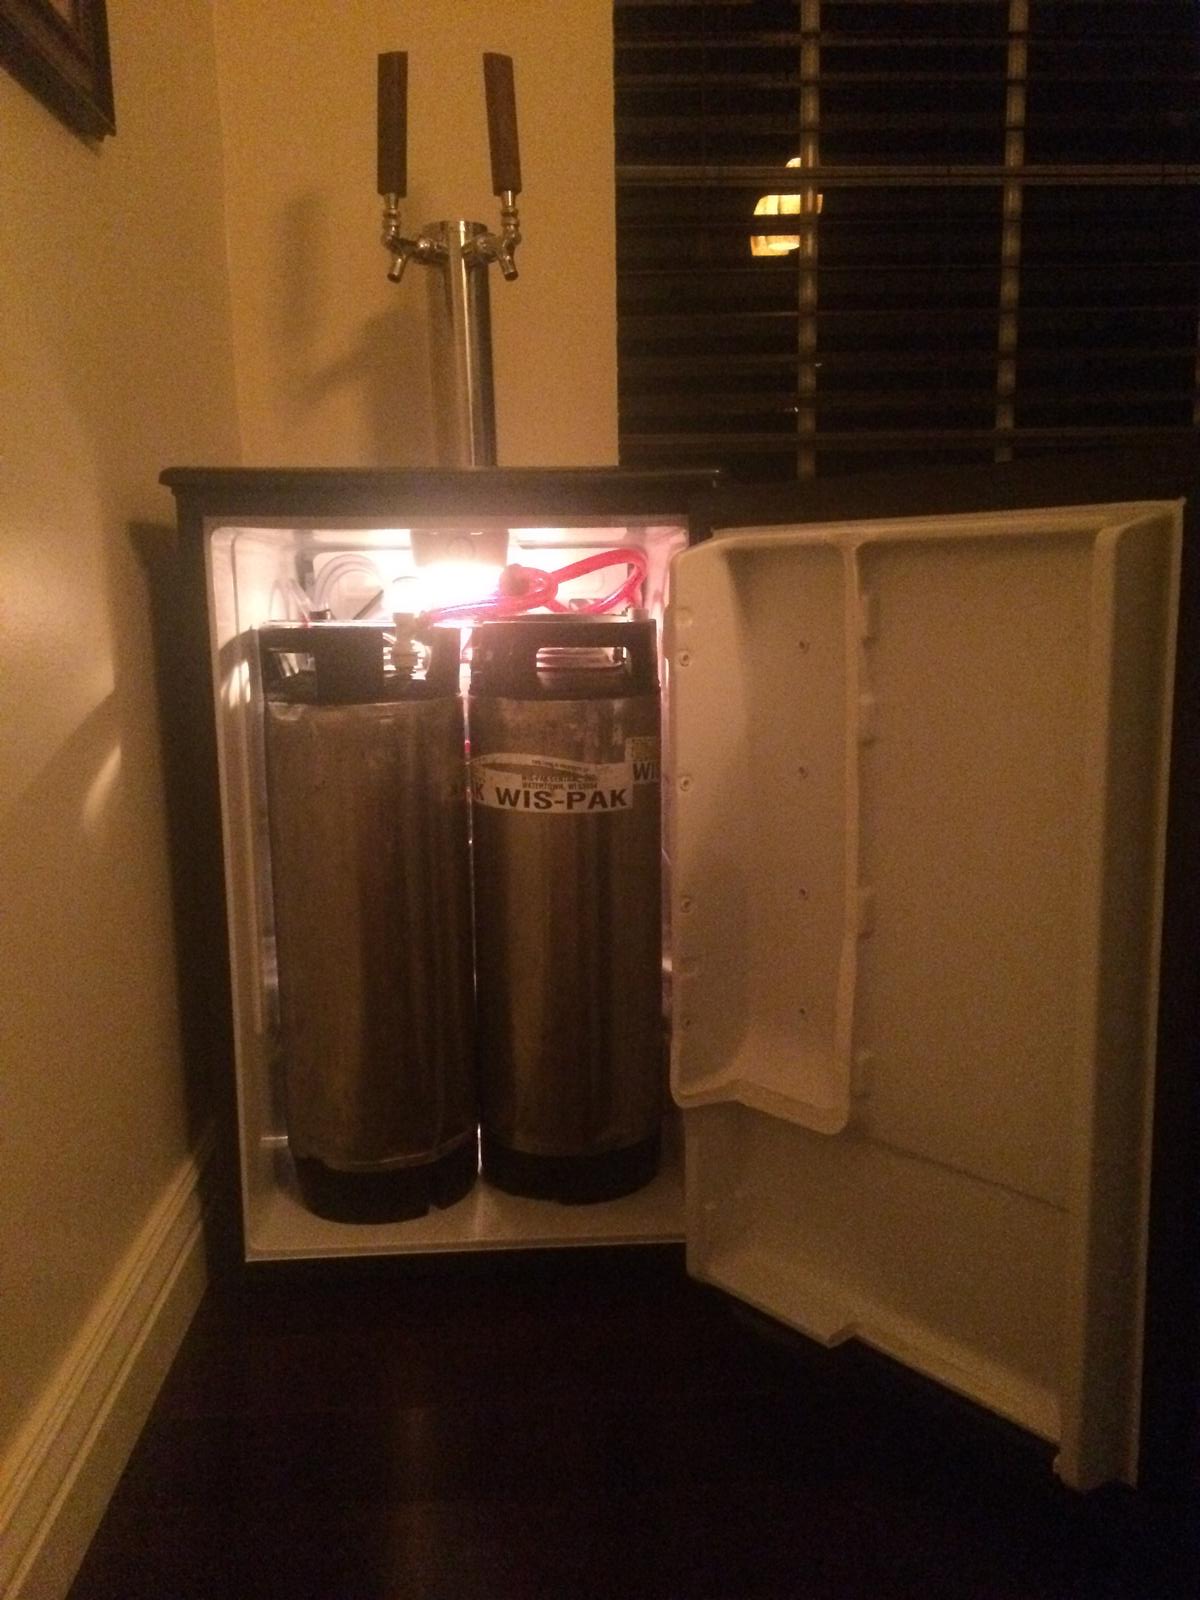
Danby DAR125SLDD Kegerator Build

Homebrew Talk - Beer, Wine, Mead, & Cider Brewing Discussion Forum

Help Support Homebrew Talk - Beer, Wine, Mead, & Cider Brewing Discussion Forum:

This site may earn a commission from merchant affiliate links, including eBay, Amazon, and others.
Looks great!

I didn't do anything special to cool my tower and haven't noticed that the beer comes out warm. I also drilled a bigger hole (2 1/4" I believe). It's also in my 59F basement so maybe that helps too. Guess we'll see in the summer.
 
I'm about to commence a build on a DAR125SLDD. Has anyone had success not cutting the full door panel? I'd like to push the right ball lock keg to the back save the can holders for chilling beer glasses. Anyone tried/is that viable?
 
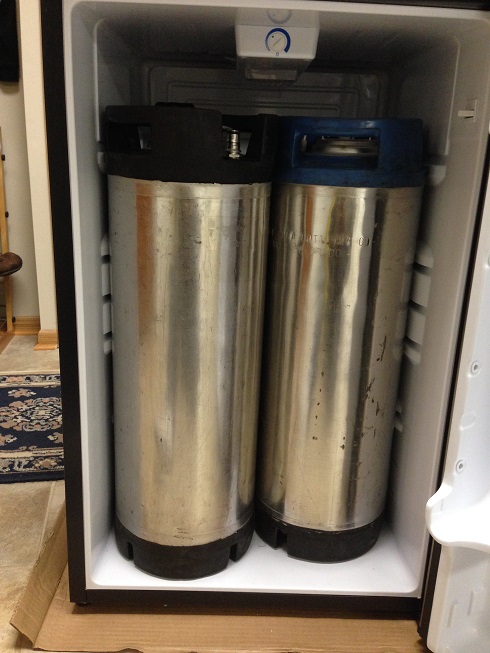
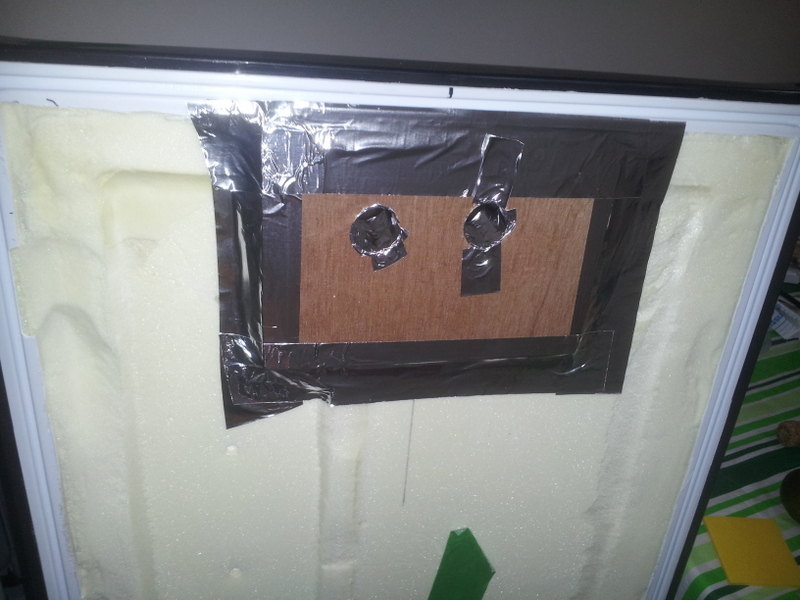
It's not possible if you want to get two kegs in there. If you look at the pictures from my build, I made the minimum number cuts needed to be able to shut the front door with two kegs. Furthermore, there really is not enough room between the front door and the kegs to have anything stored on the front door (e.g., beer glasses).

The only way I could see this happening is if you opted to only put 1 keg in the fridge on the left side. You should be able to shut the door then without making any modifications to the door.


Sent from my iPhone using Home Brew
 
Has anyone moved the thermostat (or full on removed it somehow)? The location makes getting my tank + dual product reg in place, it would be nice to somehow hook it up to an STC1000 if that was possible
 
For the people who have done this build - is a piece of wood or something 100% necessary on the top for added support for the tap tower? About to do this build and want to keep it as simple as possible. Was thinking about just using some oversized washers on the inside when mounting the tower instead...
 
For the people who have done this build - is a piece of wood or something 100% necessary on the top for added support for the tap tower? About to do this build and want to keep it as simple as possible. Was thinking about just using some oversized washers on the inside when mounting the tower instead...

I built mine without the wood and used large washers and my kegerator is great, no issues or anything.
 
For the people who have done this build - is a piece of wood or something 100% necessary on the top for added support for the tap tower? About to do this build and want to keep it as simple as possible. Was thinking about just using some oversized washers on the inside when mounting the tower instead...

I on the other hand did add a piece of wood to mine. I figured that if I was going to the trouble of drilling a hole through the top and installing a tower, I may as well add the wood for extra assurance. It's really not that much more work and was probably the simplest part of the build for me.

Taking the top off is easy. There are two screws in back and two in front. Once you do that, there is square cutout under the top that you can just glue a piece of plywood to. I just took the measurement of that square, bought a piece of plywood from Lowes, and had them cut it down to size for me there.
 
For the people who have done this build - is a piece of wood or something 100% necessary on the top for added support for the tap tower? About to do this build and want to keep it as simple as possible. Was thinking about just using some oversized washers on the inside when mounting the tower instead...

Adding the wood took 5 minutes so I did it, I believe it was worth the effort. Top + tower feel very solid
 
Has anybody moved / relocated the light to make more room to mount the tap tower? If so - how easy is it? It's kinda a tight fit. My tap tower has mounting holes that are 2.75" apart...
 
Has anybody moved / relocated the light to make more room to mount the tap tower? If so - how easy is it? It's kinda a tight fit. My tap tower has mounting holes that are 2.75" apart...


My tower mounting holes are about the same. Roughly 3" apart from front to back. There was enough space for the mounting holes without having to mess with the light. I had no trouble drilling the holes or mounting the tower. He's a pic of the inside, you can see there is enough space between the light and screws. Sorry for the funky angle but it was hard to get a good pic with the kegs in the way.
ImageUploadedByHome Brew1400335526.787049.jpg


Sent from my iPhone using Home Brew
 
How much space is between the light and the backplate? I feel like maybe they changed the fridge design slightly as its barely over 3 inches of space on mine...
 
5 inches between the light and backplate in mine. See post #120 for a sketch of the measurements I took for mine.


Sent from my iPhone using Home Brew
 
Danby must have slightly redesigned this fridge then. I only have 3.25 inches between the light and the backplate. If the backplate wasn't curved at the top, I would have lots more room. Suggestions?
 
Is there enough room to build a shelf level to the back part, to hold a fermentor or carboy?


Sent from my iPhone using Home Brew
 
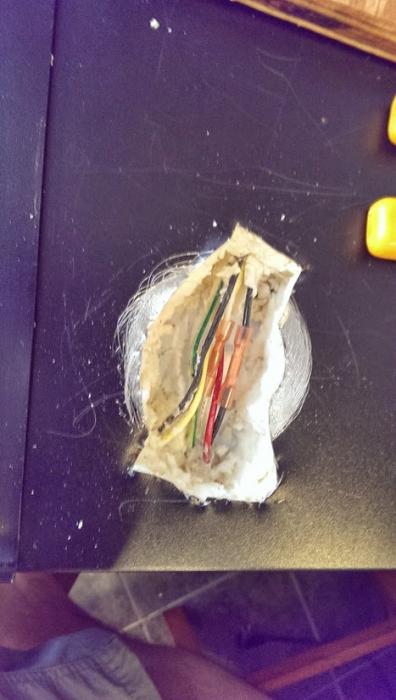
Fyi. I learned the hard way that the wires run from the center where the thermostat and light assembly are directly to the right and then back. I was attaching a wooden top I made to the Danby and screwed directly through the wires. Had to repair EVERY wire i there and make a big ass hole. But all is well now.

If anyone is interested in pictures I'll upload some.


Sent from my iPad using Home Brew

Definitely upload some pics. I think it would be useful for others looking to do this build to know exactly where the wires are. Glad you were able to fix them.
 
Here are the pictures. I had to embiggen the hole in order to get in there to patch the wiring. Initially the hole was to verify that I fried the wiring there. I noticed there was some discoloration on the screw when I pulled it out, so I assumed that there was electrical arcing there. You can kind of see they're travelling from the middle to where the light switch is located.
I realized that I fried the wiring when every time I plugged it in I would blow a breaker even when it was set to off. So I knew it wasn't the compressor that fried and I messed something else up. Hope this helps someone.

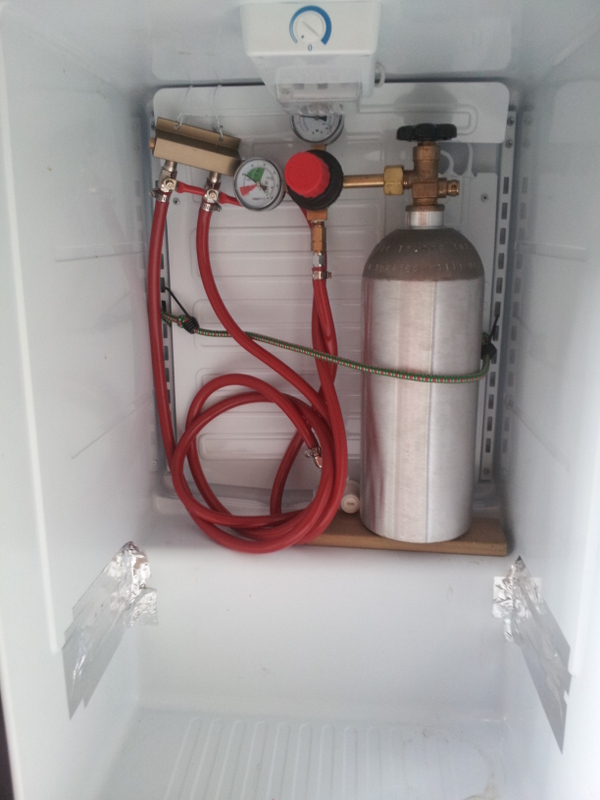
The other picture is the finished product. I used velcro to hold in the CO2 tank, unscrewed the bottom screws on the cooling panel and slipped it underneath. So it's just a loop of velcro. And some more velcro to help organize the hoses.

The top is a piece of plywood with an oak veneer glued on top. I also routed out a depression to fit the drip tray.

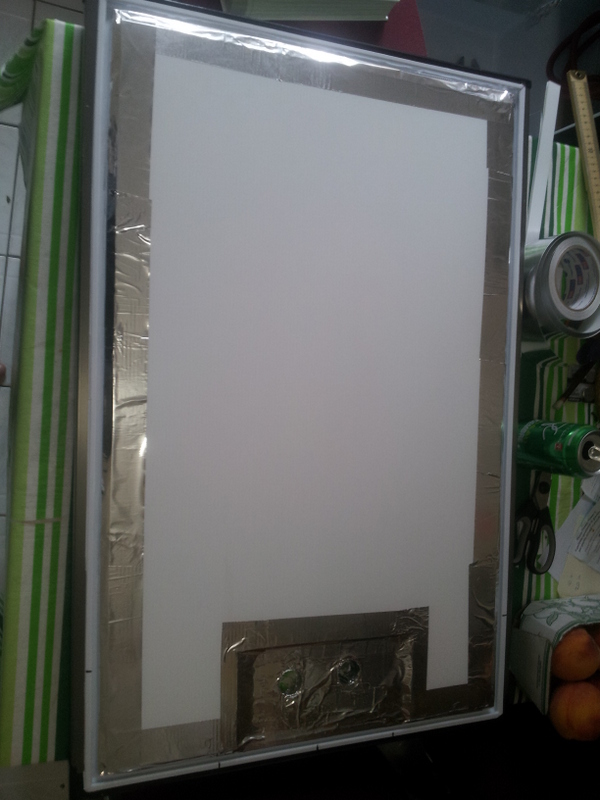
Inside of door is whiteboard cut to fit and then liquid nailed to the door.

Aside from the electrical mishap, I cut the top based on measurements without the door bracket on there and consequently it's too short.

A variation of a Leffe recipe I found is presently carbonating though. :fro:
(edit to show a close up of the wiring - hit every one of them bastards!)

Finished.jpg


Wiring.jpg


patching.jpg
 
I am looking into getting this fridge.

I basically have two 5 gallon ball lock kegs that are roughly 9" in diameter (the rubber adds width to the 8.5" keg). For those of you that have this fridge, can anyone confirm if you can fit two 9" diameter kegs in here?

Also, I was hoping someone could get me the exact internal dimensions of this fridge, including the hump? That would be great. Thanks!
 
i am looking into getting this fridge.

I basically have two 5 gallon ball lock kegs that are roughly 9" in diameter (the rubber adds width to the 8.5" keg). For those of you that have this fridge, can anyone confirm if you can fit two 9" diameter kegs in here?

Also, i was hoping someone could get me the exact internal dimensions of this fridge, including the hump? That would be great. Thanks!

image.jpg
 
I am looking into getting this fridge.

I basically have two 5 gallon ball lock kegs that are roughly 9" in diameter (the rubber adds width to the 8.5" keg). For those of you that have this fridge, can anyone confirm if you can fit two 9" diameter kegs in here?

Also, I was hoping someone could get me the exact internal dimensions of this fridge, including the hump? That would be great. Thanks!

I think it depends on how the shelves are mounted inside. In older models, the shelves mount in the back whereas in newer models the shelve mounts are built-in the side of fridge. I have a newer model and you can see the built-in shelf mounts on the sides of my fridge. My kegs are 8.25-8.5" in diameter and they barely fit due to the side shelf mounts. 9" kegs would not fit in mine without cutting out the shelf mounts first.

iPhone-2014.02.05-21.37.21.357.jpg
 
I think it depends on how the shelves are mounted inside. In older models, the shelves mount in the back whereas in newer models the shelve mounts are built-in the side of fridge. I have a newer model and you can see the built-in shelf mounts on the sides of my fridge. My kegs are 8.25-8.5" in diameter and they barely fit due to the side shelf mounts. 9" kegs would not fit in mine without cutting out the shelf mounts first.

Oh wow, that's a good point. I didn't notice that. Shoot....

Basically the circumference of the metal part of the keg is 27", which yields about an 8.6" diameter. The rubber part is 28" circumference, which yields about an 8.91" diameter. Setting the kegs side by side is give or take 17 7/8". I think if the side mounts weren't there it would work according to the size diagram on the first page of this thread.

Quite the predicament given that it comes down to a fraction of an inch.

The side mounts can be removed, it's just more work b/c you will have to cut them out and then seal the cuts to protect in insulation. I've seen other builds on here where people have done that. I did not go that route because mine fit (just barely). I literal have to squeeze the left keg in about 1" to get the door to shut.
 
The side mounts can be removed, it's just more work b/c you will have to cut them out and then seal the cuts to protect in insulation. I've seen other builds on here where people have done that. I did not go that route because mine fit (just barely). I literal have to squeeze the left keg in about 1" to get the door to shut.

For the initial use I just plan to use my picnic taps with the kegs until I go with the draft tower. So, I was just hoping to find something I could just throw the kegs in with as little modification as possible. It's too bad that they made the switch!
 
The side mounts can be removed, it's just more work b/c you will have to cut them out and then seal the cuts to protect in insulation. I've seen other builds on here where people have done that. I did not go that route because mine fit (just barely). I literal have to squeeze the left keg in about 1" to get the door to shut.

Hmm, I've been looking at some pictures of the Danby fridge models online and are you sure that one you were referring to is actually a DAR125SLDD and not a DAR044A2SLDD?

The DAR044A2SLDD model mounts on the side and all the pictures of the DAR125SLDD seem to still show mounting in the back.
 
Hmm, I've been looking at some pictures of the Danby fridge models online and are you sure that one you were referring to is actually a DAR125SLDD and not a DAR044A2SLDD?

The DAR044A2SLDD model mounts on the side and all the pictures of the DAR125SLDD seem to still show mounting in the back.


You're right. I went back and checked my model and it's actually the DAR044A2SLDD. Sorry, my bad.


Sent from my iPad using Home Brew
 
I just finished a front tap Conversion. Since there were folks asking about the amount of space at the top, here are some photos to shot what mine looks like:

1-2014-08-03 19.03.21.jpg


2-2014-08-07 20.45.19.jpg


3-2014-08-07 20.45.27.jpg


4-2014-08-23 13.57.45.jpg


5-2014-08-23 14.49.13.jpg


6-2014-08-24 15.50.58.jpg


7-2014-08-24 15.51.09.jpg


8-2014-08-24 16.01.04.jpg
 
I want to thank everyone who contributed to this thread. I used the information to build my Danby dar125sldd kegerator. The entire process only took a few hours of combined time and was fairly easy as a result of all the great tips and explanations. A specific thanks to BansheeRider for showing how to cut the door in specific places in order to avoid having to rebuild the entire door and to Squash1978 for posting measurements (which were perfectly accurate). The measurements saved me at least a couple hours of measuring and provided confidence that I was not going to drill into some refrigeration line or electric component. Now if I could only figure out a way to get that silly energy star decal removed in an easy way.

image.jpg
 
I built this kegerator about a month ago and love having my homebrew on tap!

Just wondering, has anyone had problems with a relatively loud bump/popping noise coming from the fridge? It's kind of hard to describe but almost sounds like a sheet of metal wobbling or something. It happens every half hour or so but doesn't seem to correlate to the compressor turning on/off.
 
I want to thank everyone who contributed to this thread. I used the information to build my Danby dar125sldd kegerator. The entire process only took a few hours of combined time and was fairly easy as a result of all the great tips and explanations. A specific thanks to BansheeRider for showing how to cut the door in specific places in order to avoid having to rebuild the entire door and to Squash1978 for posting measurements (which were perfectly accurate). The measurements saved me at least a couple hours of measuring and provided confidence that I was not going to drill into some refrigeration line or electric component. Now if I could only figure out a way to get that silly energy star decal removed in an easy way.

Looks great!!
 
I built this kegerator about a month ago and love having my homebrew on tap!

Just wondering, has anyone had problems with a relatively loud bump/popping noise coming from the fridge? It's kind of hard to describe but almost sounds like a sheet of metal wobbling or something. It happens every half hour or so but doesn't seem to correlate to the compressor turning on/off.

I have not noticed a sound like the one you described. I have noticed however that the refrigerator is a bit loud in general and when running, it sounds like there is liquid bubbling in the lines. I originally thought this was a problem, but I spoke with Danby directly and they said it was normal operation. I check two other Danby units and they sounded the same, which kinda sucks.

I would suggest calling Danby and asking them. They were very helpful and polite when I spoke with them. I will keep an ear out to see if mine makes the same noise.

It's VERY noticeable and actually pretty loud. I'll try giving Danby a call.
 
4. Drill holes to mount your tower. I used large fender washers coupled with regular washers on my mounting hardware. The screws in the kit I ordered were to short so I bought some longer ones at Home Depot.

Did a similar build myself on a Danby. For mounting the tower I didn't bring the mounting screws through the interior wall of the fridge. The threads bit into the metal of the fridge. Shortened the mounting screws with a Dremmel. The tower is rock solid.

Great post thanks for sharing it. Love the pictures.
 
Back
Top