How do you seal a Beer Keg for fermenting after cutting top off

Homebrew Talk - Beer, Wine, Mead, & Cider Brewing Discussion Forum

Help Support Homebrew Talk - Beer, Wine, Mead, & Cider Brewing Discussion Forum:

This site may earn a commission from merchant affiliate links, including eBay, Amazon, and others.

Roadhogdave

Member
Joined
Mar 31, 2012
Messages
6
Reaction score
0
Location
Upland
I am trying to convert an old vintage Beer keg for fermenting and I know it is important to seal a lid on it after cutting of the top so no air can get in while fermenting and then install an air log on it. Any suggestions on how to do this.
 
TXCurtis said:
I use uncut kegs for fermenting....

This.

And then a brewers hardware snake fermenter kit or carboy cap stretched over the keg top. You've got to remove the spear first, there are posts that show you how to do this.

I would use your cut keg for something else. Put in a weld less bulkhead, and turn it into a mash tun, brew kettle, or hot liquor tank.
 
I haven't cut it yet, But it just seems like it would be very hard to sanitize it if you don't cut a lid in it. ALl I read is make sure you can clean it out good. Maybe a glass Carboy is the answer but I wanted something better.
 
Roadhogdave said:
I haven't cut it yet, But it just seems like it would be very hard to sanitize it if you don't cut a lid in it. ALl I read is make sure you can clean it out good. Maybe a glass Carboy is the answer but I wanted something better.

They are more difficult to clean, but not impossible. I used to soak mine in hot PBw, and leave it overnight, then brush it out, rinse it. If you have an automatic keg washer, you could just use that. You will need to have a flashlight and dental mirror (or similar) to inspect your cleaning job. I have now switched to a stout conical, and find it so much simpler to clean and keg from, but the brewers hardware kit did work well.
 
DO you have a site glass on it? Otherwise how do you know where the sentiment is when you are ready to bottle or keg it / pump it out? Does the site glass even show the sentiment level? What level do you put the drain at to do this. I will be doing 5 and 10 gallon batches. This is why I want to got to a 15.5 keg from a 5 gallon carboy. Really Appreciate your inputs here.
 
I have also thought of welding and adding some 3 or 4 metal clasps on it with a rubber seal on the lid and keg that I cut off, Not really that hard to do I don't think.
 
What's a cornie top? Make end up giving up on this and using something else. Don't want the bacteria possibilities or spoiled batches. That's why i thought of asking here before doing it. I thought this was done all the time, maybe I am mistaken and they are used for brewing mostly
 
Roadhogdave said:
What's a cornie top? Make end up giving up on this and using something else. Don't want the bacteria possibilities or spoiled batches. That's why i thought of asking here before doing it. I thought this was done all the time, maybe I am mistaken and they are used for brewing mostly

I have used one many times, no infections. The brewers hardware sanke fermenter kit is a great product. they are sort of a pain to clean. One of my friends has welded a 4 inch triclover on a few kegs, and uses these, they are easier to clean. If going that far, though, why not just buy a conical?
 
Roadhogdave said:
DO you have a site glass on it? Otherwise how do you know where the sentiment is when you are ready to bottle or keg it / pump it out? Does the site glass even show the sentiment level? What level do you put the drain at to do this. I will be doing 5 and 10 gallon batches. This is why I want to got to a 15.5 keg from a 5 gallon carboy. Really Appreciate your inputs here.

You just lower your racking cane until you start to see sediment, then pull it back a tad. Easy to do with the brewerY's hardware kit
 
Sabco made a Sanke with a cornie top welded onto it for a while. It's intended purpose was as a yeast brink. But I and others I know of use them as fermenters. If you can make or get a hold of one, I highly recommend it.

image-1085928212.jpg
 
I have been fermenting in un-modified Sankes for a while, and cleaning them is not really that difficult. I do two things to help prevent infections:

1) I use PBW and fill the keg 2/3 full with water. I then place it on my burner and heat it to ~120F. I then use a carboy brush and scrub it blindly. Then I put a tri-clover cap and clamp on it and roll it around. Finally I pour out all but a gallon or so and put the tri-clover cap & clamp back on and shake it. I let it drain/dry upside down while I brew.

2) After my boil I run the boiling wort directly into the Sankey fermenter (NO COOLING). I place a sanitized tri-clover cap and clamp on it and seal it. I then drop the entire keg into a barrel of water and cool the wort by cooling the outside of the Sanke. I frequently let the wort cool overnight and pitch my yeast the next morning. Regardless, when the wort reaches pitching temp, I spray everything down with Starsan, remove the cap, aerate the wort, pitch the yeast and install a tri-clover cap with a 3/8 tube welded in it (and a bubbler attached to it).

OK, Here is the picture version:

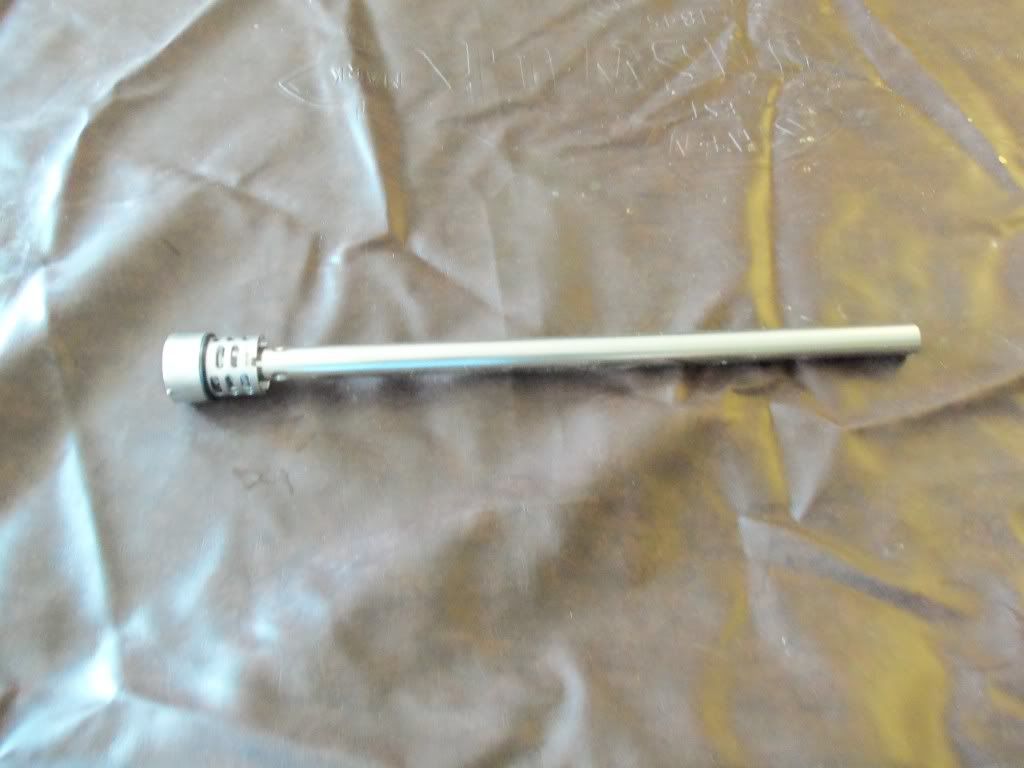
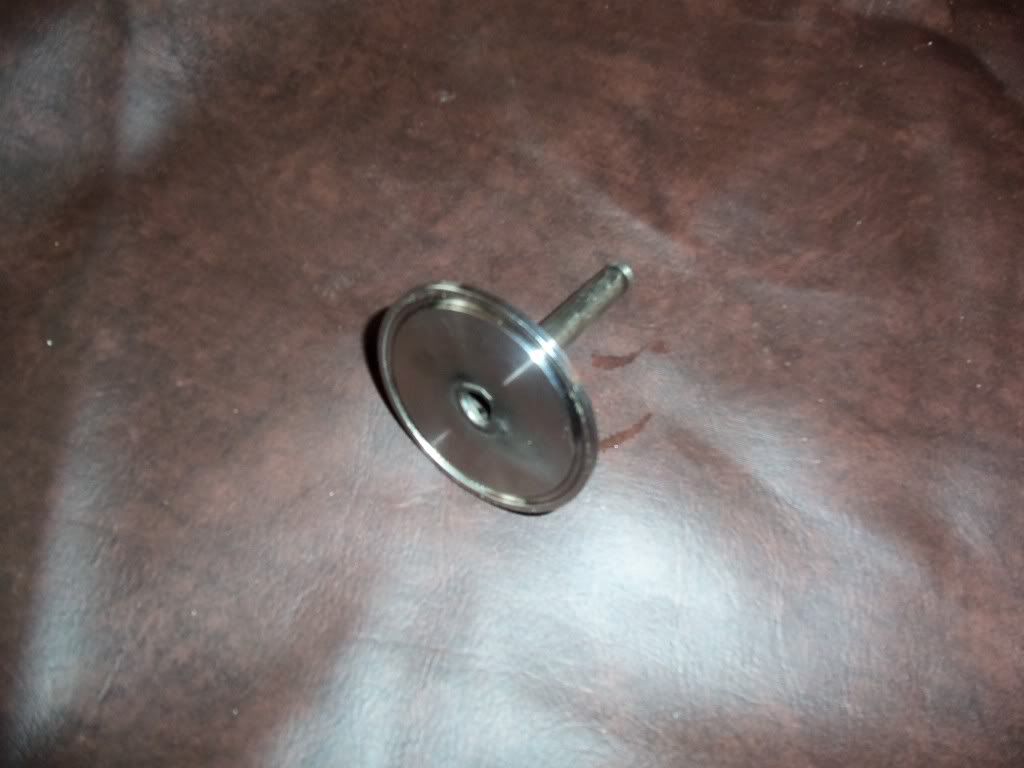
FIRST, Remove this from the Sanke you want to ferment in:

SankeSpear.jpg


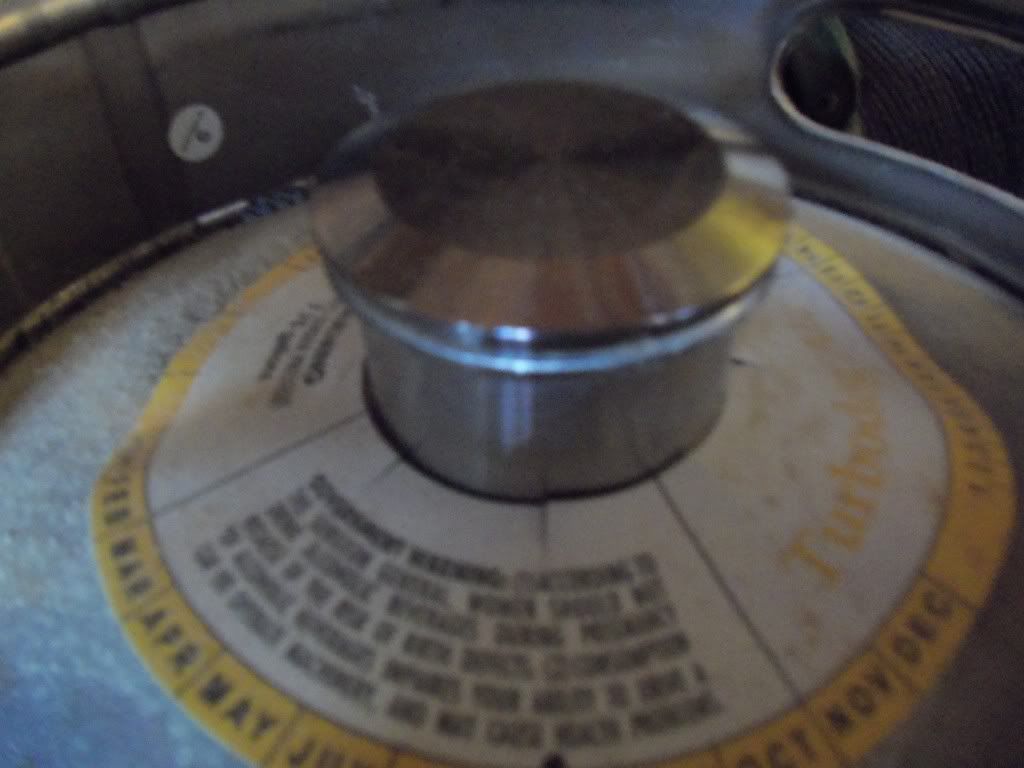
Second Clean & Sanitize the Sanke (NO PICTURE) then rack your BOILING wort into the Sanke and put a cap like this on it:

Tri-CloverCap.jpg


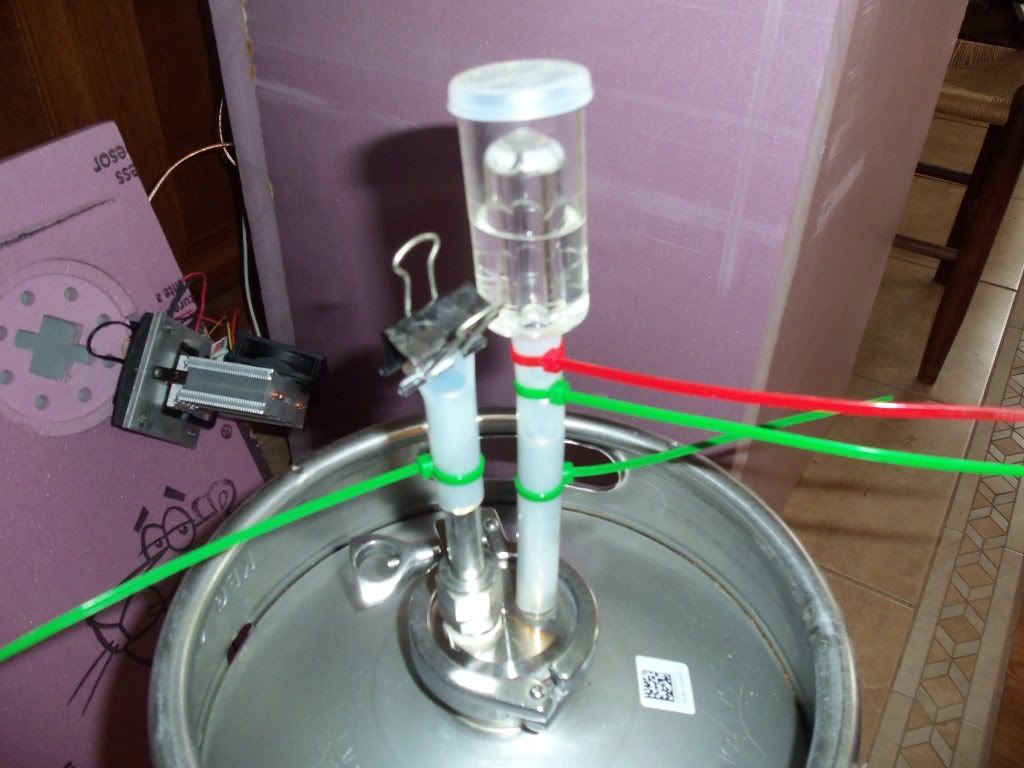
THIRD: Cool the wort to pitching temp (NO PICTURE), Aerate it (NO PICTURE) and then place a bubbler cap like this on it:

Tri-CloverFermentingCap.jpg


It should now look like this:

Tri-CloverCapwithbubbler.jpg


FINALLY, when it is time to rack, you should sanitize a tri-clover fitting with an inlet tube and a racking cane and replace the bubbler cap with it. When installed it should look like this:

Tri-CloverCapwithBubblerandRackingCane.jpg


You should rack it into a Sanke Keg that has been cleaned and sanitized in a similar fashion to the way you cleaned and sanitized your fermenter Sanke, except this time you replace the spear. I rack to the Sanke then replace the spear, but it would not be any more difficult to assemble the Sanke and then rack to it (obviously you would need to remove the check valve from the keg coupler).

Hope that helps :)

Fish

Edit:
I just read another thread on "cold break", and it seems cooling the wort quickly is more important than I had given consideration to. With my "water bucket" it takes around 30+ minutes to get the wort ~80F in a 6 gallon batch (my 12 gallon batch I brewed yesterday took almost an hour), I am going to have to revisit wort chilling, but the rest of the Sanke fermenting process should be the same. An immediate idea would be to put the boiling wort into the Sanke fermenter and then use a racking cap & re-circulate the wort through a chillier in a closed loop, but I will have to think this through....
 
I boil a couple gallons of water in my unmodified keg after cleaning with hot PBW. I cover the bung with foil during the boil and until I'm ready to rack the chilled beer to the keg. I don't know of any nasties that'd survive a boil...
 
Cut a 9 1/4 inch hole in the keg and put one of these sealed lids on it. Stuff from Lowe's except for the gasket. MSC Supply for that, or make it yourself.

IMG_0530.jpg


Components.jpg
 
Unmodified sanke fermenter here.
After racking our of the fermenter, I wash out the trub with a hose, and some hard shaking.
Then, I put it on a sump-pump powered keg washer (hundreds of posts here on HBT that show how to make one of these) with some oxyclean.
Rinse out that oxyclean, and maybe throw some star-san in there, if I have some left over from a previous brew-day.

Next brewday, I boil a gallon of water in the fermenter for 10 minutes after steam starts to come out the top, (with the brewers hardware attachment on).

Been doing it this way for a year now, haven't had an infection yet.
 
Cut a 9 1/4 inch hole in the keg and put one of these sealed lids on it. Stuff from Lowe's except for the gasket. MSC Supply for that, or make it yourself.

What thickness is the lid? Did you purchase that at Lowes? I'm in Lowes weekly and have never seen acrylic that thick.
 
It's a quarter inch thick. As far as I know, Lowe's and HD still carry the stuff. When I make my next lids, I'm going with polycarbonate. Never tried it but it sounds like good material.

http://freckleface.com/shopsite_sc/store/html/polycarbonatesheetonequarterinchthick.html

A buddy at work just made one, cutting it out with some kind of an electric saw. Doesn't have to be pretty, but it does have to roughly match the gasket OD for handling purposes.
 
Back
Top