
NoNothing
Well-Known Member
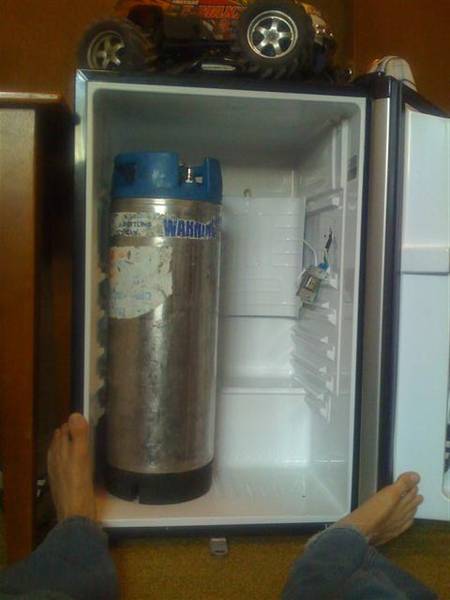
I was given a free mini fridge by my dad to take up to school and keep in my room. Its a GE Spacemaker GMR04 with a lock. The lock is fairly useless on it and on first inspection it wouldent make a kegorator because of a small freezer that takes up the entire top of the fridge. But, after a little fiddling, and I mean little, this fridge is great for kegs!
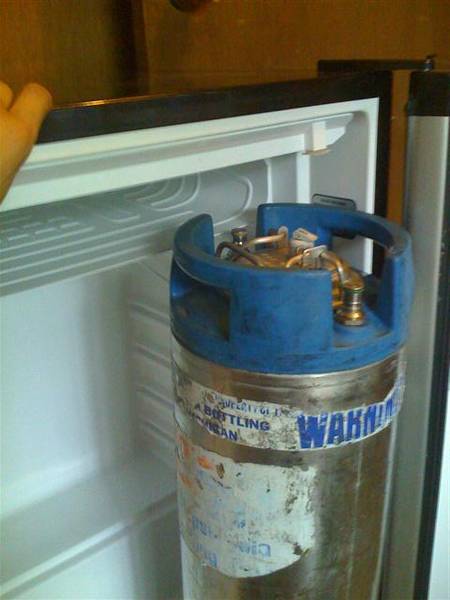
Here you can see the little bugger freezer wont allow a keg to fit in!
so now we get started to mod the fridge.
What you will need:
A screwdriver
THATS IT.
On the back of the fridge there is a diagram showing that the only place there is cooling ('evap') is the freezer, and on the sides of the fridge there are heat disipation coils, nothing on the top of the fridge like the Sanyos to worry about drilling through. So we need to get the evap out of the way.
To remove the little lid for the freezer just pull it out, its plastic and will bend and come right out.
Now there are 4 screws holding the freezer up, remove those, you can put them back in the holes to seal them once we move the freezer later.
Here is a picture of the freezer with the door removed and the screws out, it droops a little, this is fine.

Now, the freezer is still in the way. So we need to CAREFULLY bend it back. There is only one line connecting the freon (r134a) line to the evap. So very slowly and carefully bend the freezer back so it is flush with the back of the fridge. You will encounter the most resistance from the freezer rubbing the side of the fridge itself, this is fine, the fridge sides are what will 'hold' the freezer in place (no need to put new screws in). You REALLY need to be careful to avoid kinking the freon line here. (as a side note, does anyone know what r134a smells like, or any other sign that its leaking? so I and anyone else can know if they do cause a problem and dont fall asleep with this thing running and be brain damaged?)
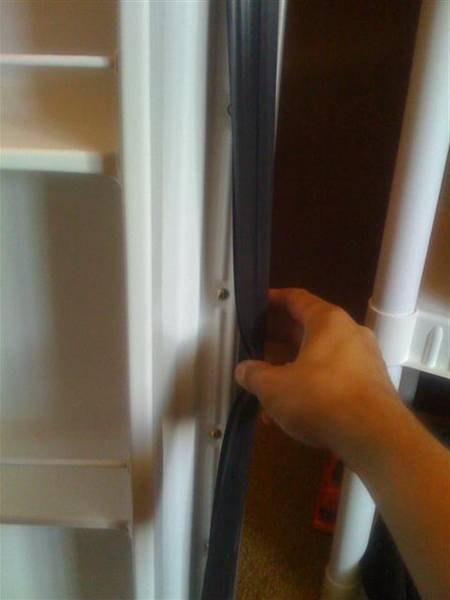
I should mention, in order to push the freezer back you will need to remove the cover to the temp control (the probe is attached to the freezer) so the freezer can bend in its path. To do this remove the 1 screw behind it, and 1 screw behind the nob (pull the nob off) to remove the case, and remove the 2 screws holding the unit in place. Now bend the freezer down and you wont run into any problems.
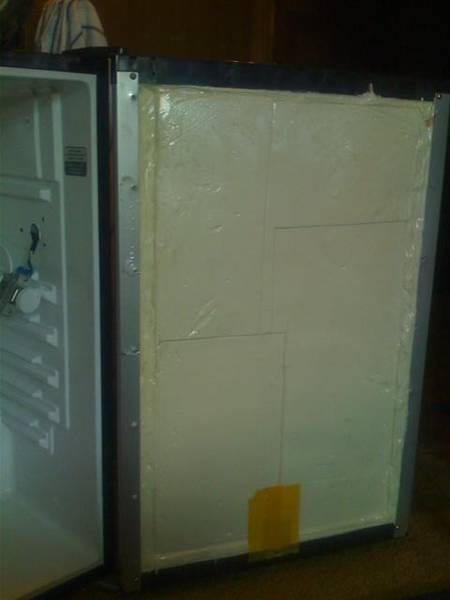
Here is a pic of the freezer pushed back.

Here you can see the little bugger freezer wont allow a keg to fit in!
so now we get started to mod the fridge.
What you will need:
A screwdriver
THATS IT.
On the back of the fridge there is a diagram showing that the only place there is cooling ('evap') is the freezer, and on the sides of the fridge there are heat disipation coils, nothing on the top of the fridge like the Sanyos to worry about drilling through. So we need to get the evap out of the way.
To remove the little lid for the freezer just pull it out, its plastic and will bend and come right out.
Now there are 4 screws holding the freezer up, remove those, you can put them back in the holes to seal them once we move the freezer later.
Here is a picture of the freezer with the door removed and the screws out, it droops a little, this is fine.
Now, the freezer is still in the way. So we need to CAREFULLY bend it back. There is only one line connecting the freon (r134a) line to the evap. So very slowly and carefully bend the freezer back so it is flush with the back of the fridge. You will encounter the most resistance from the freezer rubbing the side of the fridge itself, this is fine, the fridge sides are what will 'hold' the freezer in place (no need to put new screws in). You REALLY need to be careful to avoid kinking the freon line here. (as a side note, does anyone know what r134a smells like, or any other sign that its leaking? so I and anyone else can know if they do cause a problem and dont fall asleep with this thing running and be brain damaged?)
I should mention, in order to push the freezer back you will need to remove the cover to the temp control (the probe is attached to the freezer) so the freezer can bend in its path. To do this remove the 1 screw behind it, and 1 screw behind the nob (pull the nob off) to remove the case, and remove the 2 screws holding the unit in place. Now bend the freezer down and you wont run into any problems.
Here is a pic of the freezer pushed back.

") (addiction? or passionate?)
(addiction? or passionate?)