Closed-system pressurized fermentation technique!

Homebrew Talk - Beer, Wine, Mead, & Cider Brewing Discussion Forum

Help Support Homebrew Talk - Beer, Wine, Mead, & Cider Brewing Discussion Forum:

This site may earn a commission from merchant affiliate links, including eBay, Amazon, and others.

What do you guys think about pressure fermentations? Time for a poll.

  • I've done it and I liked it just fine!

  • I've done it, nothing wrong with it, but prefer normal fermentation techniques.

  • I've done it, hate it, and never will do it again!

  • I've never done it, but it is on my list!

  • I've never done anything. I only brew beer in my mind.


Results are only viewable after voting.
At work and boredom has struck. Been thinking about vacuums and how they can boil and freeze a liquid. What if you could boil with a vacuum, chill with a vacuum, then pitch and ferment under pressure?

Neat idea...but. :) When you boil wort, you're not just boiling for boiling's sake, the temperature is an important part of the equation. In fact, the reason that recipes often have "high altitude" directions, is because of the lower air pressure found at high altitude. As a consequence, food does not cook as quickly because the temperature at which water boils is lower (~1°F for every 550ft above sea level).

A good example of this is trying to brew in a place like Denver, CO where water boils ~202F. As a result, hop utilization is about 20% lower.
 
Wow. You must have been very bored....and deadset on on getting the 1000th post! (You beat me to it! :mad: ;))

Looks like you need to build a rocket ship to do you brewing in outer space :mug:
 
Neat idea...but. :) When you boil wort, you're not just boiling for boiling's sake, the temperature is an important part of the equation. In fact, the reason that recipes often have "high altitude" directions, is because of the lower air pressure found at high altitude. As a consequence, food does not cook as quickly because the temperature at which water boils is lower (~1°F for every 550ft above sea level).

A good example of this is trying to brew in a place like Denver, CO where water boils ~202F. As a result, hop utilization is about 20% lower.

Hop utilzation is lower at higher altitudes? Can you please direct me to more detailed information on this subject? Thx - someone who lives around 2372 feet.
 
Hop utilzation is lower at higher altitudes? Can you please direct me to more detailed information on this subject? Thx - someone who lives around 2372 feet.

There's an article around here somewhere...I'll see if I can find it. Basically, alpha isomerization rates roughly half for every 10ºC in temperature drop below 100ºC.
 
I had a leaking keg lid the first 60 hours but managed to pressure ferment from there forward.

I counter-pressure transferred my beer this morning. It was very easy and un-eventful. So easy even a cave man can do it. I had 7 psi of carbonation already on my finished beer at 35*F, so it was ready to drink, IMO. That's a 14 day 'cube-to-glass'. This is my first pressure ferment, it is very drinkable, and an easy process. Count me in as a believer. :rockin: I believe, brother WortMonger, I believe.

This is absolutely delicious.
9 # 2-row
8 oz biscuit
8 oz carapils
1 # golden naked oats
3.6 oz FWH of Palisades.
That's about a 1.057 starting gravity or so.

I'm sticking with BIAB and the "Closed-system pressurized fermentation technique". I no-chill but am not afraid to whip out my IC.

Now for my next trick, 10 gallon batches and I'll be sitting pretty, woo.

Nice! Actually I just brewed up my second batch of pressurized fermented goodness and my grainbill was very similar to yours. I do 10 gallon batches so my quantities were doubled. A little less 2-row, same biscuit, same carapils. No naked oats (I dont even know what those are), but instead I added 1 lb of crystal 10L.

Hops were 2 oz of Nugget and 2 oz of Magnum as FWH, and 2 oz of Hallertauer at flameout.

Gravity readings tasted good, at 1.049.
 
Question is what will the next innovation in closed pressure fermentation be? I remember when this thread was birthed and like the long line of dirty runners I too joined behind Forest Gump as we ran across America again and again and again until he said...."like I said bored" and we all stood there in wonder what to do next.
 
I'm curious why you've ended up with this method. In some ways it's easier than naturally carbing..you just set it, forget it, and then put it on gas in the fridge. Do you do so for better results, simplicity, or just because it works? God knows there are thousands of steps to brewing beer which people might do because "it's what I do, and it works".

Just trying to get some insight from those who have used this method a few times more than me (maybe not for long... :mug: )

It started because I had trouble with the sanke rings. I found them hard to get out and worse to get back in. I used snap rings and the special snap wring pliers for a while. Those went in and out pretty easily, but they are too thick. So they didn't seat perfectly and I found that they popped out at about 20 psi. Although sometimes they didn't. I once left my spund valve closed when starting fermentation by accident. I came back later and the keg was at 45 psi! I slowly bled the pressure down and beer came out great.

But that same setup popped my snap ring off at 15 psi later in the brewing. I wasted 15lbs of Co2. I just never trusted it except at 12psi or so. Hence my method. Now I have a Brewershardware kit and I like it just fine. I liked the modified coupler better, but the sanke ring issues made it a no go.

This method still saves me time, though. I can carb during the end of fermentation or during crash cooling. So I still save time on this step.

For me, the biggest thing about this method was fermenting in a sanke and using gas to transfer. It has enabled me to experiment quite a bit with filtering, pressure ferments, etc.
 
Hop utilzation is lower at higher altitudes? Can you please direct me to more detailed information on this subject? Thx - someone who lives around 2372 feet.

Ray Daniels posted a conversion formula on HBD a while back: http://hbd.org/hbd/archive/4125.html


Date: Fri, 20 Dec 2002 05:53:07 -0600
From: "Ray Daniels" <raydan at ameritech.net>
Subject: Re: hop utilization, Designing Great Beers

This is about altitude and hop utilization. My information on this
subject came from Garetz (Using Hops, 1994). On page 137, he gives a
correction factor as follows:

TF = ((Elevation in feet/550)*0.02) + 1

Multiply your wort volume by this factor in IBU or hop weight
calculations to apply the correction.

I just ran a little sample calculation to see what the effect would be
for your two locations and it showed a drop in bitterness yield of about
20 percent.

As I have brewed entirely in Chicago with a few hundred grand feet of
elevation above sea level, I have never had occasion to use or test this
equation.
Others may be able to comment on its suitability in settings such as
those Dave describes.


Ray Daniels
Editor, Zymurgy & The New Brewer
Director, Brewers Publications
Association of Brewers

ray at aob.org
773-665-1300
 
Here's an update:

Blow off tube for 24 hours then crank up the pressure to the final target pressure at that temp.

I'm 6 points above my predicted FG by hydrometer, 2 points by refractometer (using more beer's formula to correct for alcohol). So, I think I squeezed the crap out of the yeast. I depressurized and I've been shaking the keg for the last several days but no change in SG. This batch is White Labs 007. The Wyeast Kolsch seemed much more tolerant of abuse.

I can't think of a better way to get this batch to fully attenuate, short of pitching more yeast (I'm not too excited about that) and apparently my refractometer needs to be calibrated. Which is interesting because I used it for the OG not the hydrometer, so maybe I'm not that far off...:confused:
 
You probably aren't that far off. I don't take my FG until it is ready to be put into my glass to drink. I set a little aside to degas and measure with my hydrometer and my refractometer. Refractometer is always a lower number, I think due to not being as precise an instrument. There are a lot more lines with space between them on a hydrometer. If I am super-serious about my numbers I take a hydro sample post-boil and then again after I am pouring, otherwise I take a "reference" post-boil and going into my glass with my refractometer. I equate it in my mind with the difference between Celsius and Fahrenheit... only much greater range than even that. Specific gravity is just that, specific... Plato and Brix are a little more forgiving in that aspect. I never beat myself up unless I use the same measurements with a hydrometer the whole way through. I love my refractometer though, but consider it a reference tool not a fine scientific instrument.
 
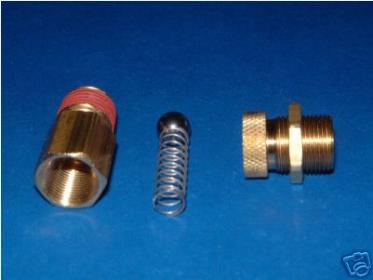
Do you guys really use those pressure/vacuum relief valves from McMaster (www.mcmaster.com/48935K25) with good results? I have a couple that I bought for making counter-pressure bottle fillers, and every one that I've tried, leaks at anything more than a couple PSI. The metal-to-metal sealing surface is just not good enough on the ones I've used.

Additionally, how in the world do you adjust them to keep 30PSI late in the fermentation?
 
No, I use the more adjustable one. I had thought about getting that one, but had those same concerns. I had to spend more money than I wanted, but it works.
 
Thanks for the replies and wortmonger thanks for starting this great thread, tons of great information here. I still have not managed to read it all. After 36 hours I am seeing pressure build up in the system. Just needed a little more patience on my side. I will let you know how the batch turns out in the end.
I need a relatively quick turn around for this batch (6 weeks) and here is my current plan. Ferment @ 50F with 5-7 psi until gravity is down to around 1.020. Increase temperature to 60F (diacetyl rest) over two days and bump pressure up to 20 psi (highest my spunding valve allows). Leave @ 60F until fermentation is complete. Slowly cool back to 50 F over two days. Depending on how long these steps take and how the hydrometer samples taste will determine how I proceed. I am planning on a 2-3 week primary fermentation , cold crash for 3 days @ 32 F, transfer and filter (1 micron) to serving kegs, lager for 2-3 weeks @ 32F, and serve.
Any advice would be appreciated. I have never had to brew a lager on a timeline before.

I made a few slight changes to the process outlined above, but I have to say this has been a great success. I will definitely be brewing my 10 gallon batches under pressure moving forward. I am still 11 days away from the beer needing to be served, but it is tasting great right now. The spunding valve has also made my pressurized transfers for my other beers more hands off.
 
What pressure range would be ideal for an adjustable valve? They seem to come in a few different flavors (0-10, 0-30, 0-60, etc.), 0-10PSI being the most common.

Also, those of you who are using this cheapy: did you have to make any modifications to make it work correctly (lube, spring adjustment, replacement sealing surface, etc.)?

Valve.jpg
 
GNBrews said:
What pressure range would be ideal for an adjustable valve? They seem to come in a few different flavors (0-10, 0-30, 0-60, etc.), 0-10PSI being the most common.

Also, those of you who are using this cheapy: did you have to make any modifications to make it work correctly (lube, spring adjustment, replacement sealing surface, etc.)?

I bought a 115psi safety pop off for an air compressor at Lowe's and against the instructions on the package tampered with it's adjustment. With a different spring I got it to bleed at around 10-15. I haven't put it into actual service yet.
 
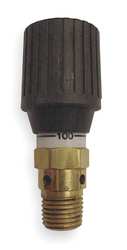
I don't want to rain on your parade, by any means, so hopefully I don't rub you the wrong way, but for $10 bucks more you could have gotten everyone's favorite from McMaster at the exact pressure rating you want and have ultimate fine control. (Shipping is usually $5 for me, on my porch the next day, so $40 total). The one you show is a 100 PSI valve. Do you think you will have enough control to make this all worth it?

Anyways, for the even more cost conscious, why not just go with a 40 PSI relief valve (non adjustable) that you slap on during the last 1/4 of fermentation? For those folks who aren't concerned if they end with the perfect carb level and just want something to build up pressure so they can transfer, sample, etc.

We're talking $4.95. Scroll down to bottom.

http://beverageequipmentco.com/BEC_Co2_regulators__parts.htm

(exit soapbox stage left)

502090.JPG
 
I have the grainger one, and (as far as I know) it works just fine (with the attached valve). I say 'as far as I know' only because I haven't used anything else, nor do I have any other way to see if it's working. I'm just curious why it work just as well...thoughts Sanke?
 
I went from the Mcmaster 60 to the 30 cause I want the finest control not cause its all that works. There's a big knob on it with a dial. I just like knowing that x cranks = x psi. Worth $10. Helpful for things like gentle depressurizing of the yeast cake after I rack.
 
The one that I ordered from Grainger showed up this morning and I tested it out a bit. It definitely works better than the $8 one, but the pressure range is nowhere near 0-100PSI as advertised. If I set it via the graduations on the side, I need to have it set to ~40PSI in order for it to vent at 15PSI input. Additionally, if I up the input to 30PSI while keeping the previous setting, the pressure maintains ~22PSI while actively venting.

Sanke - With the polysulfone one from McMaster, do you have to adjust the pressure setting during the peak of fermention? If the fermentation gets especially vigorous (i.e. the input pressure is higher than normal), are you having to open the valve more to keep the back pressure consistent?
 
I have the polysulfone one as well and it's great, set it and forget it. The only time it can get a little wonky is when I'm at the lowest lager temps say 32 - 31 degrees. I've had it freeze up a bit.
 
At those low a temperatures I probably wouldn't even need one to be on in my fermentation setup. I feel if you have controlled the pressure enough throughout the fermentation, given a little more pressure before you drop that low to bleed off later, and then bleed once you are ready to transfer to your serving kegs (or not if you are just a psi or two off and plan on bottling), then you should be fine leaving it completely all sealed up doing it's thing in the lagering keg.

flan, how much pressure (over what you want for final volumes) do you think you produce in your lagering stage? It would be sweet to know a formula for say: I'm at ?SG pre-lagering and it usually drops ? more SG before finish, so I need to be at ? psi prior to lagering. I guess that would still be tricky though just in case you didn't attenuate to what you plan and would still be under volumes of CO2. I think if it were me and I wanted to still control pressure at 32*F, I would rig up a pressure gauge and just bleed extra pressure via the keg tap relief valve. I really want one of those poly relief valves, and didn't buy one at first because I was worried about their working temperatures. They really need to make one in 1/4"npt, since that was another reason I initially chose not to go with that particular one when I was starting up.
 
On my current lager my og was 1.058 and I kept my psi at 4 until 1.03 where I'll ramp to 8 psi. When the beer hits 1.025 I'll ramp to 16psi and them start lowering my temp down to 32. The last lager settled out around 12psi at 32 and then I transferred over to kegs under pressure at 12psi. Once it comes back up to temp I'm still a little under carved but still drinkable. At my kegerator temp I like my lagers at 18psi
 
flan, do you put space between your keg bottom and the fridge/freezer, or are you resting directly on the floor of it? I ask because I have had ice form when I am directly on the bottom and have now added boards to allow for more circulation under the keg. The freezing and slushing stopped after that.
 
I do just put it directly on the bottom of the upright freezer turned lagerator. I don't have frozen beer issues rather the polysulphone valve and the dip tube will freeze a small amount when I am actually at freezing temps. I imagine if I just wrapped the top off the kgf with a towel or a small blanket it would prolly not freeze.

Note on why it's so important to use a hydro over a refractometer. I took a small sample last night and was reading 1.035 which I thought was too high. I pulled a sample and let it de-gas over night and the hydro read 1.02. I'll still use the refractometer on brew day but hydro will be more actively used toward the end of the fermentation.

My way to late octoberfest looks and tastes great. Can't wait to drink it.
 
So I've been looking through the thread to find a couple of answers to questions of mine, but so far I haven't found all of them. So here's the few that are still open:

I don't exactly have a keezer/room for a keezer, so I was looking at building a draft box to cool the beer down from the keg. Since I'm looking at the beer staying around 70*F the entire time, this just means I need to set the spunding valve to ~30 psi to get around 2.2 vol. of CO2, correct?

Also, if serving straight from the fermenter, I do realize there will be about a quart of beer full of sediment/yeast at first. Could I in theory just pour this into a sanitized mason jar and call it good for the next time I need to build up a starter?

I think both of those assumptions are generally acceptable, with a couple things that you may or may not realize:

1. You do want to make sure you dont ramp up to 30 psi until the latter stages of fermentation. The yeast do not work well under that much pressure.

2. Make sure to depressurize slowly when harvesting yeast. I am not sure if just dumping the first quart or so of beer into a sanitized container at 30 psi would be the best way to harvest yeast for a starter. It may be a better idea to wait till the keg is kicked, slowly depressurize, then harvest. But then again maybe its better to get the yeast out of there as soon as possible. I just confused myself.

I'm sure it wouldn't be the best method of harvesting yeast, but since I figured if the first few pints are going to be full of sediment anyways, why not take advantage of it? It would probably be wise to do a step up before the full starter size since I'm assuming there will be plenty of cell death when experiencing a 30 psi drop. This way I could brew a batch before having to wait for the keg to float.
 
flananuts said:
Note on why it's so important to use a hydro over a refractometer. I took a small sample last night and was reading 1.035 which I thought was too high. I pulled a sample and let it de-gas over night and the hydro read 1.02. I'll still use the refractometer on brew day but hydro will be more actively used toward the end of the fermentation.

Flan,

I agree with the inaccuracy of the refractometer in a carbonated sample. The CO2 bubbles must bend the light different than a degassed sample because it doesn't seem to be accurate. But it's a real PIA to degas a sample for a hydrometer reading. It seems to take forever.
 
It was real strange, I was getting 1.035 for two weeks and I wondered if I had a stuck fermentation. The only bad news is that I ended up at 4psi for my pressure fermentation. The good news is I'm able to force carbonate while it's at 33 degrees so I've been slow pumping the pressure up to 16psi and the gauge is showing the absorption. I've got two more weeks at 33 degrees and them I'm transferring to serving kegs and will finish carbing then.

Ante good note is I fermented this octoberfest at 48 degrees on Bavarian lager yeast at 4psi and no diacetyl.

Flan,

I agree with the inaccuracy of the refractometer in a carbonated sample. The CO2 bubbles must bend the light different than a degassed sample because it doesn't seem to be accurate. But it's a real PIA to degas a sample for a hydrometer reading. It seems to take forever.
 
Flan,

I agree with the inaccuracy of the refractometer in a carbonated sample. The CO2 bubbles must bend the light different than a degassed sample because it doesn't seem to be accurate. But it's a real PIA to degas a sample for a hydrometer reading. It seems to take forever.

What I do is pour the sample into an empty 12 oz bottle. Cover the top with your hand and shake the bejesus outta it. Let it settle and then pour back into your hydrometer sample tube.
 
What I do is pour the sample into an empty 12 oz bottle. Cover the top with your hand and shake the bejesus outta it. Let it settle and then pour back into your hydrometer sample tube.

I like the add to a bottle, put on a wine-fresh cap (you know the ones that have a slit in the top and allow the vacuum pumper to pull the air out, then you have to squeeze it to open it and get it back out of the wine bottle), and vacuum-shake-vacuum-shake-vacuum... you get the picture! Those things suck for wine anyways, so why not put them to some good use pulling the gas out of a sample, lol.
 
Back
Top