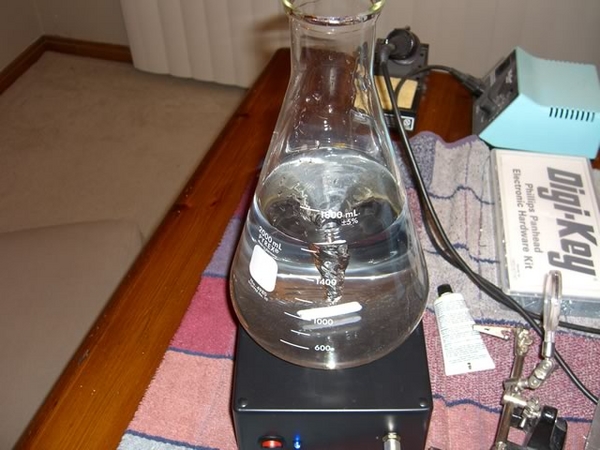
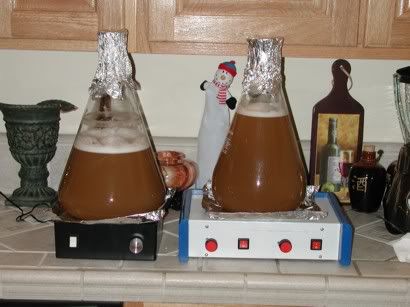
Ok, here is a 'mini-tutorial' on how to build one of these. This should get you pointed in the right direction. I'll just reuse the pics from the first posts. Let me start out by saying that this is not my idea, but rather my take on this excellent project. Since I was going to be doing yeast starters anyhow, and I had 95% of the parts already I thought I'd give it a go.
The idea is that a yeast starter that is fermented on a stir plate will yield a substantial larger amount of viable yeast then a non-stir plate starter. This is because the yeast are kept in suspension and not allowed to flocculate by the stiring process. The stirring may also aid in airation of the yeast.
What you need:
1) 12V DC fan.
2) a few rare earth magnets.
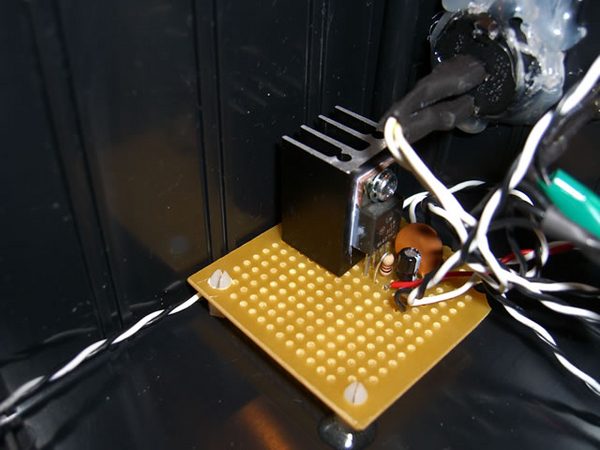
3) something to control the speed of the fan.
4) a 12 v AC-DC power supply (wall wort)
5) stirbars
6) something to 'hold' it all.
7) misc bolts etc.
8) (optional) switch and LED
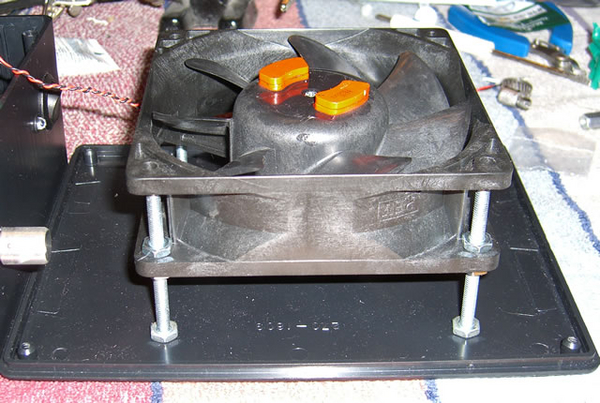
For the fan, I used a 120mm 12v DC pc case fan. You can probably use a 90mm or a 80mm fan but they are smaller. The magnets are placed on the fan hub so i like the 120mm fan better bacause the hub is larger and the magnets can be placed farther apart. You DO NOT need a high power fan, in fact don't want one because the speed the fan spins is too fast and you need to slow it down even for a low power fan. You can also buy fans that already have a speed control at some PC mod sites or stores.
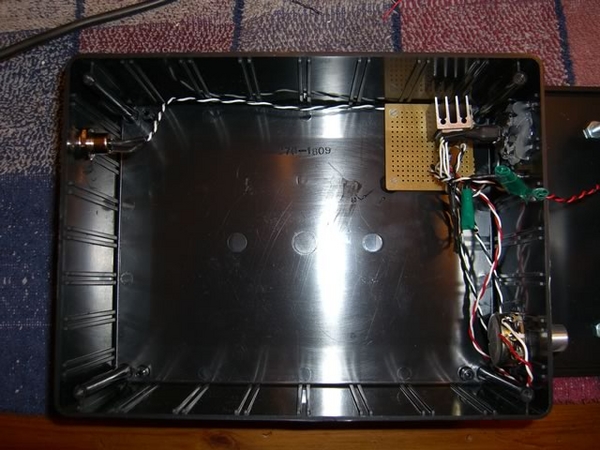
Now for the container. I used this
Project Enclosure from radioshack. Its perfect for a 120mm fan and this project. Its 8x6x3 and provides a good platform for even a 2000ml erlenmeyer flask.
You can get rare earth magnets at mcmastercar or at any science surplus store, but a great place to get them is from old hard drives. I ripped open a few old hard drives and stole magnets out outa them. They are on the arm of the read/write head. They are usually glued on and you may have to wack them with a hammer and screwdriver to get them out. They are SUPER strong magnets and will stick together really tight. Careful and don't get your fingers pinched in between them. I used epoxy and glued 2 together and then glued them as far apart as I could to the hub of the fan. (center them as best you can so as not to upset the spin of the fan.) I placed one north side up and one north side down.
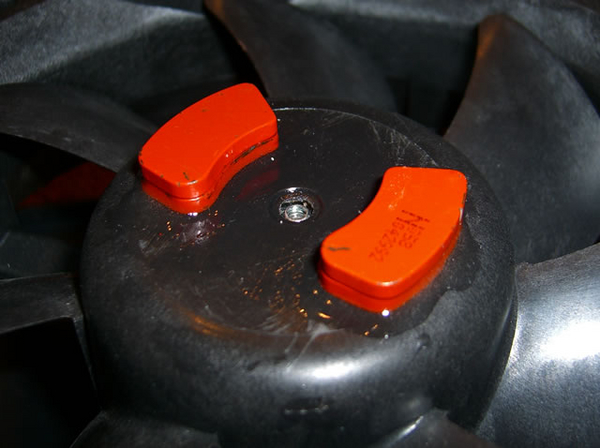
I placed the fan hub facing up centered on the lid of the project box and marked the fan holes. Then I drilled 4 holes though the lid. I then put 4 #10 2.5" machine screws through the lid with the head sticking out on the outside. I then tighted a nut on them. Next, I spun another nut on each bolt down about 1 inch from the bottom. The fan went on next, followed by another nut. You can now adjust the height of the fan by moving the nuts up or down the bolt. You will want to adjust it so that tihe magnets are as close to the top of the enclosure as possible without touching. Note: When I say top I really mean the bottom section of the enclosure because the enclosure is placed upside down when it it complete and operating.
This is what it looks like.