Yunus
Well-Known Member
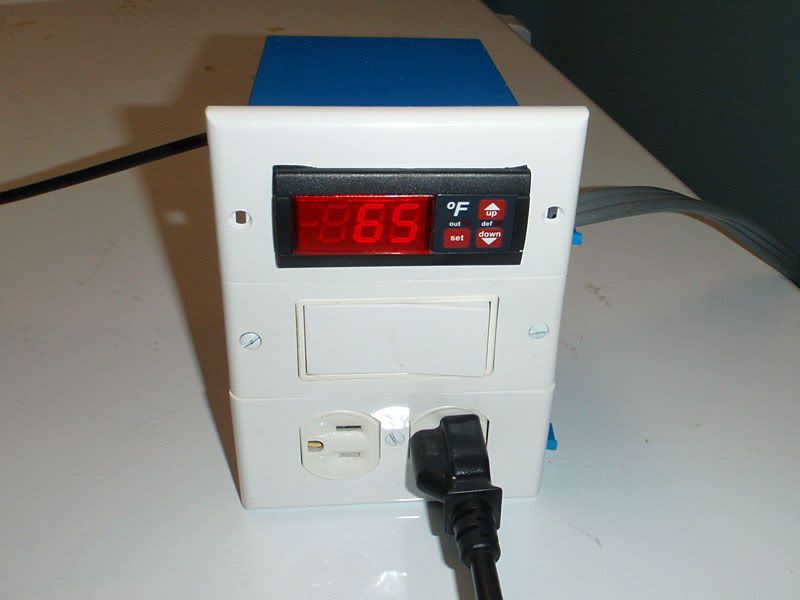
Another love controller build. Here are the details.
Goal:
Temperature controller for a kegerator chest freezer. Must look half decent and be pretty simple.
Build time: 1 hour
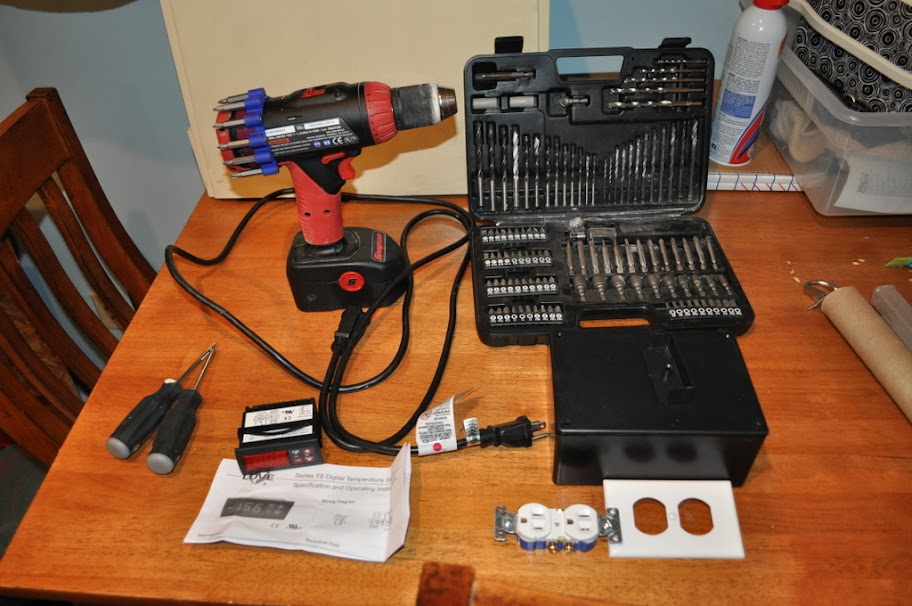
Key parts: Love controller, Project box, standard wall outlet with cover, extension cord with male end. I used a computer cable because I work in IT and have a ton of them lying around.
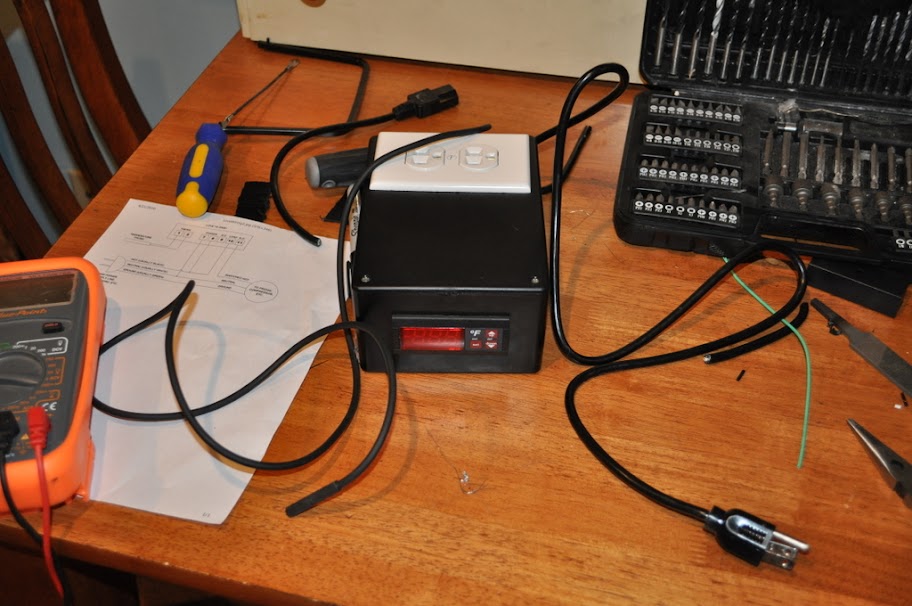
Most of the tools and items required. In addition to whats in the picture I needed a very small flat head screw driver to clamp the wires in the love controller. Also used a utility knife to strip wires and pliers to tear apart the extension cord when needed.
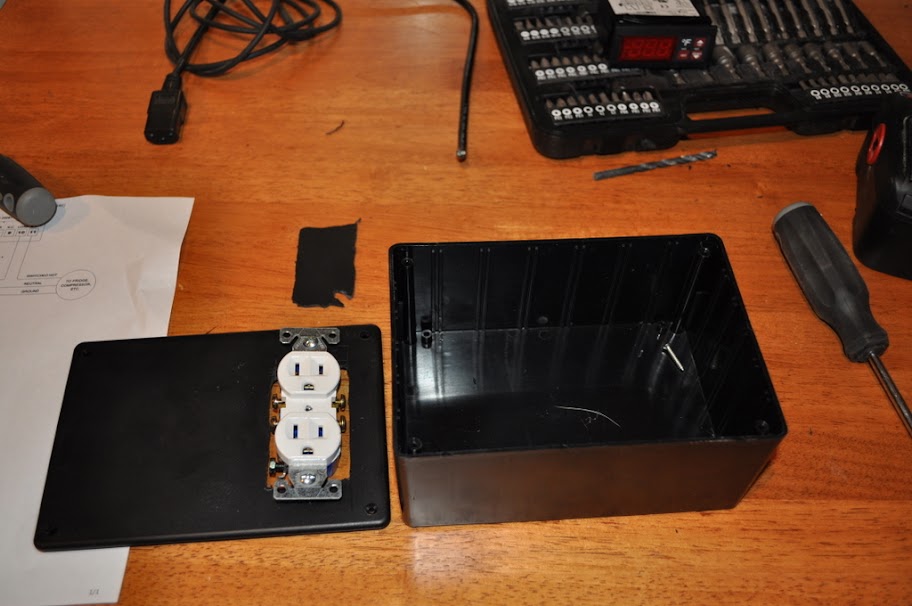
Cut a hole in the top of the project box that is big enough for the wall recepticle to fit in but small enough for the screw on top and bottom to still have something to mount to. Next you need to cut a hole for the love controller to go into the side of the box and drill 2 holes for the wires (extension cord and temp probe).
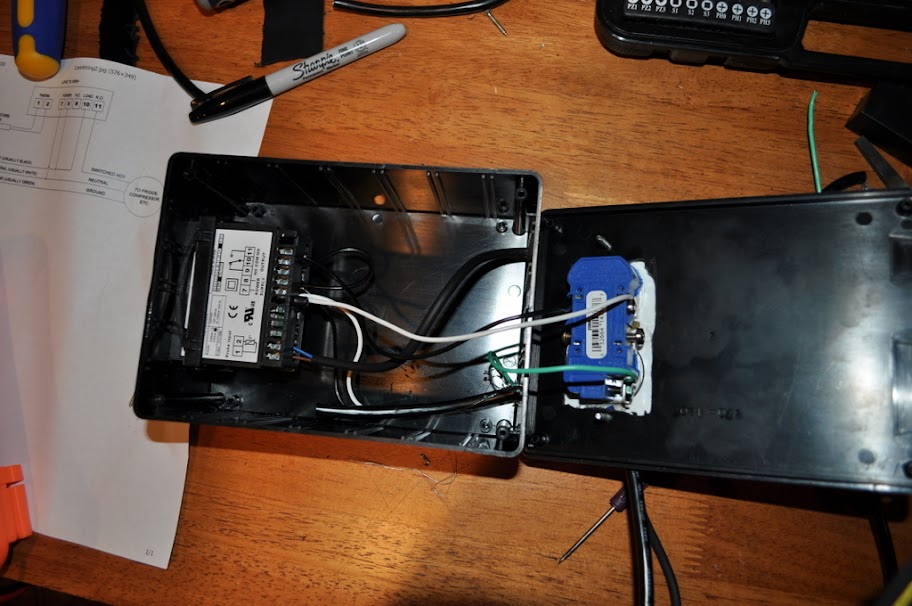
Wire up the love controller and wall recepticle as other posts show. The wire that is on the bottom is the male end of the extension cord. The other wire is the temp probe. https://www.homebrewtalk.com/f11/love-temp-controller-series-ts-wiring-diagram-2008-a-88369/
Put the box back together. That's it.
Lastly, Silicon or glue the wires entering the box in place. You don't want tension on the wires as they might get pulled out.
I realize this does not go into extreme detail but this is as much for my own use next time I need to build another temp controller as it is for anyone else. Nothing in this design is original, I stole all the ideas from this board")
Goal:
Temperature controller for a kegerator chest freezer. Must look half decent and be pretty simple.
Build time: 1 hour
Key parts: Love controller, Project box, standard wall outlet with cover, extension cord with male end. I used a computer cable because I work in IT and have a ton of them lying around.
Most of the tools and items required. In addition to whats in the picture I needed a very small flat head screw driver to clamp the wires in the love controller. Also used a utility knife to strip wires and pliers to tear apart the extension cord when needed.
Cut a hole in the top of the project box that is big enough for the wall recepticle to fit in but small enough for the screw on top and bottom to still have something to mount to. Next you need to cut a hole for the love controller to go into the side of the box and drill 2 holes for the wires (extension cord and temp probe).
Wire up the love controller and wall recepticle as other posts show. The wire that is on the bottom is the male end of the extension cord. The other wire is the temp probe. https://www.homebrewtalk.com/f11/love-temp-controller-series-ts-wiring-diagram-2008-a-88369/
Put the box back together. That's it.
Lastly, Silicon or glue the wires entering the box in place. You don't want tension on the wires as they might get pulled out.
I realize this does not go into extreme detail but this is as much for my own use next time I need to build another temp controller as it is for anyone else. Nothing in this design is original, I stole all the ideas from this board