How about another E-Rig!

Homebrew Talk - Beer, Wine, Mead, & Cider Brewing Discussion Forum

Help Support Homebrew Talk - Beer, Wine, Mead, & Cider Brewing Discussion Forum:

This site may earn a commission from merchant affiliate links, including eBay, Amazon, and others.

Brewmoor

Supporting Member
HBT Supporter
Joined
Aug 27, 2009
Messages
927
Reaction score
15
Location
Colorado
Here is a look at what I have been doing for the last month or so. I committed to building an electric sculpture modeled after some of the systems I have seen here on the board. I have been gathering ideas.

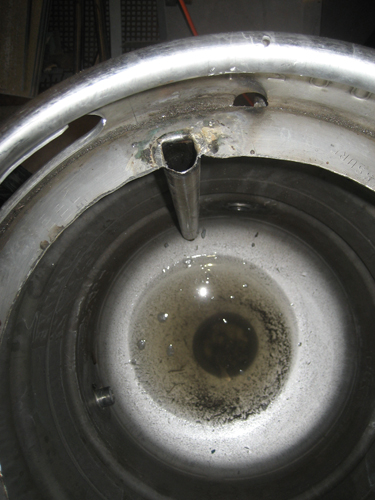
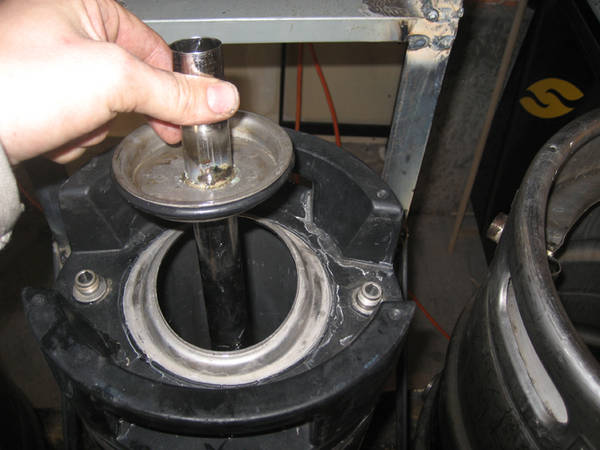
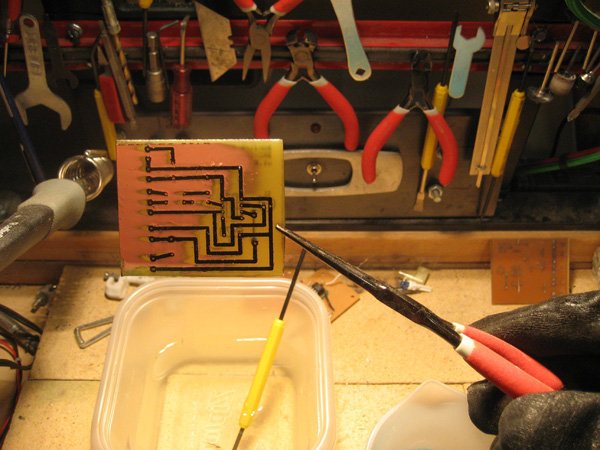
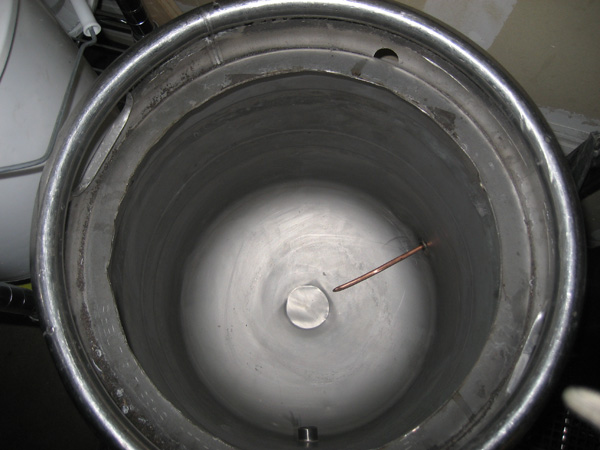
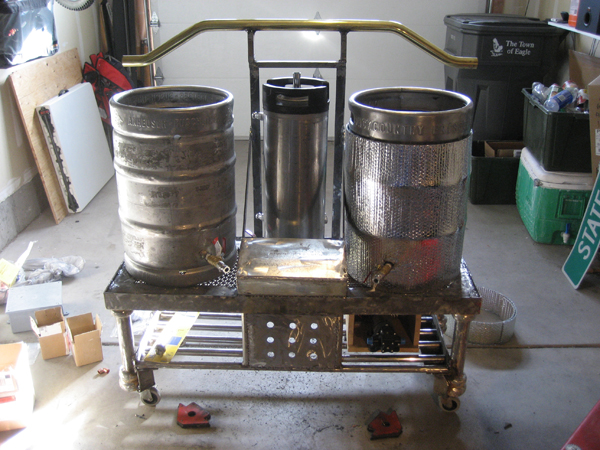
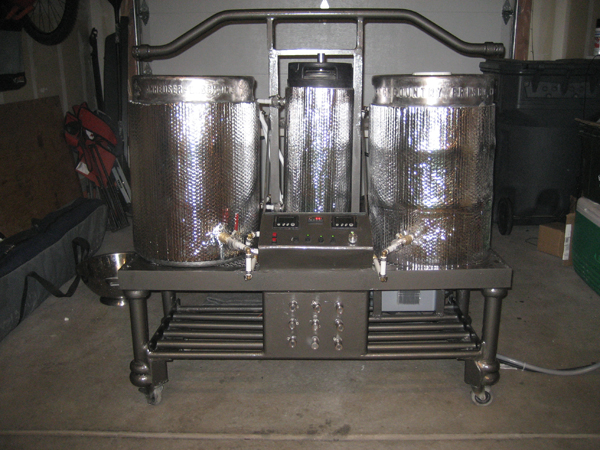
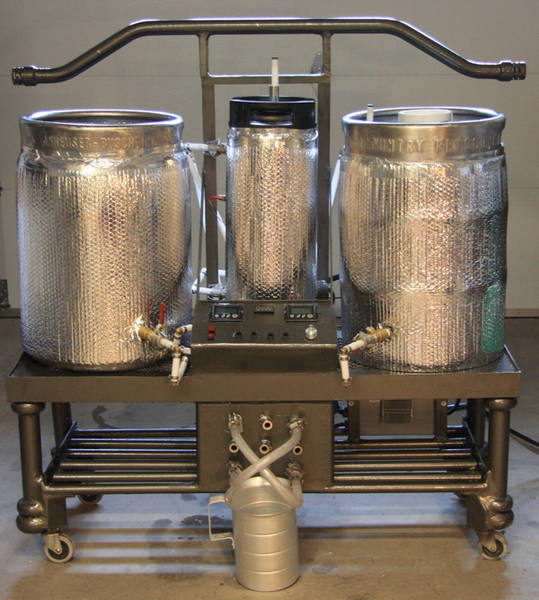
I am using three vessels. 2 sanke kegs, 1 for the boil kettle and the other for the mash tun. I have a corny keg that will be used as an hlt/heat transfer tank. The HLT will be powered with a 1500w element and controlled by a PID. The BK will have a 5500w element and a PWM circuit to control the temp.

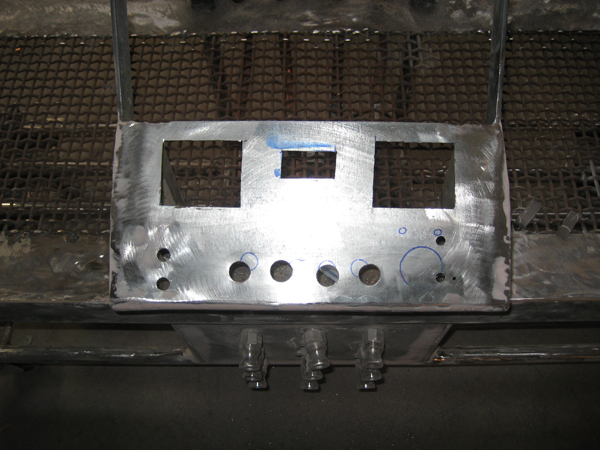
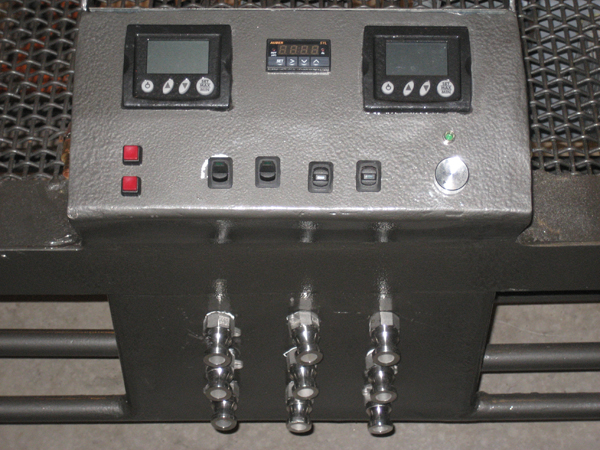
There will be two digital oven thermometers mounted into the panel to give readouts from the boil kettle and the mash tun.

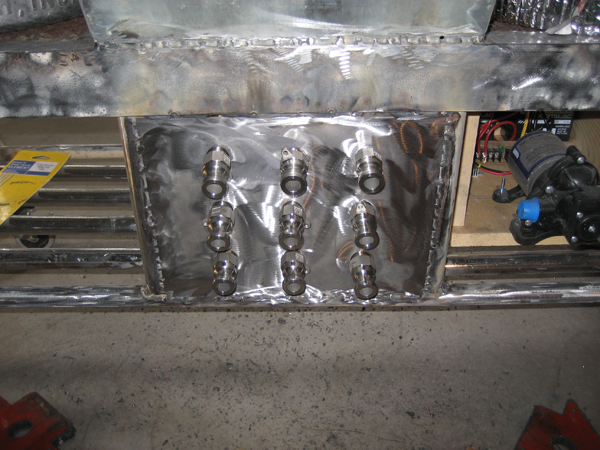
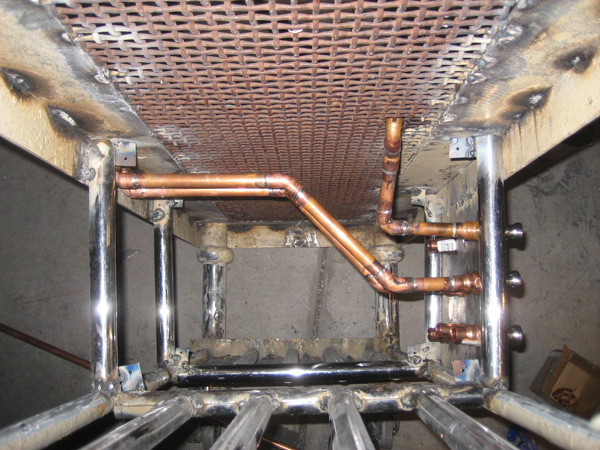
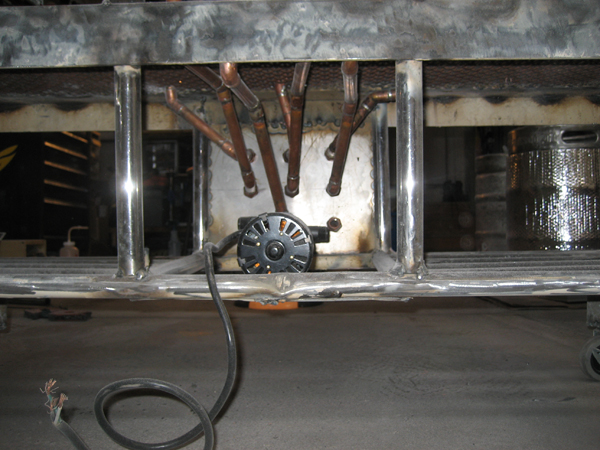
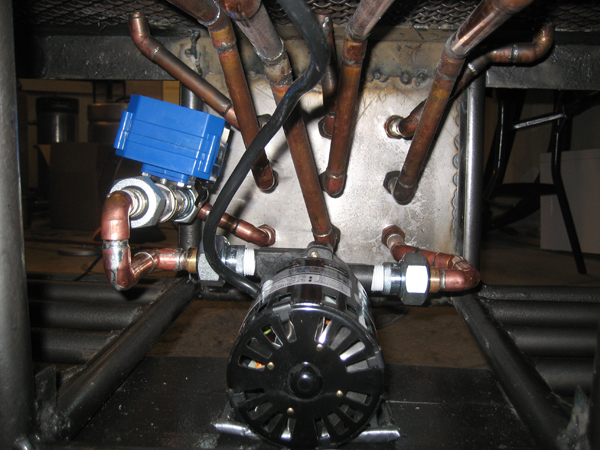
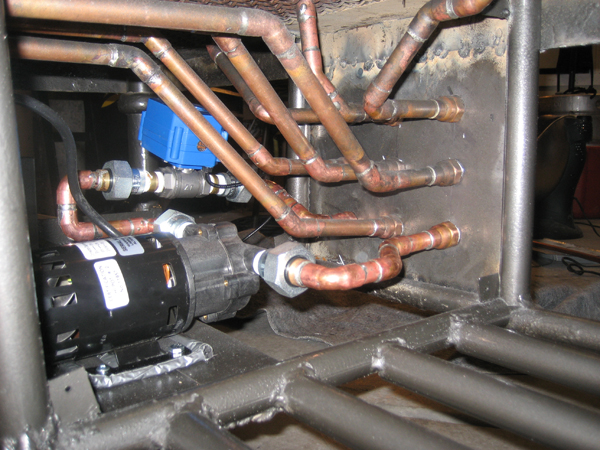
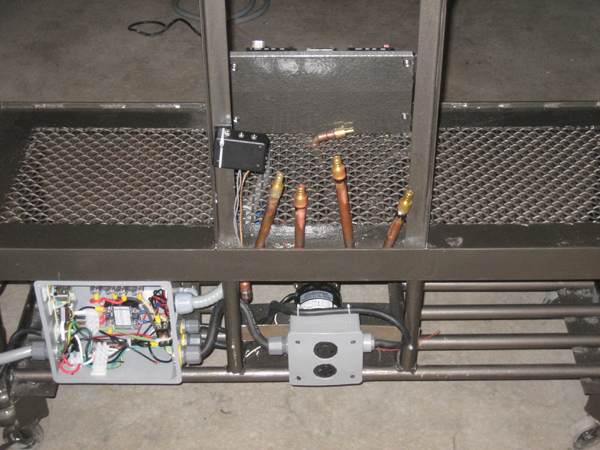
There will be a quick change panel on the front of the stand to select the route the pump takes. This will be accomplished with several short "jumper" tubes. All connections to the kegs will be quick release so the pots can be cleaned easier. I am also planning some sort of faucet with a quick release for a garden hose.

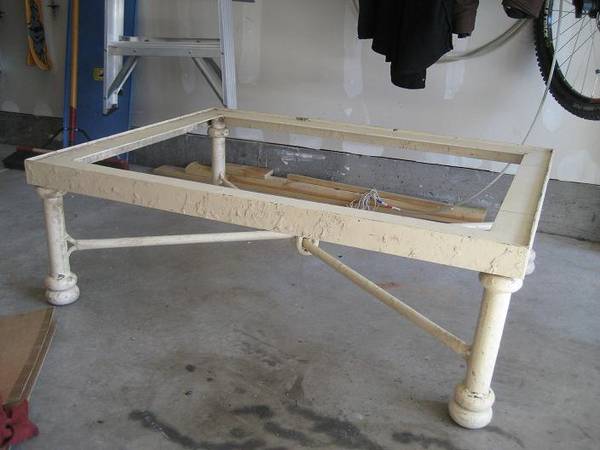
Here are the pics. I will try and get pictures up when there is something to see. You will notice I like to use scraps from the habitat store.
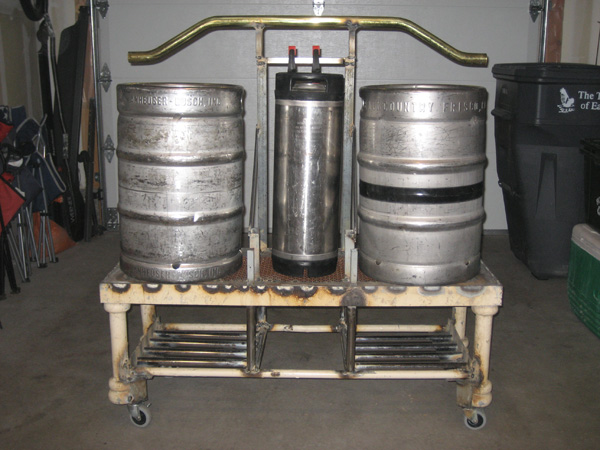
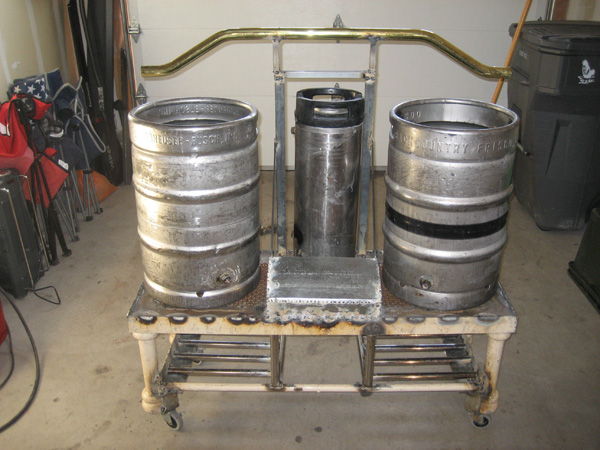
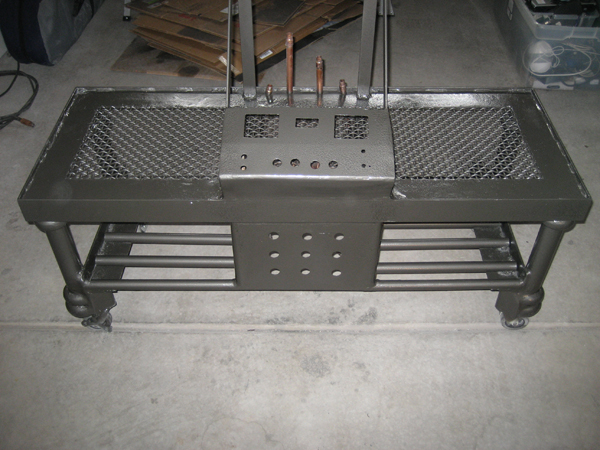
The Stand:

IMG_4212.JPG


IMG_4219.JPG


IMG_42231.JPG


IMG_00013.jpg


IMG_00023.jpg


IMG_00092.jpg


IMG_00083.jpg
 
Some Freshly purchased Kegs sitting on the stand:

IMG_00372.jpg


Tops of the kegs cut off. Control panel added. Some of the fittings are brazed in. I was waiting for the element and temp probe couplings to come in.

IMG_00402.jpg


Some pictures of the keg modifications.

IMG_00661.jpg


IMG_00521.jpg


IMG_00552.jpg


Site gauges which will have some sort of float with markings in gallons.

IMG_00723.JPG


IMG_0073.JPG


IMG_00751.JPG


IMG_00761.JPG
 
Some of the electronics:

This is me ironing the laser printer ink onto copper

IMG_00134.jpg


Here is about half of the copper etched away on the pwm board.

IMG_00264.jpg


IMG_00274.jpg


Here is the finished PWM board.

IMG_00304.jpg


Here is a shot of me testing the voltage regulator circuit that is going to power the Themometers. I don't want to have to change out AAA batteries all the time.

Temp1.jpg


Here are the boxes and wiring for the control circuits.

Labeled.jpg
 
Cleaned up the kegs a bit and started fitting pieces onto the kegs to prepare for leak testing.

IMG_00861.jpg


IMG_00854.jpg


Finished grinding and sanding the stand for paint. Also got the ball valves on the kegs as well.

IMG_00832.jpg


Here is a random shot of parts.

IMG_00641.jpg


Mr. Brown stopped by my house today and brought me some goodies. I can start the plumbing panel and the hard lines for the system maybe this weekend.

IMG_00871.jpg
 
Started working on the plumbing panel. I got the face welded on and I started fitting the hard lines. Man I am not a plumber. The first couple of sweat connections pissed me off. I thought it would be as easy as brazing. It should be. I am not sure what I was doing wrong. I am getting better though. When they are all done I will clean them up and make them look pretty. I am about half done with the hard lines.

IMG_00953.JPG


IMG_0097.JPG


IMG_01371.JPG


IMG_01831.jpg


IMG_01851.jpg


Paint is finished so it was time to attach the plumbing for good. I mounted the pump and the Motorized ball valve.

IMG_02732.jpg


IMG_02721.jpg


IMG_02744.jpg


Here is the plumbing from the back.

IMG_03202.jpg
 
Wiring and control panel:

Here is the control panel cut out ready for paint.

IMG_0181.jpg


Here is the main wiring panel. This is where the line voltage is housed. There is a relay missing It is in the mail. I have the leads just hanging in there.

IMG_02905.jpg


Relay came in. So here is another picture with the final relay in place

IMG_03134.jpg


This is the inside of the front panel. This panel only has low voltage. 12v and 1.5v.

IMG_02972.jpg


Here is the front of that panel.

IMG_03081.jpg


Here is a picture from the back. You can see the cover installed on the front panel.

IMG_0309.jpg
 
Paint Has been sprayed. I ended up going with the hammered finish paint. It is kinda like tool box paint. I have used it in another project it and takes a good beating. So paint and Fab works is done. Now I have a pile of parts I need to start assembling.

IMG_02681.jpg


IMG_02651.jpg


IMG_02672.jpg


Well it is finished......mostly. I have some touch up painting, taping the insulation, and cover panel for behind the heat exchanger to make. Functionally it is done. I am going to do a wet test this weekend. All the electronics checked out. I am happy about that. If it all holds water. I am going to make a dunkel in a week or so.

IMG_03173.jpg


IMG_03154.jpg


Here is a pic taken with my girlfriends DSLR. Came out a bit better. I cleaned up the insulation a bit, and brewed my first beer.

Rig.jpg
 
Started the plumbing. (posted some pics on first page) I got about half done. I hope to get more time this week and the weekend.

Got my PID today so I think I will work on the panel a bit this week too. Just waiting on some switches that should be here this week.
 
I live in Eagle. About thirty minutes east of Glenwood Springs.

Maybe when summer rolls back around, we'll have to kick around thoughts on a brew weekend for some of us west-slopers.. It'd be nice to glean some knowledge from those more experienced... There used to be a brew club here in Montrose, but it's defunct now...

I'm going to try and build something similar to your setup over the winter. I'm tired of the propane bottles...
 
How do you like the quick disconnects? Would you recommend them?

So far yes, but I have not used them yet to brew. Playing around with them though I think they are going to be great. They are not one handed but I am not concerned with that. They are easy to handle. They have gasket on the inside and the connection seem real tight.
 
I was the one introducing the pro-flo camlocks. They are great, seal as good as tri-clamps. probably even more tightly.
Here are the drawbacks: 1. They are a ***** to clamp shut. When you do, they clamp so tightly that they scratch grooves into the male coupling half.
2. The female hose barb coupling half has quite a small inner diameter. I'm guessing they are 3/8" or slightly smaller. Not at all the full 1/2".
3. Not sure, but I doubt the flat gaskets are high-temp resistant. They are black rubber. It wouldn't be hard to replace the gaskets with silicone I am sure if someone is concerned about it.

Anyway, the system looks great! Glad you found good use of those connects, and I applaud your original rig ideas.
Cheers and grats!
 
I noticed the barb coupling seemed small. I can't see it being much of a problem but it was a suprise. I noticed to close the coupling efficiently you need to make sure you are pressing down both wings evenly. Glad to know that overall you like them.

As for new ideas for my rig. I have just purchased an electric ball valve from china. I have another thread on march pump control. I was given some great ideas from some posters and I went with it. I am going to control the flow with the motorized ball valve and a momentary on-off-on switch. I can't wait to get it. Hitting the switch up or down will adjust how far open or closed the valve is. I will post picture and video when I get it.

Here is a picture of the valve

Stainless_Steel_Electrical_Ball_Valve_DN15L_.jpg
 
hey, i like the build. I am intrigued by your manifold. Could you take more pics and explain where each pipe is coming from and going to and how you will control the flow, with the automated valves or ball valves? I just left Colorado in September, i miss it!
 
VERY nice work, especially on the fluid board! How are you going to keep it from dumping when you disconnect; check valves?

I also like the sight gauges! Simple, elegant, and indestructable!
 
Thanks. I am going to try and paint it this week. After paint. I think I have all the parts to start assembly. I should be brewing by the end of the month.

Well. I did not think through my panel very well. So no check valves. I thought that would make it too hard to clean. That fluid would stay in there and rot. So I got this for christmas to help out. 1 gallon version

ALM-4.jpg


Not the best solution but it will work untill I figure something better out.
 
hey, i like the build. I am intrigued by your manifold. Could you take more pics and explain where each pipe is coming from and going to and how you will control the flow, with the automated valves or ball valves? I just left Colorado in September, i miss it!

The manifold has a tube for every connection on the kegs. Then it also has an IN/OUT for the pump. So there is the IN/OUT for the heat coil. IN/OUT for the mash tun. IN/OUT for kettle. Then there is an out on the HLT. So in all there are 7 couplings on my kegs for fluid. 9 nipples on the panel.

The idea is that I can route the flow where I want with only one pump. As for flow control. I wanted the pump hidden so I got a motorized ball valve that I can control from my control panel. I will have two buttons. One for open and one for close.

I am trying to make it as clean as possible. I am trying to hide everything I can.


Edit: I also just added some new pics. The rig is painted and plumbing is set.
 
I am sooooo close to finishing, I can taste the beer coming from it. I got the bulk of the wiring and assembly done over the weekend. I have added some pics to the first page. You will see the wiring panel. The control panel and how the back of the rig is laid out. Also there is a box zip tied to the back. That is the mono headphone jacks for the temp probes to plug into. It is just temporary until I finish the sheet metal that will cover up the back.

I have a bit of touch up to do when I am complete, but here is the front panel. Any suggestions on how to label everything. I would like labels for the switches and maybe my logo on the panel too. The picture in my avatar.

IMG_03081.jpg
 
Well I did a wet test on the rig this weekend. Everything work as it should. I had a bunch of leaks in the PEX connections. I thought I could get away with hose clamps to keep it tight. That did not work so well. So I bought a crimp tool and got the right clamps. I will be able to test if the leaks are gone next weekend.

Here is a video of me running oxyclean through the BK.

[youtube]http://www.youtube.com/watch?v=iZBhgpQXZSY[/youtube]
 
Awesome!!!! I love this design.

What about installing a drip tray similar to a kegerator drip tray under the manifold panel to catch drips. You could have it drain into a container and just dump it at the end of brewday.

Great system!!!! :mug:
 
Thanks!

I have been thinking about that a bit. A drip tray might be the ticket. I was thinking about some sort of pan or similar that would slide out from the bottom. Right now I using a 1 gallon aluminum pitcher. It works ok but I still seem to make a bit of a mess.

Rig.jpg
 
What material are these (see circled in red in the pic) cord strain reliefs made of? and where did you get them?

Thanks.

I found them in the electrical isle in Home Depot. The are not seal tight connectors. They are tension relief connectors. You will find them with the PVC and electrical box connectors. I forget the name of them.


Bobby_M: So you are saying my rig looks like Big Tex. Texas steer? Yeah you are kinda right. I had that bar laying around and decided I needed to fit it in somehow. I wanted to spruce it up a bit. Keep it from looking too industrial. My girlfriend just started team roping. I tell her it is in honor of her. We like our rodeos here in colorado.
 
I found them in the electrical isle in Home Depot. The are not seal tight connectors. They are tension relief connectors. You will find them with the PVC and electrical box connectors. I forget the name of them.

I've tried Lowes and a couple Home Depots, no luck. I even took the picture in to ask about them. I've seen a few similar items but they seem to be made of galvanized steel or something.
 
I've tried Lowes and a couple Home Depots, no luck. I even took the picture in to ask about them. I've seen a few similar items but they seem to be made of galvanized steel or something.

I have to stop at lowes today for some parts. I will see if they have them and get a name for you. I will go on my lunch break.

Edit: If your hd & lowes are like mine. Don't even bother asking. They never know anything
 
Why catch the drips? That's what sloped tile floors and trench drains are for :D

If you happen to not have such things where you brew, look for what is known as a bus tub in the restaurant industry. It should be large enough to hold all the drips and still fit under your rig.

Nice job on the diverter panel.

I am finally going to change my QDs out to those stainless cam-locks.
 
That is a good idea. I was thinking a little bit more shiny though. Maybe a stainless serving tray. The ones they put the little sterno's under at a banquet. I am sure I can ebay a used one for a decent price. Otherwise the bus tub might be a good way to go.
 
Are the connectors straight thread or NPT? Don't see that info on the site.
I could actually go for some straight.
 
Back
Top