m1k3
Well-Known Member
Hi All-
I was inspired by the DIY Whole House Water Filter projects that I saw here on HBT.
First off, this is the most painful DIY that I have done yet (maybe I am just not a plumber!) So, I hope this inspires someone else to do something better. I am a pretty sure that this could have been done for less money and time (I went to Home Depot about 6 times!)
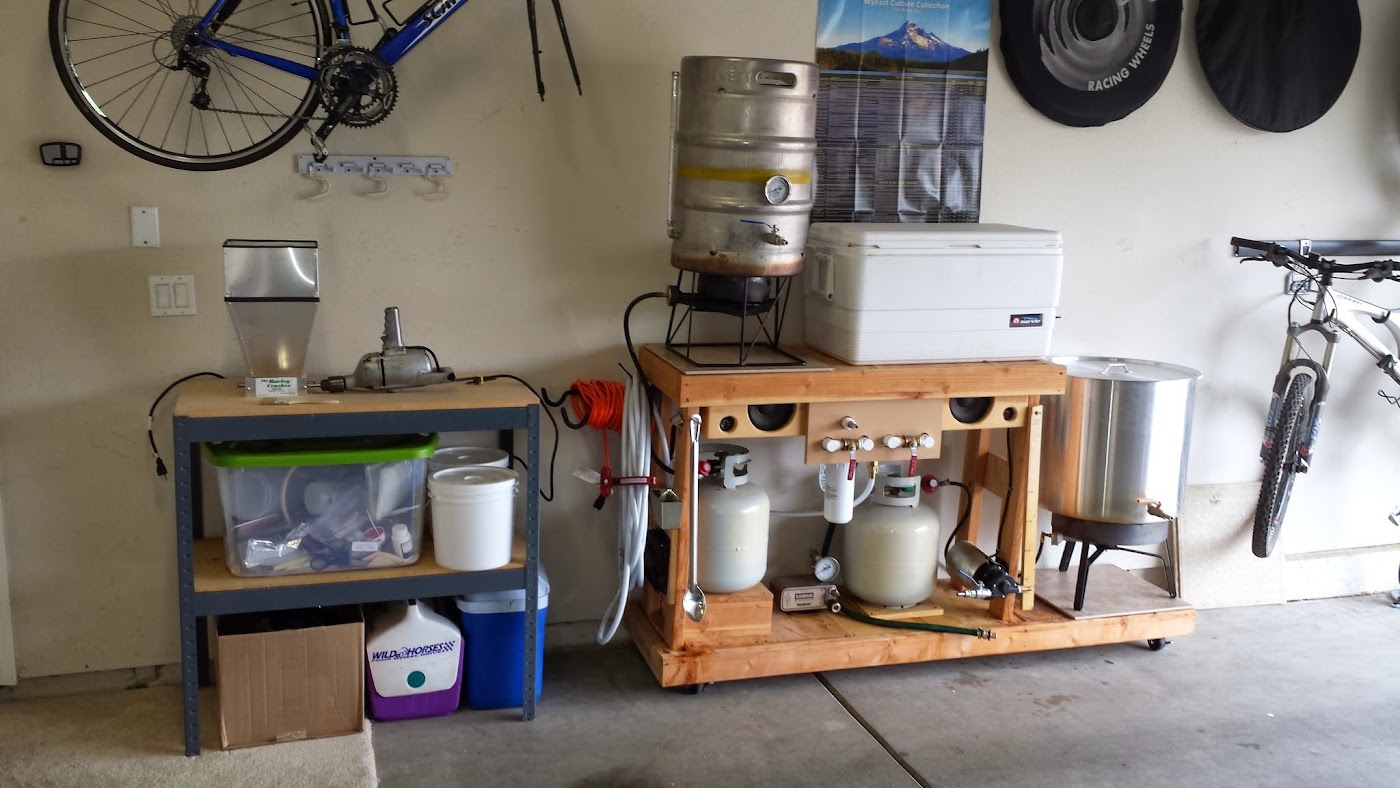
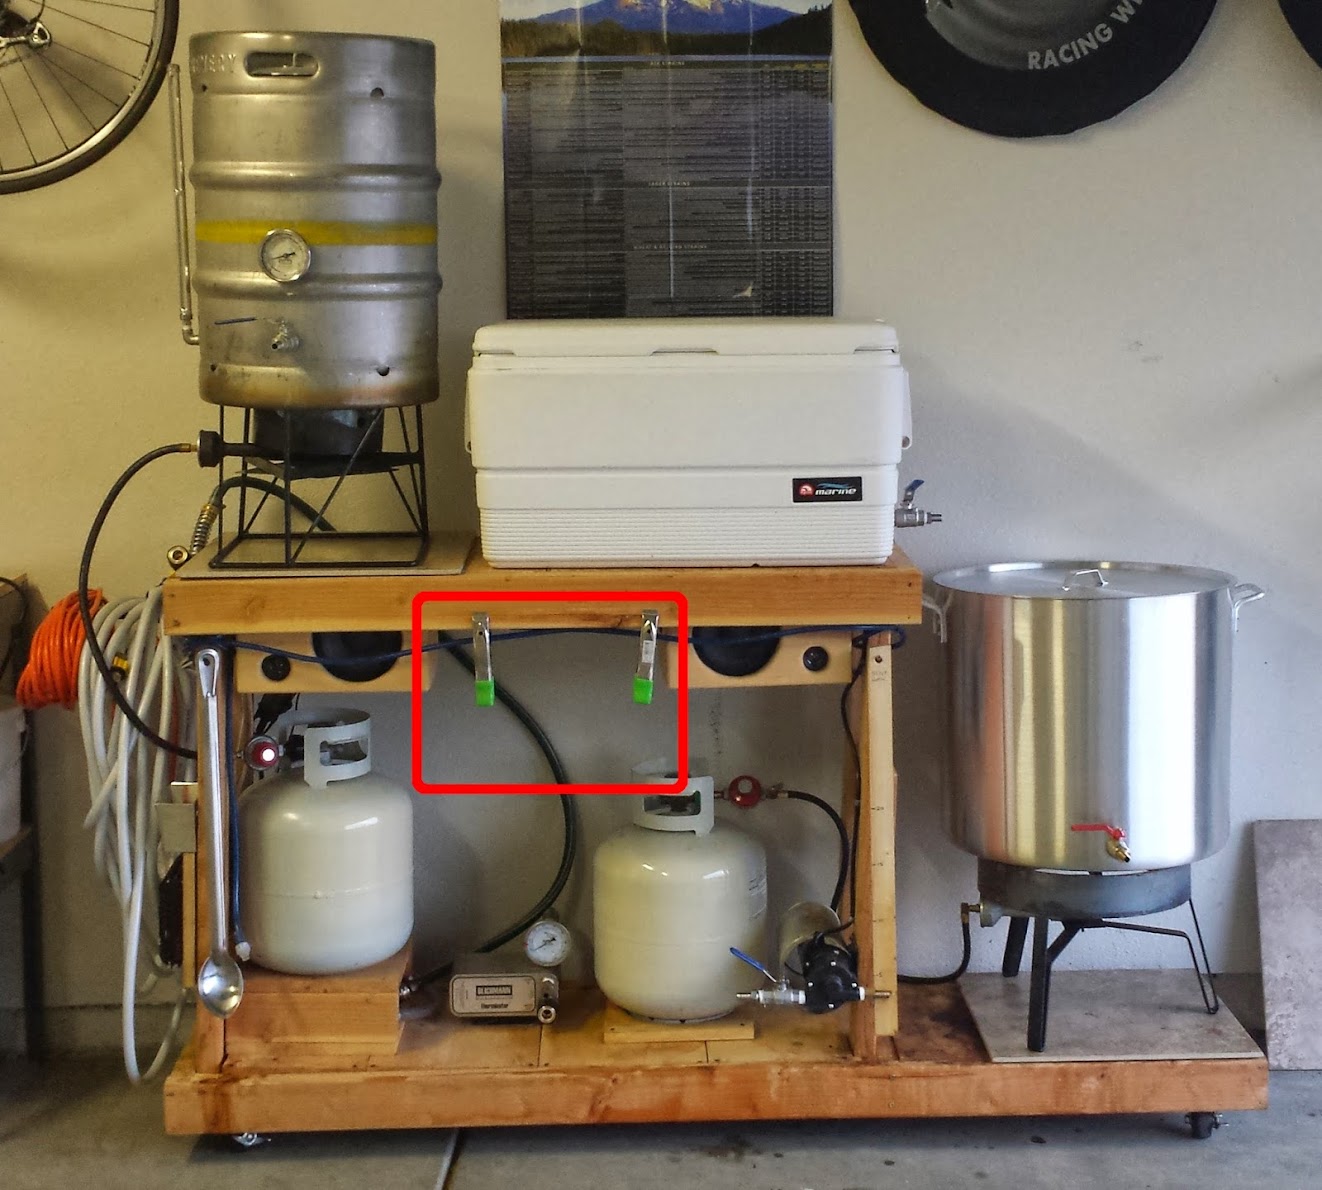
I have a wooden brew cart with a RV Hose and Therminator Plate Chiller.
I use a refrigerator ice make filter but it would leak, I had to store it and it wasn't very integrated.
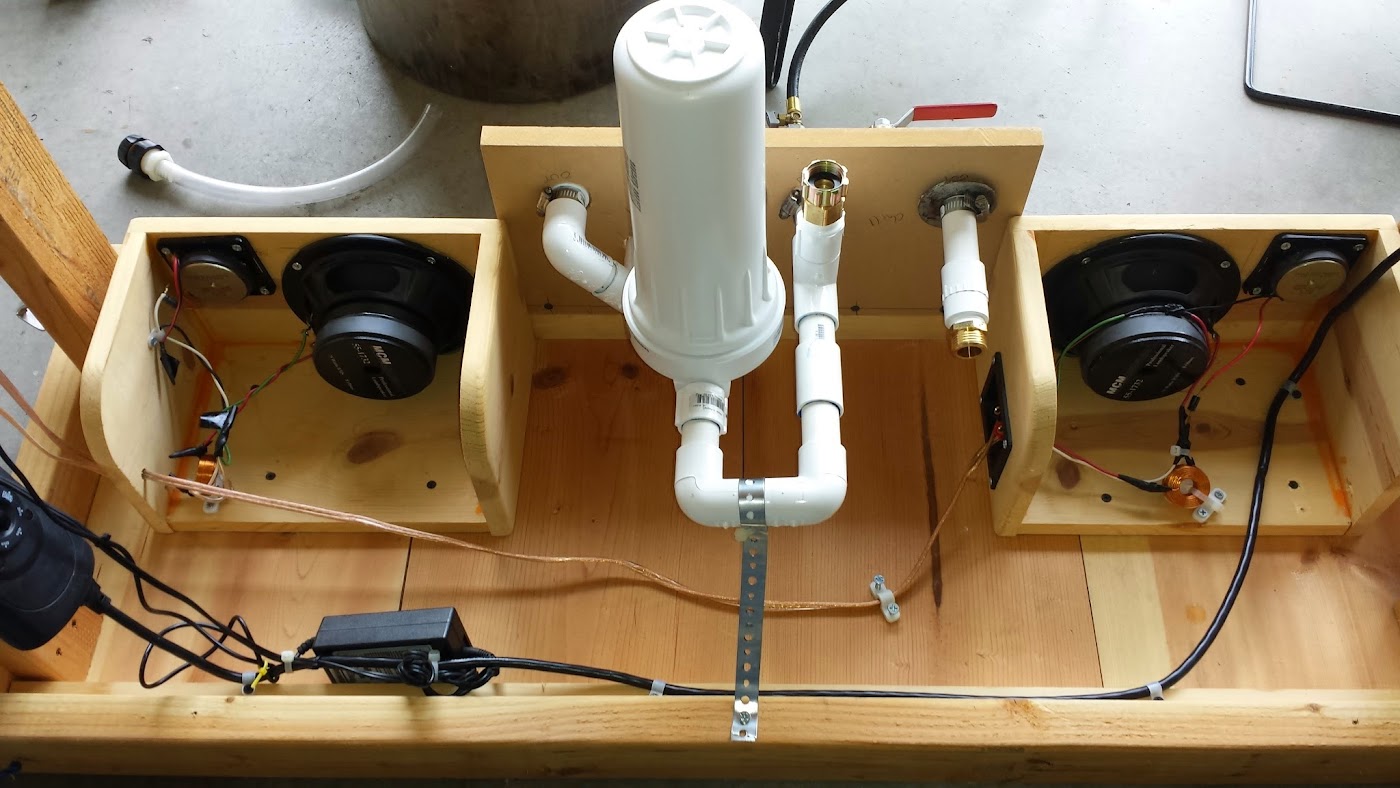
The is the space that I had to work with on the cart:
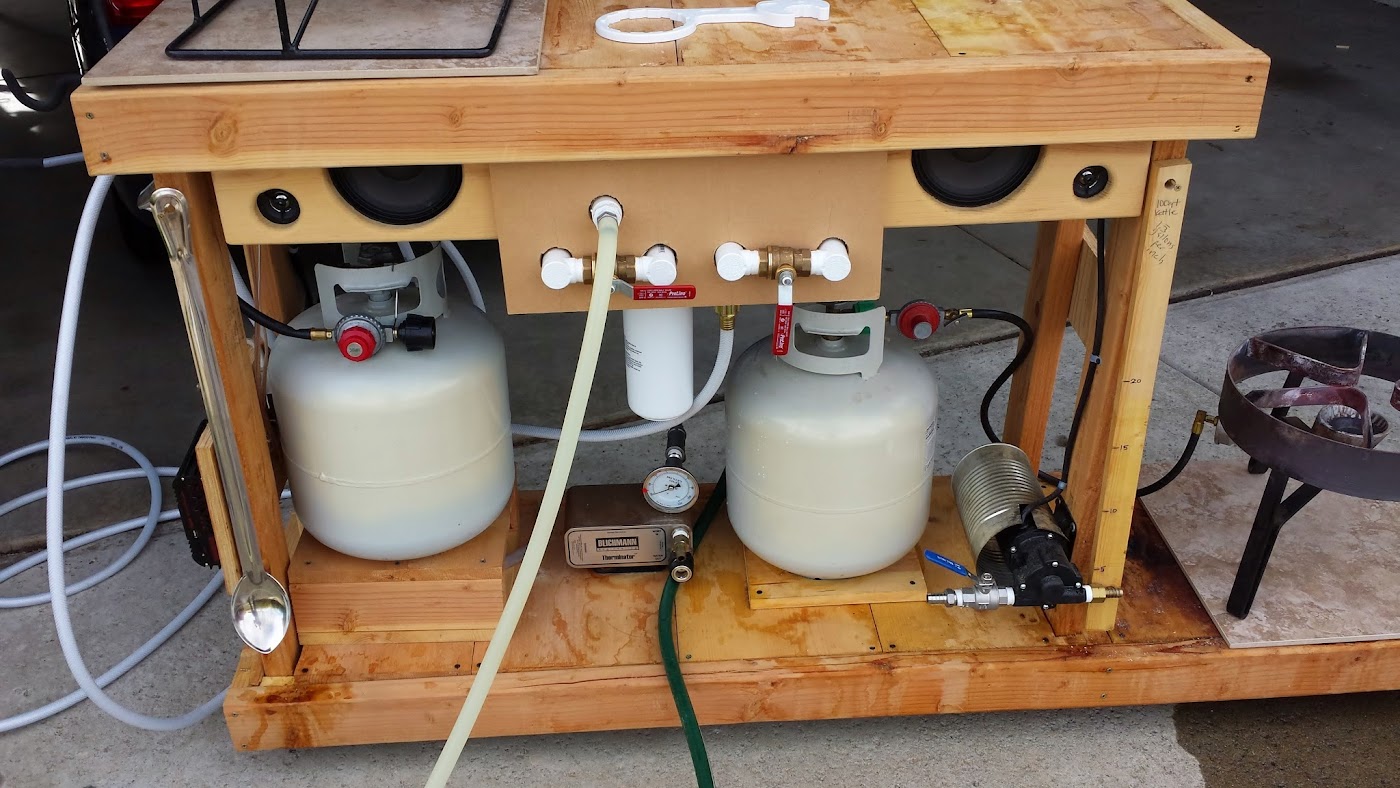
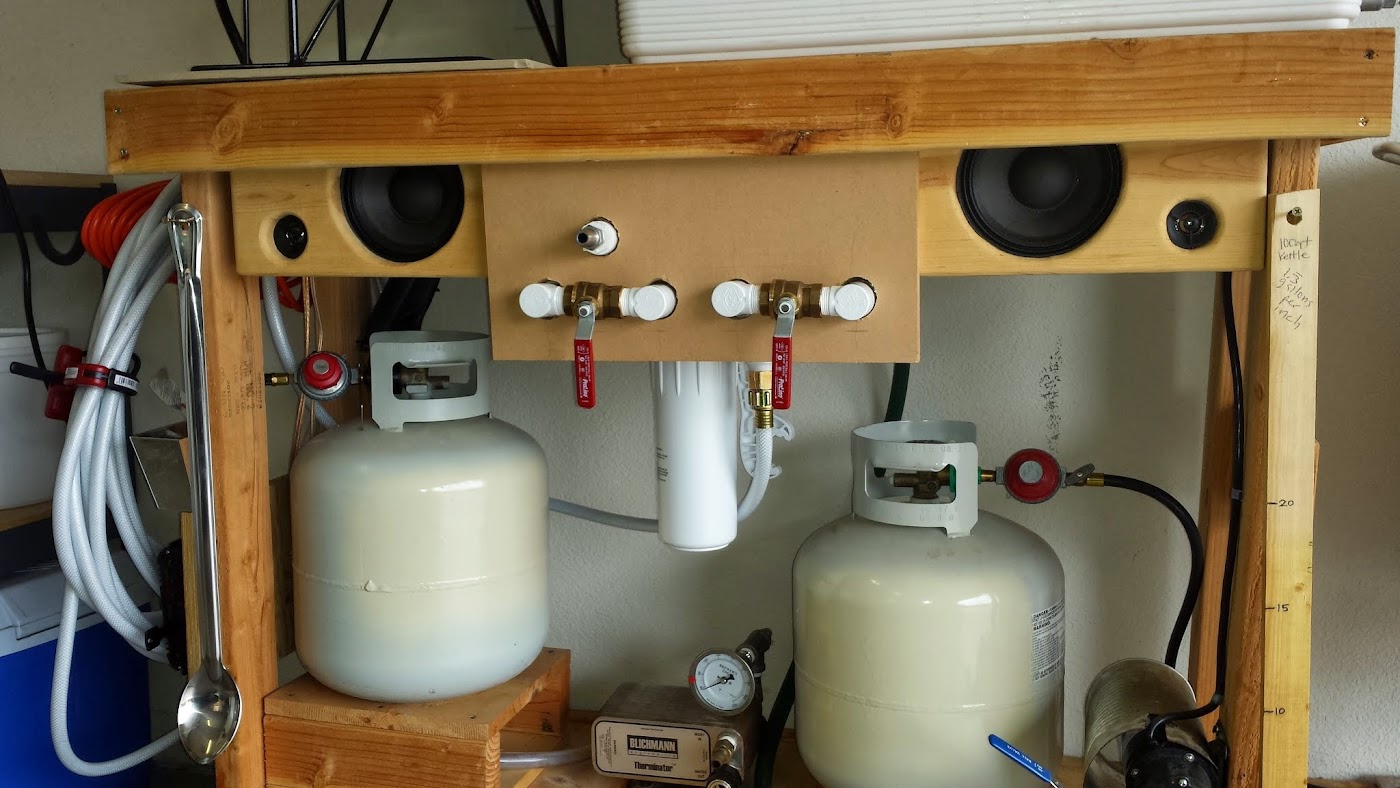
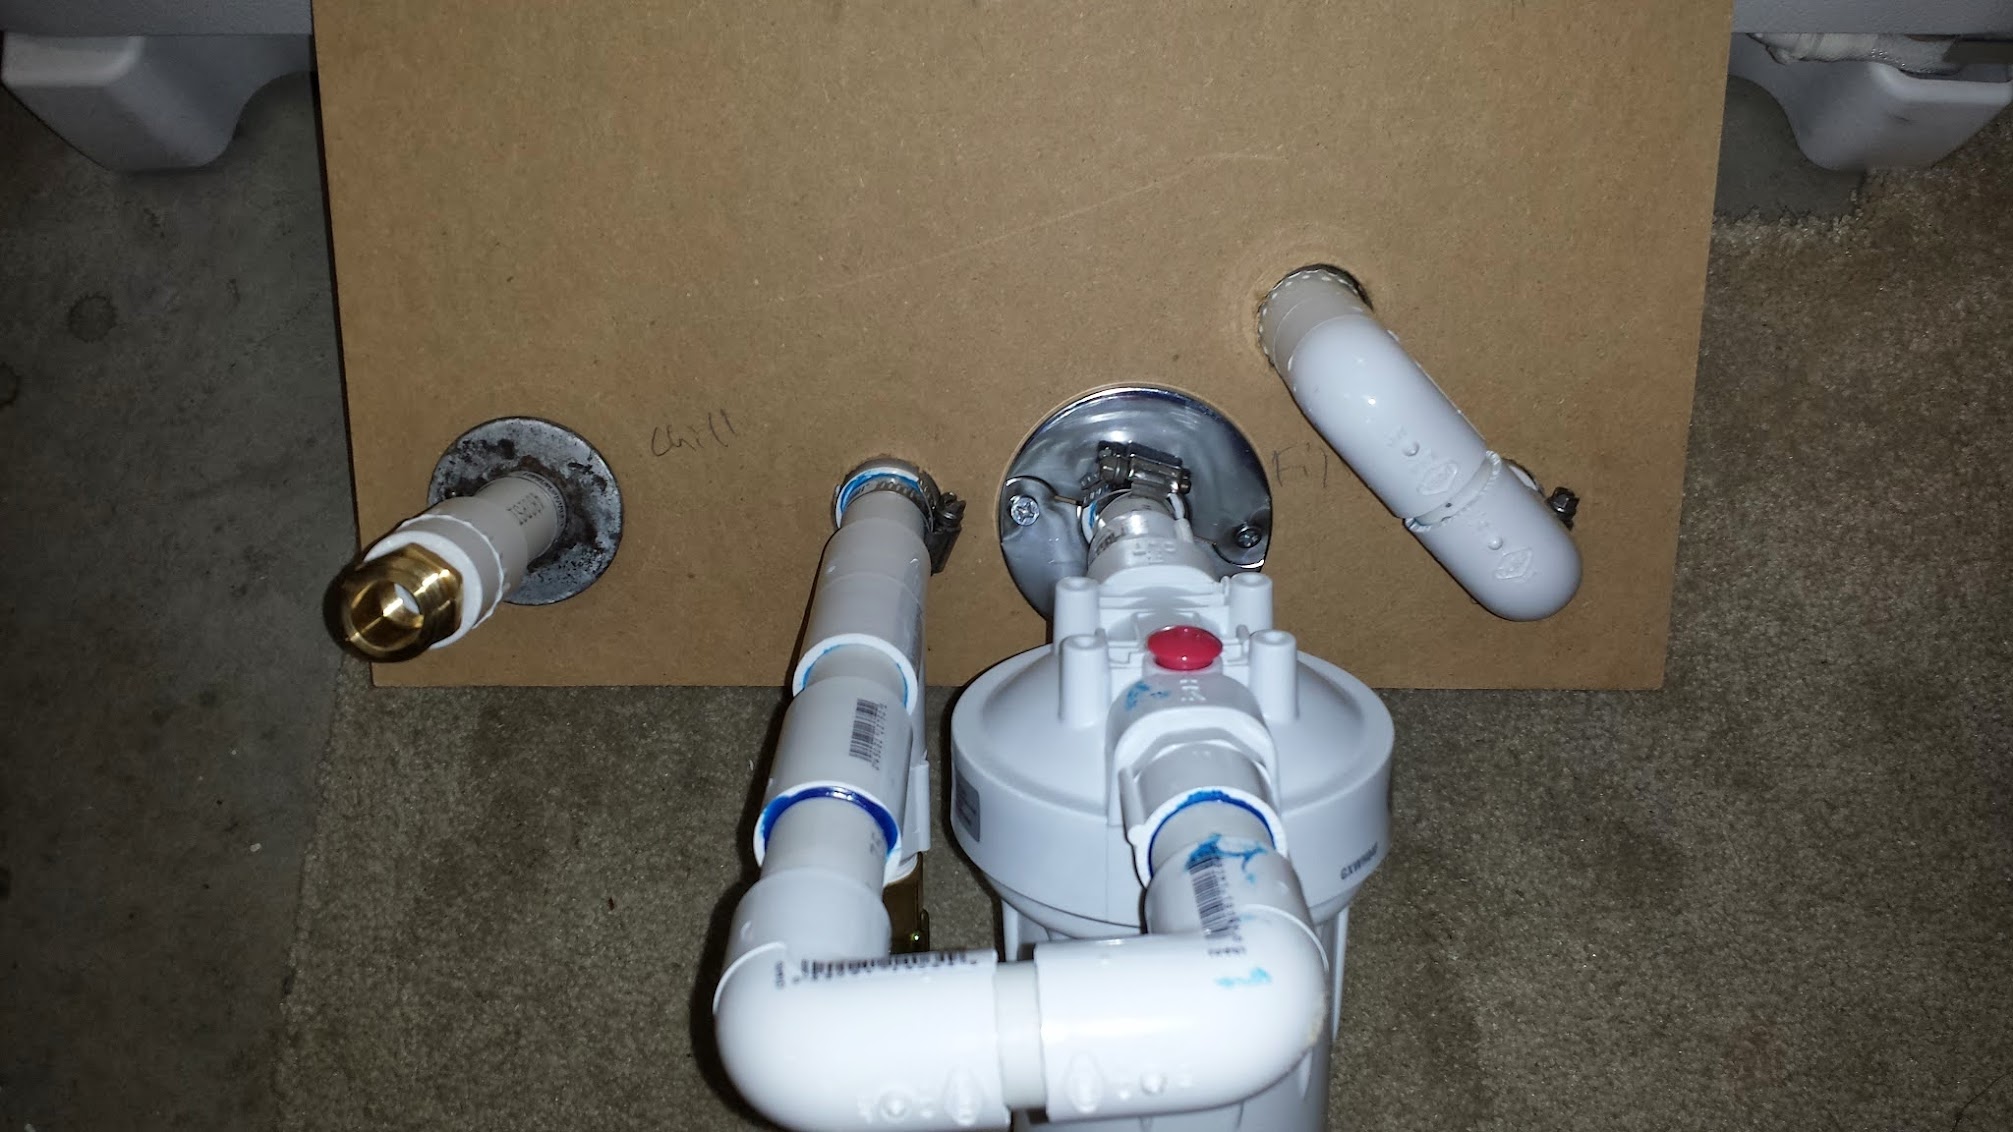
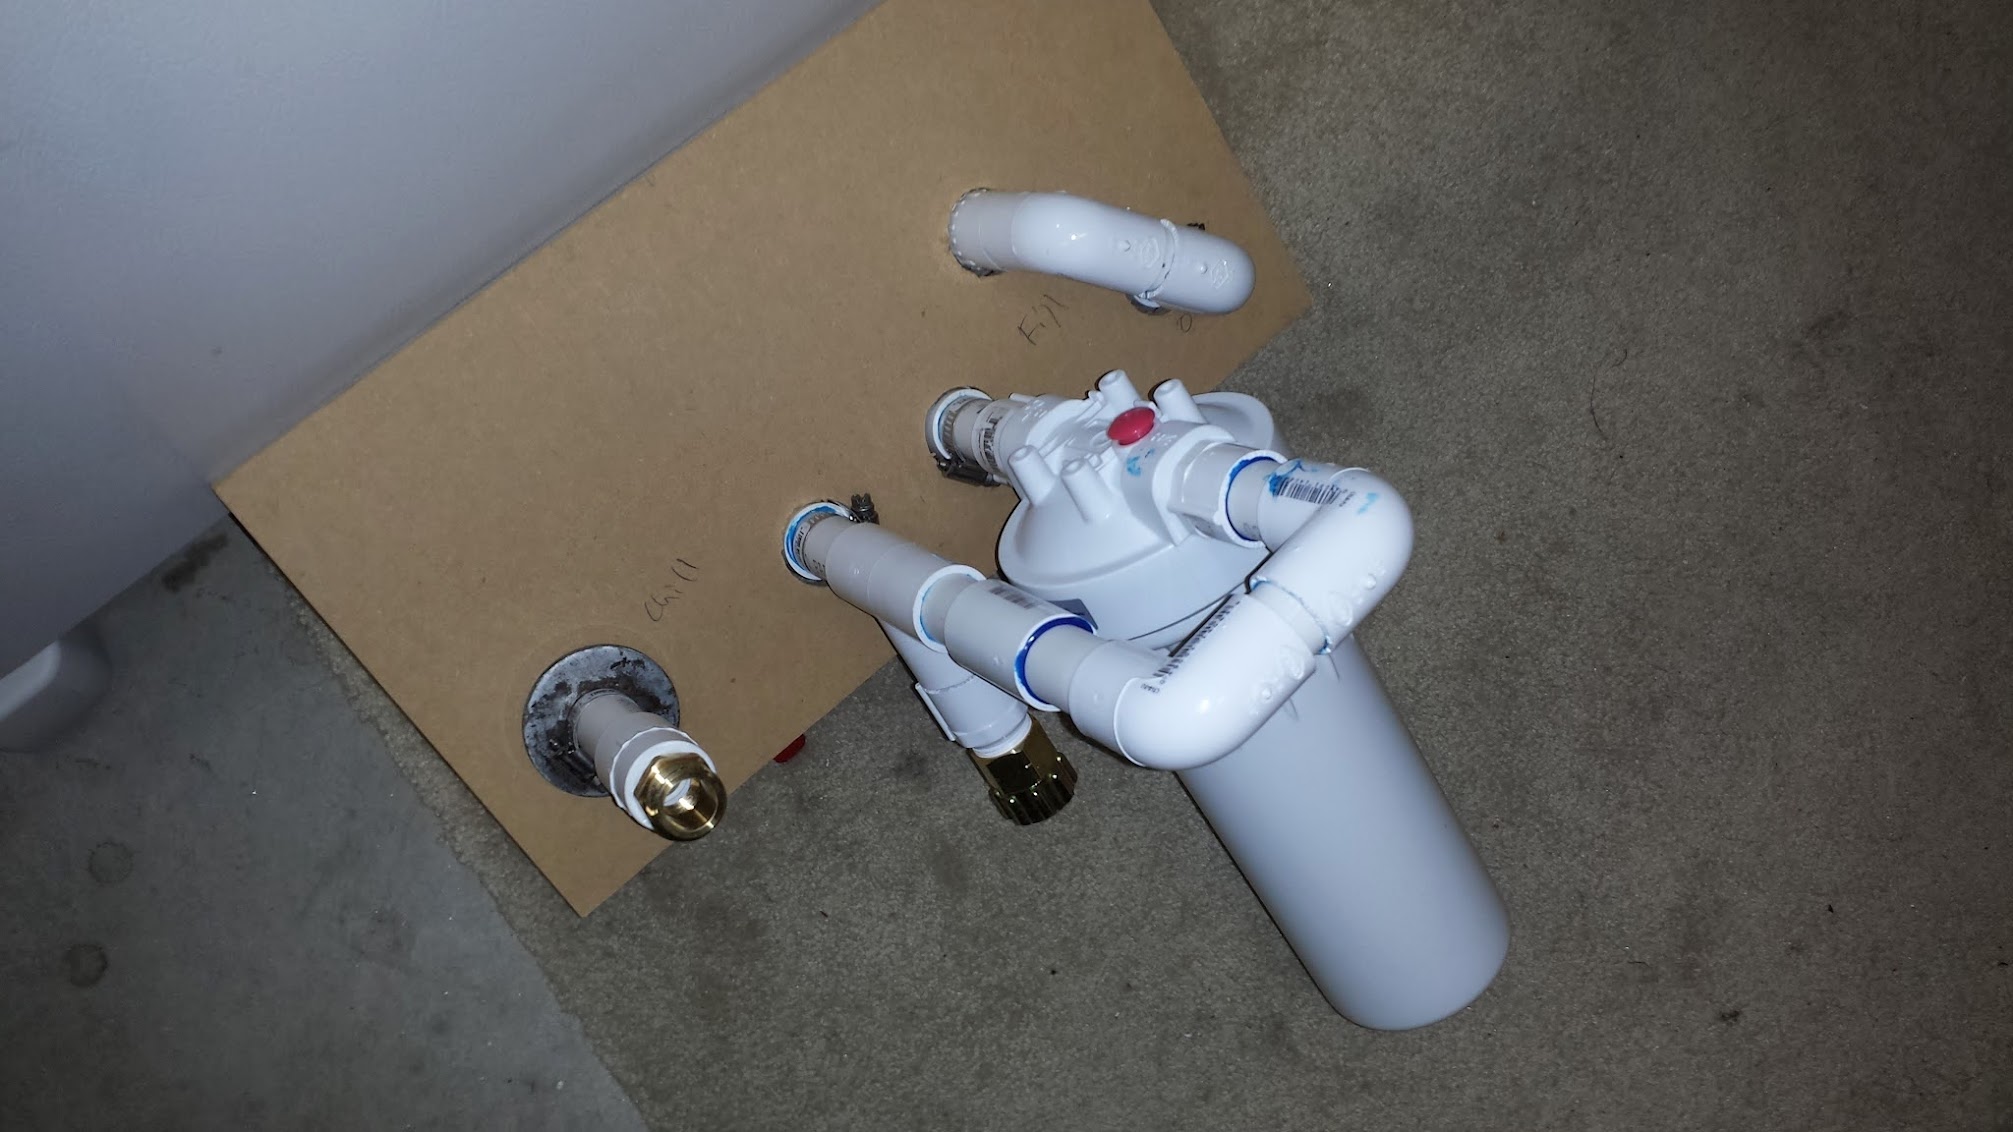
Here is what I came up with, I hope to mount it on the cart this afternoon and give it a test:
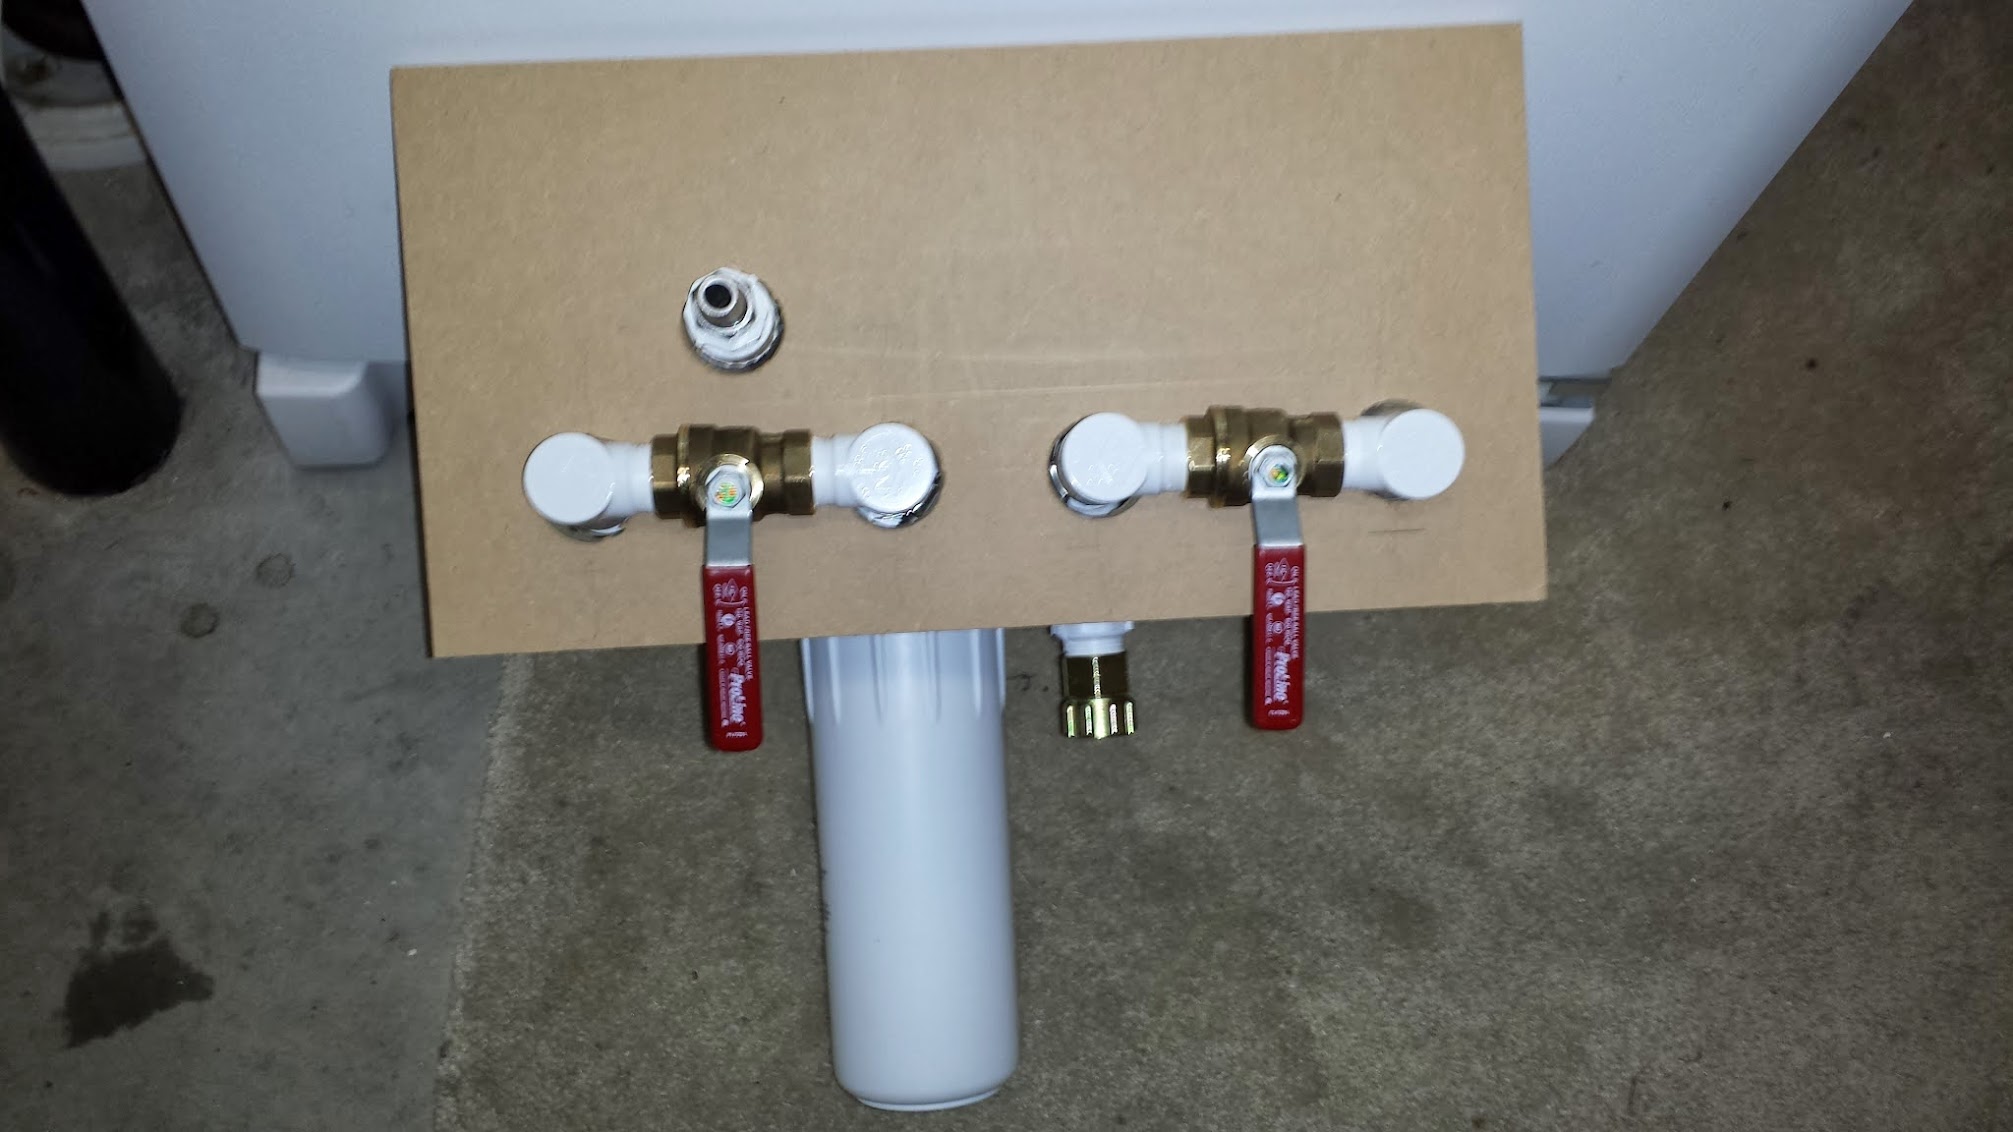
The left side (is the filter and valve) it comes out of a 1/2 hose barb.
The right side, has a garden hose out that I can quick connect to the Therminator chiller.
(you can see the garden hose water in from below, that will be connected to the RV hose that is attached to the cart.)
I will post some final photos when it is on the cart and tested.
I was inspired by the DIY Whole House Water Filter projects that I saw here on HBT.
First off, this is the most painful DIY that I have done yet (maybe I am just not a plumber!) So, I hope this inspires someone else to do something better. I am a pretty sure that this could have been done for less money and time (I went to Home Depot about 6 times!)
I have a wooden brew cart with a RV Hose and Therminator Plate Chiller.
I use a refrigerator ice make filter but it would leak, I had to store it and it wasn't very integrated.
The is the space that I had to work with on the cart:
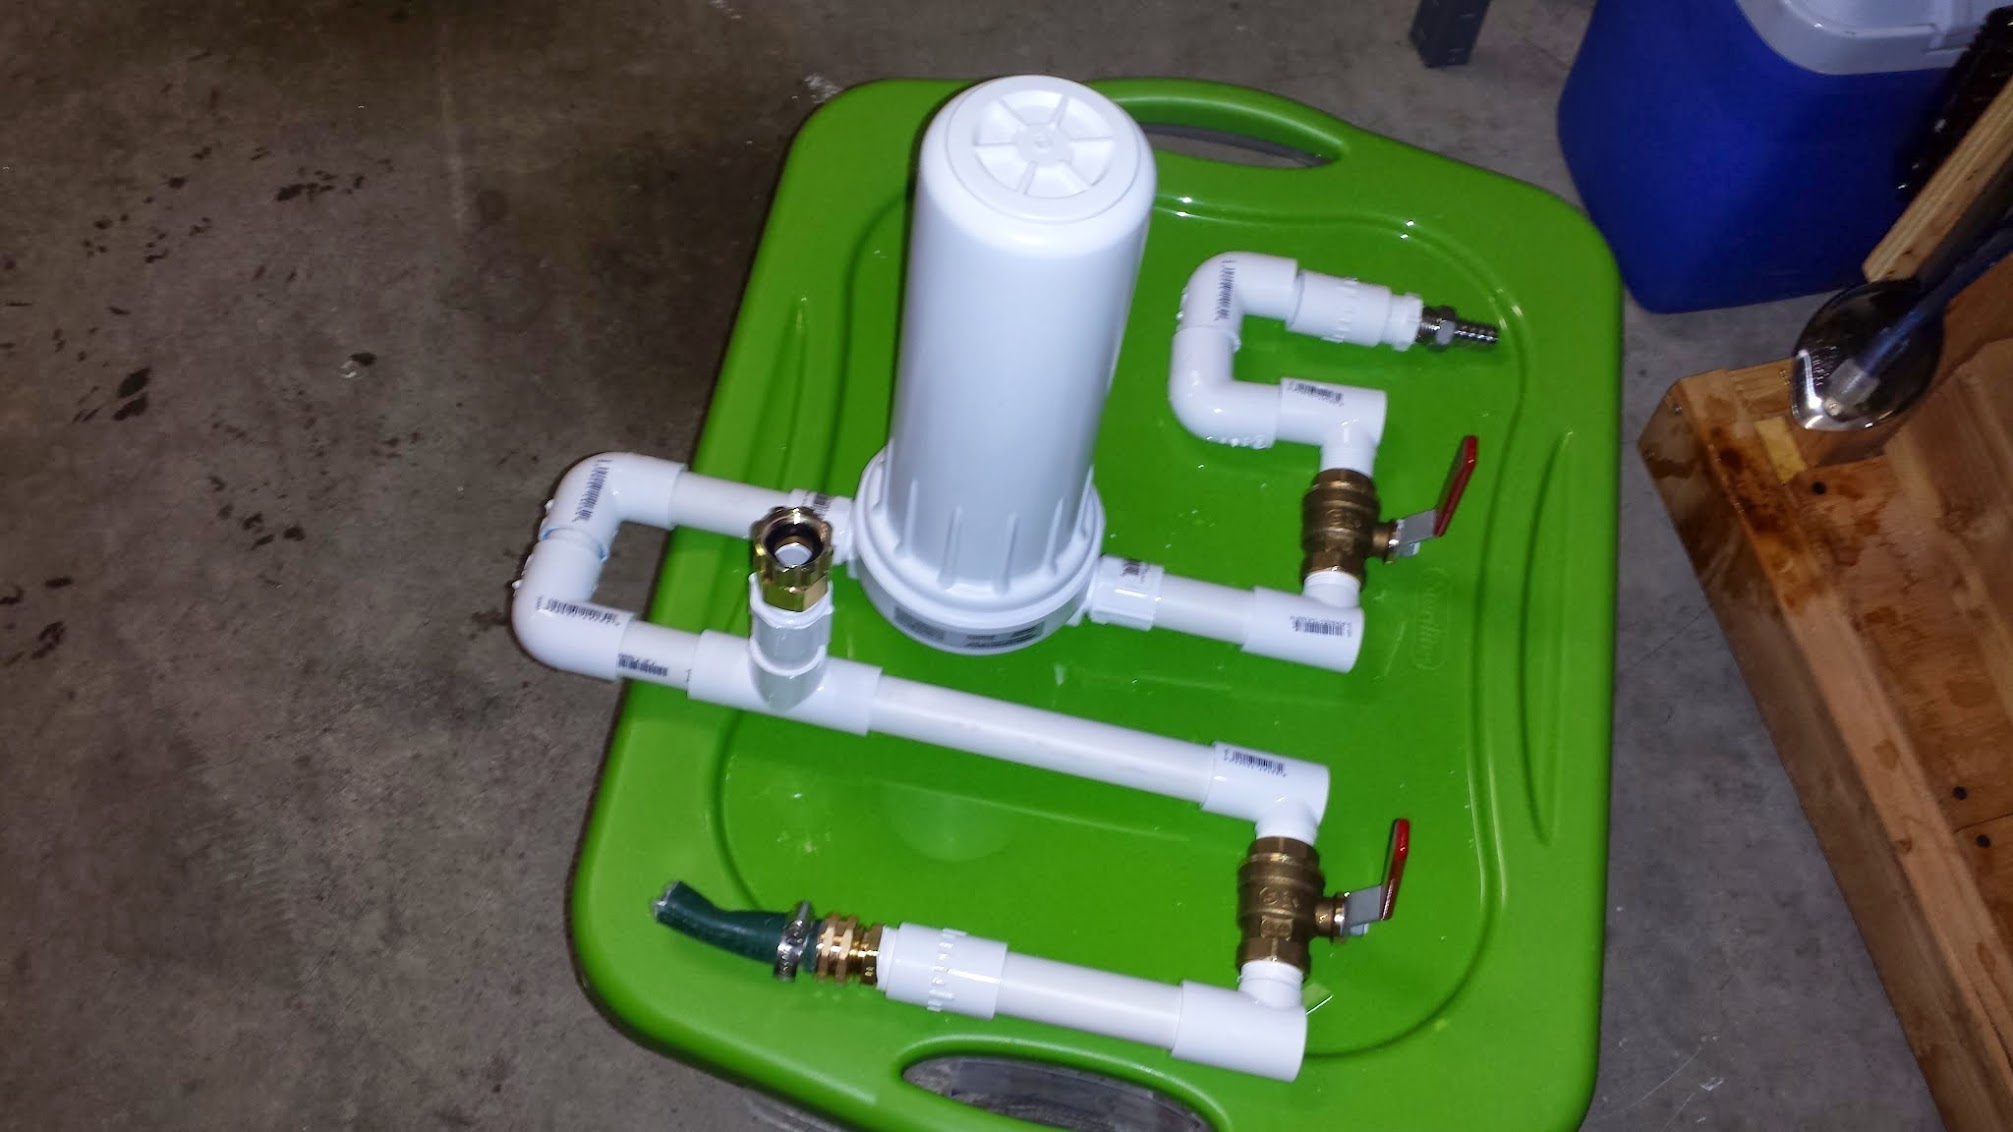
Here is what I came up with, I hope to mount it on the cart this afternoon and give it a test:
The left side (is the filter and valve) it comes out of a 1/2 hose barb.
The right side, has a garden hose out that I can quick connect to the Therminator chiller.
(you can see the garden hose water in from below, that will be connected to the RV hose that is attached to the cart.)
I will post some final photos when it is on the cart and tested.