"polishing your keg" is more than a clever euphemism

Homebrew Talk - Beer, Wine, Mead, & Cider Brewing Discussion Forum

Help Support Homebrew Talk - Beer, Wine, Mead, & Cider Brewing Discussion Forum:

This site may earn a commission from merchant affiliate links, including eBay, Amazon, and others.
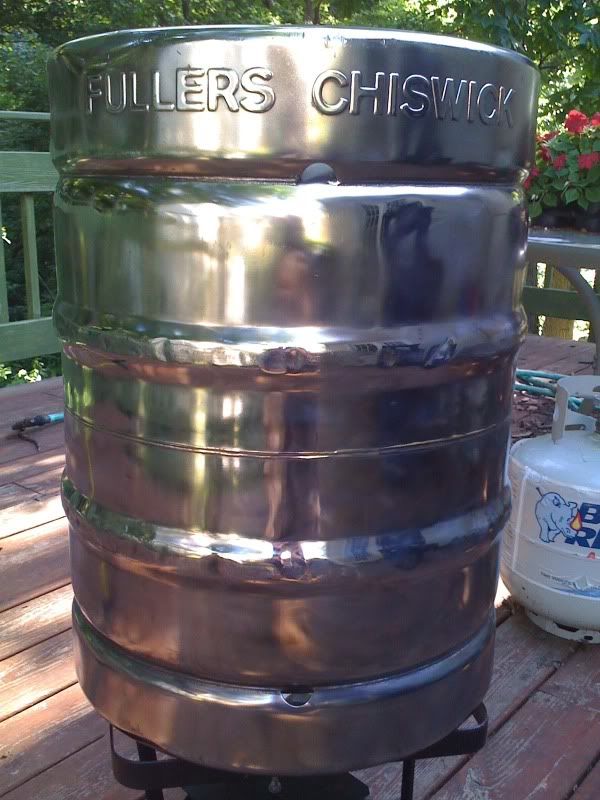
It doesn't help that its a balance between hitting the center metal ring and burning the sides. But i finally have the right polishing compounds so i'm going to try getting all my rubber off and go to town with the polish.

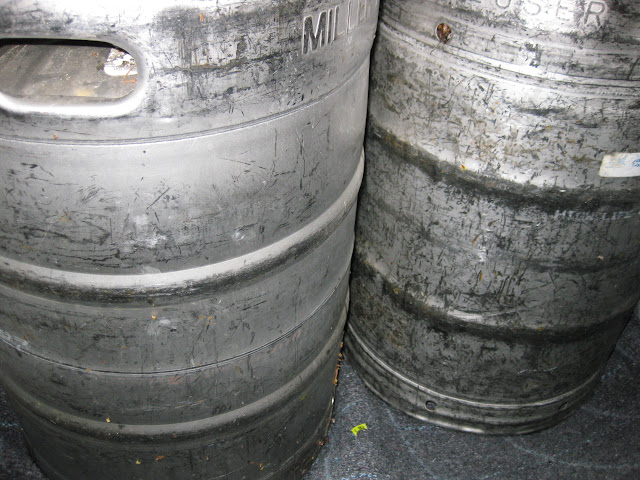
Side note, My kegs have a few small rust points on them.... BKF them? and BKF is just the cooktop cleaner they sell at grocery stores correct?
 
BKF should take care of the rust spots. "Bar Keepers Friend"... in a gold cardboard "can" (same way Comet is packed). Blue logo, white letters.
 
Schweaty,
The grinder is running too fast, using too much pressure, or a combination of both. If you have one near by, get a router speed controller from harborfreight, if not order it. This way you can dial in the speed about on the grinder saving you some pads. I bought one for a port and polish job on some heads and have used it for all kinds of odd jobs like keg polishing. Useful thing to have.

That aside, try not to work on the same spot for too long, the metal does get pretty hot quickly. Try to keep the pad moving and working your way around the keg. Several light passes will work better than one concentrated one.

Good luck on the next one.
 
Worked like a charm. I used the "fine" pad, then #2 and #5 polishing compounds on two different polishing pads.

iPhoneUpload-2.jpg


LOL, is it just me.....


or is there a woman in a bikini reflecting off that surface?
 
Well <blush> thanks for the compliment I guess :), but no, it's just my cargo-shorts-clad self.
 
Coming along now. I had the wrong polishing compounds. plus a thousand to the Harbor Freight throttle. Didn't have any burning issues at medium power untill i cranked it to deal with a particular tough spot. Also works great with the polishing pads on half power.

kegpolish.jpg
 
Nice!!

Always cool to have a keg that says something other than AB, too. :D
 
Brew_Cart.jpg


Here are my kegs after polishing. I'm not going to lie the one on the left was rushed because I wanted to brew on Labor Day.

I've decided that I'm going to have to put some sort of a sealant or gloss on the outside because these things get water marks very easy. And lets not forget PBW or wort that kills the shine if left on for too long.

I'm pretty happy with the results but I have a feeling they won't stay like this for long!
 
This is an awesome thread. I just finished converting my keg into a keggle tonight. Looks like I've got a new excuse to go to the hardware store! Thanks for sharing. I'll be sure to post pics when I've had a go at this. Thanks again!
 
Note, this is also a high quality upload so watching directly on youtube will look better.

[ame=http://www.youtube.com/watch?v=9Ln-plGzVc4]YouTube - Brewing with Bobby_M - Polishing Stainless[/ame]
 
Just started in on this myself. However, I've started out with the medium pad because a couple of my kegs are deeply scratched. I tried it out last night for about 5-10 minutes and it actually looks pretty nice with just a quick pass. Looking forward to a homebrew, and some more work on the kegs. Thanks for the guide!
 
Good call on the medium. After cutting the video, I opened my pack of coarse pads and I'll say that I think it's a great place to start for any keg just to make quick work on any scratches or dings. Coarse will put fine scratches in the surface if you push hard, but lightening up the pressure buffs them out too. Gatorgrit FTW.
 
Bobby, great video as always, and sorry for ribbing you.
It just looked so strange having one super looking one and the other two just dull.
 
It all comes down to time to brew or time to polish. Like right now I have my HLT apart and half polished and my Saturday brewday is knocking at my door. Need to finish.... Of course the goal is to make this one so shiny and flawless that my BK is sickly jealous.
 
Dang, overshined this one, now I gotta go back and hit the original again. I suppose it's not so bad for a year old finish.

hltshine1.jpg


hltshine2.jpg


hltshine4.jpg


Here's what the kettle looked like last year....
shinykeggle.jpg


I'm going to say nevermind the Caswell stuff. If your keg is relatively smooth with no deep scratches or pits, start with the medium gator grit with a light touch, then the fine pad. It's hard to know when you're done with the fine pad but methodically do the entire surface with it otherwise you'll see scratches beneath the shine in the next steps. Nothing sucks worse than spending 15 minutes polishing and realizing you have to back out to a coarser grit.

After you have an even smooth finish, put the gatorgrit polishing discs on and apply the coarse polishing stick, something like #2 or 3 and get the surface a bit shiny. It's not going to get like a mirror in this step and don't try. Do the whole keg with this and you'll probably wear out a whole pad in the process.

Next change out the pad and wipe the whole keg down really well to remove any remaining coarse polish. Then start with the #5 stick. I noticed the real work is done here by applying a pretty decent pressure to the point where the grinder slows down to about half speed. I know it sounds bad but it's what takes the orange peel surface down to a mirror. Keep applying more polish often. After some time, lighten the pressure and buff. Each step took me about an hour.
 
Thanks for the guide, just completed two out of three kegs this last Saturday. You're not kidding about that being a TON of work...I'm estimating about 3-5 hours per keg. Here's how they look now..not quite the mirror finish you've got on yours but I'm happy with them. Who knows, after a while I may take the buffing wheel to them again and get that mirror finish!

Shiny%20Kegs.jpg
 
Hey Bobby, thanks for the info. Went to Lowes to get the course, medium, and fine pads. used all three, then use the buffing pad by gator grit and used the black emory. Didn't bother the use the green rouge cause I saw the swirl marks. I'm not going over that again, but what can I do for next time to avoid the swirl marks? Am I pressing too hard? Should I go over it again with the fine pad before moving on to the buffing pad, or is that about as good as it gets? Any feedback would be great, thanks guys. On another note, how did you modify your lid to fit the top without falling in?
https://cdn.homebrewtalk.com/gallery/showphoto.php?photo=29423&size=big&cat=all&ppuser=45084
 
I think it's tricky to know how long to spend on each grit because they all put scratches in while taking the deeper ones out. I'd say there's really no keg out there that needs the coarse pad. It's too aggressive. I'd even say the medium is to much for kegs in decent shape. The best result has been fine pad with some pressure, then lighten up as it cleans up. When I switched to the buffing pad with the white stick from Lowes, heavy pressure worked best to bring the mirror making sure to load the pad often. Let the backing pad cool down every 10 minutes.
 
Will these guys (specifically the keg on the right) clean up as well? or do those scratches look too deep?

IMG_0457.JPG


Can pick these both up today for around $40 each.
 
Will these guys (specifically the keg on the right) clean up as well? or do those scratches look too deep?

IMG_0457.JPG


Can pick these both up today for around $40 each.

Mine were just as bad when I picked 'em up. I cut out the top using a similar jig to Bobby's, then started with the coarse gator grit pads and worked down to fine. Bobby has pointed out that the coarse and even the medium pads may be too abrasive. I'm sure you can knock out all of that stuff using 2 "fine"(blue) gator grit pads for each keg. Then follow up with the polishing discussed earlier in the thread. After all your work, your kegs will not be perfect, as I have learned, but you can get them pretty damn close. Before you even start, use BKF to clean it up real quick.
 
Just a safety note:

I picked up a few kegs with painted bands (thick paint) that I didn't want to waste a GatorGrit pad on so I took a 4 1/2" Metal Wire Brush for my angle grinder to the keg. This thing gave a lot more vibration than a GatorGrit did and my hand slipped part of the way through removing the paint, even with the guard on my finger managed to graze past the brush while the grinder was on and I did a number on my fingertip. Took a good size chunk out of it. Should have thought twice about wearing some leather gloves while using the grinder (had on glasses and ear protection but no gloves, thinking my hands were far enough away).

Not the most enjoyable way to spend an evening - so just thought I'd give a bit of a safety reminder - wear gloves!
 
That's a good point, but I wish you used sandpaper or paint stripper on the bands. If that was a regular steel wire brush, you're going to have a bit of a rusting problem now. More importantly, I hope the skin grows back.
 
That's a good point, but I wish you used sandpaper or paint stripper on the bands. If that was a regular steel wire brush, you're going to have a bit of a rusting problem now. More importantly, I hope the skin grows back.

Bummer - luckily I only did it on a 6" section. I still need to go back over it with the gator grit and polishing - will I still have rusting problems?
 
Bummer - luckily I only did it on a 6" section. I still need to go back over it with the gator grit and polishing - will I still have rusting problems?
Sand it thoroughly and then start the polishing process again. You need to get rid of any small bits of iron that have embedded themselves in the surface of the stainless.
 
Just a safety note:

I picked up a few kegs with painted bands (thick paint) that I didn't want to waste a GatorGrit pad on so I took a 4 1/2" Metal Wire Brush for my angle grinder to the keg. This thing gave a lot more vibration than a GatorGrit did and my hand slipped part of the way through removing the paint, even with the guard on my finger managed to graze past the brush while the grinder was on and I did a number on my fingertip. Took a good size chunk out of it. Should have thought twice about wearing some leather gloves while using the grinder (had on glasses and ear protection but no gloves, thinking my hands were far enough away).

Not the most enjoyable way to spend an evening - so just thought I'd give a bit of a safety reminder - wear gloves!


Sorry to hear you had a disagreement with your grinder.

However I disagree with the idea of wearing gloves. The issue with gloves and moving objects is that they like to get caught in the fast moving object and pull you into it. While the glove may have saved you some of your bark, the gloves may have caused a more violent reaction with the grinder or even a broken finger. Just think how bad it would suck to have you glove caught in the brush whipping around at a few thousand RPMs.

Just my thoughts.
 
Okay. I've been following this thread and bought all the stuff a while back. Just got around to trying it tonight and here's where I am at at this point. Just wanted some pointers if anyone has any to save me some time. I seem to be using a lot of pads.

I started with the blue (fine) and then went to the medium and on to the coarse which worked the best for mine. Then back down to the fine. All Gatorgrit.

Here's the start:


Then I switched to the polishing pad with the #5 compound per Bobby's instructions in post #91


I am getting a nice mirrored finish in certain spots then it dulls over then it comes back. I need to know how often to add the compound? I am adding it quite often.


Also, the number order of the compounds seem backwards to me. Here's what I have. #5 reads "light polishing" and #2 just reads "hard metals". Should I be using 2 first then 5? Maybe I read it wrong, I'll go back and look.


Should I use 2 then 5? I also have this number 5:
 
I think you're making it too complicated but others who have completed this can chime in.

All I'm doing is starting with Medium - working out as many of the deep scratches as I can, then switching to fine, ultimately following up with the polishing pad and compound. I'm using what I think is equivalent to your #5.

You're doing a lot more steps than I am! Although mine are polishing up quite nicely.

As for pad life - keep the pad surface flat on the keg - it keeps the edge from getting torn up. For 3 kegs I think I'm good with 4 mediums and 2 fines. I'm not quite done - the worst for me was the removal of the bands that were painted on 2 kegs - I just hit them with the medium after I'd hit most of the keg first - but that did kill that pad!
 
Yeah, the painted bands are best dealt with using paint removing chemicals. Medium pad should be used only where deep scratches exist, then go to fine for a total cleanup.

The lower number polish is coarser, hit the whole keg with that and keep going until the pad is toast.

Switch to the higher numbers, 5 is good. New pad otherwise you still have #2 grit in there. Keep the pad as flat as you can and apply enough pressure to slow the grinder down. I was doing like 4" x 6" area, reapply the stick and move on. If you don't get a mirror shine, not enough pressure.
 
How much compound are you guys loading into your gator-grit polishing pads? I know it just takes a second to load it, but low long before you re-load?

Thanks...
 
Back
Top