walk-in cooler with 8 taps thru wall. temp concerns with long shanks

Homebrew Talk - Beer, Wine, Mead, & Cider Brewing Discussion Forum

Help Support Homebrew Talk - Beer, Wine, Mead, & Cider Brewing Discussion Forum:

This site may earn a commission from merchant affiliate links, including eBay, Amazon, and others.

wacky1980

Active Member
Joined
Jan 17, 2016
Messages
43
Reaction score
16
Location
Mt Sterling
lol long shanks. like the guy in the movie... anyways

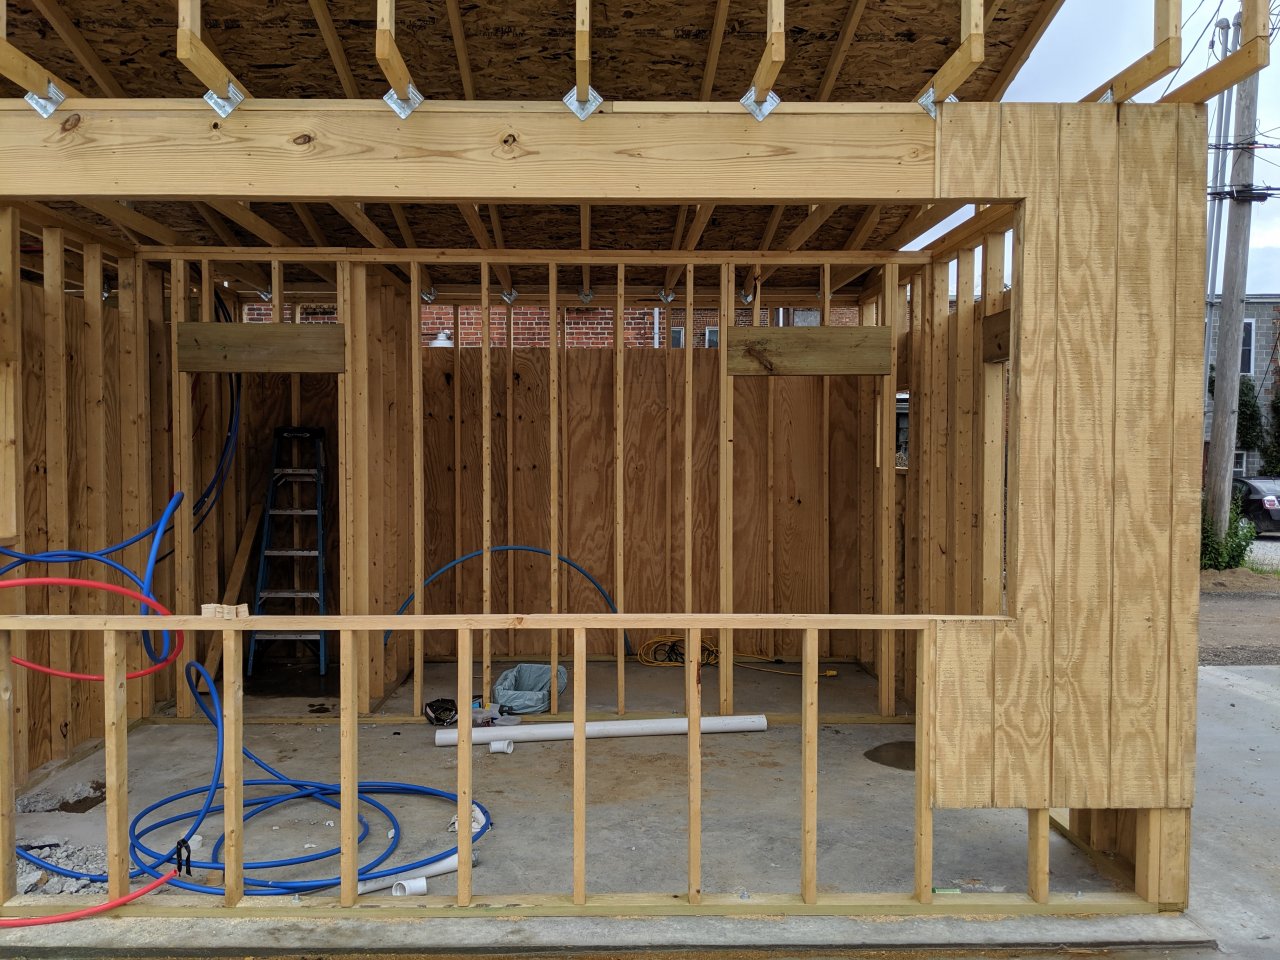
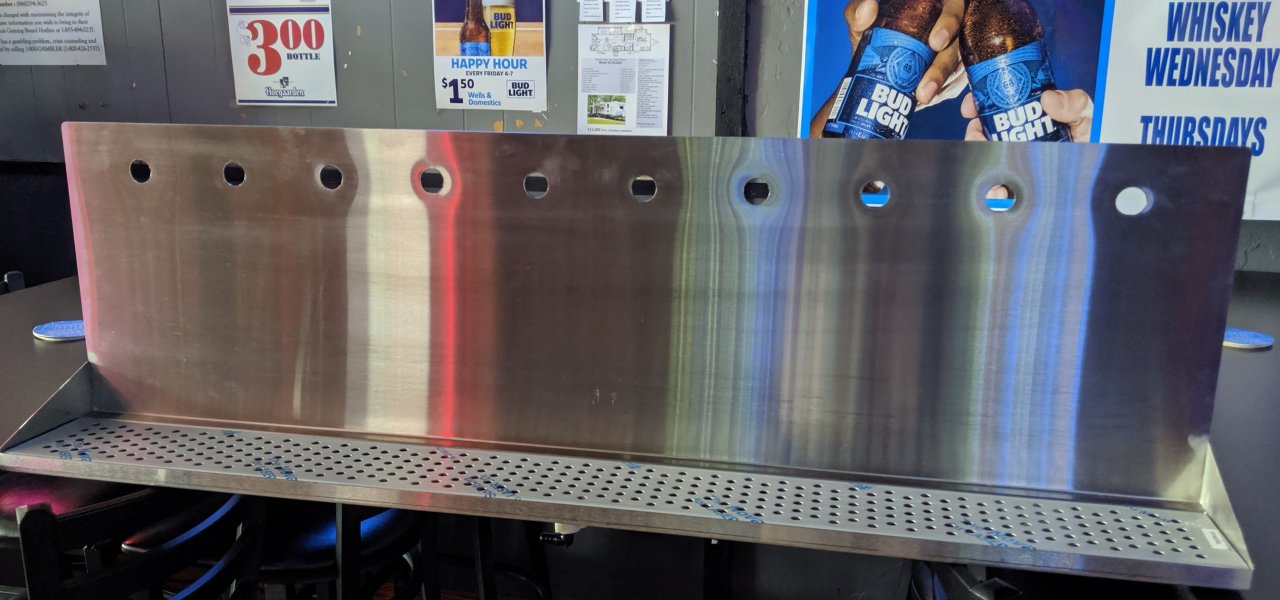
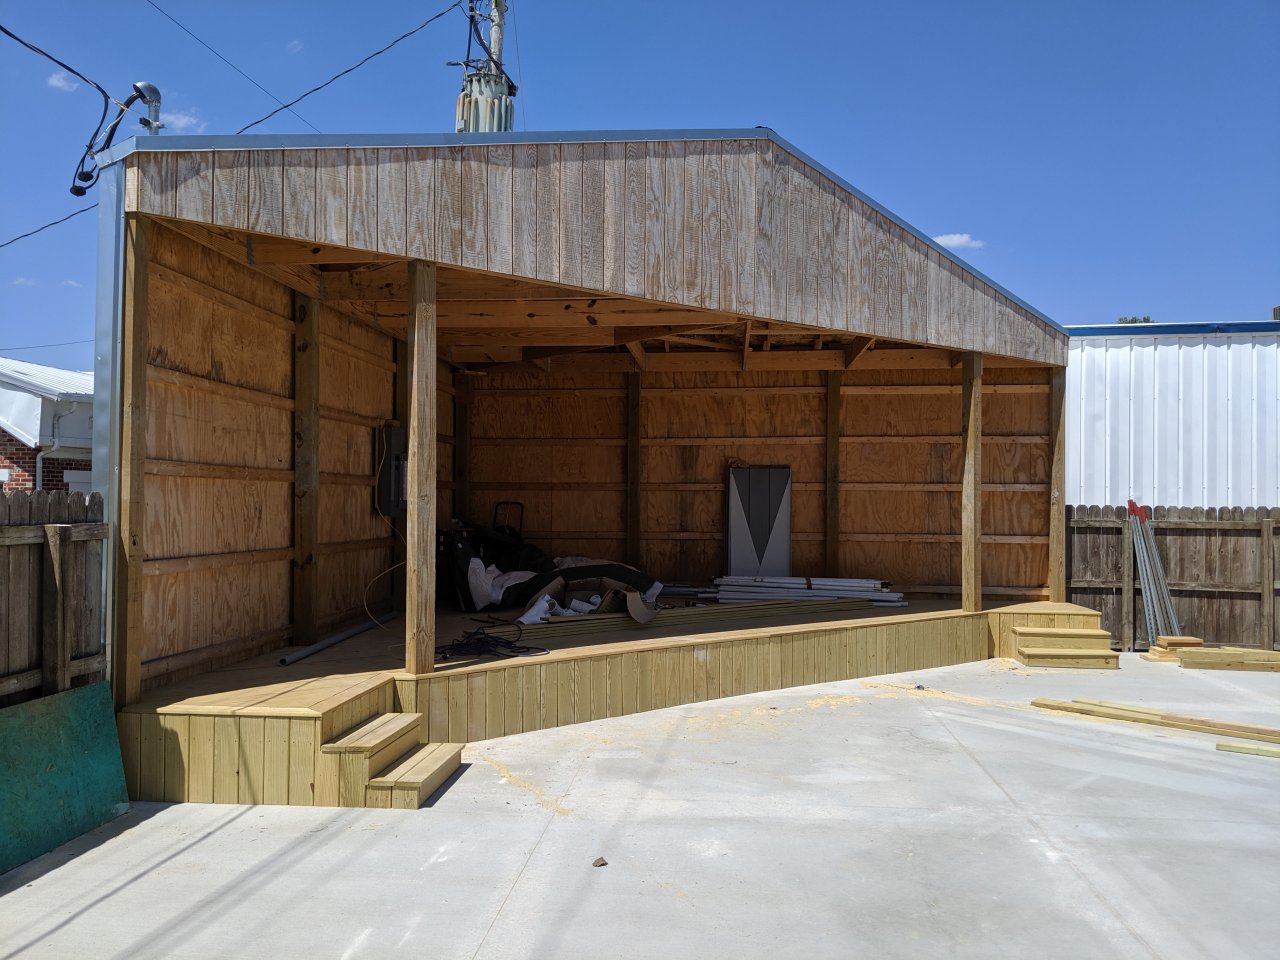
i'm building an outdoor venue this spring, and i'm throwing together a walk-in cooler with an 8-tap setup from scratch. i plan on walls being built with 2x4 studs turned sideways, plus 4" of polyiso foam inside that for proper R-value. that's ~6" of wall depth i'll need to bore through in order to get from inside the cooler, out to the faucet. this means a lot of pours are going to start warm, which is obviously a no-no. i don't want the first spurt off each pour to be a blob of foam that just compounds inside the glass. that's a lot of waste.

so i'm trying to weigh my options here. if i were to simply cut out a 6" wide by 3" deep trench in the foamboard to shorten up the wall thickness around the tap shanks to 3" (1" insulation and 2" dead space inside framed wall), would the cooling area on the shank be close enough to the faucet to avoid having foam issues? and would i be screwing my overall R-value in the process? would it help to fill the wall with foam between the studs, or would that just be a waste of time/money?

i'm not interested in active cooling systems like glycol right now because i'm trying to keep costs down as much as possible. with that in mind, is there a better way to keep the beer at the faucet at or near serving temp, that i've not already thought of?
 
I'm gonna bump this, interested to hear about solutions too.
in lieu of solid advice on the issue, my plan is to cut in the trench and maybe also spray some foam into the wall gap around the taps. then hope like hell we move beer fast enough that it doesn't have time to warm up :)

at any rate, i'm still about 2-3 months from starting the cooler build, as we still need to tap into city water/sewer, lay concrete, build restrooms and bar structure, and install electrical. plenty of time to research and acquire said solid advice. just finalized the cooler design yesterday and started buying materials this morning. we'll be running eight perlick flow control taps with two being dedicated to kegged cocktails, and the other six to various beers. we intend to cool the 8x8' walk-in with one of those coolbot controllers and a hefty window AC unit. should be interesting.
 
You should try and email the guys at keg connection. I know the one guy on their podcast was building his own walk in cooler and would probably be able to give you some solid advice. I'm pretty sure they've set up a bunch of tap rooms for breweries too
 
You should try and email the guys at keg connection. I know the one guy on their podcast was building his own walk in cooler and would probably be able to give you some solid advice. I'm pretty sure they've set up a bunch of tap rooms for breweries too
the solid advice is exactly the kind i'm looking for! i'll go check them out. thank you sir!
 
Many, many years ago I worked for an AB distributor and one of my responsibilities was draft accounts. I actually converted an old milk truck into a portable draft serving unit for festivals. It had 6 taps and we could run 6 kegs in series on each tap. I also had to rehab a smaller standalone draft trailer that was poorly designed and insulated. One of the larger festivals we sponsored was in June with daytime ambient temps mid 90’s with very high humidity.

All I would suggest is however you can do it is to keep the shanks as cold as possible. Also take precautions to not allow direct sunlight to hit your taps, whether you have an overhang or awning. I actually attached rollout awnings like you see on rv’s to our units. The servers appreciated that too! Additionally, pay attention to orientation in relation to the track of the sun in the summer.

Whatever you do, you will still get a slight moment of foam in direct relation to how close your temps are between beer to tap outside. If you are pouring a lot of beer, should be very minimal to none. We never used flow control faucets, just the basic taprite rear sealing faucets. If it was me I would save my money on the flow control faucets. Best of luck!

BTW, looked at your website, looks like a cool establishment. Wish I lived closer!
all solid advice, thank you. the cooler will be under a roof with a 3-wall enclosure (open wall is service side, facing north) so there's zero chance of sunlight adding heat at the faucets. i've never used flow control either, but when pricing them out on ritebrew, the cost difference is only $10 per ($38 for perlick 630ss vs $48 for 650ss). i bought two this morning to install in place of regular perlicks to see if they perform any better in the bar. if they don't, we might save the $10 and go with 630's instead, but i figured i'd take every advantage i can in order to minimize wasted product since the outdoor bar is not going to be climate-controlled, with the exception of the walk-in.
 
Re: Perlicks, I understand that isn’t much of a price difference. I don’t know what series Perlicks I have, but I think they are an older model. I’ll tell you, the other day I broke them down and cleaned them and forgot how finicky they are. I had to fiddle around with with them to get them to seal closed. What a PITA compared to the taprite rear sealing faucets. When I bought my old beverage air draft box it came with a lot of extra faucets including the old basic chrome plated taprite faucets. I think next time I’m going to change them all out to the taprites. They are so much simpler and don’t have all those orings to deal with and lube. I don’t know why they don’t get any love on this forum.
 
I have slowly transitioned from taprites to perlicks in the bar. The perlicks have fewer parts = fewer points of failure, they don't gum up or stick like the taprites tend to do, and they just look nicer in my opinion. These 630's come apart and clean up real easy. I'll occasionally have an o-ring jump out of place, but it's easy to pop back in.

Having said that, I still use taprites on all my rental equipment because if they're maintained well, they are workhorses. I know I have some that are 20+ years old, still in use.
 
Well good luck on your project. It sounds like it will be a great addition to your tavern. Please keep us updated on your progress with pictures.
 
I think your idea of a smaller "trench" where the taps are is sound. I'd use longer shanks so they extended out into the cool area, and use a small fan to blow on them to keep them cool. They will conduct heat away from the business end of the taps, and unless the outside is incredibly hot, that should work.
 
I can't imagine you would see an appreciable volume of warmed beer for it to be a problem. Sure, the first ounce may be warm, but I don't think you're going to have an issue other than the first pour of the day. I really think the fix to most beer problems is "drink more faster".
 
I can't imagine you would see an appreciable volume of warmed beer for it to be a problem. Sure, the first ounce may be warm, but I don't think you're going to have an issue other than the first pour of the day. I really think the fix to most beer problems is "drink more faster".
That's how I solve all my problems! :D
 
Let's see some pics of this place. I'm getting excited. any progress pics of the tavern?
why not!

this is the front of the bar. restrooms are off to the left, and bar service area is the large opening on the right. wall panels aren't all on yet, but will be by end of the week (along with trim and roof tin).

this is a closer view of the bar service area. the two rooms in the back are a utility closet to the left, and the walk-in cooler to the right. the room ended up being a bit larger, approx 6x11' before insulation. i ordered insulation the other day and will be picking it up next week to install. we're doing water and electrical this week/end.

this is the tap plate and drip tray we'll be installing. we ended up going with 10 taps, all of which will now be beer. rather than doing draft cocktails, we're adding a frozen drink machine. soooo much easier, plus much bigger margins.

and this is the stage. it's not finished but it's pretty close. it's doubling as storage for now, until the rest of the project is built out.
 
That's really cool! i can't wait to watch the progress. I'll be sure to stop in when my GF and I get to the Chicago leg of our Route 66 adventures. We have so far finished all of Ca as we live near Sanata Monica, the other end! ha ha!
 
I took advantage of the day off from the bank to get the walk-in (mostly) built. First I cut some styrofoam to fit between the studs for a little extra R value in the dead space.
IMG_20190704_135538.jpg

Then I used two 2" layers of foil faced polyiso foam boards, glued to the inside of the studs. Fashioned some cap screws out of regular screws and washers to help keep everything snug, since none of the local stores carries cap nails long enough to get thru even one layer of foam. The first layer going on...
IMG_20190704_135604.jpg

Since I have 8" shanks, I can get thru the stud wall and one layer of foam just fine. On the second layer, we cut out a block of OSB for a sturdy backer, and then cut around it with the second layer of foam board. Ended up with this.
IMG_20190704_193648.jpg

I'll seal that up and knock holes thru the wall for the shanks, after we add a layer of FRB panel onto the foam boards (the stuff in bathrooms, white plastic that looks like a bubbled surface) to protect the insulation from damage.

I think this will do a good enough job of keeping the beer cold out to the last inch or 2 before the faucet. I'm still a bit concerned with condensation inside the wall, so I'll probably smash a can of great stuff around the shanks after they're mounted, just for good measure.

Should have this thing up and running by Tuesday next week. Will come back with more images after that. Cheers!
 
Thats called a shadowbox, and i wouldn’t insulate the shanks. Cut the shadowbox only big enough to assemble the shanks. Get a fan on the shanks to keep them cold if your box doesn’t have good air movement. You can put like 1/2” foam on the back of the stainless panel for insulation and id leave it at that.
 
Dang. I needed this info like 12 hours ago. Might be able to make some adjustments since the outer wall is still open. Thanks for the advice!
 
@SanPancho your suggestion was a smashing success. after doing a little figuring, i managed to cut through the wall and add in a header that spanned the 4' width of the wall plate, and then i built in the shadow box and insulated it.

IMG_20190705_192409.jpg


IMG_20190706_150532.jpg


i ended up with about 1-1/4" depth from stainless wall plate to shank nut: 7/16" osb, 3/4" xps foam board, and a 1/16" fiberglass panel so i wouldn't chew up the foamboard while tightening the nut down. i have a bit of cleaning up edges and trimming it all out, and i'll post up a few pictures once that's done. but i wanted you to know it's pouring all taps like a champ. i still have some fine-tuning on a couple of the lines, but for the most part, they already pour as good/better than i was expecting with this setup. and that's without the flow control faucets. here's the very first pour (TG pseudo sue.....drool) after priming the lines. cheers!

result_1563071477686.jpg
 
nice.

two notes-

1-waterproof the hell out of it.

2- once or twice a year, you should waterproof the hell out of it.

osb and water are not a good combination. (no surprise) but more importantly lots of water gets on the floor of bars and coolers. in fact, the bottom plate of your framing is typically done in pressure treated for that reason. its already done, not a huge deal. you gotta do what you gotta do to get open. but I'd run a big fat line of caulk where your framing meets the floor both in the cooler and anywhere you'll have water (under the bar, back bar, bathrooms, etc). use the best quality caulk you can reasonably afford. then after sheetrock or final wall board/finish goes on, caulk that **** again before you add baseboard or cove base.

our health inspectors require cove base, which basically means tile. I typically use dal tile "thin lip cove base" because its the one you can use as a "retrofit" i.e. it isn't squared on the bottom edge, its rounded so you can slap it right onto a concrete slab and not have to tile the whole damn floor. it aint cheap, but its cheaper than tiling the whole damn floor.
daltile-x714s3419t.jpg

vs

daltile-0190a3361mod1p2.jpg


alternatively, I was told just last week by a friend that she found "aluminum cove base" to do the same job. 8' length's. she didn't know where it came from, and my google isn't really turning it up. id be a bit surprised if your health inspector didn't require it. in any case, you've got options.
 
the biggest concern i've got with the setup is that the shanks will sweat enough against the osb that there will be some rot over time, right around the area where the shanks pass thru the wall. i did a lot of taping and waterproofing inside the cooler to avoid heat transfer thru the walls and floor. it actually did happen just a bit during last week's heat, where the concrete around the exterior base of the cooler walls was sweating enough in a couple spots to darken it (no standing water, just ever-so-slighty damp). if that continues, i'll probably drop a layer of foam panel on top of the concrete in the cooler and then cover that with something strong enough to handle keg movement. all bottom plates are treated lumber, and interior rooms (minus the cooler) have floor drains.

i've used about a dozen tubes of caulk already, sealing around door frames and casings, trim, bar surfaces, etc etc. i plan on that being a task that gets repeated a couple times every season, plus fresh paint maybe every year if necessary. our health inspector made no mention of cove base requirements, and was kinda lax overall with our inspection (i was dreading our final inspection, but he passed us with only a couple minor issues). it helps that we don't actually do any food prep (unless you want to talk about ice), so we've been given the most basic classification and don't have to go to all the great lengths required for commercial kitchens.

at any rate, we'll conduct regular and constant maintenance to keep mother nature at bay. and hopefully we kick a few hundred barrels before we need to tear the cooler apart and re-work it.
 
hopefully we kick a few hundred barrels before we need to tear the cooler apart and re-work it.

Bingo. Folks worry too much about being perfect and 100% complete to “open” the doors. Pass inspection. Open the doors. Asses in seats. Money in the till.

Then you tweak things, add finishing touches, etc.

Lucky you got the easy pass from health. Even bars are considered food serviceo out here, with everything that entails.

Sounds like you’re making it happen. Congrats.
 
I think your idea of a smaller "trench" where the taps are is sound. I'd use longer shanks so they extended out into the cool area, and use a small fan to blow on them to keep them cool. They will conduct heat away from the business end of the taps, and unless the outside is incredibly hot, that should work.
This was my thinking too. Fan and trench. I have seen pipes enclosed over in wall lines cant recall how they chill them. Edit- Day late dollar short. Nice work. Would treating the osb with kilz or some waterproof paint/stain be needed? I dont think it will matter. Nice looking framing. Sounds like you have it sealed and are well on your way. Hope to see it finished.
 
Last edited:
This was my thinking too. Fan and trench. I have seen pipes enclosed over in wall lines cant recall how they chill them. Edit- Day late dollar short. Nice work. Would treating the osb with kilz or some waterproof paint/stain be needed? I dont think it will matter. Nice looking framing. Sounds like you have it sealed and are well on your way. Hope to see it finished.
i will probably be finishing out the cooler and getting the rest of the painting done next week. once that's finished up, i'll bring some more pictures.
 
got a couple more pictures of the working setup. i didn't get the shadow box all taped up and pretty for the pic, but you get the idea. i'm pleased with the end result so far. i have 8" shanks because i was going to be coming through 6" of wall and insulation, and it was gonna put me behind by at least a week to exchange them for something shorter. oh well.
IMG_20190803_115147.jpg


and the outside. we went with mainstream options because we like to get weird with our taps in the main bar, but we're looking for volume sales outside. i had handles for all the taps we opened with, but the draft has been so popular that we kicked 4 kegs before we had a chance to re-order them. so we had to make do with a couple other local pickups to get by. #1 and #2 are from "hand of fate" in petersburg il. great little brewery. #1 is double bean dream, and #2 is currently a scottish ale because that's all they had in stock. it will be dogfish head seaquench once again, later this week. #5 is currently bell's two hearted, but it's supposed to be toppling goliath pseudo sue. the pseudo keg went quick. either of those two are fine by me, really. #6 is black butte porter.
IMG_20190803_115126.jpg


obligatory night shot. that scottish ale is tasty.
IMG_20190802_215545.jpg


and our second weekend officially open. good crowds showed and enjoyed themselves. i still have a lot of decorating to do, painting and adding logos on walls and finishing up a couple little projects here and there. and getting the hops planters put in place (mostly for decoration, but maybe we'll get enough of a harvest for a couple batches).
IMG_20190726_220148.jpg
 
thank you to everyone who gave helpful tips on how to set up that cooler! i was about to do it completely differently, and you folks saved my butt from having to endure a nasty reconfig. as it is now, i open the tap into a pitcher to catch that first plop of foam, and then shove the cup under the tap for a smooth pour every time with very minimal waste. maybe a half pitcher of waste per 30 pints poured. way better than i hoped for, and that's thanks to you folks. so if you're ever in the area, look me up. i owe you a beer or three.
 
Back
Top