You are using an out of date browser. It may not display this or other websites correctly.
You should upgrade or use an alternative browser.
You should upgrade or use an alternative browser.
Tiny Brew House. Ultimate BIAB 110v System Build
- Thread starter poptarts
- Start date

Help Support Homebrew Talk:
This site may earn a commission from merchant affiliate
links, including eBay, Amazon, and others.
Shiny! Did they include a free pair of sunglasses? If not how can you brew with all that bling?

iijakii
Well-Known Member
Sexy kettle, man!
Dont think I saw you mention it, but how come you didnt go with 2x 120v circuits? Could just run an extension cord for a 1500w element to heat strike and come to a boil. Shorten your brew day by an hour or more and be able to do larger boils.
Dont think I saw you mention it, but how come you didnt go with 2x 120v circuits? Could just run an extension cord for a 1500w element to heat strike and come to a boil. Shorten your brew day by an hour or more and be able to do larger boils.
OP
OP
poptarts
Well-Known Member
Sexy kettle, man!
Dont think I saw you mention it, but how come you didnt go with 2x 120v circuits? Could just run an extension cord for a 1500w element to heat strike and come to a boil. Shorten your brew day by an hour or more and be able to do larger boils.
idk... something inside me says I should do this with 110v so if I can bring it over to a friends and do a brew or something but I mean... That has happened like once in my brewing career and it was like 4 years ago so honestly i'm leaning toward just rolling 220v. Im having my house built so it wont be an issue to get the hookups on GFCI wherever I want.... maybe I should just do that lol...
iijakii
Well-Known Member
idk... something inside me says I should do this with 110v so if I can bring it over to a friends and do a brew or something but I mean... That has happened like once in my brewing career and it was like 4 years ago so honestly i'm leaning toward just rolling 220v. Im having my house built so it wont be an issue to get the hookups on GFCI wherever I want.... maybe I should just do that lol...
I'm saying if you want to keep it 120v just run one of the heaters on a separate circuit. I did that on a previous brewrig and it worked well. In any kitchen you're pretty much guaranteed to have two circuits. Otherwise you can run a 20ft extension cord to another room. Too late for that already I guess with your custom pot. Unless you wanted to do a heatstick but you're too blingy for that I reckon. So yeah, go 220v lol.
OP
OP
poptarts
Well-Known Member
Yea i'm not going 2 elements haha, Ill just make sure to have them install a couple of GFCI 220v circuits for me inside and outside to future proof myself a little and roll a single 110v element for now and go from there. Worst case I get a new element and beef up some wire in the panel and go 220 in the future if I get tired of being slow.

$33.99 ($17.00 / Count)
$41.99 ($21.00 / Count)
2 Pack 1 Gallon Large Fermentation Jars with 3 Airlocks and 2 SCREW Lids(100% Airtight Heavy Duty Lid w Silicone) - Wide Mouth Glass Jars w Scale Mark - Pickle Jars for Sauerkraut, Sourdough Starter
Qianfenie Direct


$7.79 ($7.79 / Count)
Craft A Brew - LalBrew Voss™ - Kveik Ale Yeast - For Craft Lagers - Ingredients for Home Brewing - Beer Making Supplies - (1 Pack)
Craft a Brew

$53.24
1pc Hose Barb/MFL 1.5" Tri Clamp to Ball Lock Post Liquid Gas Homebrew Kegging Fermentation Parts Brewer Hardware SUS304(Liquid Hose Barb)
Guangshui Weilu You Trading Co., Ltd

$176.97
1pc Commercial Keg Manifold 2" Tri Clamp,Ball Lock Tapping Head,Pressure Gauge/Adjustable PRV for Kegging,Fermentation Control
hanhanbaihuoxiaoshoudian

$76.92 ($2,179.04 / Ounce)
Brewing accessories 1.5" Tri Clamp to Ball Lock Post Liquid Gas Homebrew Kegging Fermentation Parts Brewer Hardware SUS304 Brewing accessories(Gas Hose Barb)
chuhanhandianzishangwu


$22.00 ($623.23 / Ounce)
AMZLMPKNTW Ball Lock Sample Faucet 30cm Reinforced Silicone Hose Secondary Fermentation Homebrew Kegging joyful
无为中南商贸有限公司


![Craft A Brew - Safale BE-256 Yeast - Fermentis - Belgian Ale Dry Yeast - For Belgian & Strong Ales - Ingredients for Home Brewing - Beer Making Supplies - [3 Pack]](https://m.media-amazon.com/images/I/51bcKEwQmWL._SL500_.jpg)


$28.98
Five Star - 6022b_ - Star San - 32 Ounce - High Foaming Sanitizer
Great Fermentations of Indiana

$44.99
$49.95
Craft A Brew - Mead Making Kit – Reusable Make Your Own Mead Kit – Yields 1 Gallon of Mead
Craft a Brew


$719.00
$799.00
EdgeStar KC2000TWIN Full Size Dual Tap Kegerator & Draft Beer Dispenser - Black
Amazon.com
$53.24
1pc Hose Barb/MFL 1.5" Tri Clamp to Ball Lock Post Liquid Gas Homebrew Kegging Fermentation Parts Brewer Hardware SUS304(Liquid Hose Barb)
yunchengshiyanhuqucuichendianzishangwuyouxiangongsi


$159.50 ($26.58 / Count)
3M High Flow Series System BREW120-MS, 5616001, For Brewed Coffee and Hot Tea, Valve-in-Head Design
Amazon.com


$10.99 ($31.16 / Ounce)
Hornindal Kveik Yeast for Homebrewing - Mead, Cider, Wine, Beer - 10g Packet - Saccharomyces Cerevisiae - Sold by Shadowhive.com
Shadowhive


$479.00
$559.00
EdgeStar KC1000SS Craft Brew Kegerator for 1/6 Barrel and Cornelius Kegs
Amazon.com


$58.16
HUIZHUGS Brewing Equipment Keg Ball Lock Faucet 30cm Reinforced Silicone Hose Secondary Fermentation Homebrew Kegging Brewing Equipment
xiangshuizhenzhanglingfengshop

$20.94
$29.99
The Brew Your Own Big Book of Clone Recipes: Featuring 300 Homebrew Recipes from Your Favorite Breweries
Amazon.com


BeardedBrews
Well-Known Member
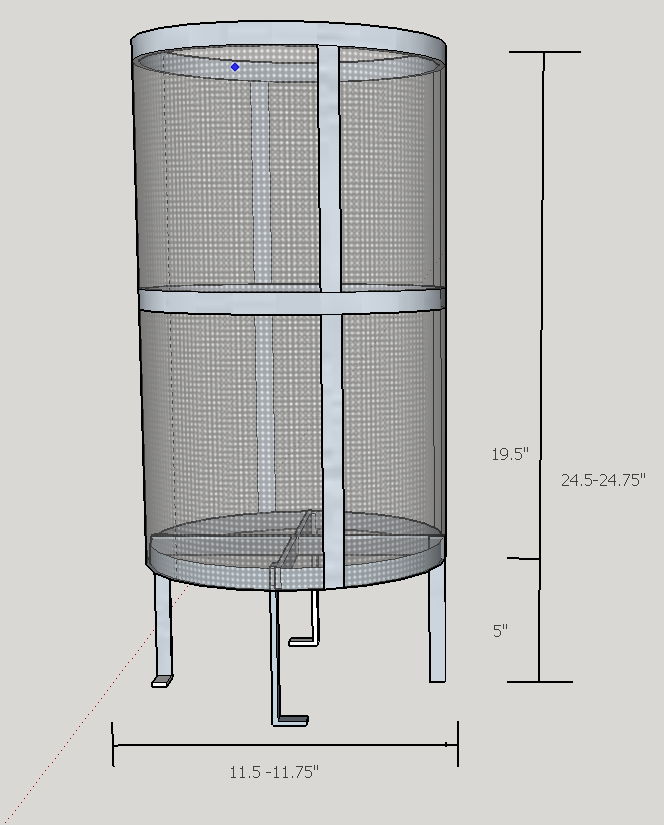
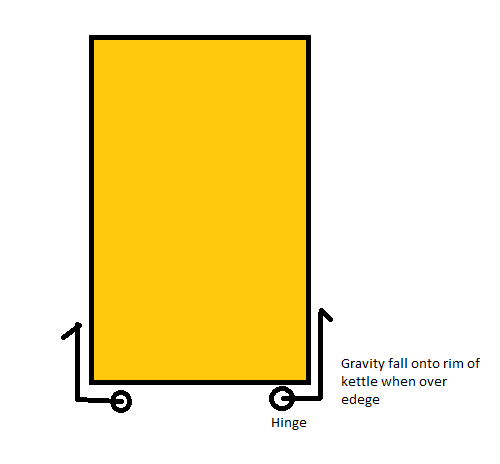
Crude but this is pretty much my basket plan with some cross braces that will go under the basket on the pot rim to support it to help it drain
You're going to have ~2.5 gallons of liquid below your basket in that design. This may not be a problem, but it's something you should consider.
OP
OP
poptarts
Well-Known Member
Back to business.
- Order placed with Arbor for basket.
- They wanted $50 for the support hooks so i'm going to just make my own out of copper pipe or buy some SS bar stock and bend my own.
- Badger Pipes wont make me a custom pool heater with TC fittings so just going to roll with the china condenser and see how that goes. My system is going to heat slow it might as well cool slow
- Going to place an order from Aliexpress for most of my parts once I get it all ironed out so those should be here by next year...
OP
OP
poptarts
Well-Known Member
You're going to have ~2.5 gallons of liquid below your basket in that design. This may not be a problem, but it's something you should consider.
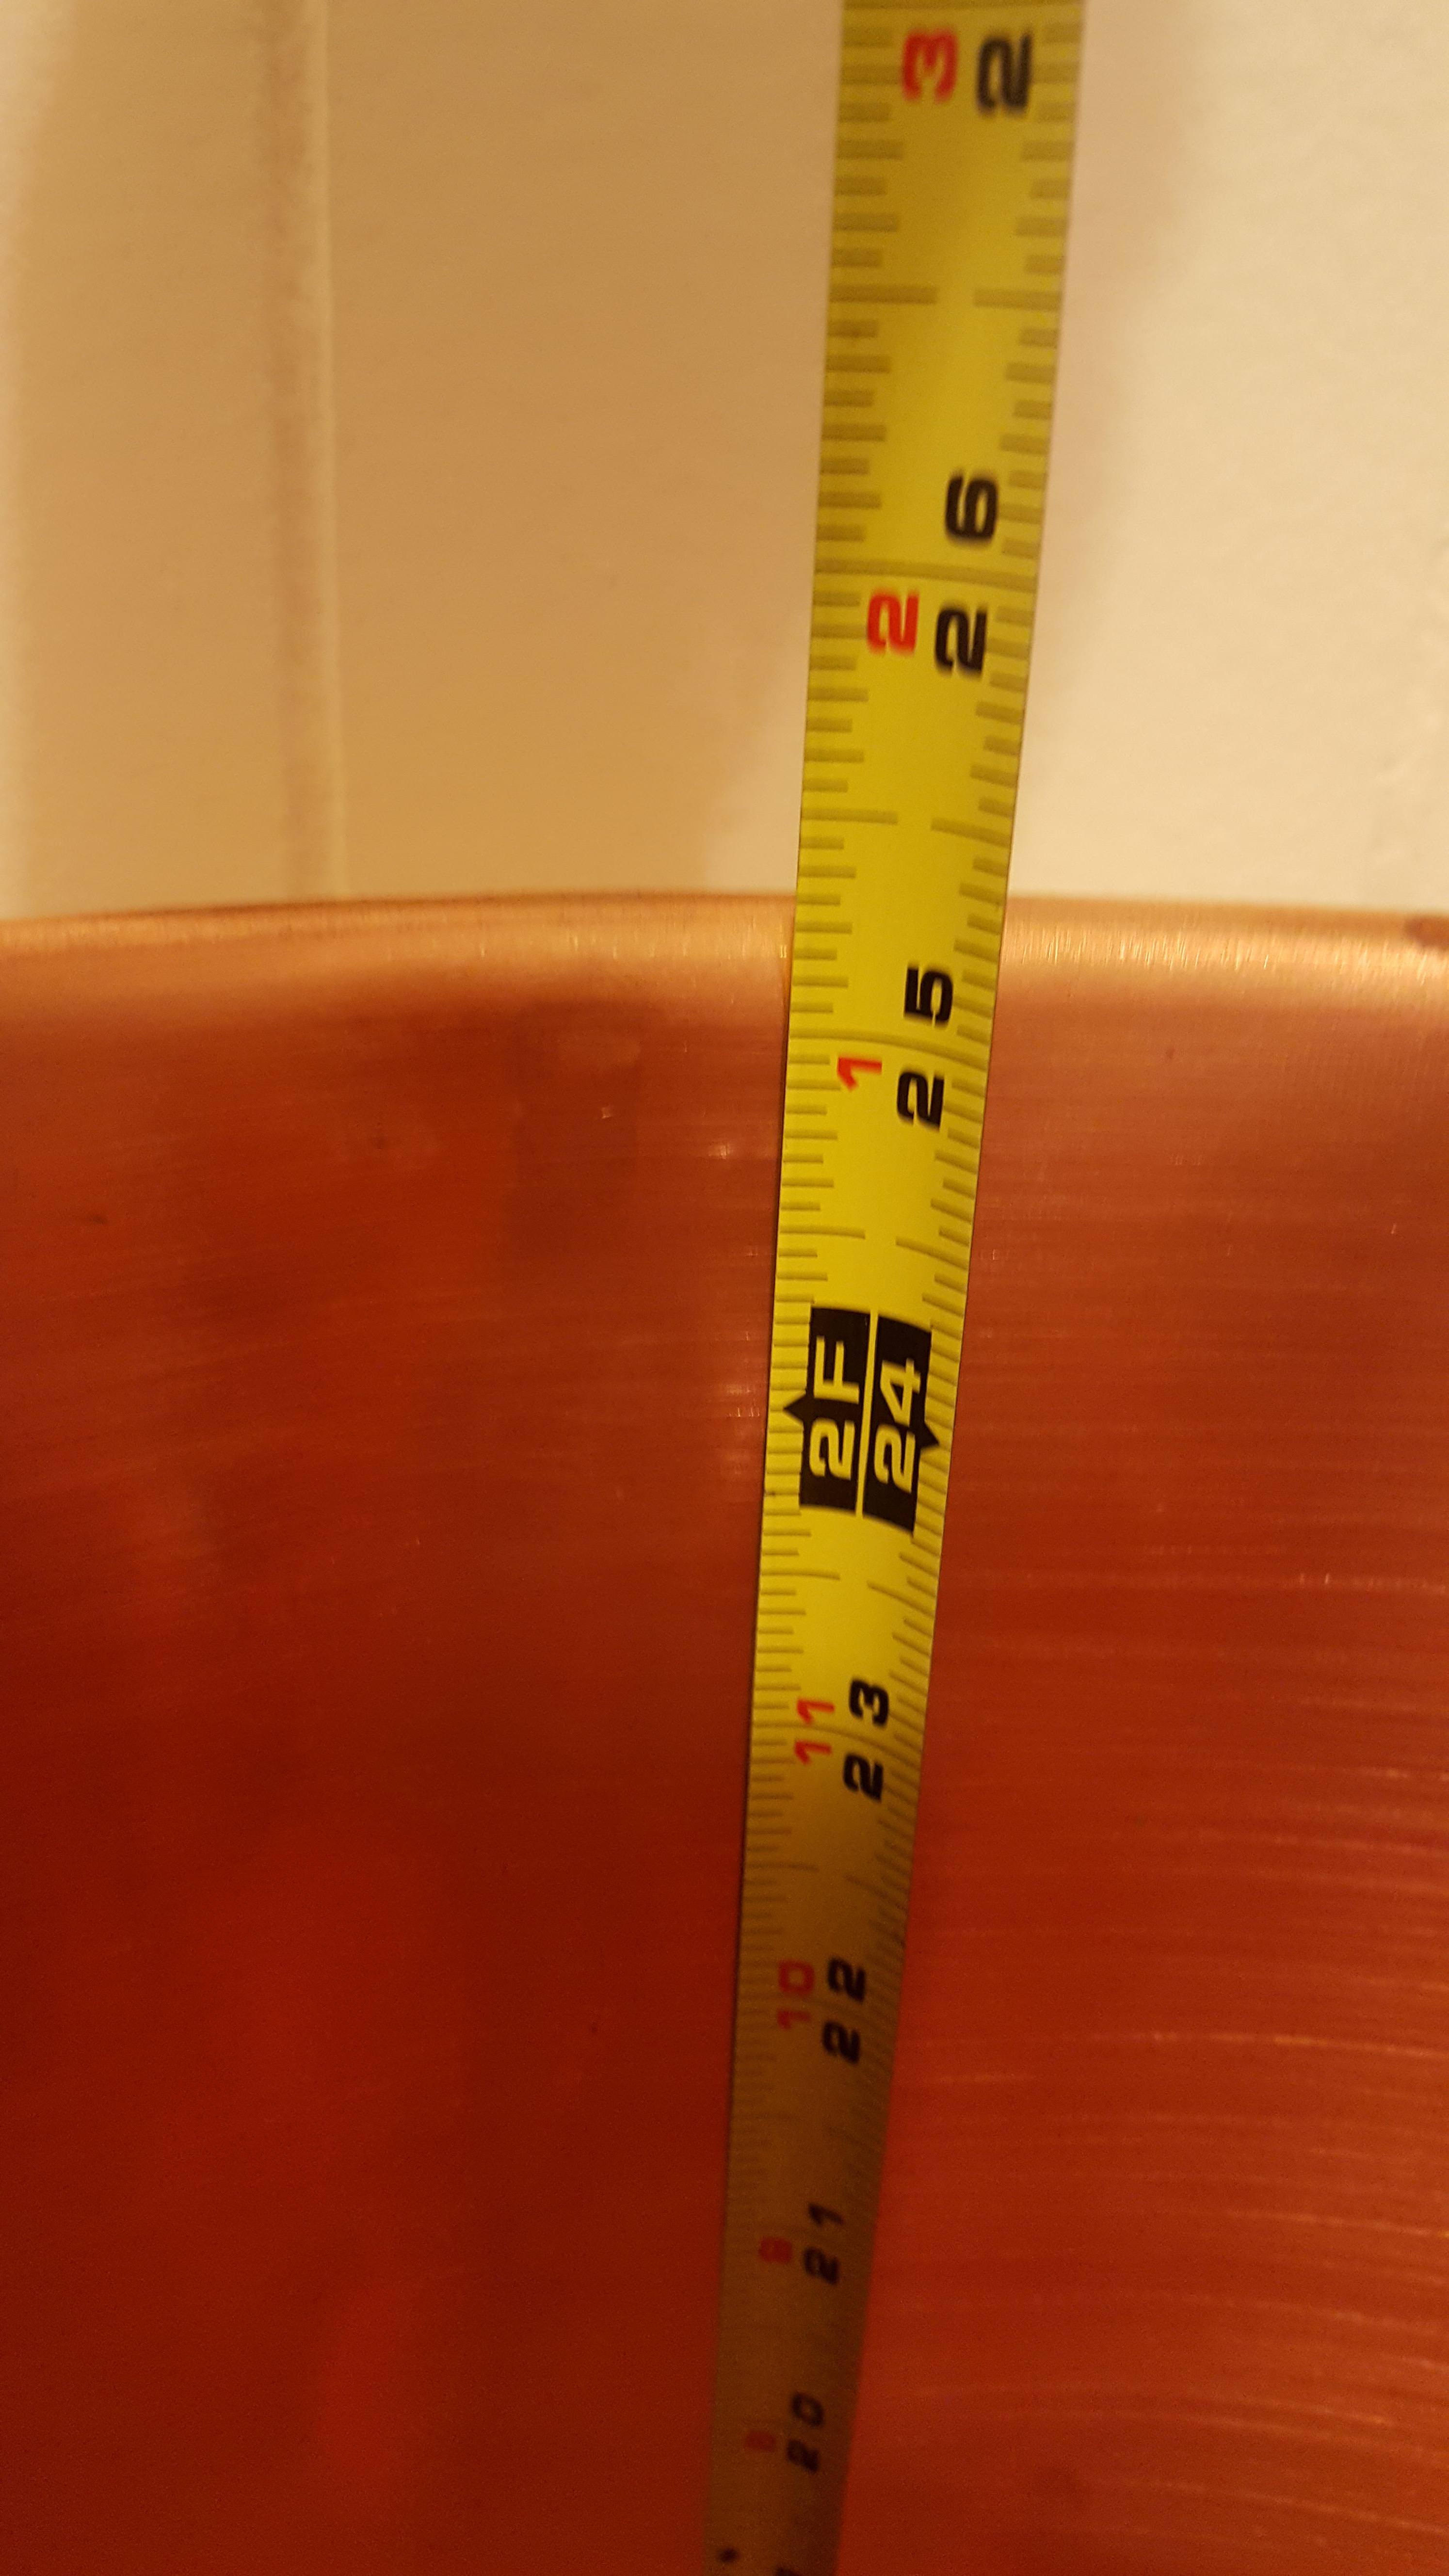
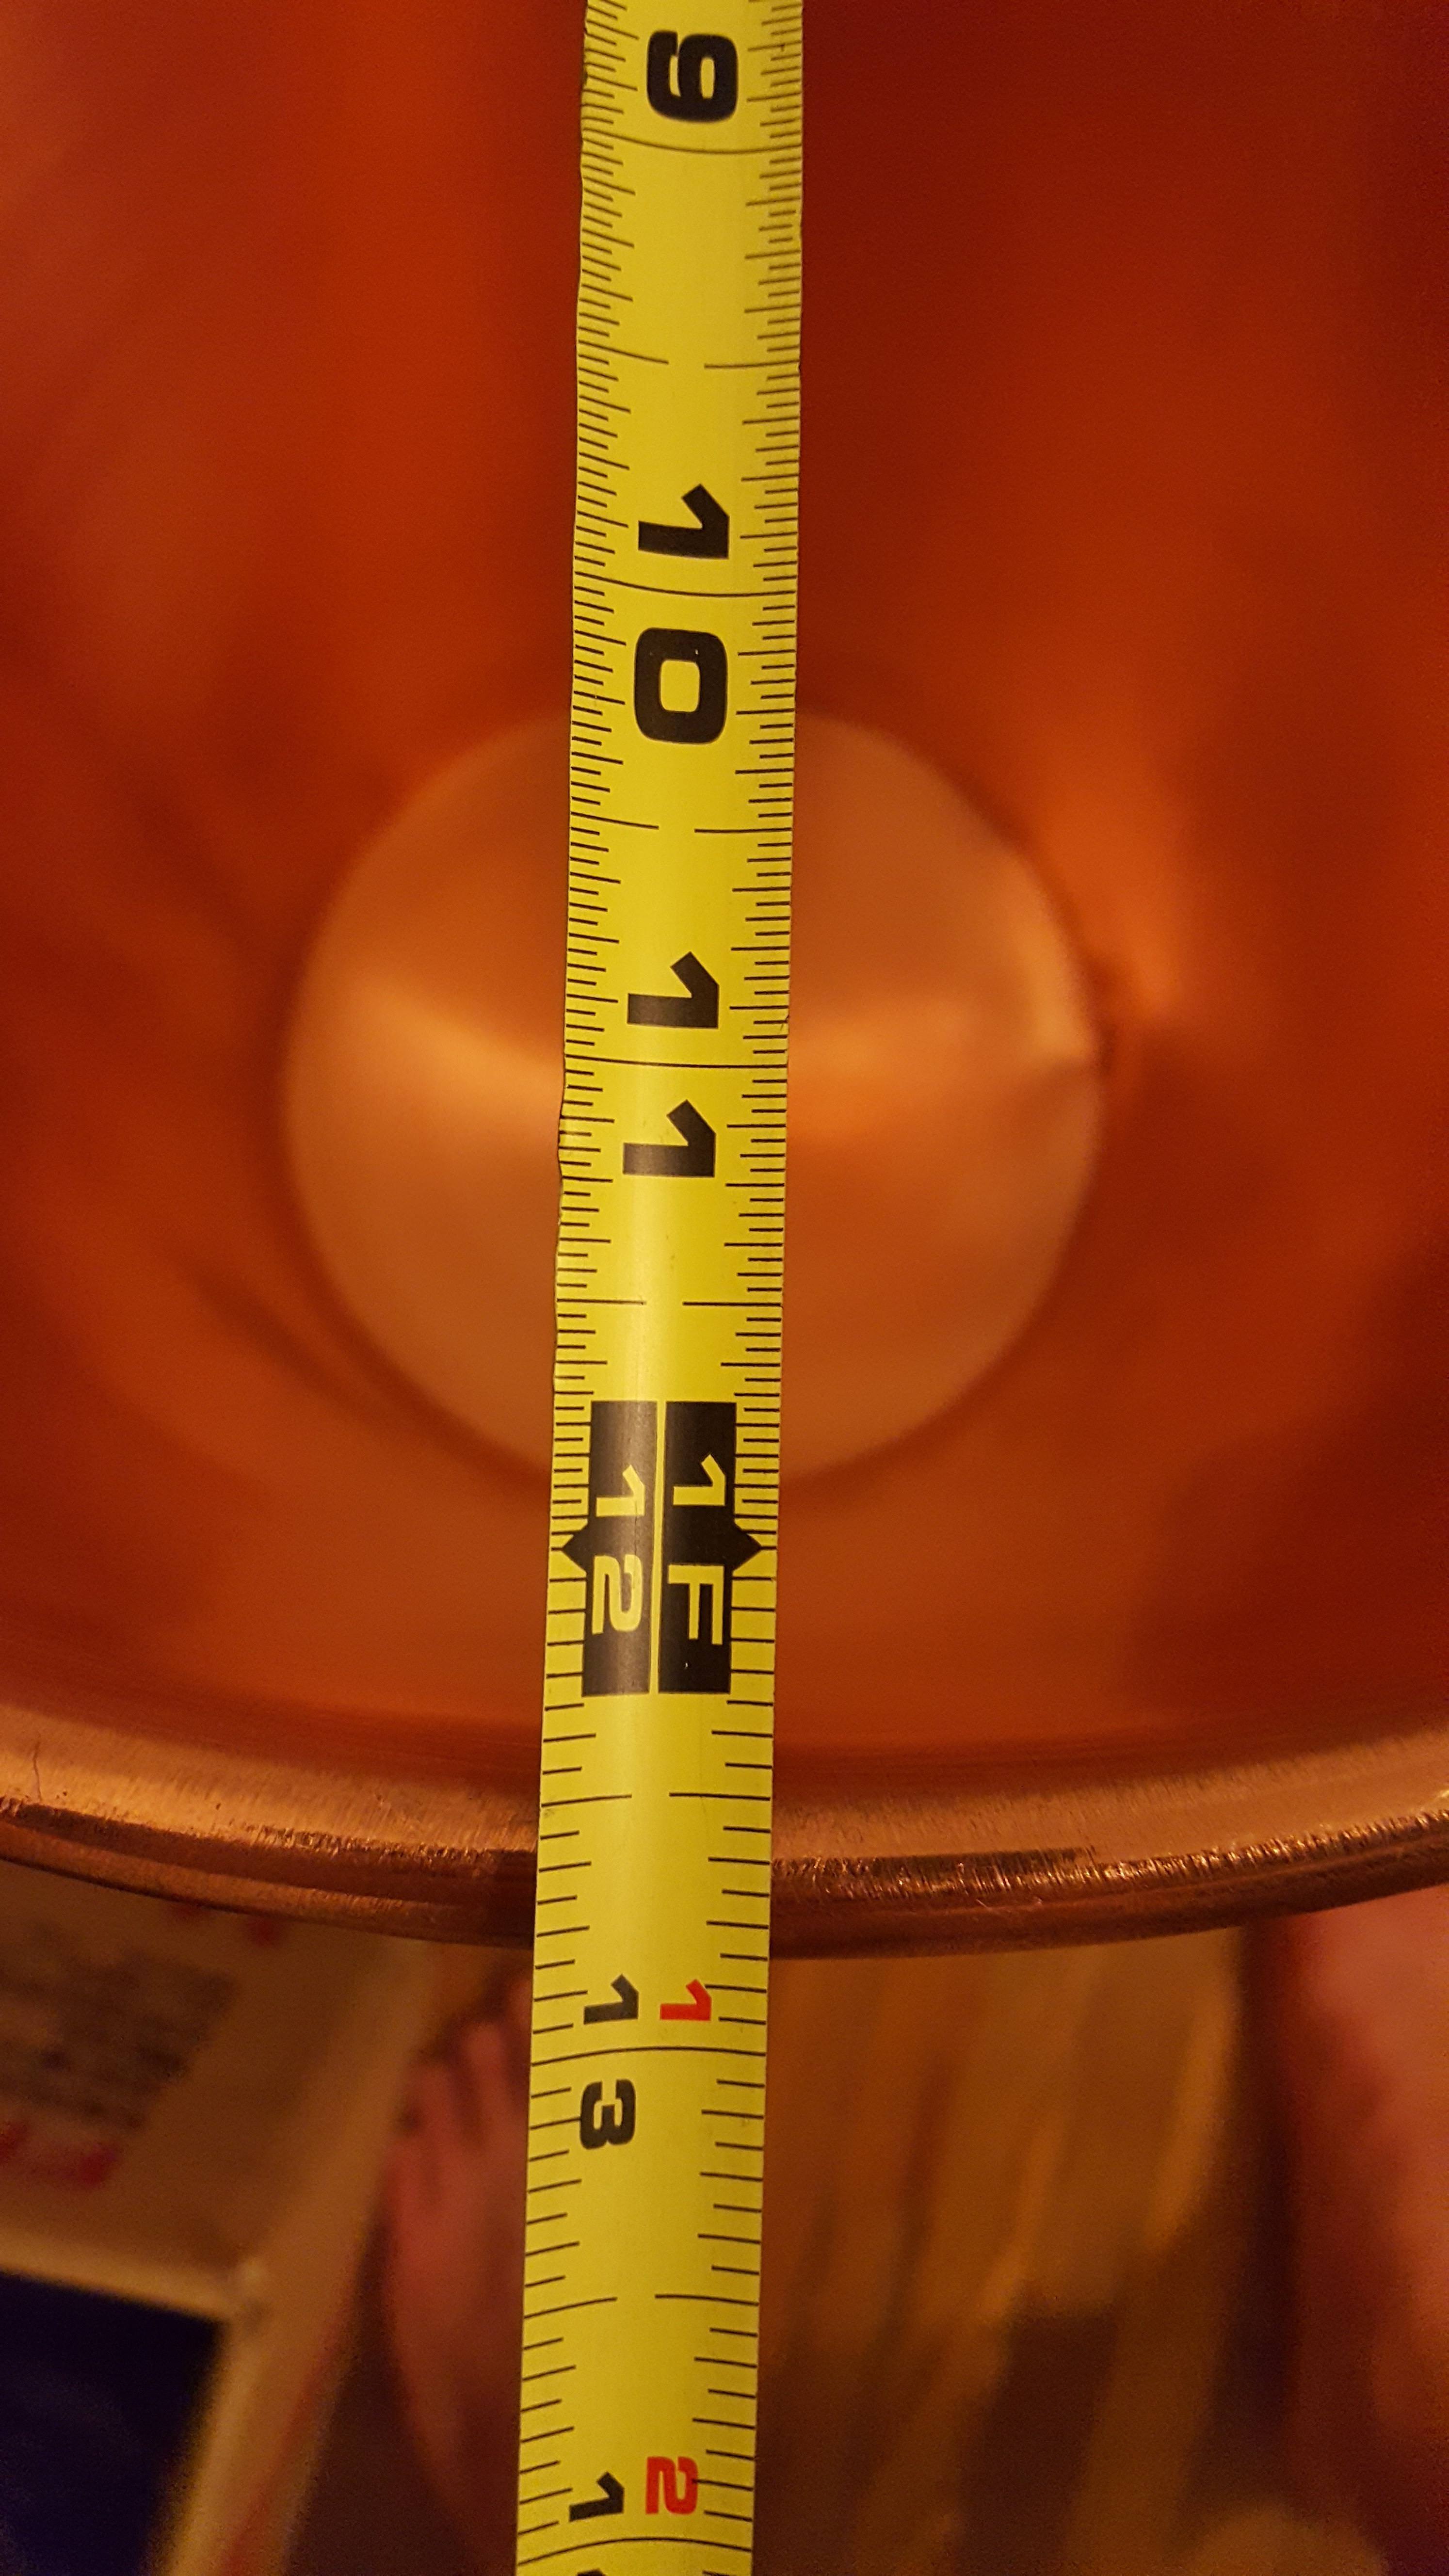
Yea already did the math on that too :/ My old system had roughly the same deadspace and it wasn't an issue. I plan on mashing at full volume and doing recirc during the mash so I dont expect any problems.
PsychoBiter
Well-Known Member
- Joined
- Feb 17, 2016
- Messages
- 158
- Reaction score
- 31
Sorry to the OP for this.....but trying to help Metzen
Put a female QD on the TC fitting on your lid with a TC to 1/2" NPT hole http://www.beveragefactory.com/homebrew/pre-fermentation-equipment/brewing-pump/tc105-cap-12-npt.html w/ a 1/2" NPT nipple. Then put 1 male QD on to the line loc (or sprayhead) and another to your whirlpool fitting, then you can easily switch from one to the other from the bottom side of your lid and not have to thread anything through the TC port.
Similar to what I did in pics below.
Also, if you need more flow from your pump, angle the pick up tube some, on mine the flow was greatly reduced until I turned it 45degrees to allow the pick up some more "breathing room"


- searching for a small sprayer head that will fit through the 1.5TC port in the lid to replace the locline. Some pieces of the locline cant be pulled through. Id like to be able to swap out the Recirc fitting after the mash and replace with a whirlpool fitting (bent tubing that drops from the lid into the wort with an angle at the end to force the whirlpool)
Put a female QD on the TC fitting on your lid with a TC to 1/2" NPT hole http://www.beveragefactory.com/homebrew/pre-fermentation-equipment/brewing-pump/tc105-cap-12-npt.html w/ a 1/2" NPT nipple. Then put 1 male QD on to the line loc (or sprayhead) and another to your whirlpool fitting, then you can easily switch from one to the other from the bottom side of your lid and not have to thread anything through the TC port.
Similar to what I did in pics below.
Also, if you need more flow from your pump, angle the pick up tube some, on mine the flow was greatly reduced until I turned it 45degrees to allow the pick up some more "breathing room"
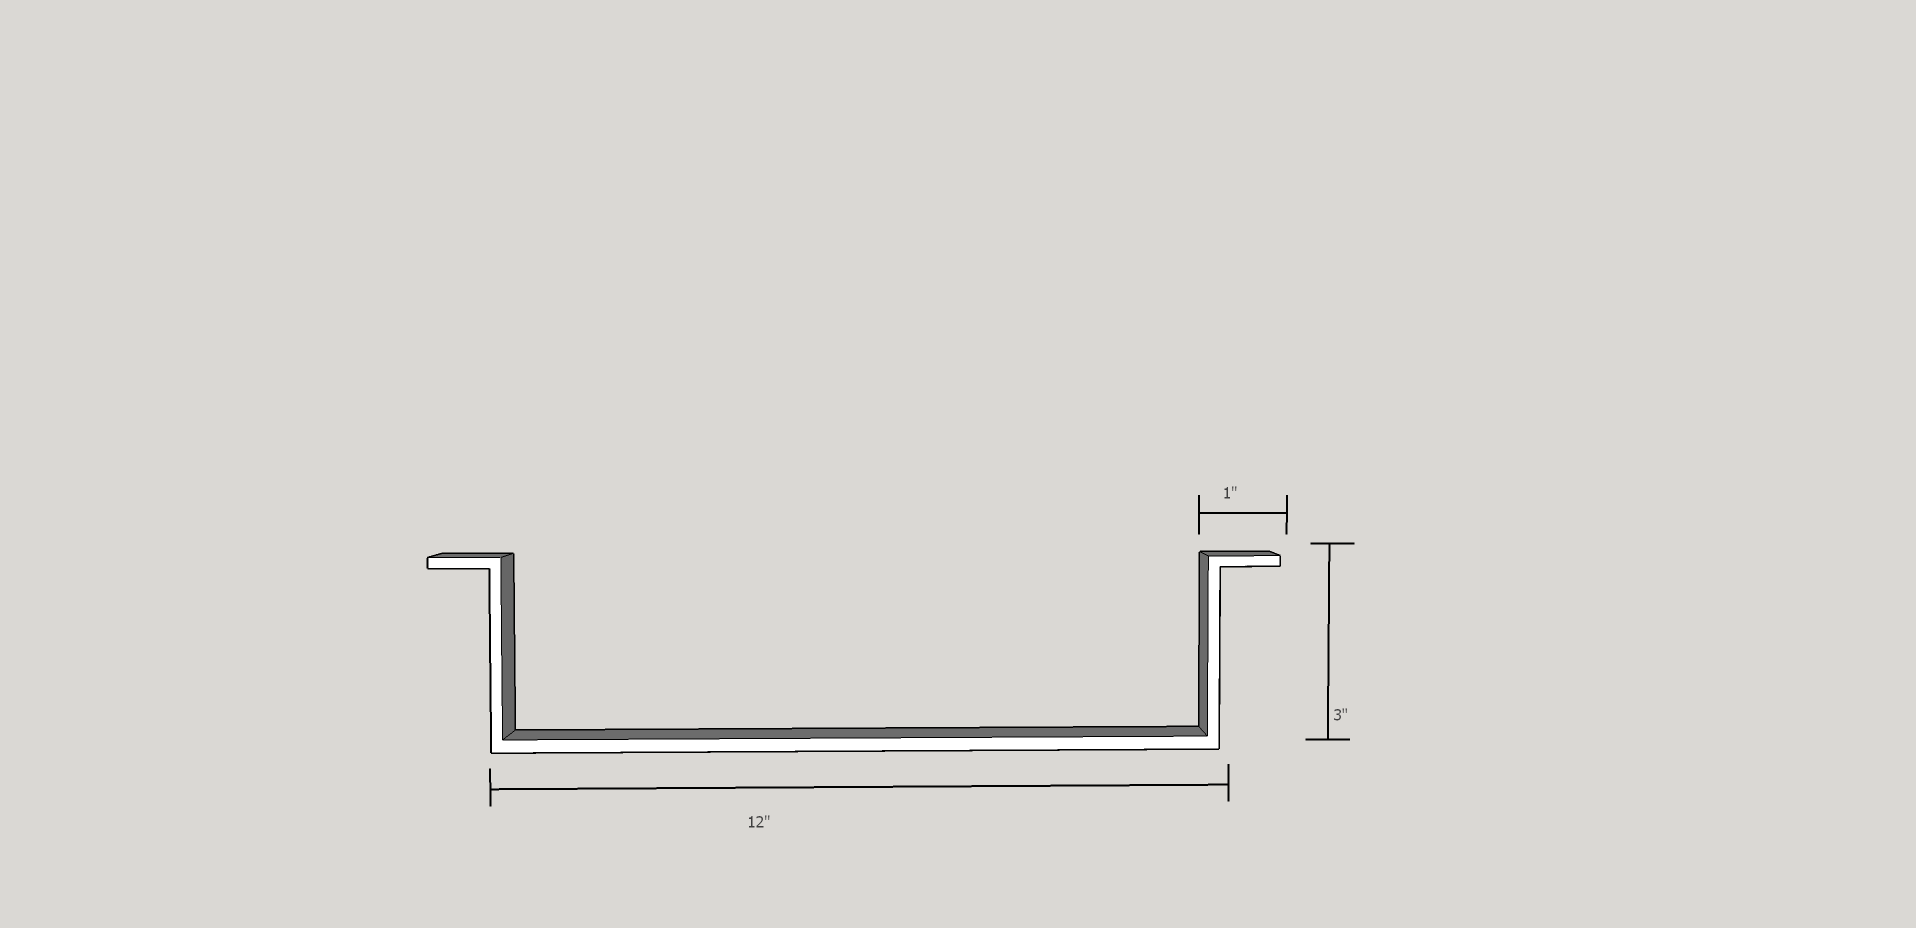
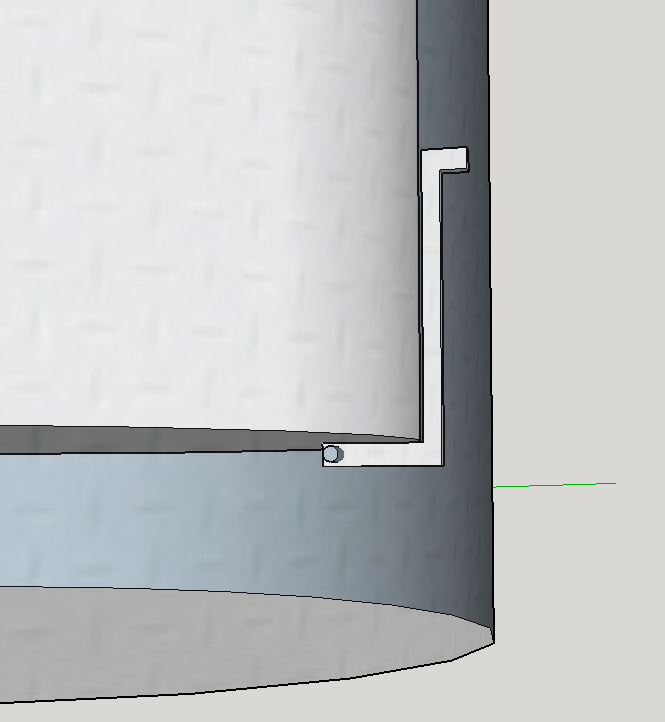
- I dont like the U bar I have for draining my the basket. Too much finesse required to position the U bar while holding a heavy basket. I am either going to use J hooks or build small supports that hang from the pot handles and swing up to form a support on which the draining hooks on the basket can rest (hard to describe but Ill draw something out and post it). This way I can pull the basket out and just flip up the supports on both sides with a quick flick of my finger
Today I constructed the steel supports attached to my pot handles to hold my basket. I still want to spring load them so that they are more stable. They work well as-is, but if the basket bumps it too hard, the support may swing down against the side of the pot. By adding a spring, the support would push against the side of the basket when at the top position and should make it that much easier to setup (literally just a flick of your finger). Ill align the spring so that when you push the support beneath the pot handle itll toggle and pull it against the side of the pot instead.
View attachment IMG_0020.jpg
View attachment IMG_0024.jpg
View attachment IMG_0027.jpg
View attachment IMG_0029.jpg
View attachment IMG_0030.jpg
View attachment IMG_0018.jpg
View attachment IMG_0019.jpg
OP
OP
poptarts
Well-Known Member
I had a dream about swing out hooks on the basket to where when you pick up the basket they would just grab the rim at the top, should allow for hands free action so I can use both hands to pick up basket. I dig your solution though, looks clean and easy to use.
give or take something like this... Probably made out of some SS or Aluminum Rod and pipe.
give or take something like this... Probably made out of some SS or Aluminum Rod and pipe.
I had a dream about swing out hooks on the basket to where when you pick up the basket they would just grab the rim at the top, should allow for hands free action so I can use both hands to pick up basket. I dig your solution though, looks clean and easy to use.
give or take something like this... Probably made out of some SS or Aluminum Rod and pipe.
Excellent idea. Looking forward to seeing your dream become reality. Cheers.
I love it so far! Keep up the good work!
John
John
Butterflies showed up.
Nice looking butterfly. If you dont mind, where did you pick these up?
Sorry to the OP for this.....but trying to help Metzen
Put a female QD on the TC fitting on your lid with a TC to 1/2" NPT hole http://www.beveragefactory.com/home...-equipment/brewing-pump/tc105-cap-12-npt.html w/ a 1/2" NPT nipple. Then put 1 male QD on to the line loc (or sprayhead) and another to your whirlpool fitting, then you can easily switch from one to the other from the bottom side of your lid and not have to thread anything through the TC port.
Similar to what I did in pics below.
Also, if you need more flow from your pump, angle the pick up tube some, on mine the flow was greatly reduced until I turned it 45degrees to allow the pick up some more "breathing room"
Took your advice. Cheers!
View attachment IMG_2759.jpg
View attachment IMG_2757.jpg
OP
OP
poptarts
Well-Known Member
Nice looking butterfly. If you dont mind, where did you pick these up?
Found a good deal on eBay for $26 each.
OP
OP
poptarts
Well-Known Member
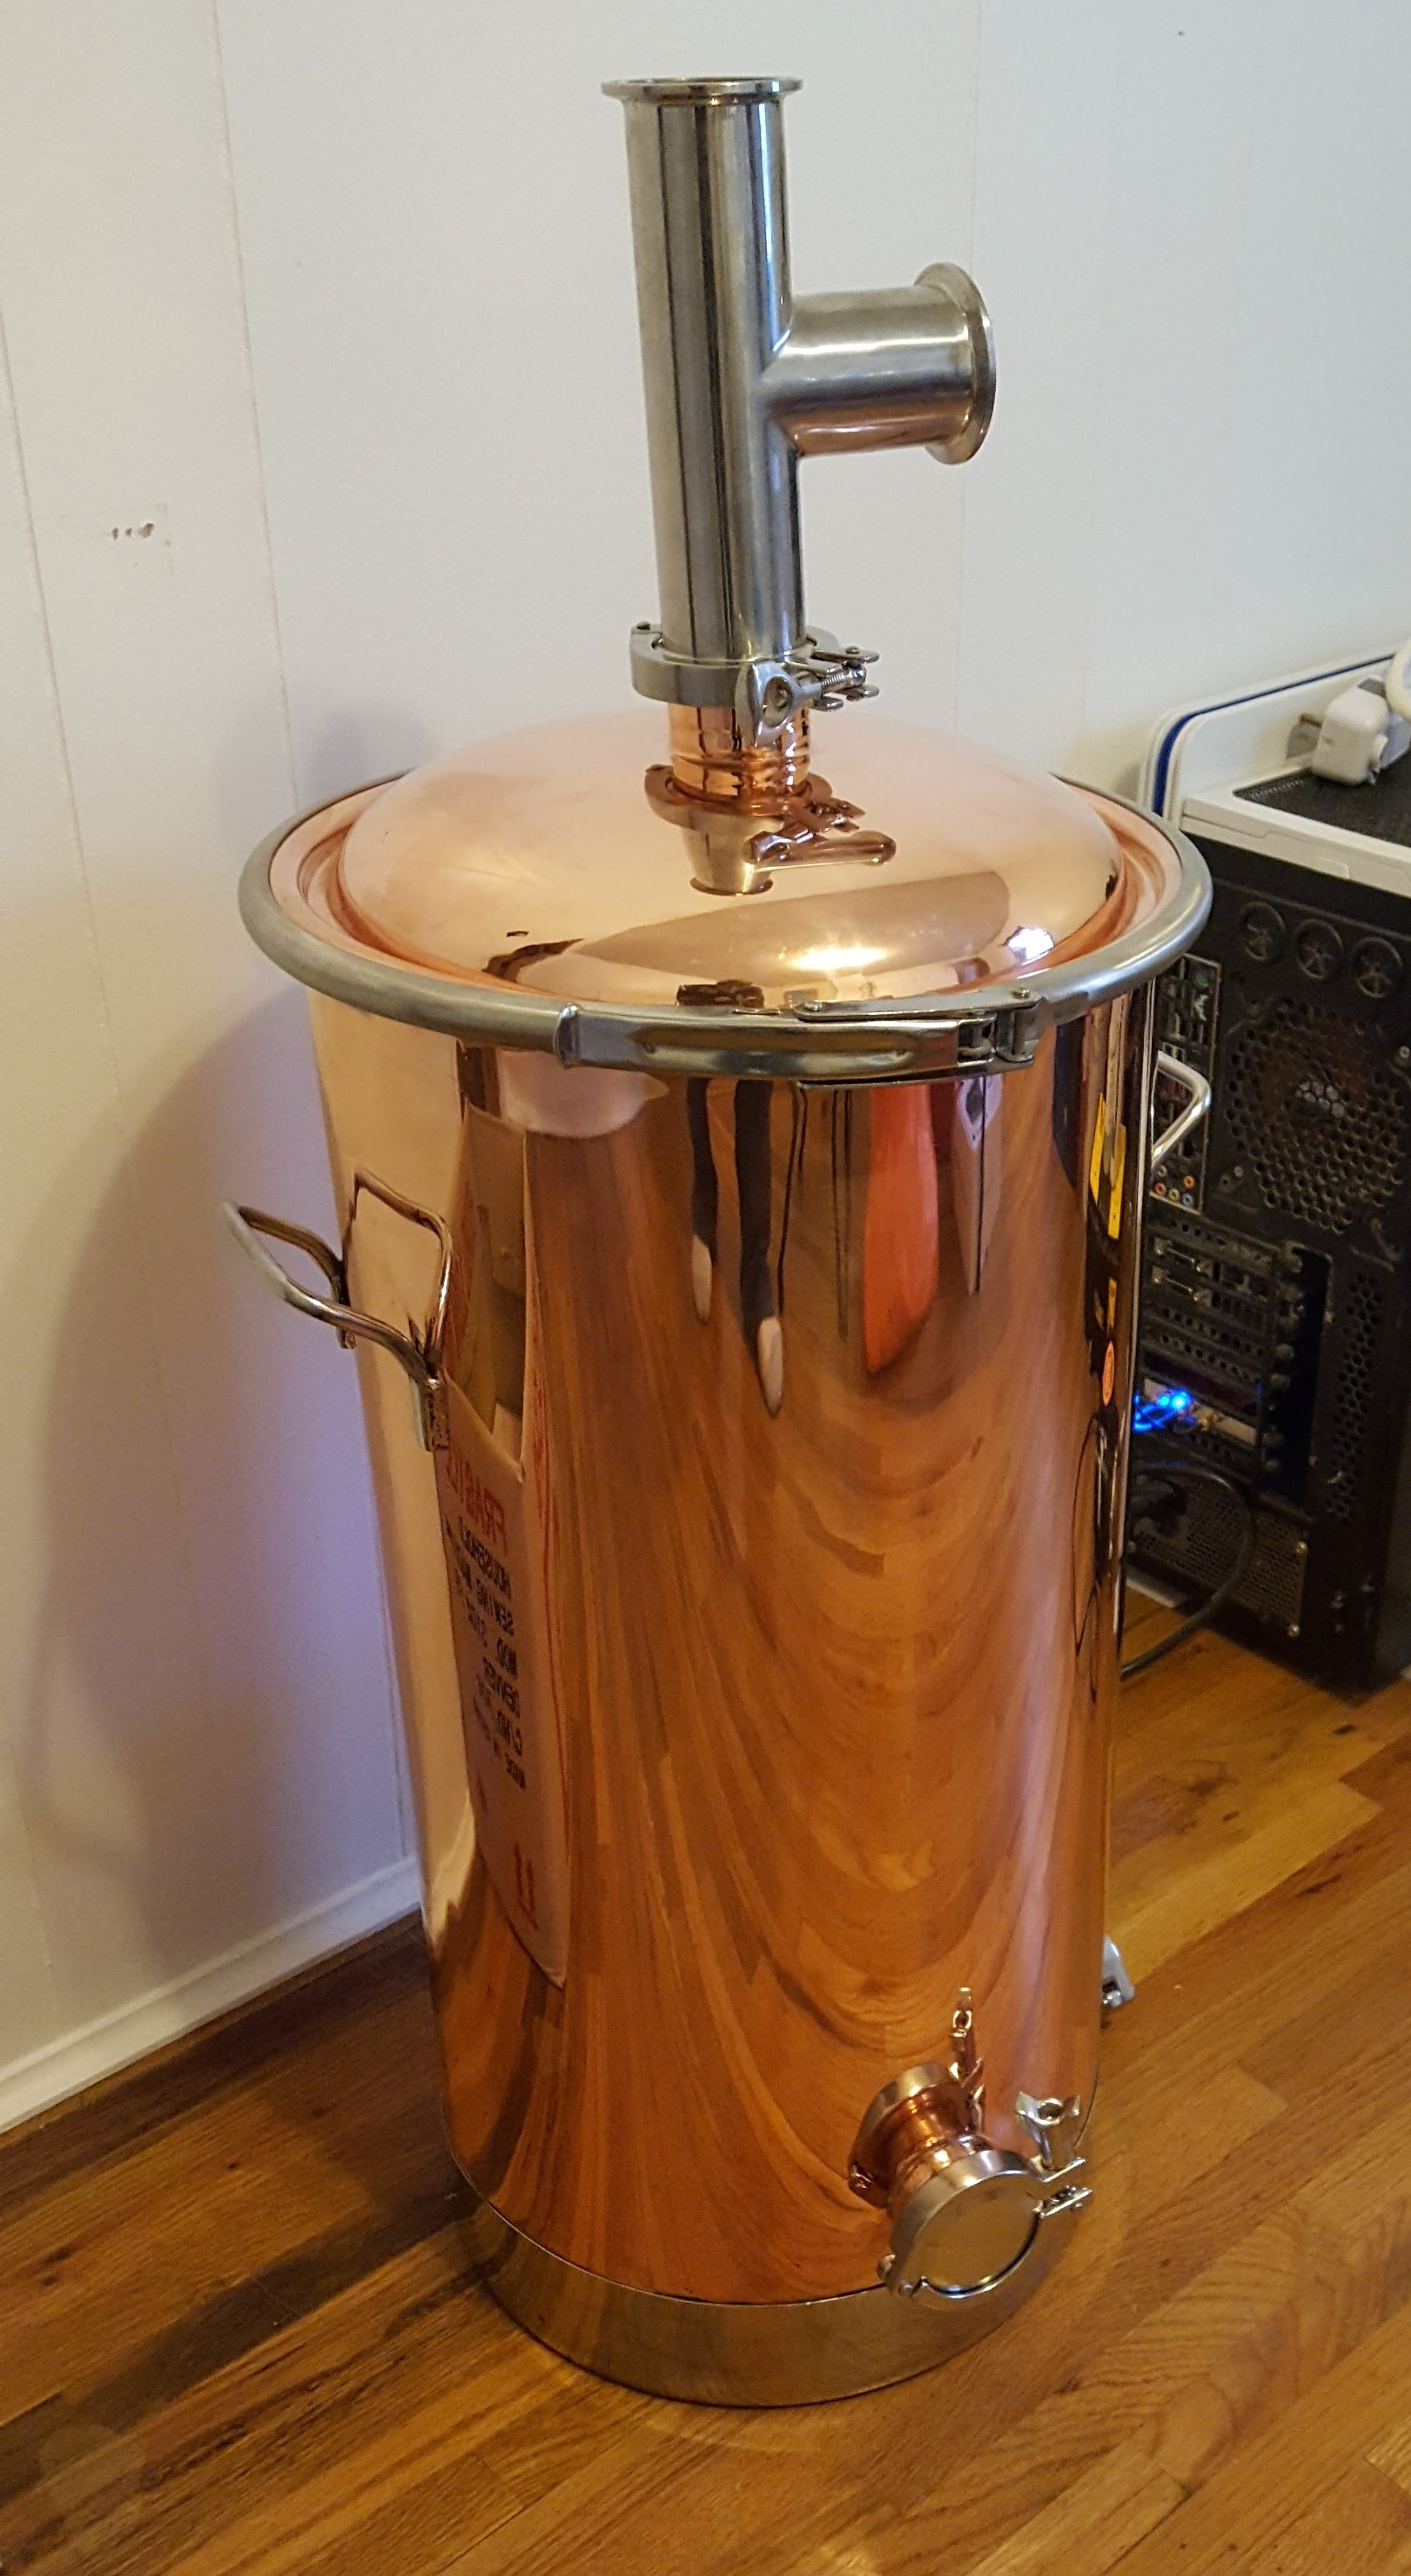
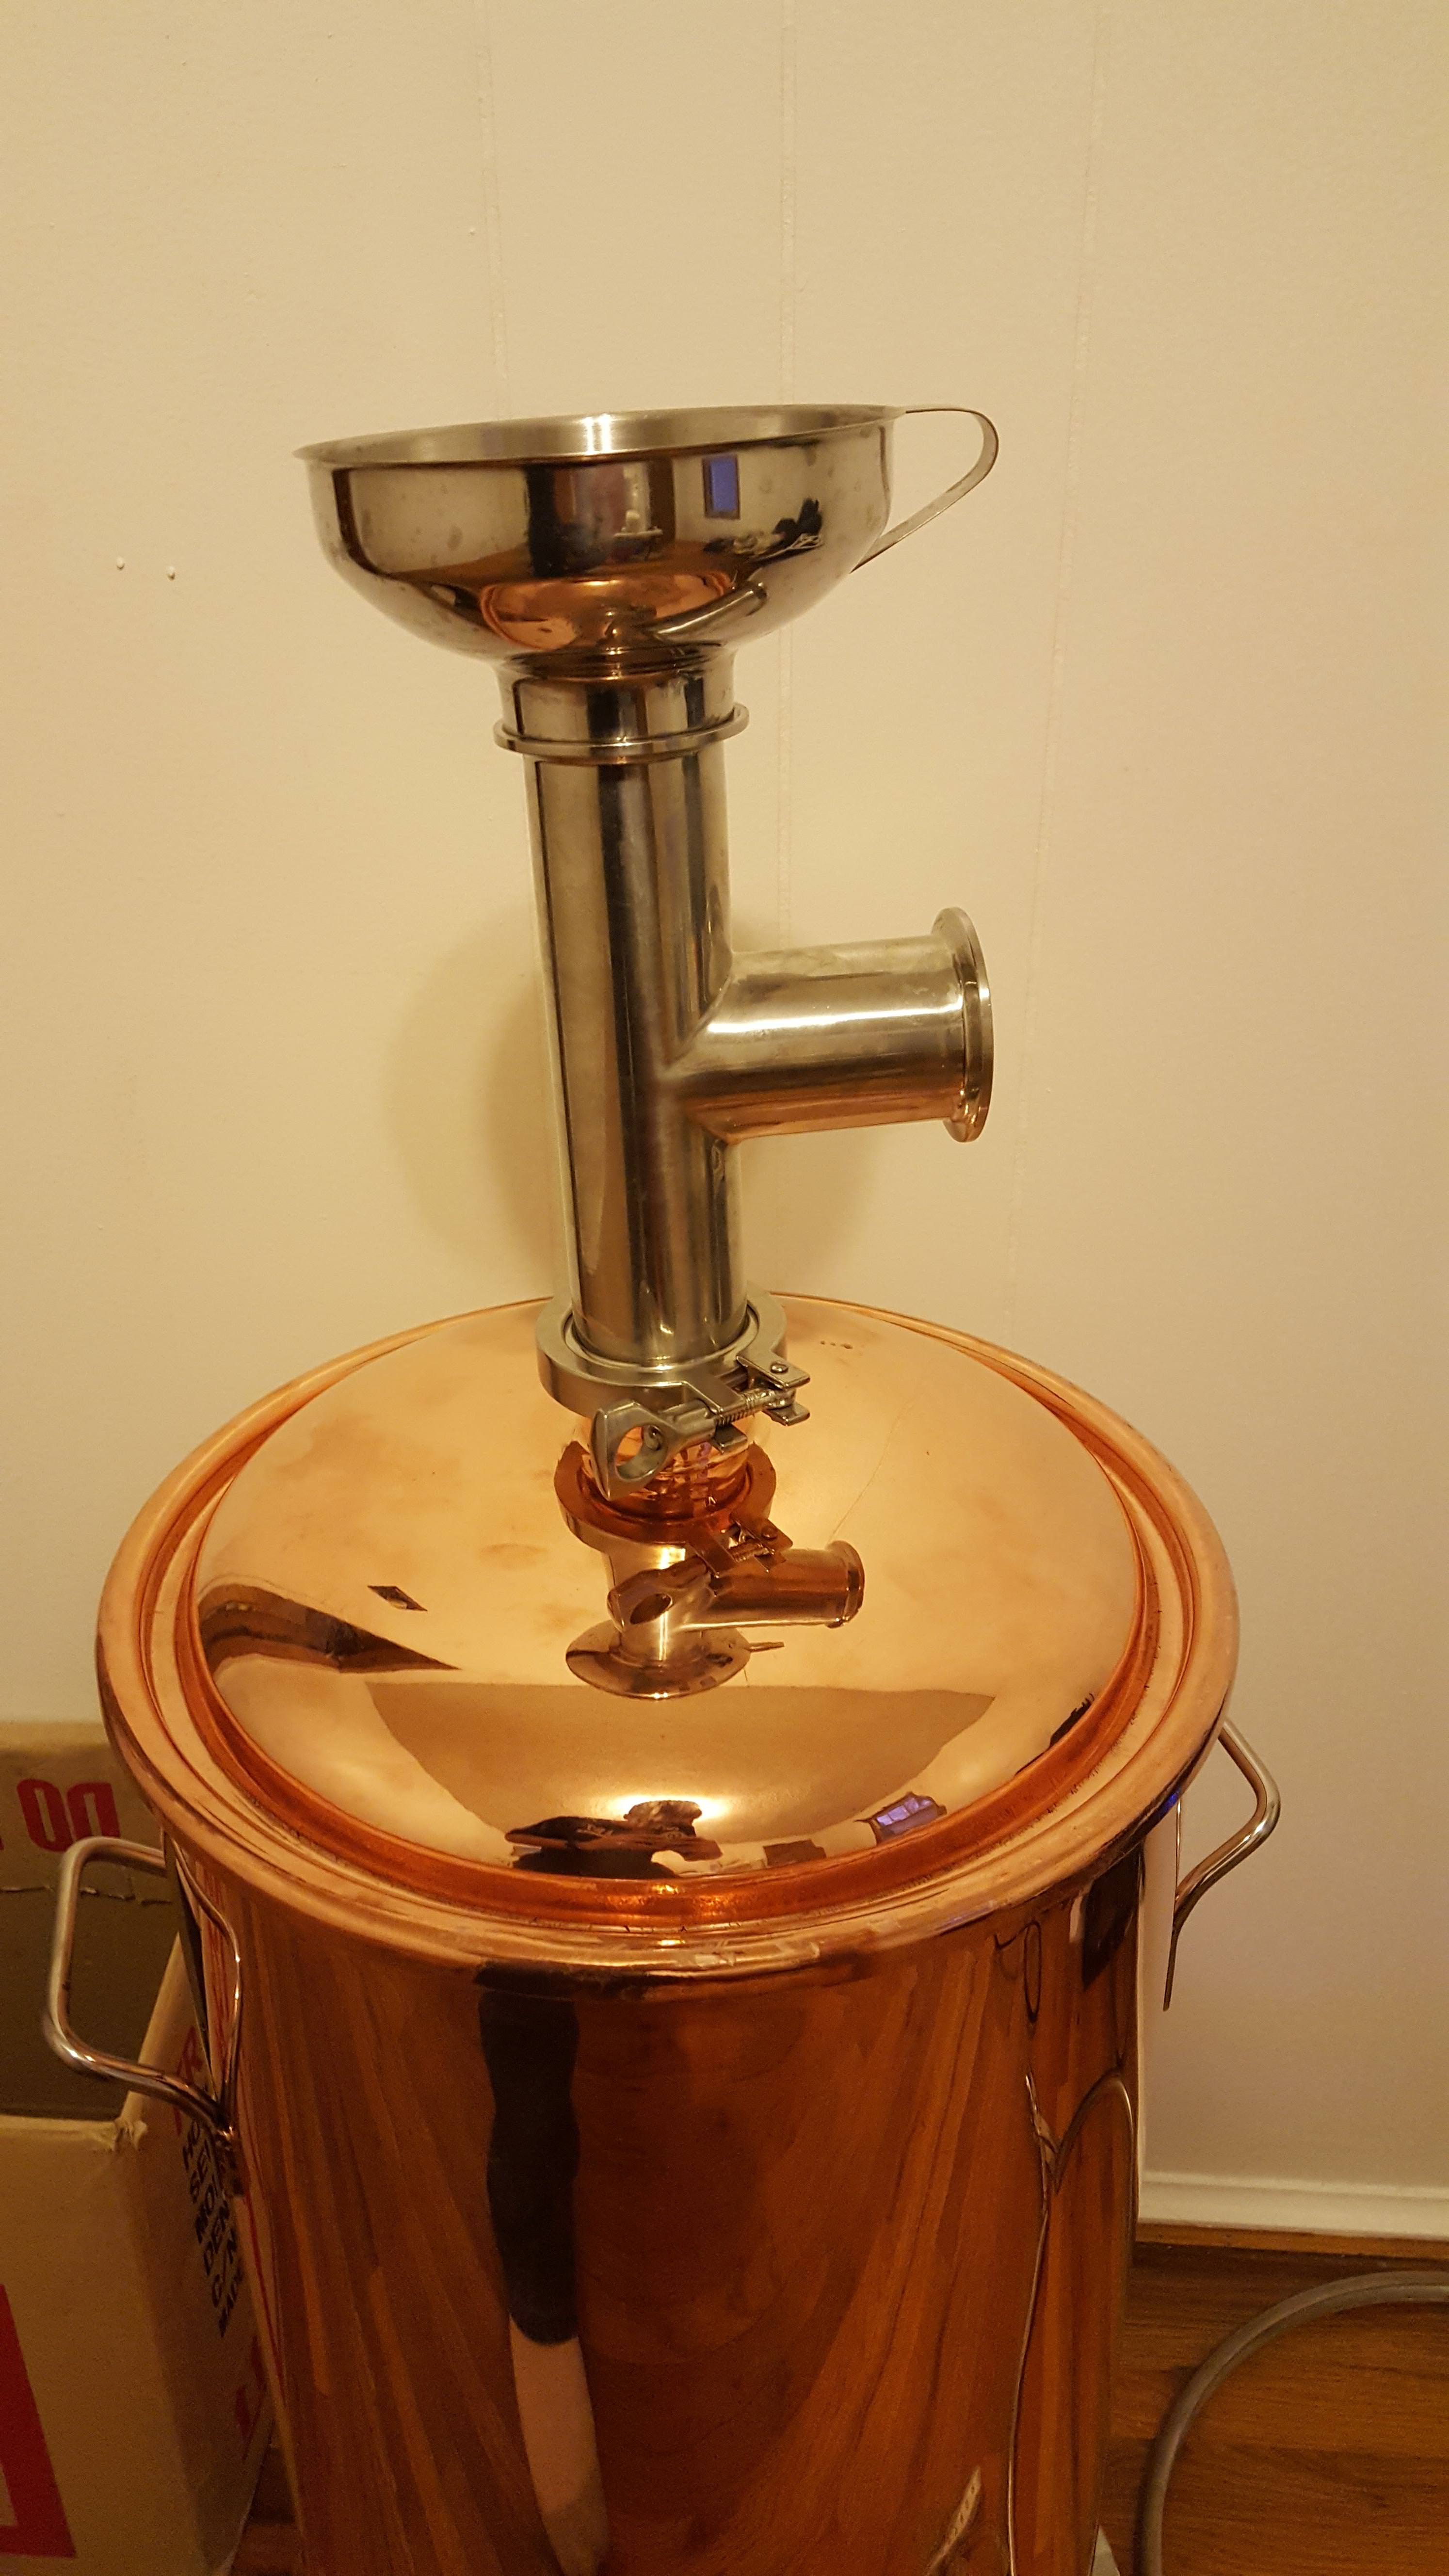
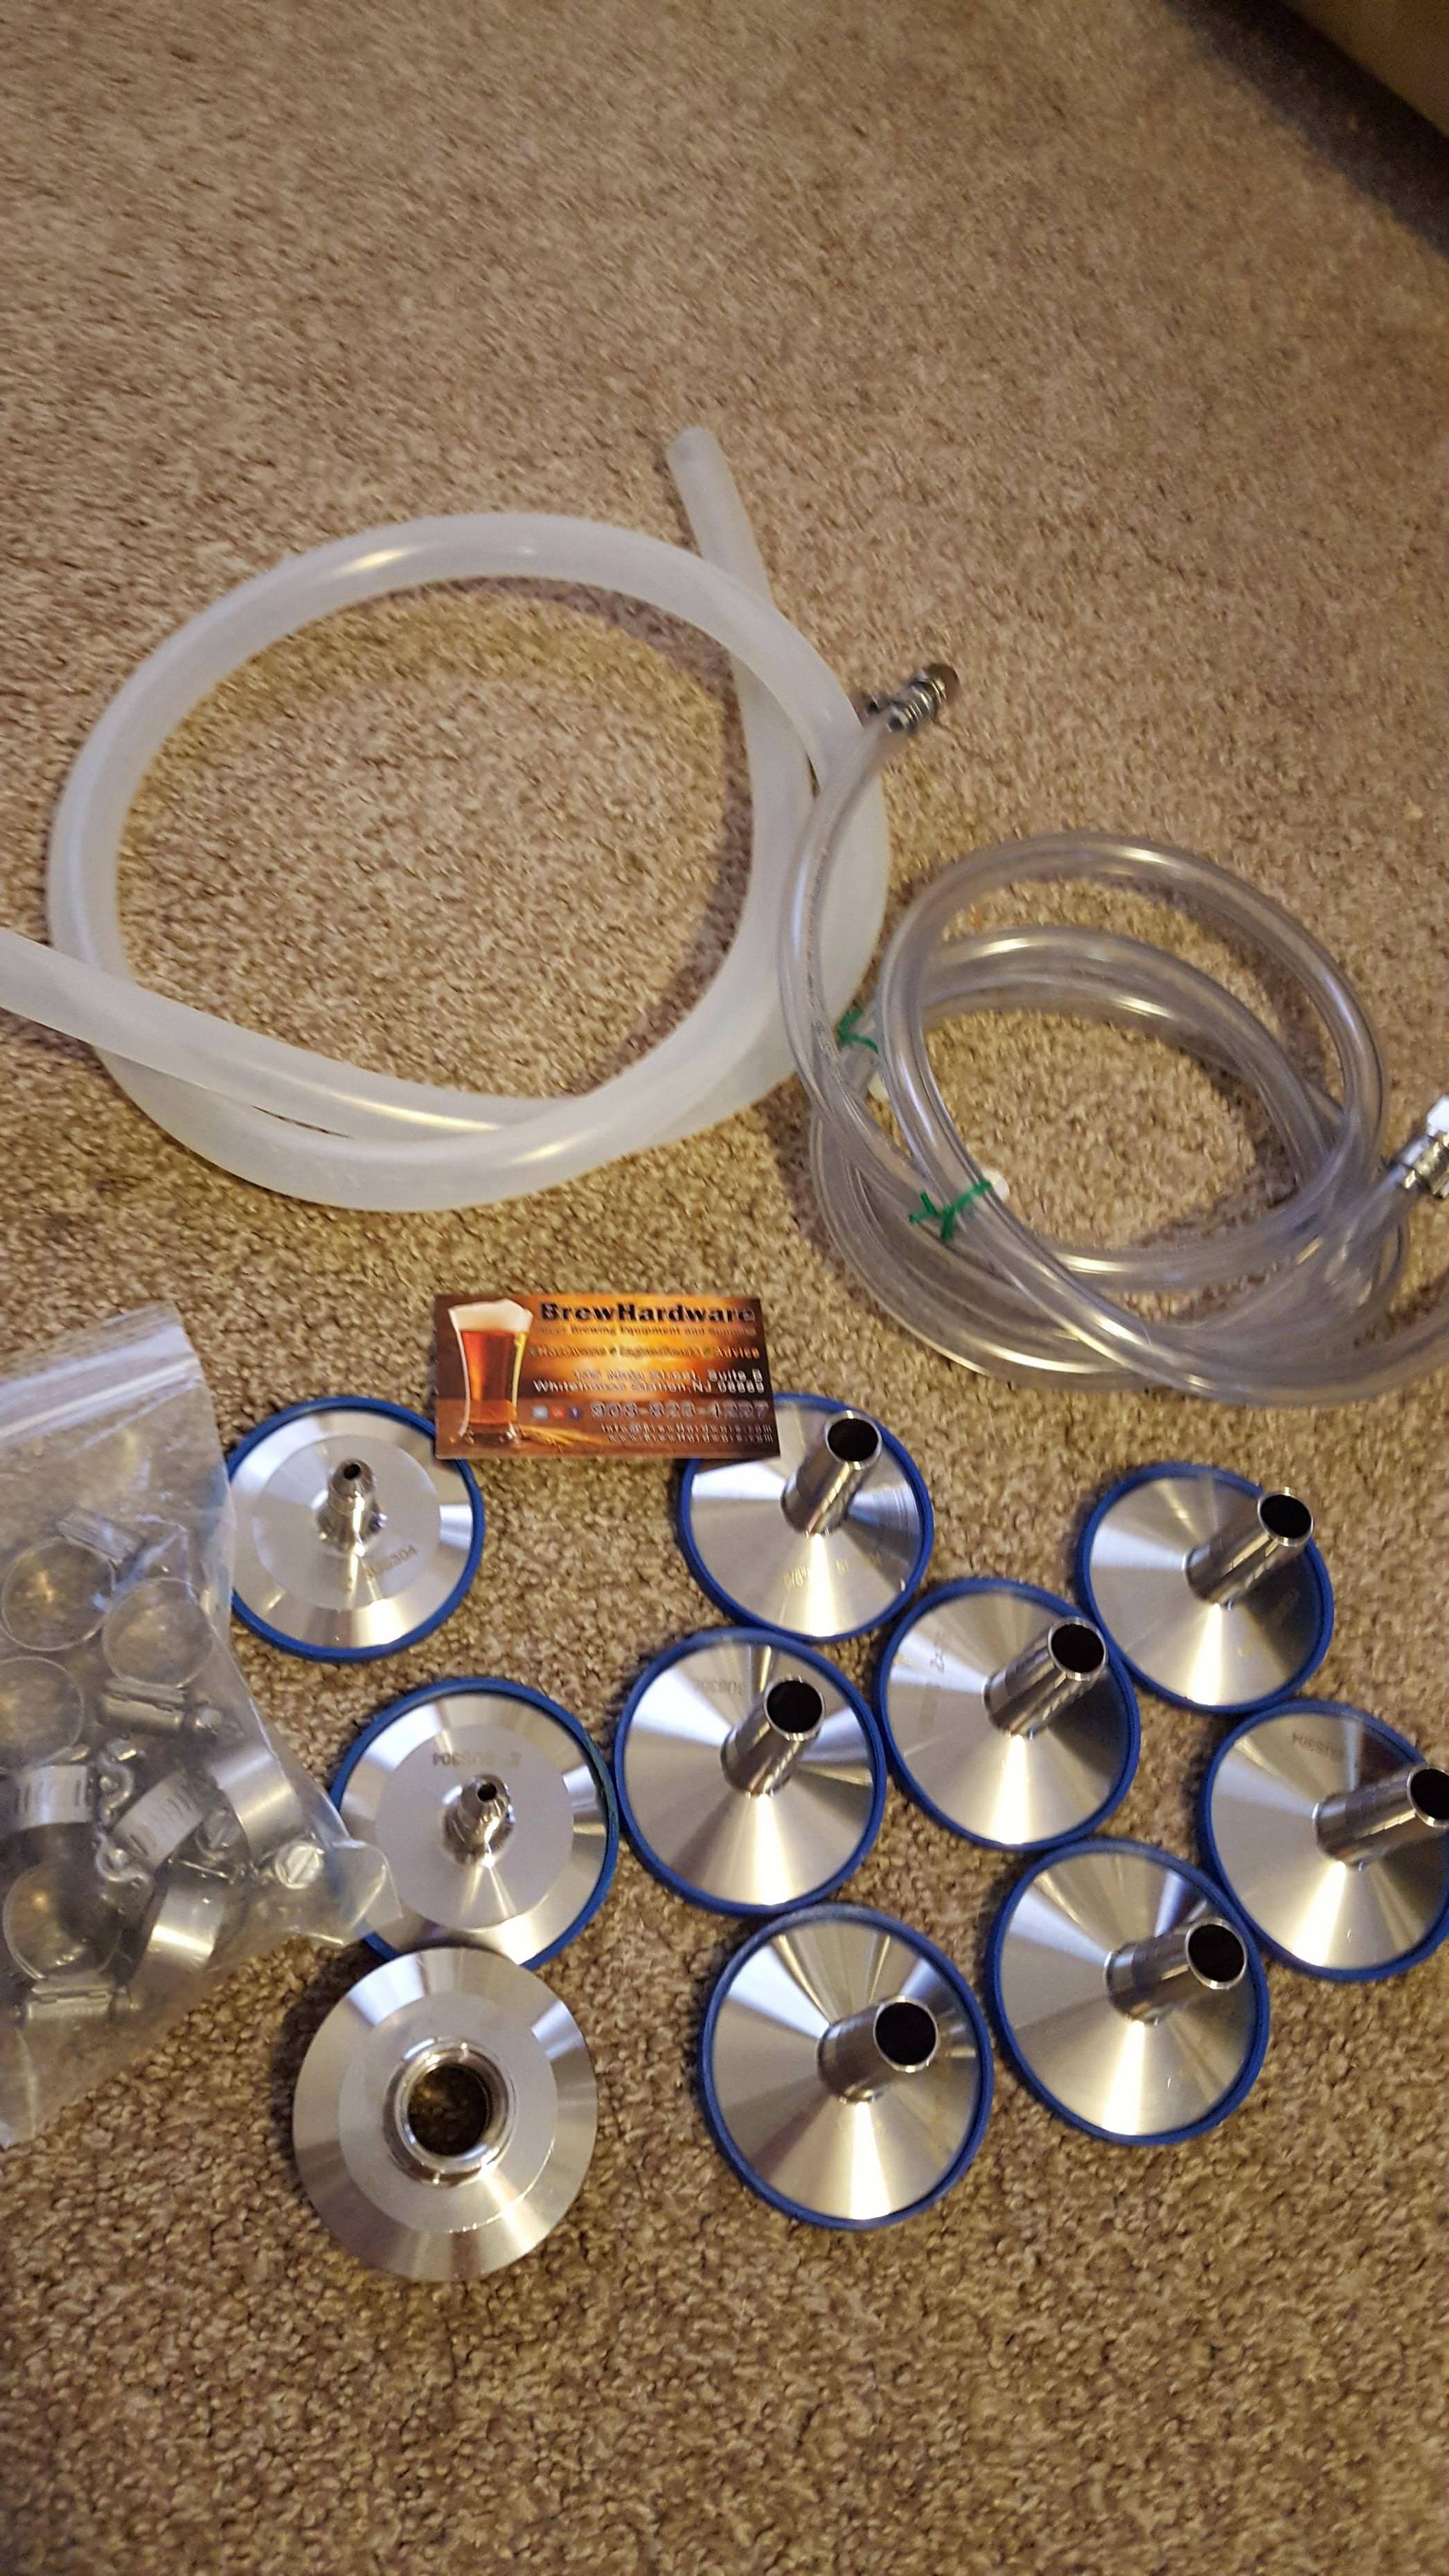
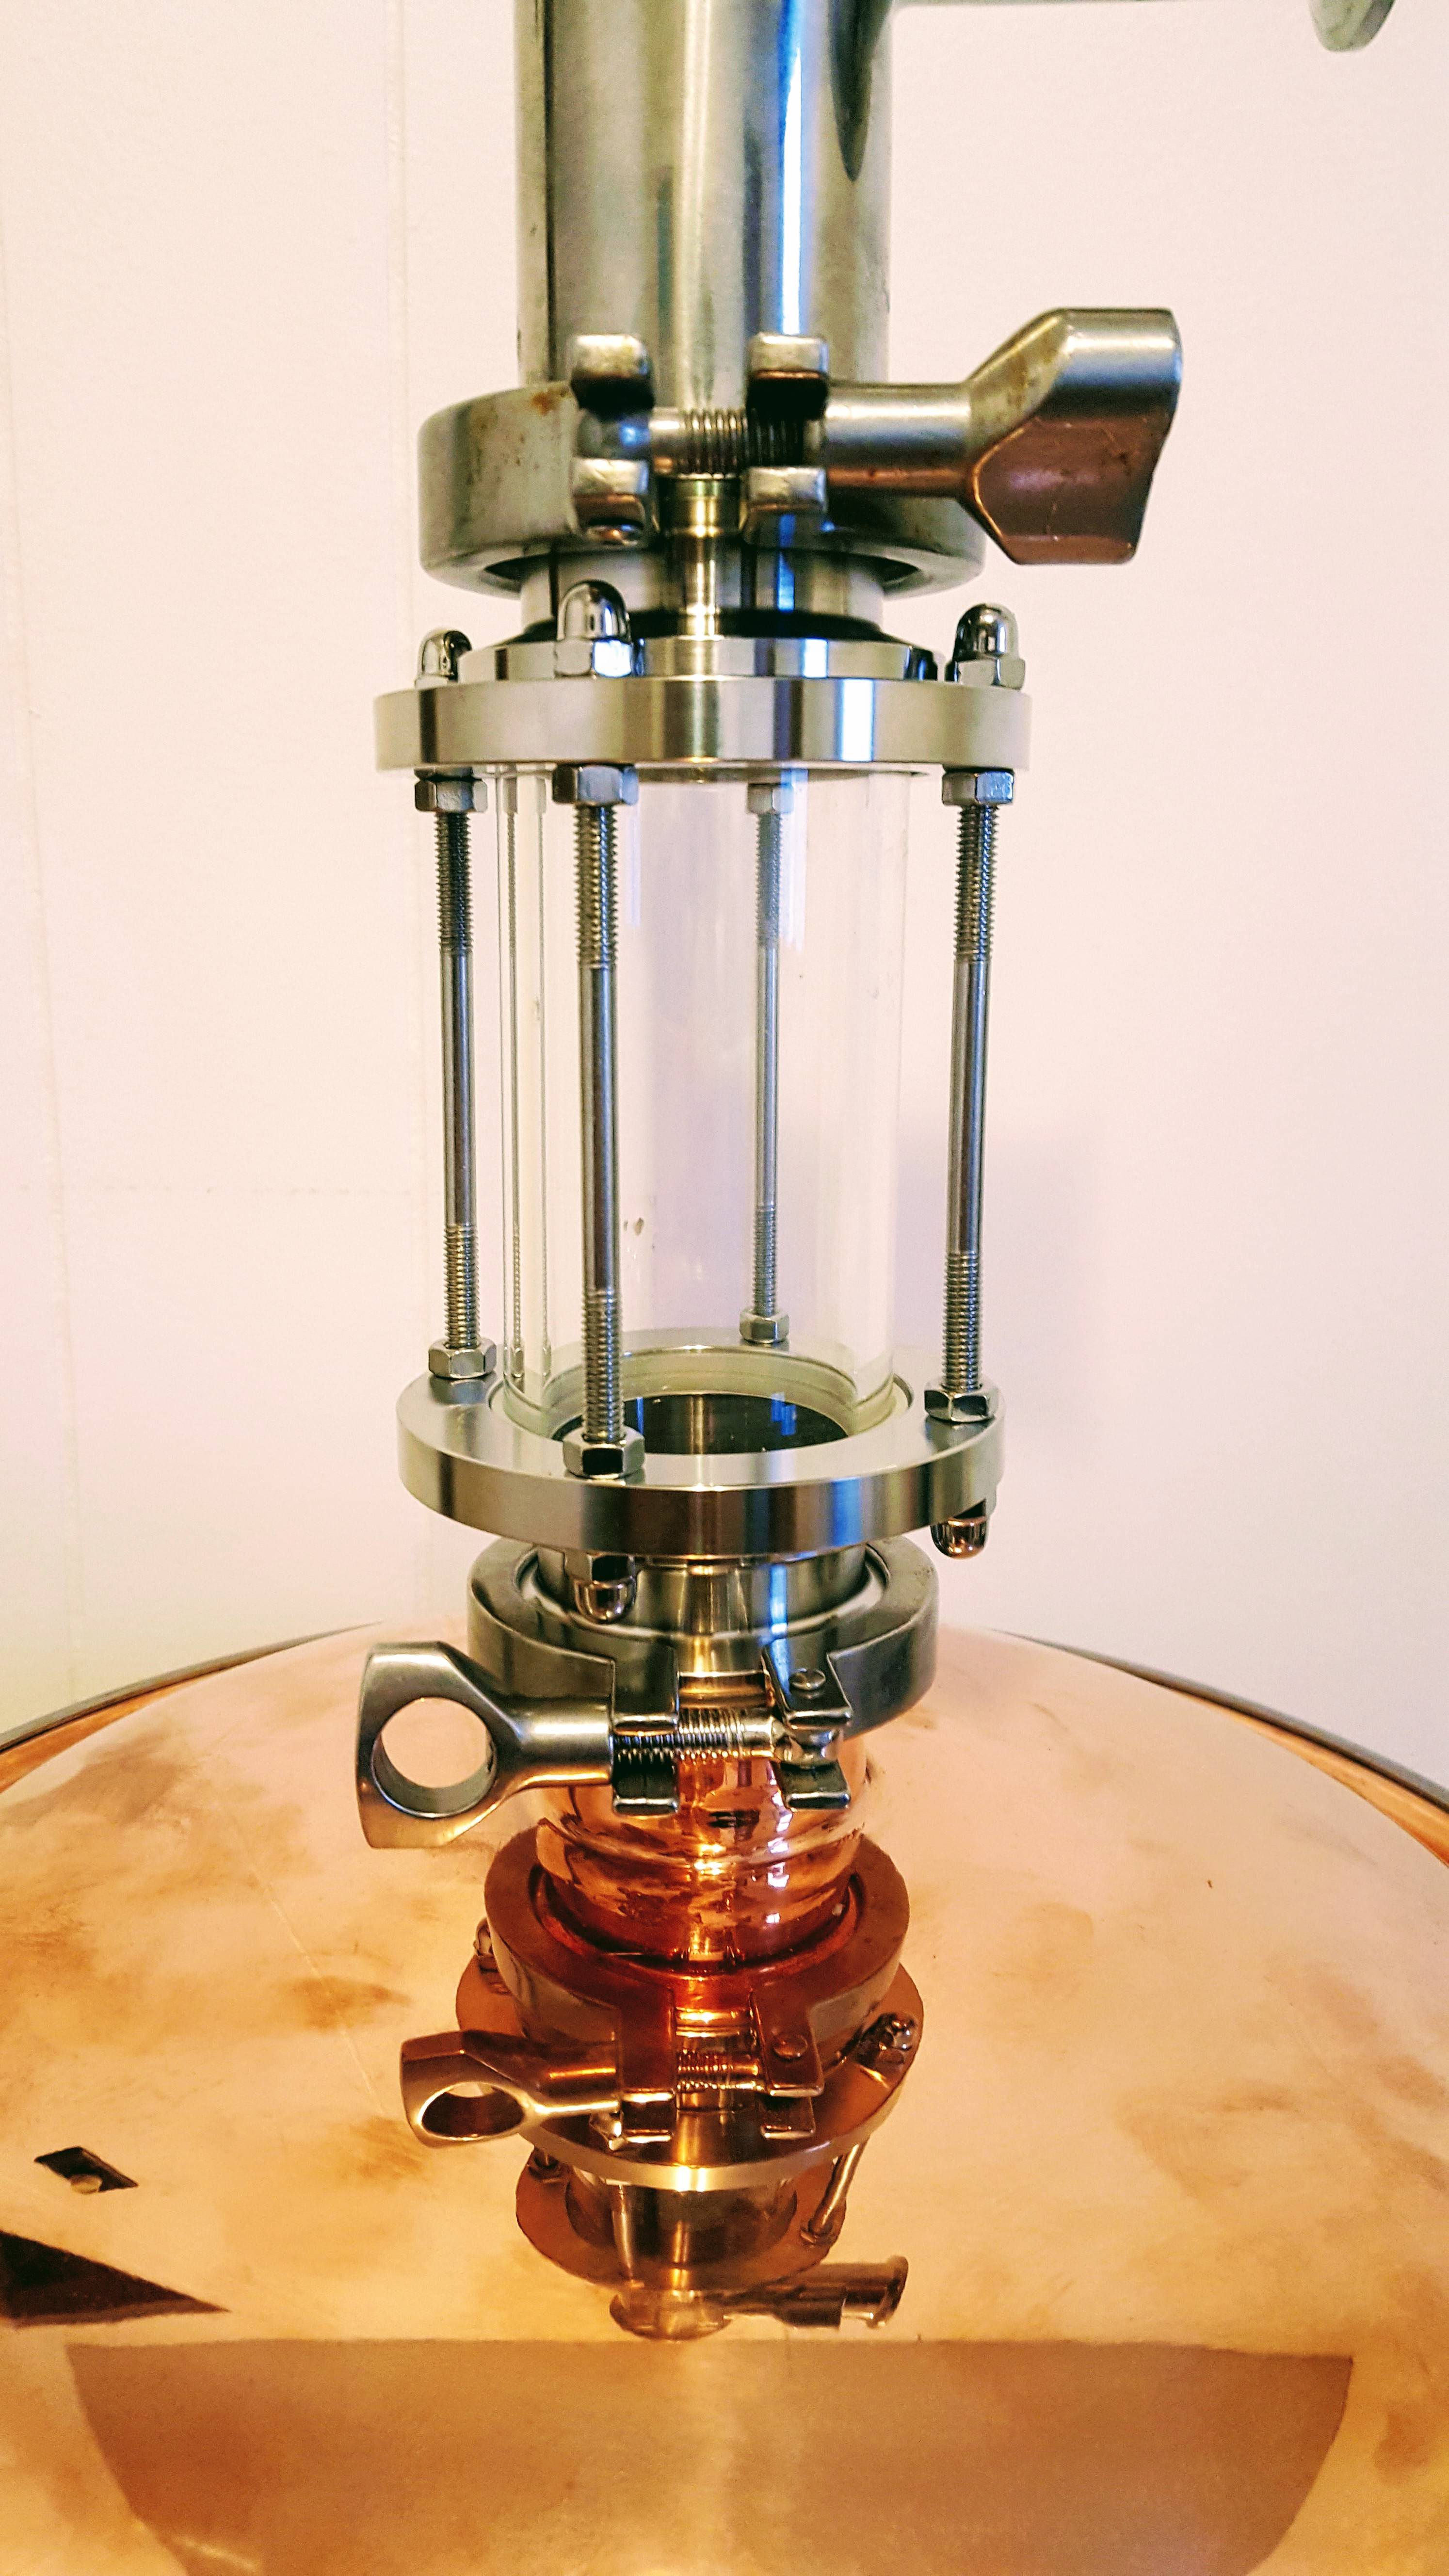
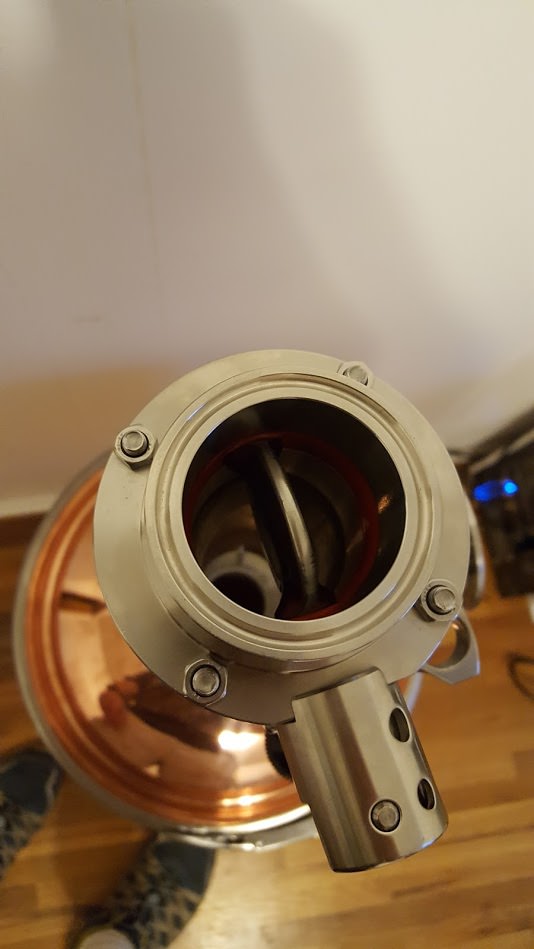
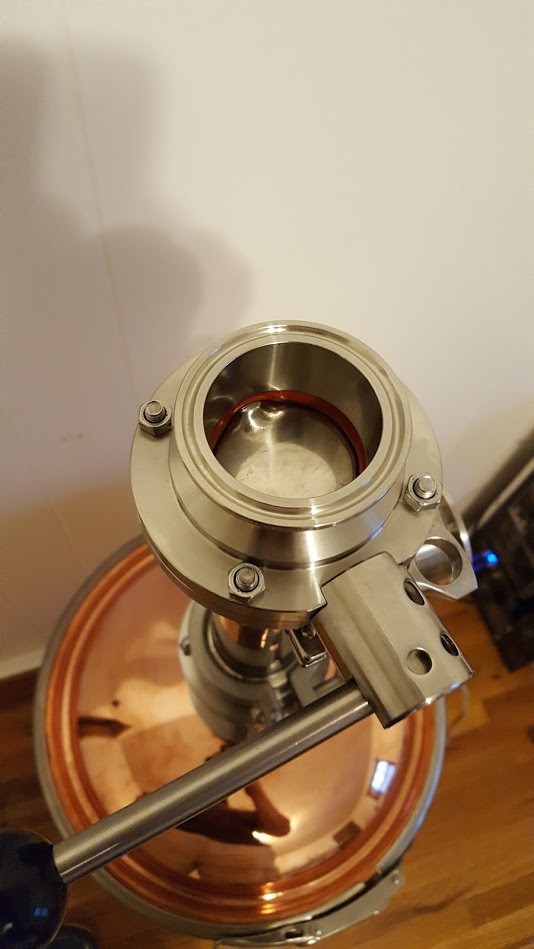
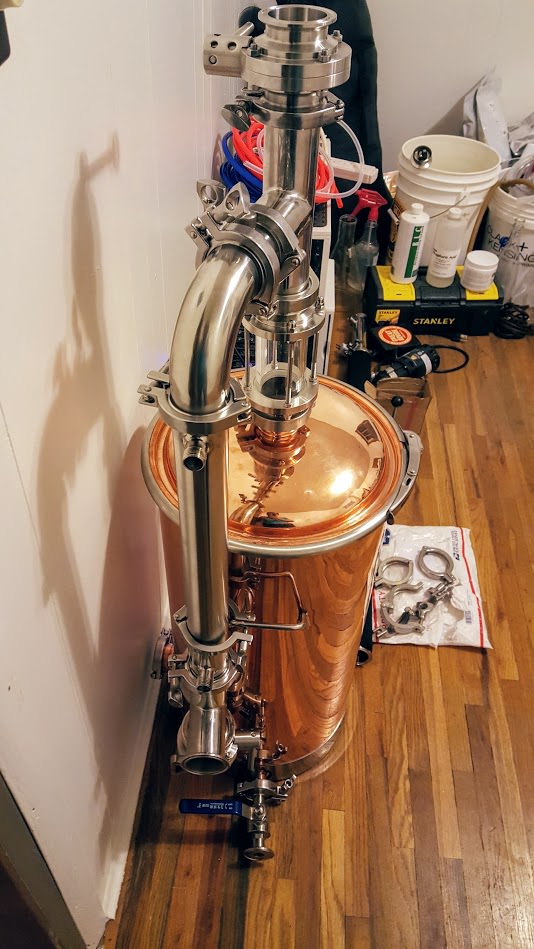
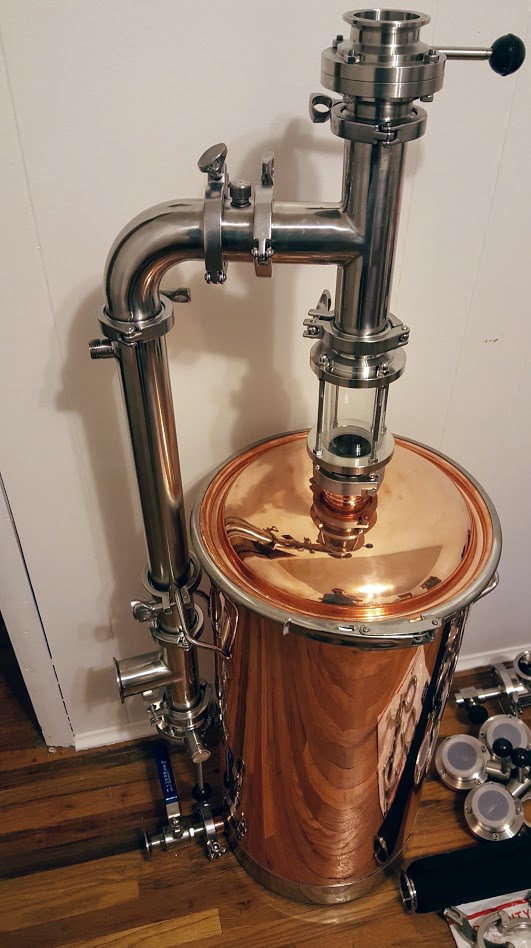
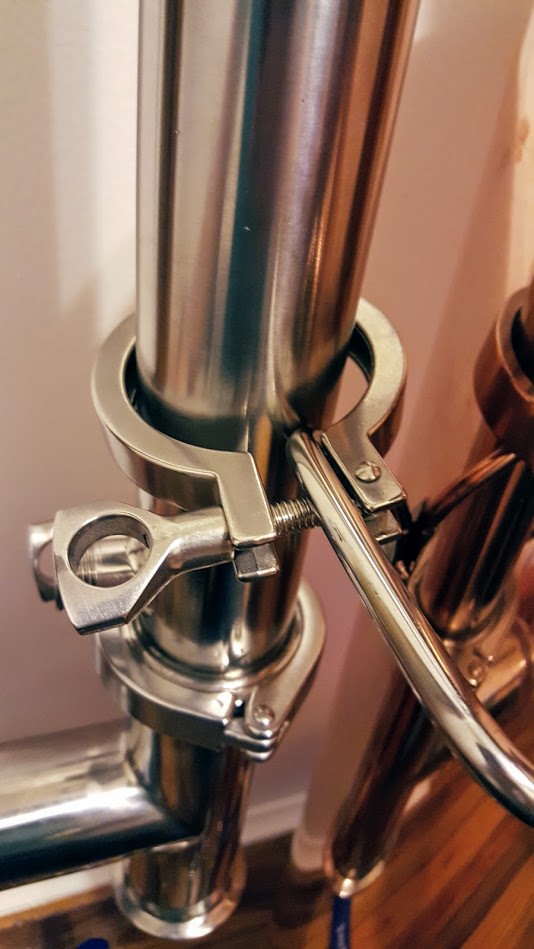
More parts showed up. So running into a little design help question. So this whole assembly hangs off the lid and I'm a little worried about stress on the lid TC fitting and overall lid clamp stress over time especially when this whole thing is filled with wort during chilling and recirc. I found a super simple solution that works perfect is bracing the condenser unit on the handle with a TC clamp but its not 100% fancy looking so looking if anyone has any easy to attach remove cleaner looking ways to do this.
hafmpty
Well-Known Member
...if anyone has any easy to attach remove cleaner looking ways to do this.
What about a sanitary pipe hanger? Something like this:
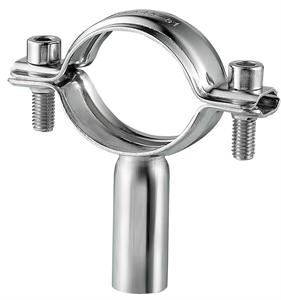
Then use something like the little clips you're using for the basket spring attachments. Attach one to the handle and thread through that into the pipe hanger. Something like that?
Rather than have the assembly supported from the lid and the side of the kettle, you could also build an adjustable height foot to support it from the bottom (if the bottom of the assembly will be close to the floor - cant tell yet). Im not exactly sure what the bottom of the assembly will look like but perhaps you could combine a pipe hanger and threaded, adjustable rubber foot to give it support. Not sure its that much more elegant, but maybe it would look more intentional
OP
OP
poptarts
Well-Known Member
Rather than have the assembly supported from the lid and the side of the kettle, you could also build an adjustable height foot to support it from the bottom (if the bottom of the assembly will be close to the floor - cant tell yet). Im not exactly sure what the bottom of the assembly will look like but perhaps you could combine a pipe hanger and threaded, adjustable rubber foot to give it support. Not sure its that much more elegant, but maybe it would look more intentional
Yea Im leaning toward some pipe clamp hanger supporting the bottom. I think I will have a 90 bend before that tee valve so that should work pretty easy then I wouldn't have to have it attach to the kettle at all.
enormous13
Well-Known Member
Man, that’s an impressive build right there. I might be wrong here, but could you Brew and distill out of this thing? (With a few small adjustments)
Similar threads
- Replies
- 9
- Views
- 1K
- Replies
- 11
- Views
- 943
- Replies
- 1
- Views
- 2K
