You are using an out of date browser. It may not display this or other websites correctly.
You should upgrade or use an alternative browser.
You should upgrade or use an alternative browser.
Squam Lakes Brewery with Pictures
- Thread starter Boar Beer
- Start date

Help Support Homebrew Talk:
This site may earn a commission from merchant affiliate
links, including eBay, Amazon, and others.
ColdCracker
There are lots of reasons for settling on the 1bb size.
We felt that with anything larger than 1bb system we would have a heat problem during fermentation. Currently we do generate a fair amount of heat but we control the room at a constant 68-70 degrees. This may not solve all the problems but what it gives us is a repeatable brew.
To control the tempter (which many people would say is better) would have been a great deal of additional investment. In addition the gadgetry required all needs to be cleaned, maintained and controlled.
Room size was another important consideration. The Blichmann 42 gallon fermentors have casters under them which allow us to role them in and out of the fermentation room easily. In addition cleaning is quiet easy.
If you look at the Stout Tanks or other larger systems you will see that they become fixed in place. You need a ladder to get up to the top for cleaning and observing. You end up with more plumbing and other costs. (yes one 2 bb system is less than 1 bb system)
A 55 gallon brew kettle is what is required for a 1 bb system if you are brewing a verity of beers. Same with the 42 gallon fermentor it yields you 30 – 35 gallon
That’s the short answer.
Yet another question. What's your time frame from bottling to delivery to make sure the beer is carbonated? Do you set aside one from every batch to test before delivering? I really like the idea of going nano with bottles over kegs even though it is far more work.
Thanks again.
Thanks again.
Boy
It takes on average 3 weeks to carbonate our beer. Yes we check every batch for overall quality including carbonation.
It takes on average 3 weeks to carbonate our beer. Yes we check every batch for overall quality including carbonation.
scooterunderwood
Active Member
So if you wish to expand or modify your brewery, the equipment not the building, like adding another fermentor or brute tank, do you have to do paperwork and get approval before you can do that?
Basically you can change your equipment but you cant expand the foot print of your brewery.

$39.22 ($39.22 / Count)
Brewer's Best Home Brew Beer Ingredient Kit - 5 Gallon (Mexican Cerveza)
Amazon.com

$7.79 ($7.79 / Count)
Craft A Brew - LalBrew Voss™ - Kveik Ale Yeast - For Craft Lagers - Ingredients for Home Brewing - Beer Making Supplies - (1 Pack)
Craft a Brew

$53.24
1pc Hose Barb/MFL 1.5" Tri Clamp to Ball Lock Post Liquid Gas Homebrew Kegging Fermentation Parts Brewer Hardware SUS304(Gas MFL)
Guangshui Weilu You Trading Co., Ltd

$33.99 ($17.00 / Count)
$41.99 ($21.00 / Count)
2 Pack 1 Gallon Large Fermentation Jars with 3 Airlocks and 2 SCREW Lids(100% Airtight Heavy Duty Lid w Silicone) - Wide Mouth Glass Jars w Scale Mark - Pickle Jars for Sauerkraut, Sourdough Starter
Qianfenie Direct

$10.99 ($31.16 / Ounce)
Hornindal Kveik Yeast for Homebrewing - Mead, Cider, Wine, Beer - 10g Packet - Saccharomyces Cerevisiae - Sold by Shadowhive.com
Shadowhive

$33.95
Five Star - 6022b_ - Star San - 32 Ounce - High Foaming Sanitizer
Bridgeview Beer and Wine Supply

$58.16
HUIZHUGS Brewing Equipment Keg Ball Lock Faucet 30cm Reinforced Silicone Hose Secondary Fermentation Homebrew Kegging Brewing Equipment
xiangshuizhenzhanglingfengshop

$176.97
1pc Commercial Keg Manifold 2" Tri Clamp,Ball Lock Tapping Head,Pressure Gauge/Adjustable PRV for Kegging,Fermentation Control
hanhanbaihuoxiaoshoudian

$53.24
1pc Hose Barb/MFL 1.5" Tri Clamp to Ball Lock Post Liquid Gas Homebrew Kegging Fermentation Parts Brewer Hardware SUS304(Liquid Hose Barb)
yunchengshiyanhuqucuichendianzishangwuyouxiangongsi

$22.00 ($623.23 / Ounce)
AMZLMPKNTW Ball Lock Sample Faucet 30cm Reinforced Silicone Hose Secondary Fermentation Homebrew Kegging joyful
无为中南商贸有限公司

$20.94
$29.99
The Brew Your Own Big Book of Clone Recipes: Featuring 300 Homebrew Recipes from Your Favorite Breweries
Amazon.com
2 years later and still rocking the dream! So glad its all working out! I think the Nano thing is catching on! Nice work guys! Love the rolling fermenters!
Keep the dream alive!
Cheers
Jay
Keep the dream alive!
Cheers
Jay
Jaybird
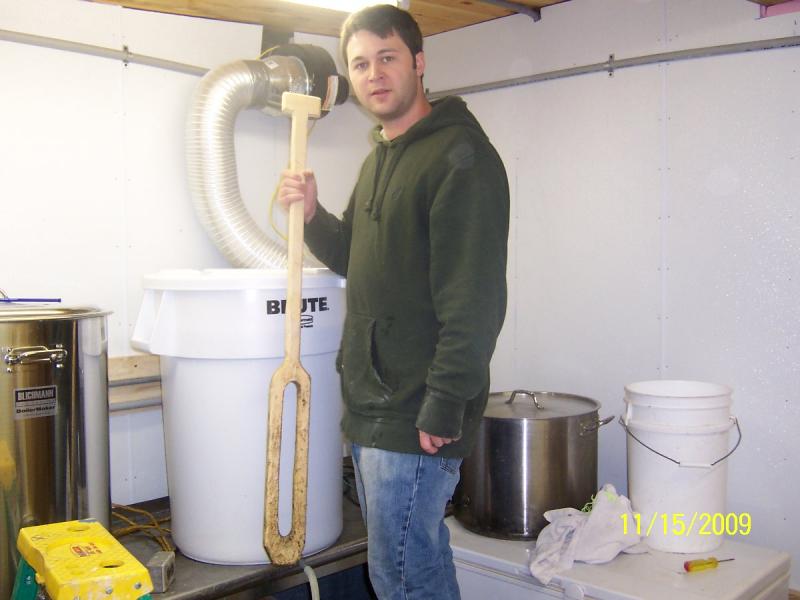
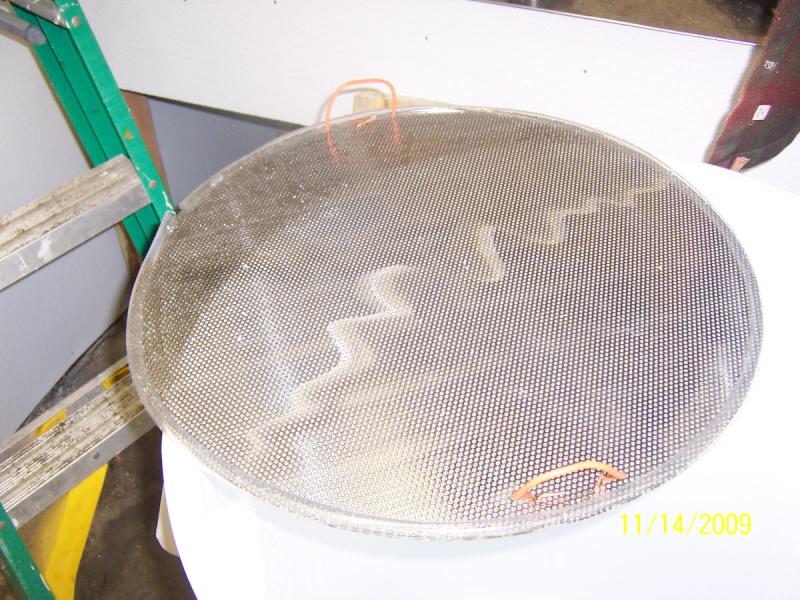
The false bottom you made for us is still working great. We put two handles on it and use a split piece of tubing around the edge to make the fit tight
We used a piece of Pex tube with 1/4 in holes drilled in it to drain the wart. The false bottom fits nice and snug into the 44 gallon Rubbermaid (food grade) tub. The system has been used without problems 1-2 times a week for a year or more.
By the way the Rubbermaid tub is great. It holds the heat much better than SS and is easy to move around and clean.
Thanks again for the custom made false bottom


Good stuff man.... Real good stuff!
My best to the 2 of you!
Jay
My best to the 2 of you!
Jay
Rivenin
Well-Known Member
- Joined
- Dec 13, 2010
- Messages
- 3,258
- Reaction score
- 342
The next step was to prepare the some grain for our brew.
View attachment 13602
did you seriously do that all with a corona? THAT IS AWESOME!
Yes we started with the corona and upgraded in November see page 16 for the mill we built
IF you buy your mault pre crushed from the factory (not your HB store) by the bag then you only have to crush your special grains. Still the new mill is much nicer
IF you buy your mault pre crushed from the factory (not your HB store) by the bag then you only have to crush your special grains. Still the new mill is much nicer
thebeers54
Well-Known Member
Nice article in Yankee Brew News on you guys! Grabbed a copy from my LHBS today... congrats!
Would love to find a semi-automatic system of some kind. Bottling is a good deal of work at 30 cases per week or almost 400 22 oz bottles.
smmcdermott
Well-Known Member
I have a couple questions, if you don't mind answering them, that I didn't see addressed in the thread yet.
1) You provided the total cost of brewing a beer with materials/electricity but did not include bottles in there. What would you say your profit is currently after all the costs (would you mind listing what you get for a full batch after all is sold)?
2) Obviously you age certain beers for different amounts of time, but we hear about the large commercial places that are able to age a beer for 2 weeks prior to bottling. I was curious how long you age a couple of your beers?
3) How many batches are you doing in a given month? You said you are making profit and this is your day job, but curious how oftern you are actually brewing vs. selling, distributing.
Thanks again for all the info, its great that you are so open about everything.
sarsnik
Well-Known Member
Just wanted to pass my congratulations to you for your article in yankee brew news. I read the article before stumbling onto this thread, which makes it that much cooler! No idea that you guys had a presence on these forums prior to becoming a micro. Actually just came back from a vacation in central NH, but when I get back up there I'll be sure to grab some of your brews!
Jaysus
Well-Known Member
holy guacamole, that is chips!
theKupiiBrewerii
Member
Hey guys. I love your setup. Stories like this make me wish I had more time to brew and actually make a living with it. I am just starting out in my brewing life but what you guys have done is one of my big goals in life. 
Time for an update
Finally a sculpture for the brewery
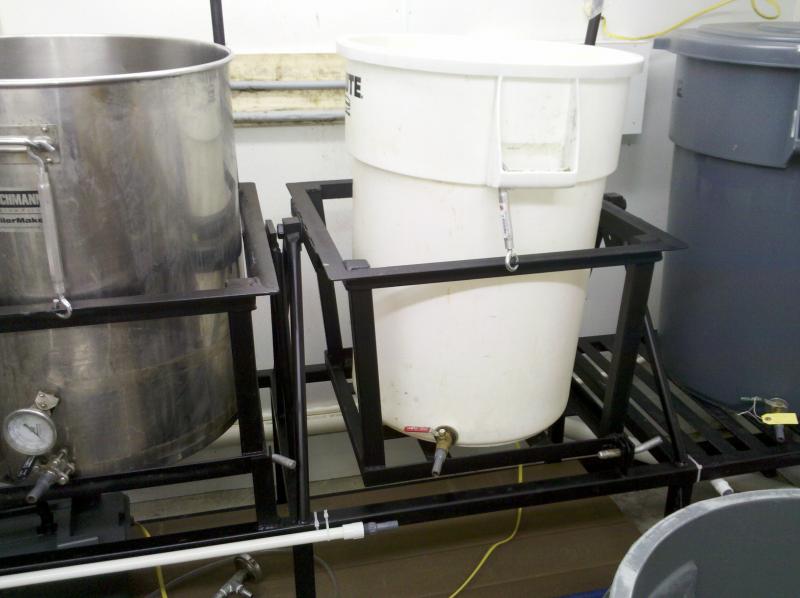
It has a heavy duty swing system for the MT
A light duty swing system for the brew kettle to make clean up easier
For the MT and HLT we have a quick disconnect system using the 1/2 in ID (3/4 in OD) tubing to connect to. I know it’s not the fancy Try Clover but its worked for a couple years and its priced right.
Two pumping systems
The first is a standard pump which I just put in a tool box
The second is a double peristaltic
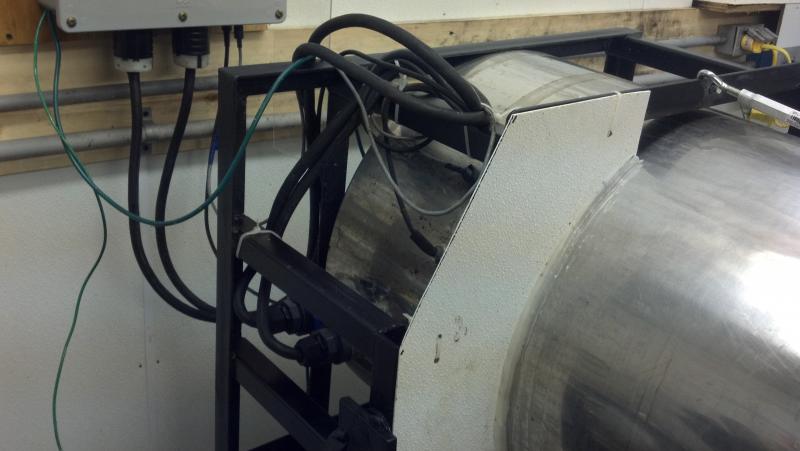
The brew kettle is a Blichmann 55 gallon kettle with a Brewmation controller. The addition of the light duty tilt system allowed us to attach the wiring to the frame reducing the risk of inadvertently causing damage. With 220 Volts and water everywhere I consider this the week point with DYI electric brewing.
The next step is to convert a second 55 gallon (gray) Rubbermaid barrel to a MT to replace the white 44 gallon one. We brewed a large Imperial stout and had to use the old 20 gallon MT along with the 44 gallon one. The sculpture is designed for this up grade I just have to figure out how to get the old false bottom to work.
We also have to rework the venting system but will try it the way it is for now.
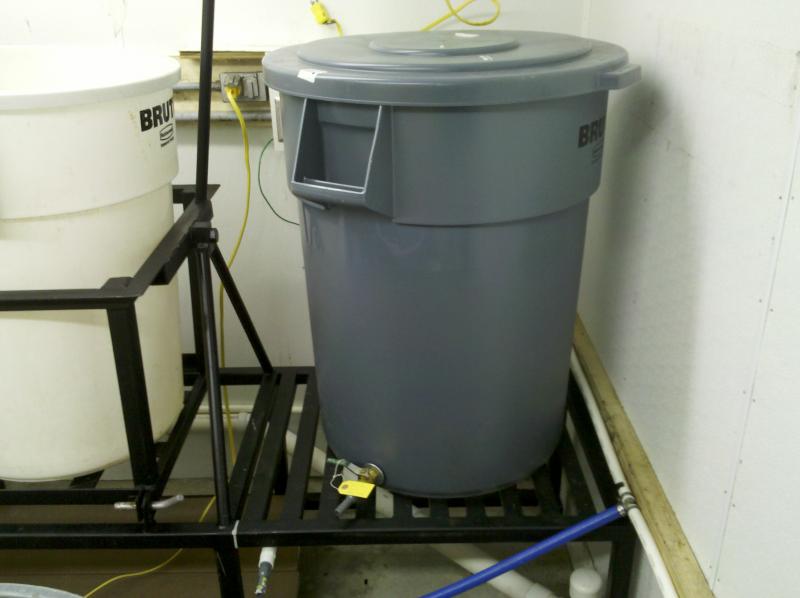


more pictures
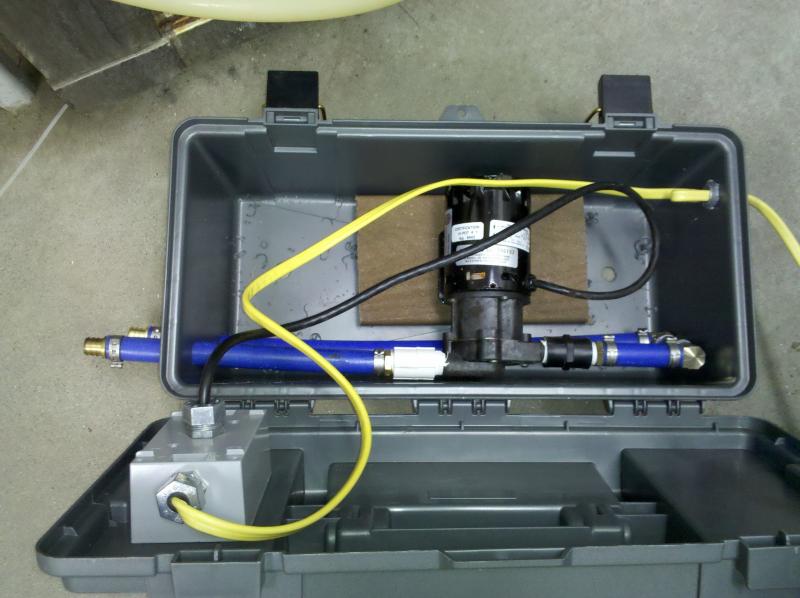
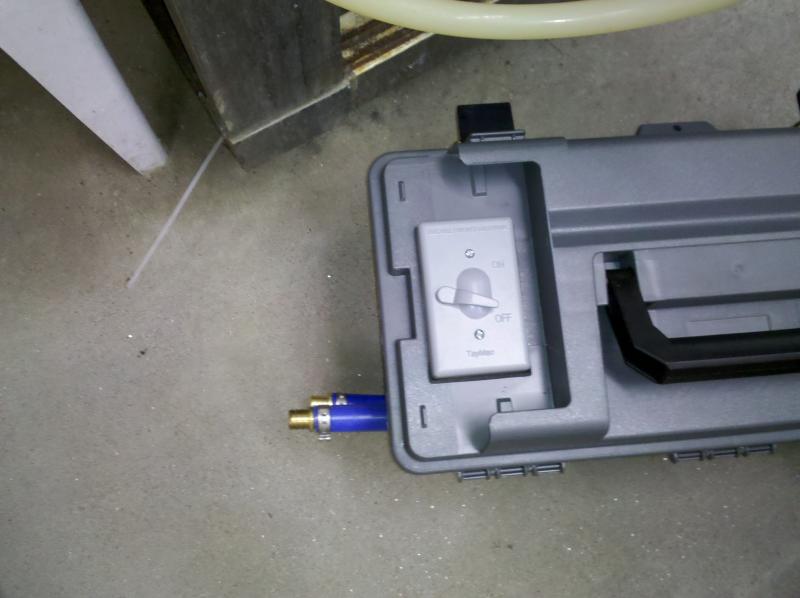


Ran the first run today with the new rig. It all worked very well
See the you tube video
[ame=http://youtu.be/UZi_FmmHpJU]Squam Brewing New setup - YouTube[/ame]
See the you tube video
[ame=http://youtu.be/UZi_FmmHpJU]Squam Brewing New setup - YouTube[/ame]
Congratulations on creating such a fantastic nano brewery. Awesome all the way around.
Can you please provide more information on your new brew sculpture? Where did you order it from? Hopefully if everything goes right i'll be in the market for one just like it at the end of this year.
Thank you for sharing all of this wonderful information !!!
Can you please provide more information on your new brew sculpture? Where did you order it from? Hopefully if everything goes right i'll be in the market for one just like it at the end of this year.
Thank you for sharing all of this wonderful information !!!
Below are two pictures showing the tilting brew kettle. We find this very important to being able to clean the kettle easily. In addition the wiring conection of the power to the heating element is a headache. On a small kettle its not that bad but with a big kettle it is very easy to put strain on the wrong 220 v cord and cause damage.



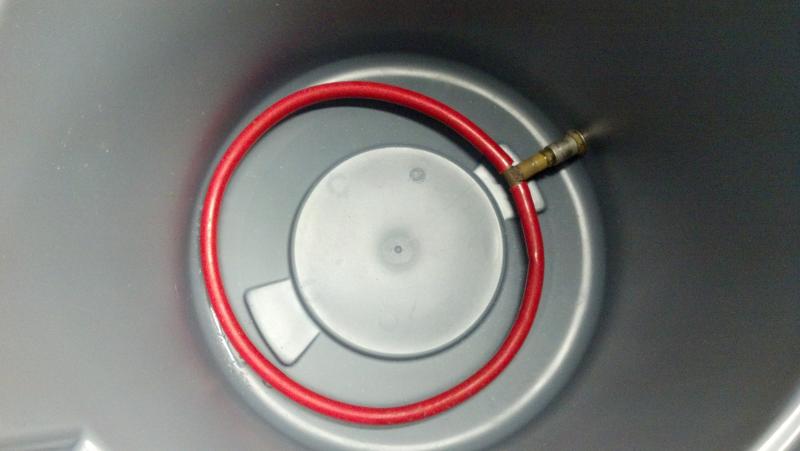
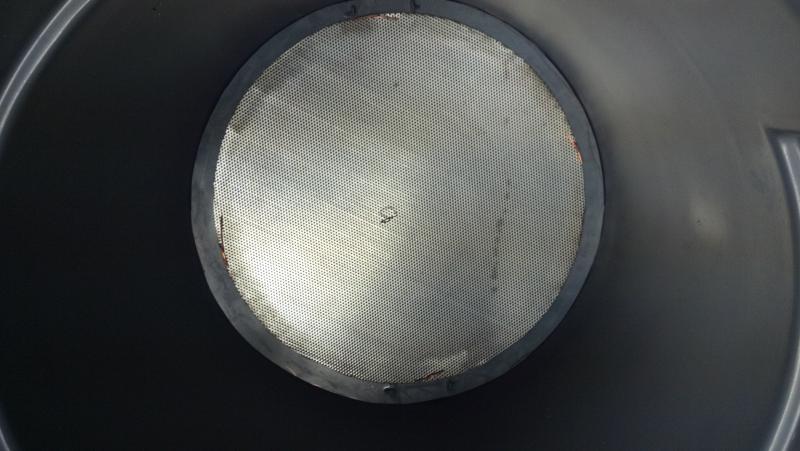
Finally got the new MT ready to use. I used the old pex tube tubing from the 40 gallon MT which will now be the new HLT. The new MT is a 55 gallon Rubbermaid tub the old false bottom was just a little small. So I cut a 2 in ring from one of the covers to make up the difference. Then use dome copper wire to attach the two. Made a wheat beer yesterday and it all worked fine. Next is to make a big beer that used 175 lbs of grain. In the past we had to use the 40 gallon MT and our old 20 gallon Blichamnn MT. Will try to post some pictures.


Jonas217
I had a local welder build the brew stand for us. No great drawings or Sketchup to work from just a guy that knew his steal.
I had a local welder build the brew stand for us. No great drawings or Sketchup to work from just a guy that knew his steal.
-MG-
Well-Known Member
Just read through this entire thread!
Very inspiring!
I know you mentioned a fermentation room. Can you speak a little more about this room and how you control temperature? For Lagers? For Ales?
Very inspiring!
I know you mentioned a fermentation room. Can you speak a little more about this room and how you control temperature? For Lagers? For Ales?
MaltMonster
Well-Known Member
Congrats on living the dream! I, like everyone else who has read this entire thread, look forward to hearing more about your progress.
Below are some pictures of the new MT
135 lb of DRY grain
You can tip the MT almost level (if you go to far the gran falls out all at once) and shovel it out into a container for disposal. You can then tilt to level and wash with a hose for final cleaning.
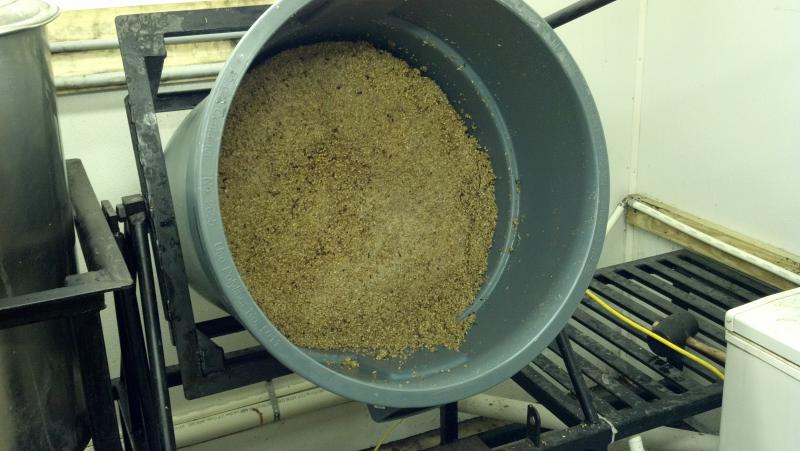
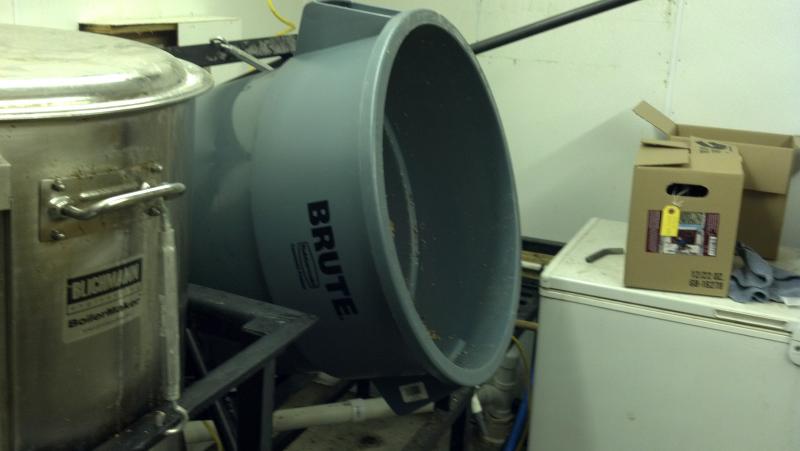

135 lb of DRY grain
You can tip the MT almost level (if you go to far the gran falls out all at once) and shovel it out into a container for disposal. You can then tilt to level and wash with a hose for final cleaning.


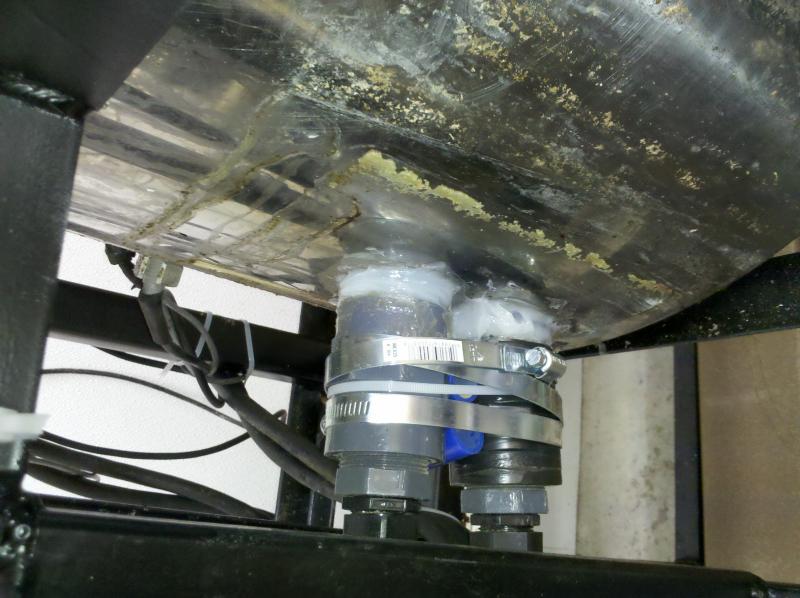
Below is a picture showing the electrical connection to the kettle. the good thing is that the wiring is connected to the frame and will not strain the connection

stubbornman
Well-Known Member
I love it when this thread pops back up in my subscriptions... Thanks for all the great updates.


Similar threads
- Replies
- 0
- Views
- 1K
- Replies
- 11
- Views
- 2K
- Replies
- 1
- Views
- 1K
Latest posts
-
-
-
-
-
-
-
Spike Conical Heater fails again--second in 3 years--ideas?
- Latest: Indian_villager
-


![Craft A Brew - Safale BE-256 Yeast - Fermentis - Belgian Ale Dry Yeast - For Belgian & Strong Ales - Ingredients for Home Brewing - Beer Making Supplies - [3 Pack]](https://m.media-amazon.com/images/I/51bcKEwQmWL._SL500_.jpg)


