Black_Marsh_Brewer
Well-Known Member
So I've been slowly starting to make my brewery electric, as it is kind of a goofy looking setup right now. This thread is devoted to the controller build.
I cannot afford to build the super fancy electricbrewery.com system in earnest at this time, but still I managed to get some money together for pumps, plumbing and electric elements, and so I decided I needed to put something together to make things work...
So I so I started doing some research and found this older build thread that used a SSVR: http://www.theelectricbrewery.com/forum/viewtopic.php?p=307715#307715 and used it as a base for the design.
Now I eventually wanted to put the parts from my simple controller into a bigger build, so I decided that everything that went into the simple system would need to be modular with the big build.
I wanted to use the absolute minimum number of parts I could to save money, but not sacrifice safety or usability. So for safety I used a key switch and emergency stop button in order to make sure that only the keyholder could turn it on/off. But still have a way to shut the thing off quickly if something went wrong while using the system.
I also wanted to make sure that it would be compatible with what I had around the house for power. I have a L6-30R twist lock receptacle for my welder in garage, which means I wanted the thing to run on it, rather than having to install a new receptacle. I also did not want to spend the extra money on a PID, I wanted a manual controller, like the SSVR. However, the SSVR does not really go into the Kal style build. After a quick read in the above thread a manual SSR controller from Auber called the DSPR1 was the answer.
So the build is a simple, one element manual controller that will run off my welder plug in (30A breaker; thought it was GFCI, it isn't). So after some reading, and a few beers with a electrical engineer buddy of mine, the general idea was made.
I got a lot of help on this one from people on other forums and friends of mine in real life. The only thing this system don't have is a GFCI, and I am working on building one of those that will be in-line with system.
So these parts were all purchased from Auber.
240V 30A contactor - http://www.auberins.com/index.php?main_page=product_info&cPath=2_31&products_id=164
2 position key lock switch - http://www.auberins.com/index.php?main_page=product_info&cPath=7_32&products_id=277
emergency stop switch - http://www.auberins.com/index.php?main_page=product_info&cPath=7_32&products_id=259
DSPR1 manual boil controller - http://www.auberins.com/index.php?main_page=product_info&cPath=53&products_id=444
40A SSR - http://www.auberins.com/index.php?main_page=product_info&cPath=2_30&products_id=30
external heatsink for 40A SSR - http://www.auberins.com/index.php?main_page=product_info&cPath=2_48&products_id=224
L6-30R plugin - http://www.auberins.com/index.php?main_page=product_info&cPath=7_43&products_id=462
I wanted to get a controller box, but the shipping from most of these things is astronomical, so I eventually did some research and found a couple of places in my city that sold thermoplastic boxes. I eventually purchased a 6x6x6" box made by scepter - http://www.scepterinnovation.com/.
I also picked up a 3/4" strain relief and a L6-30 twist lock plug from the same electrical supplier I got the box from.
I also picked about 20 feet of SOOW 10/3 Cable and a bunch of miscellaneous terminal connectors as well as some 14ga and 18ga wire. Plus obviously i needed some tools to do it with. But I have a fairly well stocked workshop, so I didn't end up buying anything crazy.
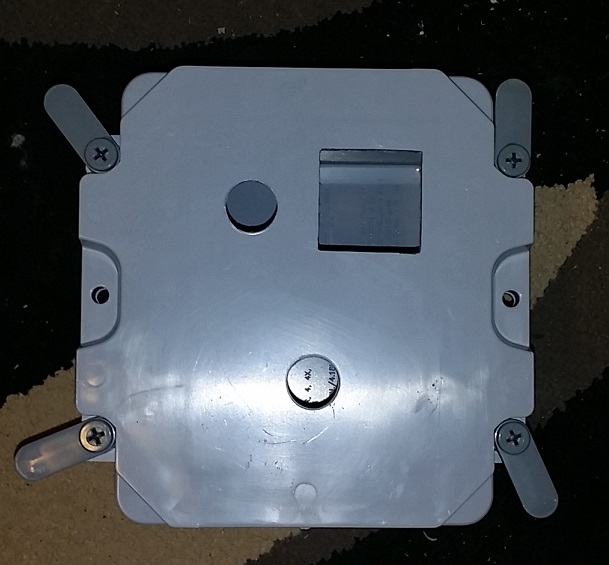
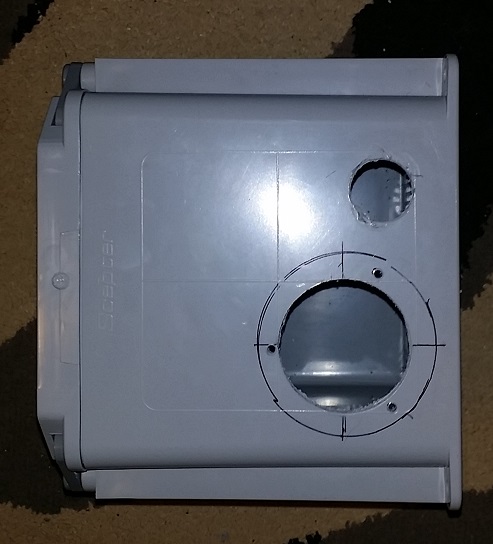
The first step was putting the parts on the box the way I wanted.
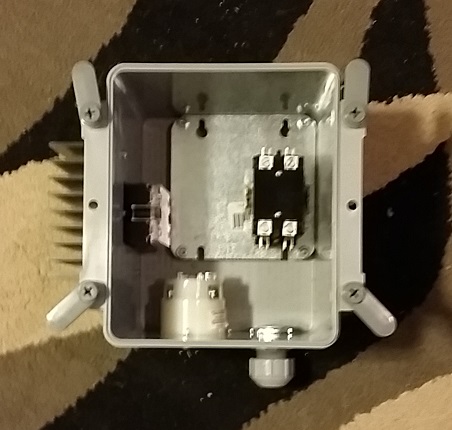
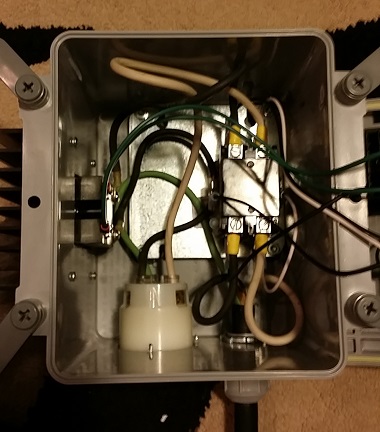
The next step was making sure everything was gonna fit okay. with the size of box I chose everything is a tight fit and needed to be installed in a specific order for ease. Also, the box I had does not come with a backplate, so I built one using some 8-24 machine screws 3/4" long, with several bolts and a coverplate for a dryer plug receptacle.
First I drilled holes in the plate for the screws, then used nuts as spacers on the screw to hold up the plate, then used more nuts to attach the new plate lugs. From there I used a generous amount of JB weld to firmly attach the plate to the inside of the box. put a weight on it and left it over night. in the morning, I removed the top nuts from the plate and attached the contactor to the plate where I wanted it using 3/16" by 1/2" long self tapping screws.
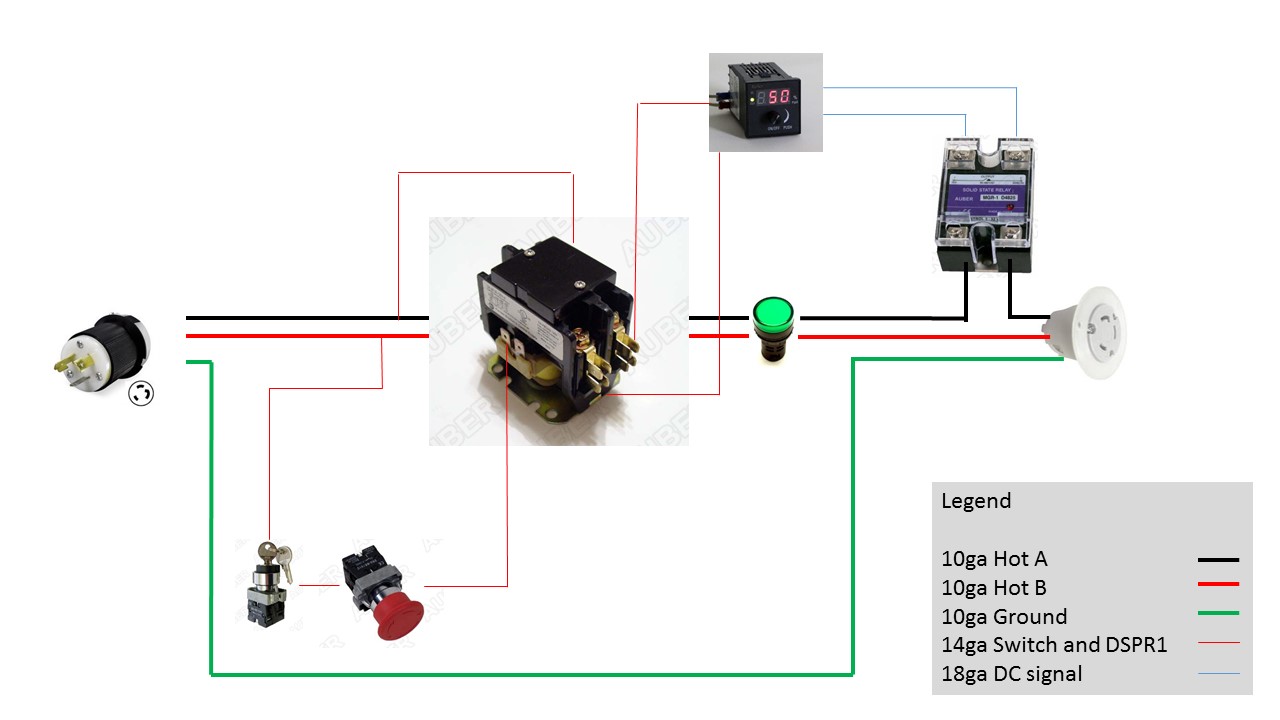
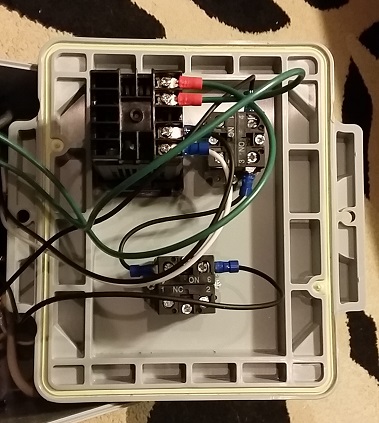
Once everything was dry-fitted and I knew it was gonna not jamb or cause problems, I needed to start wiring. I did a very basic diagram based on the simple SSVR thread controller and got some feedback on if it would work. This was also about the same time I realized that I forgot to buy an LED to show that the contactor was on and that the element was getting power. I have one on order to add to the controller, but I noticed when building the system that the DSPR1 would only turn on if the contactor had worked, so it was a moot point. However, my plan is to add a LED as a redundant safety as soon as it comes in.
The simple version of the electrical plan is attached.
Finally, I attached all the components on the lid to their appropriate spots on the contactor and SSR.
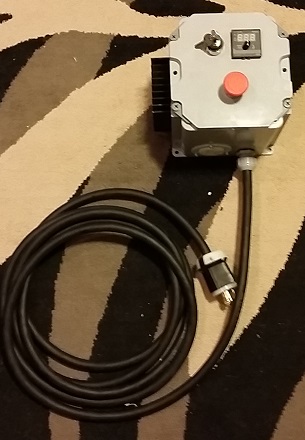
Finally I put the twist lock plug in on the end of the power cord and locked the lid to the box and it was done, for now.
I just finished the build today and have yet to turn it on. I am going to test to make sure I wired up the switches so they are in the appropriate on/off positions, before I plug it in. and will eventually use a marker for some labels.
Recently I tested it to make sure that all the parts were working and I was getting the right voltage and current across the different points, did a temperature check to make sure thing weren't overheating and it was all good. So its ready to use, and will be wet tested once I get a GFCI sorted out.
Anyway, I hope you enjoyed this. If you have any questions or comments please let me know.
The next things I will be building are a portable GFCI box for the system, and upgrading the system to be a PID for HERMS and a boil controller.
Thanks!


