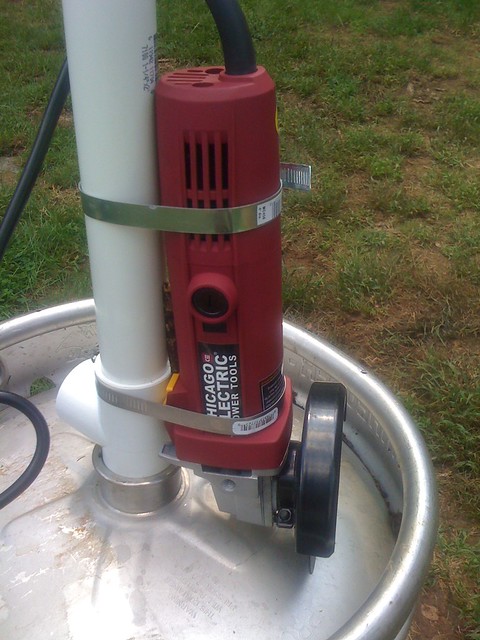
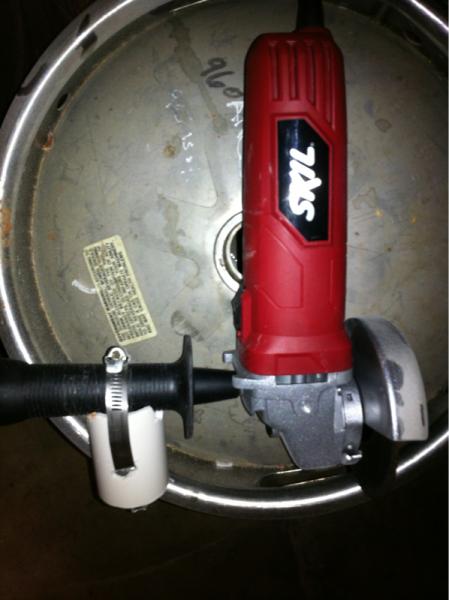
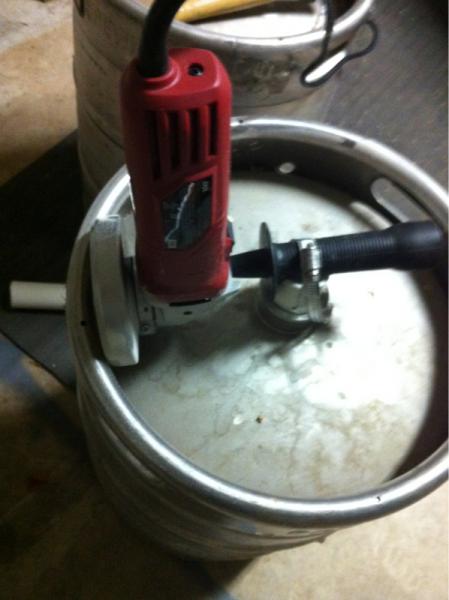
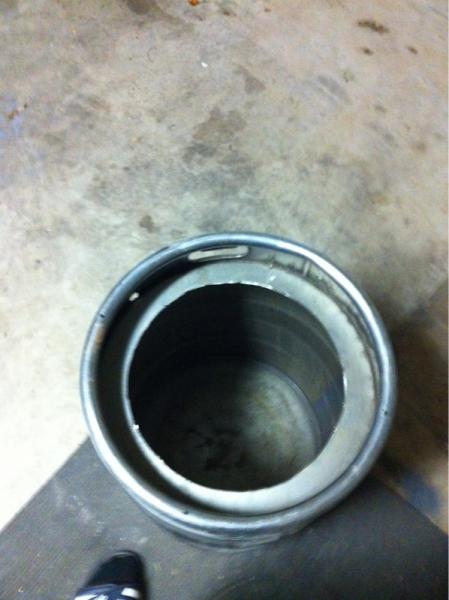
My jig for cutting tops off.
Like slicing butter. Takes about a minute to do a top.
I'd love a plasma cutter. Some day. Welder too. Some day. Nice jig.
How do you clean up slag in the keg? Do you have water in there when you cut?

My jig for cutting tops off.
Like slicing butter. Takes about a minute to do a top.
passedpawn said:I'd love a plasma cutter. Some day. Welder too. Some day. Nice jig.
How do you clean up slag in the keg? Do you have water in there when you cut?
I ended up doing a modified version as my cheapo Harbor Freight grinder didn't have the required handle attachment.

You will also notice that the switch is in a crappy spot and the operation of the entire setup hinges on the stick I jammed between the grinder and pipe to keep the switch accessible.
I have the same grinder from HB. I made the wooden jig I saw on a Bobby_M video. But just like the pic above I ended up with the switch on the wrong side. The blade can be re-positioned to enable the switch to be accessible from the the front. Just remove the head (the gray part) which is secured with four screws turn 180 degrees and re-install, of course in the pic above that means the body, red part would have to be turned 180 after the head was re-positioned. .
And to Passedpawn, Thanks Pappy! Awesome thread you started! Glad to see it surface again. Great info here from many creative people!
I ended up doing a modified version as my cheapo Harbor Freight grinder didn't have the required handle attachment.

You will also notice that the switch is in a crappy spot and the operation of the entire setup hinges on the stick I jammed between the grinder and pipe to keep the switch accessible.


Not pretty but it worked.
Here's my rig and my hole!
passedpawn said:What went wrong? This has made perfect circles for me.
My guess is operator error. This was my first time using an angle grinder.

I used a 4x6 joist hanger (could have gotten away with a 4x4) and cut it down to not get in the way of the guard on the grinder. Drilled some holes in it for large bolts to thread into the grinder, used a double-nut on one side to securely hold the grinder upright, and a PVC spacer on the other to snug things up. This was fastened to a 1.25" PVC coupler by a length of all-thread (nuts on either side of the joist hanger to secure it). The only change that's hard to see is I used a double-nut setup on the 'back' side of the coupler after discovering how much the vibration loosened things up.


I touched up the edges of the grind with a 60-grit flapper disc on the grinder till I can run my finger around the whole thing and not find any sharp places.
[*]If you intend on using a grinder with the same jig that I built, you'll need one with a handle mount on the back of the grinder head, not just on the sides. Some grinders (especially the cheap Harbor Freight ones) don't have this hole.


Thanks for the genius JIG!. Cut both of mine today and they are perfect.
That porter cable will last you a lifetime. Great choice.
Rys06Tbss said:I'm going to be getting akeg in a few weeks. Stupid question but why not use the guard as a jig and run it along the rim?
What if the rim around the keg is bent? If you look at the pic I just posted the rim on the top of the keg is flat on one side.
What if the rim around the keg is bent? If you look at the pic I just posted the rim on the top of the keg is flat on one side.
passedpawn said:With a bent rim, you end up with a smaller circle. I cut one for a friend that had a very big dented rim. Best you can to is remove the guard, but if you've had disks fly apart, you won't want to do that.
Thanks for the ideas! This is mine