I have to be somewhere in a few minutes, but I will try and throw some pics up later tonight......
You are using an out of date browser. It may not display this or other websites correctly.
You should upgrade or use an alternative browser.
You should upgrade or use an alternative browser.
Show us your element housings/pots. How did you do it?
- Thread starter Boerderij_Kabouter
- Start date

Help Support Homebrew Talk:
This site may earn a commission from merchant affiliate
links, including eBay, Amazon, and others.
I see cord grips seem to be the topic. I just had to search up some for .39 and .75 in cables with stainless mesh grips for a real life job . I couldn't find a better price or selection by far than the old elecdirect standby. I just put in my order.
Here are some multi-hole grips and at the bottom of the page, there are some slotted bushings.:
http://www.elecdirect.com/catalog/cord-grips-cable-glands-strain-relief/multiple-hole-cord-grips
This is the cord grip page:
http://www.elecdirect.com/catalog/cord-grips-cable-glands-strain-relief
They seem to cover most options at very reasonable prices IMO. I have been very pleased so far with the products I have used and their shipping has been quick.
Just got my aluminum box in, drilled the HLT and box out and installed it - looks perfect. Waiting on the pilot light and I still have to get a cord grip for it, but forward progress!


I was worried about the wall thickness of the box and the low profile threads on the element, but it fits perfect inside.

Wow, you got that thing low in there. That's the best place to keep the water from stratifying. In mine, the element is about 12" up, and the water at the bottom stays almost at room temp until it boils. If I'm looking for strike temps (i.e., ~163) I have to run a pump or stir or the top part will start boiling.
Just to conclude a previous post, I got my part from https://www.brewhardware.com/ and finished my heatstick. Bobby was good to his word, and the threaded cap is perfect.

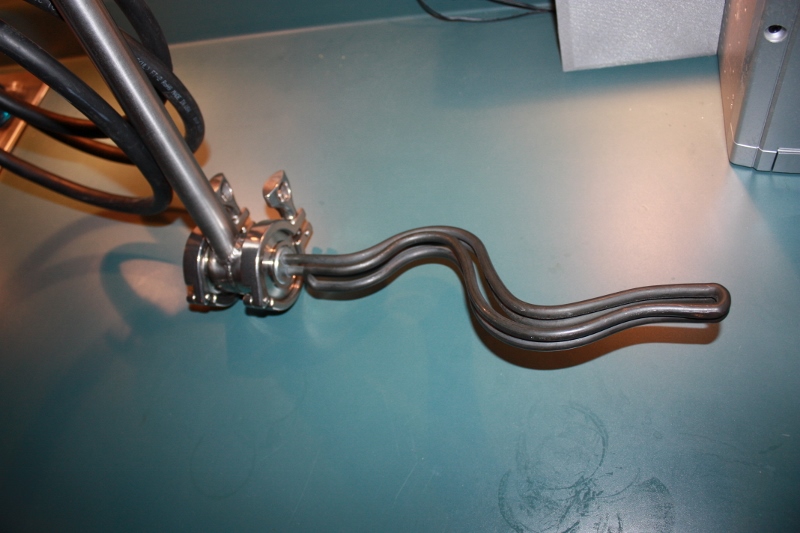


Nice job Chessking!

$33.99 ($17.00 / Count)
$41.99 ($21.00 / Count)
2 Pack 1 Gallon Large Fermentation Jars with 3 Airlocks and 2 SCREW Lids(100% Airtight Heavy Duty Lid w Silicone) - Wide Mouth Glass Jars w Scale Mark - Pickle Jars for Sauerkraut, Sourdough Starter
Qianfenie Direct

$159.50 ($26.58 / Count)
3M High Flow Series System BREW120-MS, 5616001, For Brewed Coffee and Hot Tea, Valve-in-Head Design
Amazon.com

$22.00 ($623.23 / Ounce)
AMZLMPKNTW Ball Lock Sample Faucet 30cm Reinforced Silicone Hose Secondary Fermentation Homebrew Kegging joyful
无为中南商贸有限公司

$53.24
1pc Hose Barb/MFL 1.5" Tri Clamp to Ball Lock Post Liquid Gas Homebrew Kegging Fermentation Parts Brewer Hardware SUS304(Liquid Hose Barb)
yunchengshiyanhuqucuichendianzishangwuyouxiangongsi

$176.97
1pc Commercial Keg Manifold 2" Tri Clamp,Ball Lock Tapping Head,Pressure Gauge/Adjustable PRV for Kegging,Fermentation Control
hanhanbaihuoxiaoshoudian

$7.79 ($7.79 / Count)
Craft A Brew - LalBrew Voss™ - Kveik Ale Yeast - For Craft Lagers - Ingredients for Home Brewing - Beer Making Supplies - (1 Pack)
Craft a Brew

$479.00
$559.00
EdgeStar KC1000SS Craft Brew Kegerator for 1/6 Barrel and Cornelius Kegs
Amazon.com

$10.99 ($31.16 / Ounce)
Hornindal Kveik Yeast for Homebrewing - Mead, Cider, Wine, Beer - 10g Packet - Saccharomyces Cerevisiae - Sold by Shadowhive.com
Shadowhive

$44.99
$49.95
Craft A Brew - Mead Making Kit – Reusable Make Your Own Mead Kit – Yields 1 Gallon of Mead
Craft a Brew

$53.24
1pc Hose Barb/MFL 1.5" Tri Clamp to Ball Lock Post Liquid Gas Homebrew Kegging Fermentation Parts Brewer Hardware SUS304(Liquid Hose Barb)
Guangshui Weilu You Trading Co., Ltd

$76.92 ($2,179.04 / Ounce)
Brewing accessories 1.5" Tri Clamp to Ball Lock Post Liquid Gas Homebrew Kegging Fermentation Parts Brewer Hardware SUS304 Brewing accessories(Gas Hose Barb)
chuhanhandianzishangwu

$58.16
HUIZHUGS Brewing Equipment Keg Ball Lock Faucet 30cm Reinforced Silicone Hose Secondary Fermentation Homebrew Kegging Brewing Equipment
xiangshuizhenzhanglingfengshop
![Craft A Brew - Safale S-04 Dry Yeast - Fermentis - English Ale Dry Yeast - For English and American Ales and Hard Apple Ciders - Ingredients for Home Brewing - Beer Making Supplies - [1 Pack]](https://m.media-amazon.com/images/I/41fVGNh6JfL._SL500_.jpg)
$6.95 ($17.38 / Ounce)
$7.47 ($18.68 / Ounce)
Craft A Brew - Safale S-04 Dry Yeast - Fermentis - English Ale Dry Yeast - For English and American Ales and Hard Apple Ciders - Ingredients for Home Brewing - Beer Making Supplies - [1 Pack]
Hobby Homebrew

$20.94
$29.99
The Brew Your Own Big Book of Clone Recipes: Featuring 300 Homebrew Recipes from Your Favorite Breweries
Amazon.com

$719.00
$799.00
EdgeStar KC2000TWIN Full Size Dual Tap Kegerator & Draft Beer Dispenser - Black
Amazon.com
Ok finally had some free time to get mine done today. I had to enlarge the hole in the end cap for the metal cord grip/strain relief that I added. That stainless steel cap is very thick and took awhile to enlarge with my step bit. I clamped it in a vise and even with a small towel covering the vise teeth I still beat it up a little bit. Oh well it's just cosmetic. I also had to grind down the conduit nut on the inside of the end cap as it was too big in diameter and the cap would not fit back on the tri clover ferrule. I held it with pliers and grinded down the tabs all around the nut on my electric grinder and it fit fine after that.

I drilled the ring terminal a little larger to fit the stem on the grounding screw.

I used a 5/32 Allen wrench to tighten the grounding screw, pliers would have stripped the metal with my luck.


Here she is all done with the plug attached.


I drilled the ring terminal a little larger to fit the stem on the grounding screw.

I used a 5/32 Allen wrench to tighten the grounding screw, pliers would have stripped the metal with my luck.


Here she is all done with the plug attached.

Nice build. Have you got your control panel done yet?
It would have been done a LONG time ago, but he asked me for help
Ok finally had some free time to get mine done today.
Looks really really good John. You really do things the right way. The assembly of your Still Dragon enclosure is very similar to mine, with similar modifications. It's a tight fit, and a little bit of elbow grease, etc., but in the end it's tits.
It appears to me that you need your gasket in place before you attach the wires.
Nice build. Have you got your control panel done yet?
You got a great eye! Actually since I cut a slit in the gasket to match the slit in the end cap in case water gets in, I put the gasket on after which is possible once you cut it.
I wish my box was here so I can brew!!! It's supposed to be completed near the end of November so I have to wait a little more.... Their assembled control box is pretty popular and they have a few in front of me. It's ok I still have some more work to do on my rig before it gets here.
John
It would have been done a LONG time ago, but he asked me for help
Your a good man Andrew! I am glad that you were very busy with work because I made the decision to go electric and if you wired my other box I would have been very upset with myself. I really appreciate all your guidance and tips, and I consider you a good friend.
 John
JohnLooks really really good John. You really do things the right way. The assembly of your Still Dragon enclosure is very similar to mine, with similar modifications. It's a tight fit, and a little bit of elbow grease, etc., but in the end it's tits.
Thanks! Your right about the tight fit.....The first one was a pita and the next one went on much faster.
John
MikeSkril
Well-Known Member
- Joined
- Feb 5, 2015
- Messages
- 401
- Reaction score
- 82
Thats how I did it. Simple, cheap and works great!
https://skrilnetz.net/how-to-build-a-brewing-control-panel-herms-240v-30-amp/#heating

https://skrilnetz.net/how-to-build-a-brewing-control-panel-herms-240v-30-amp/#heating

I stole the Kal style system. Used it to add 2 power boxes to my brew kettle. Each runs a 2000w
20 amp element from a separate 20 amp circuit. Got a little fancy with some spray paint too!
I used Neutrik connectors for power input and a 20 amp toggle switch.
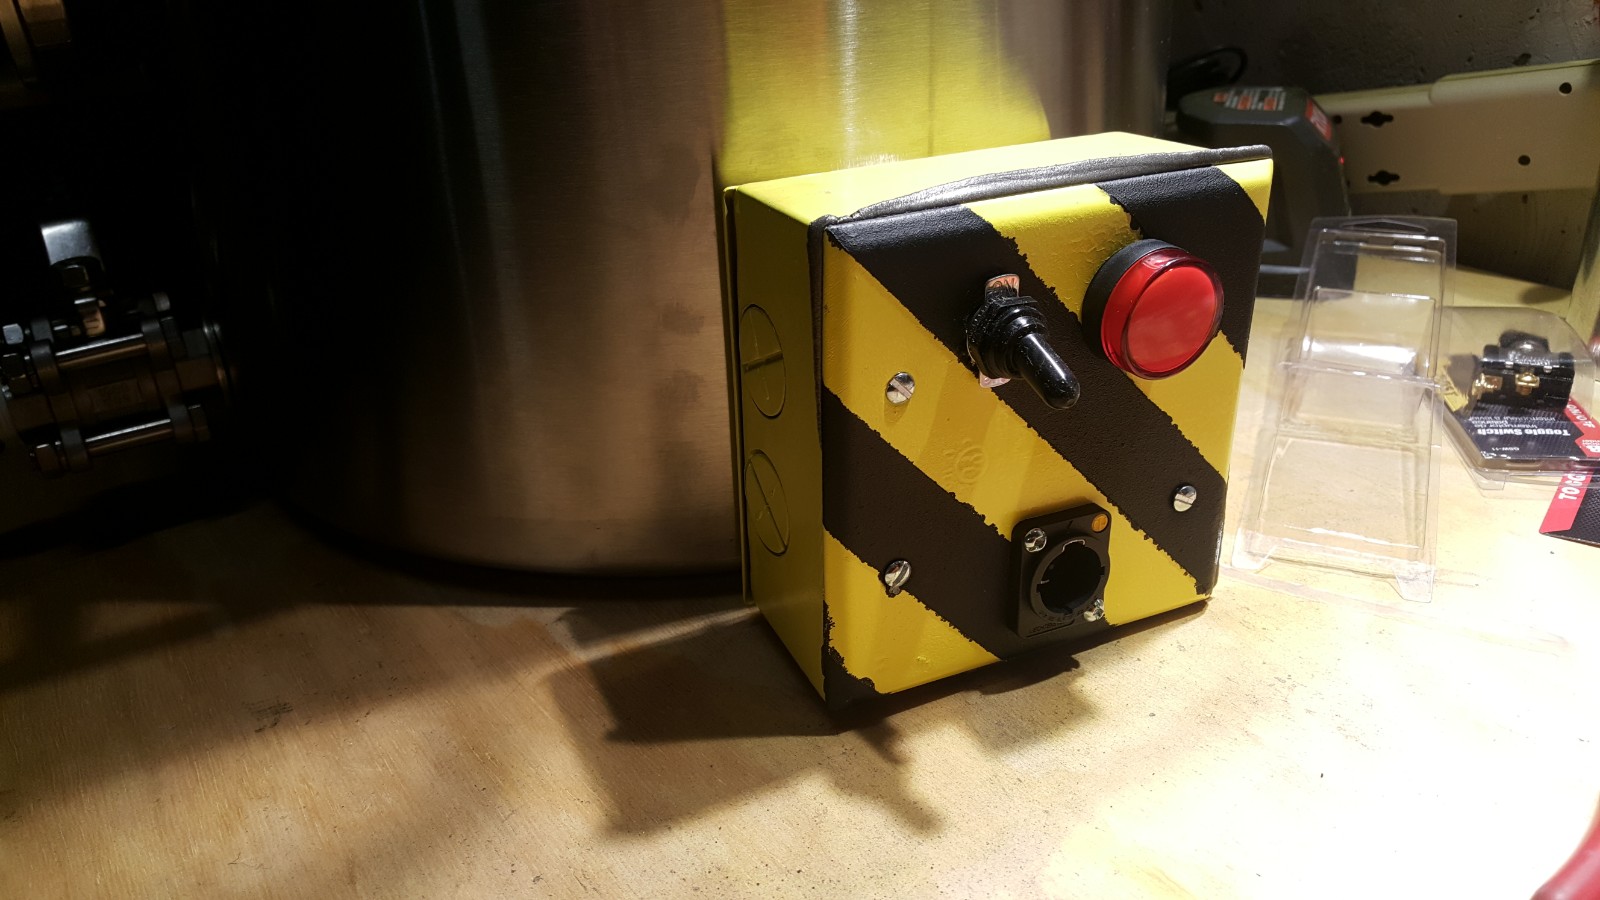
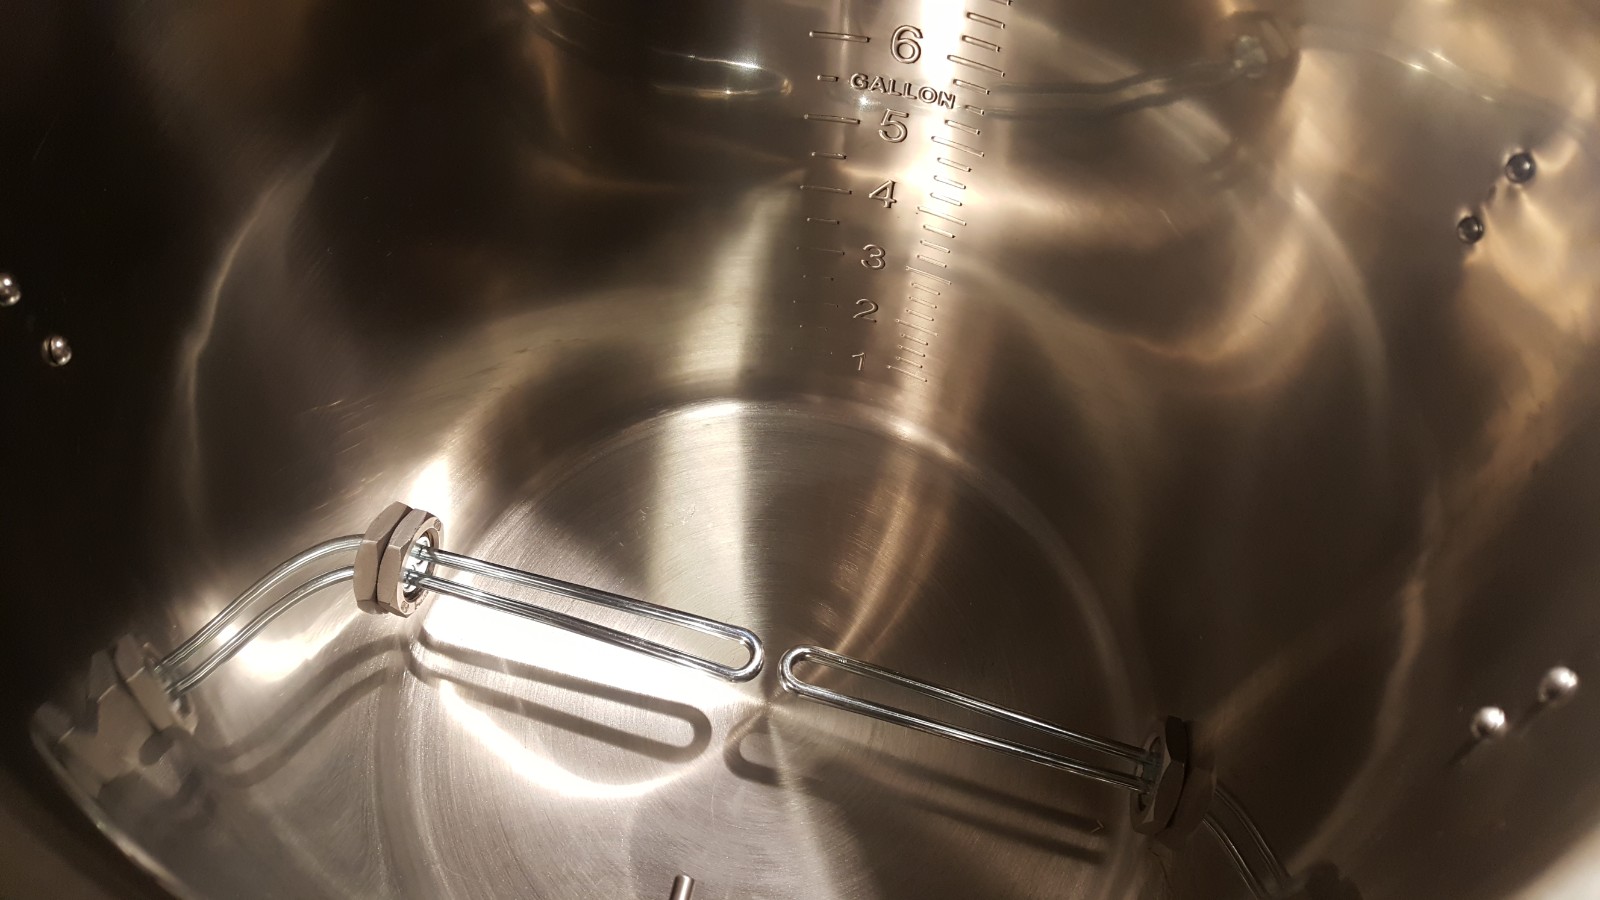
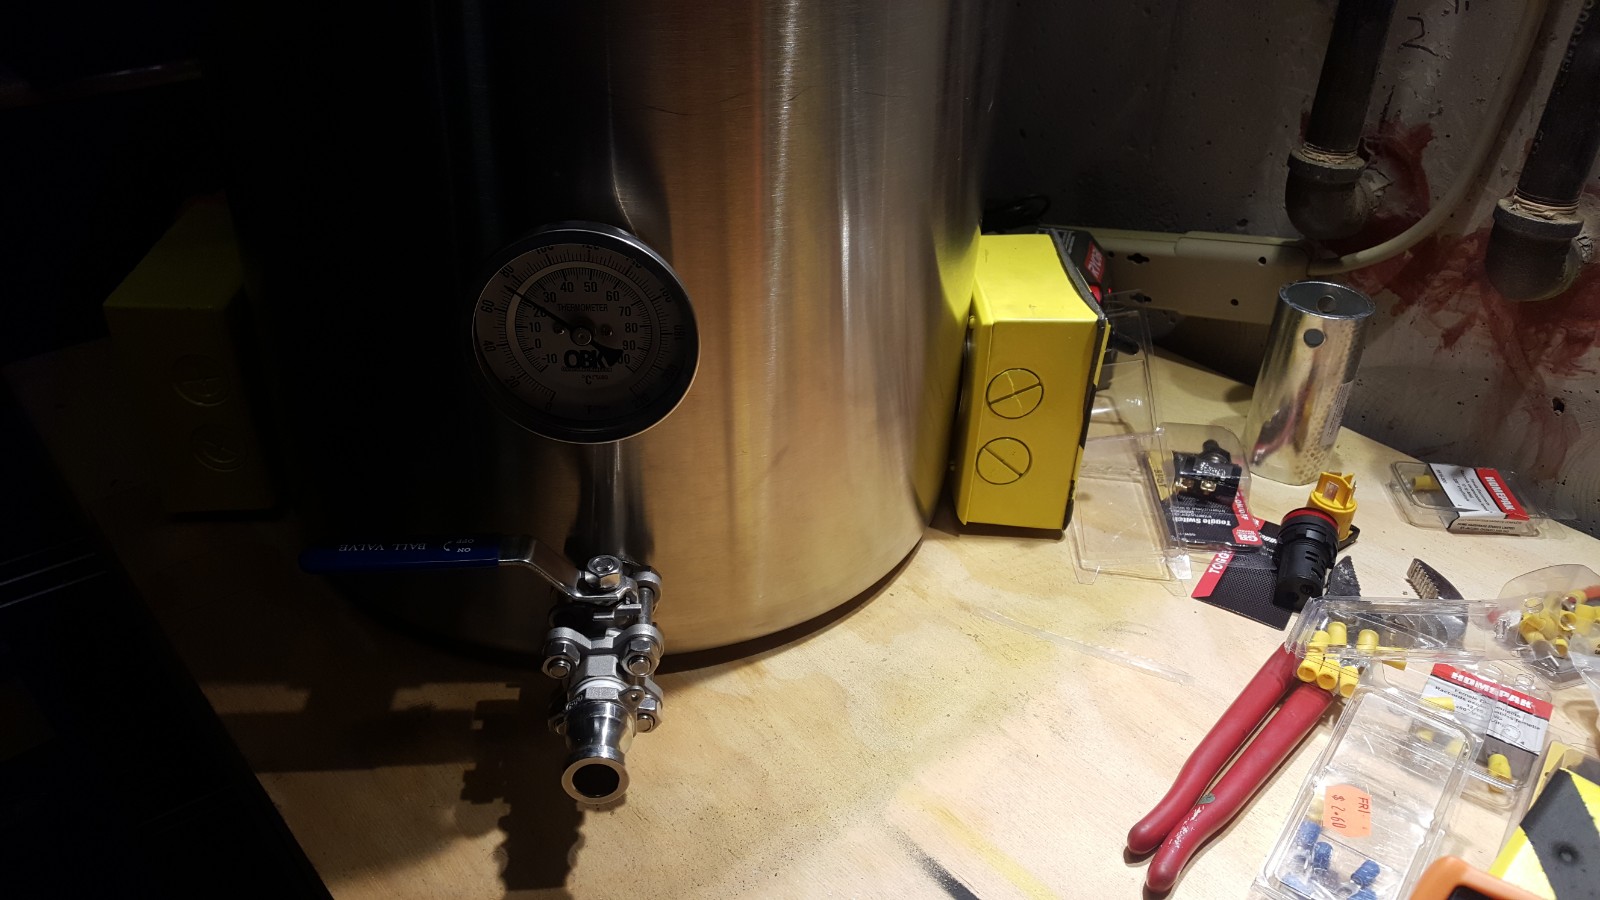
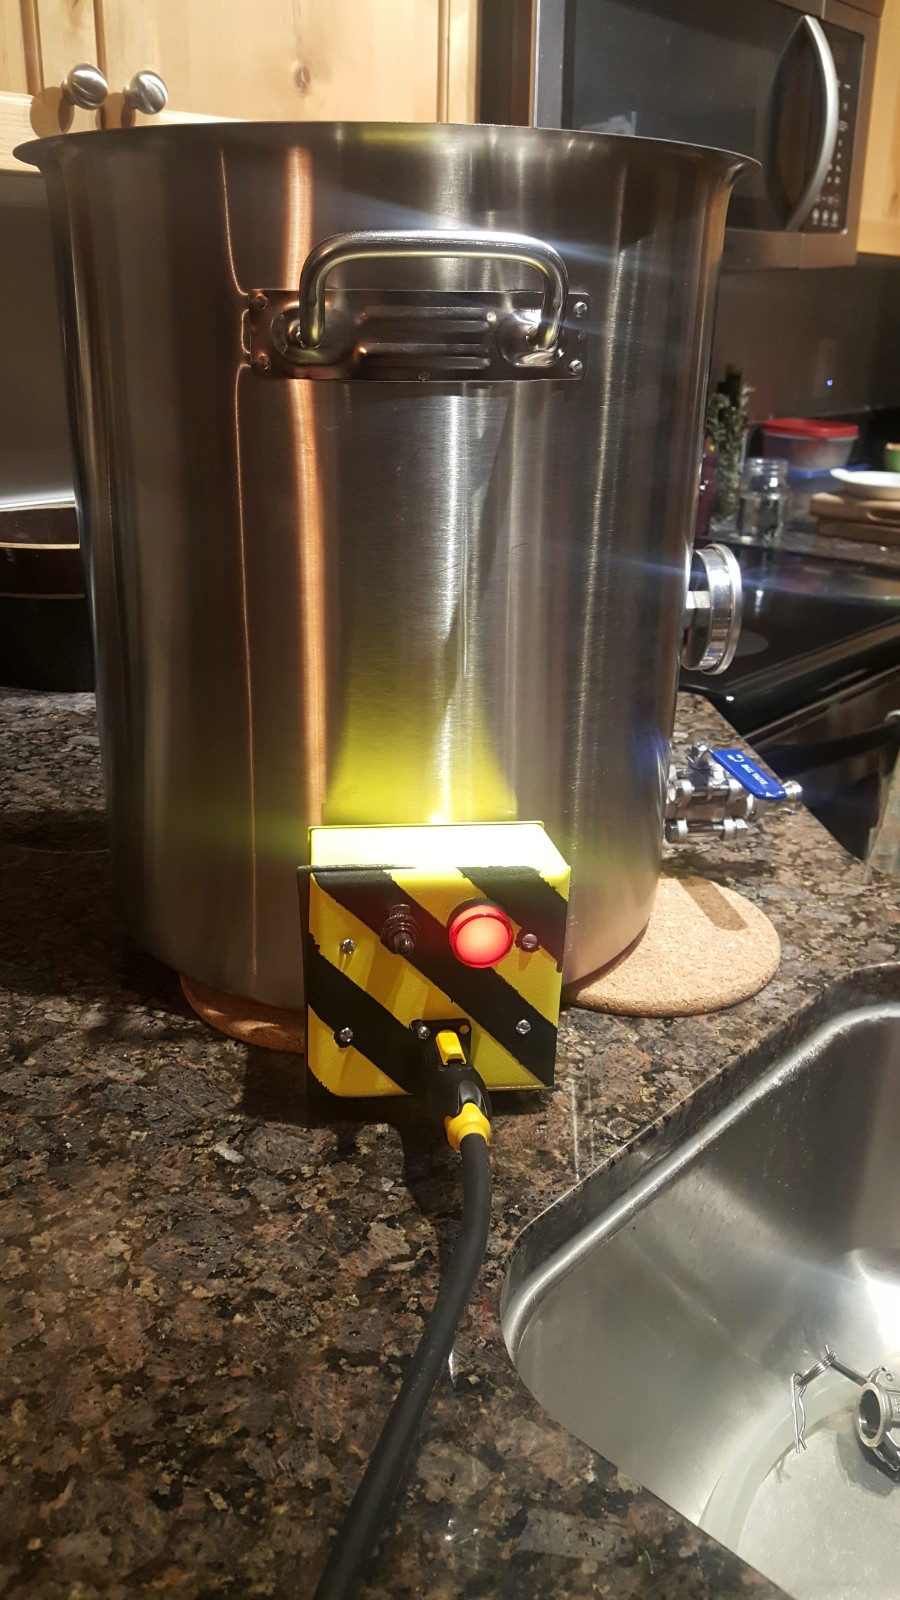
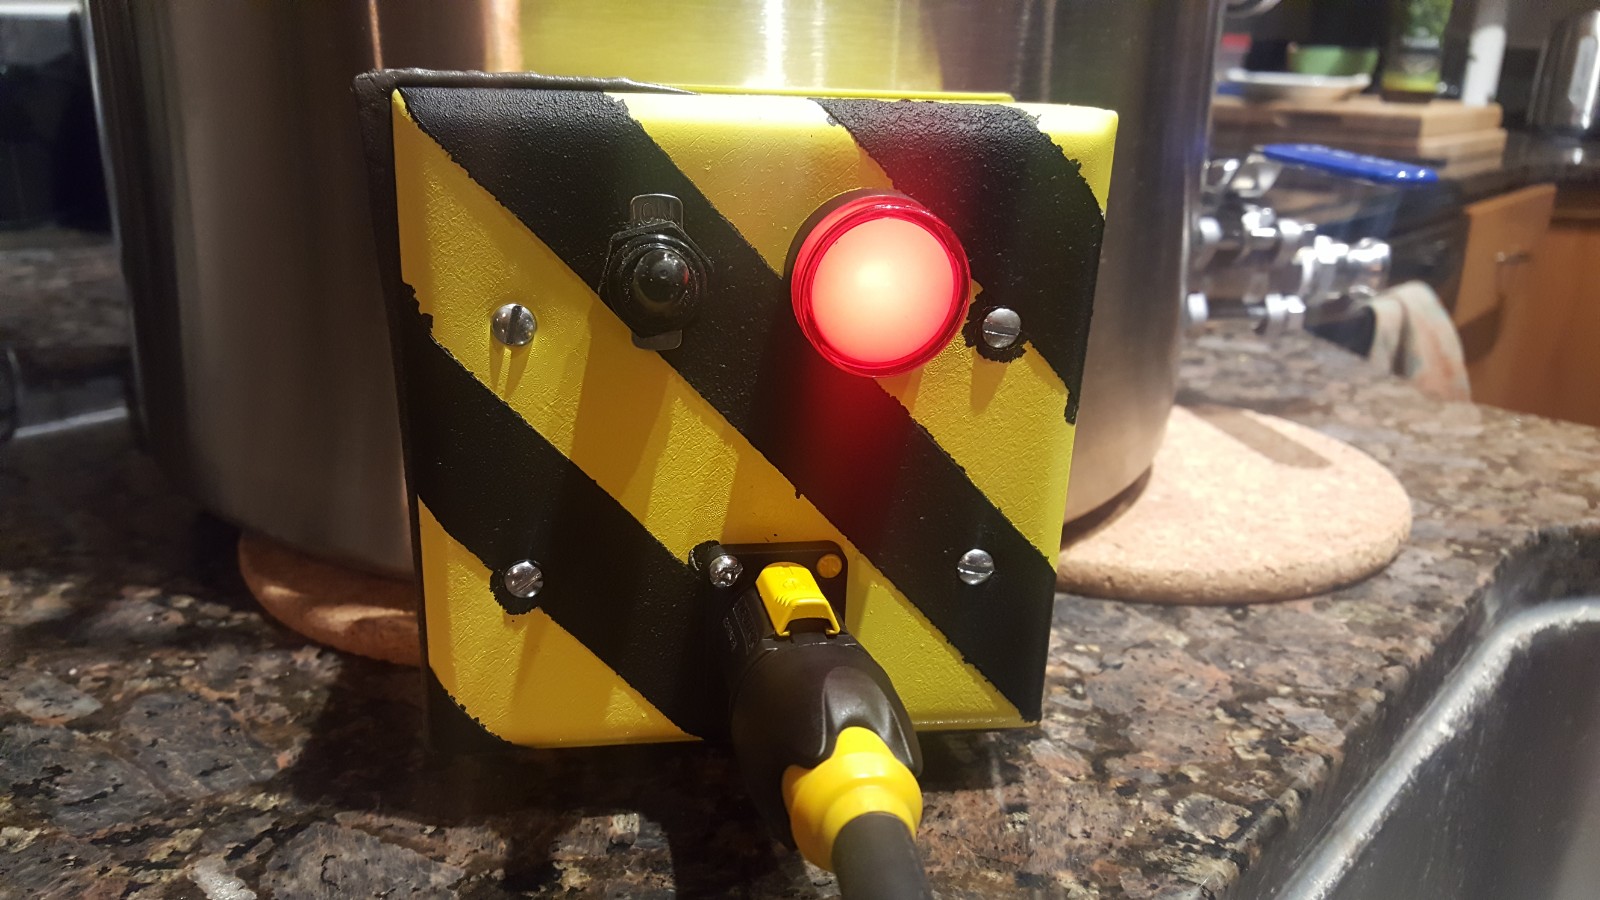
20 amp element from a separate 20 amp circuit. Got a little fancy with some spray paint too!
I used Neutrik connectors for power input and a 20 amp toggle switch.


Nice job!
John
John
This summer I replaced the original heating element with a new 5500W SS Twist-Loc Plug w/Weldless kit element from High Gravity.
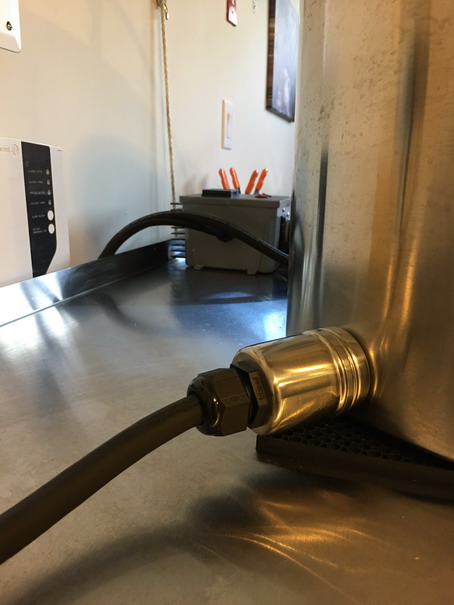
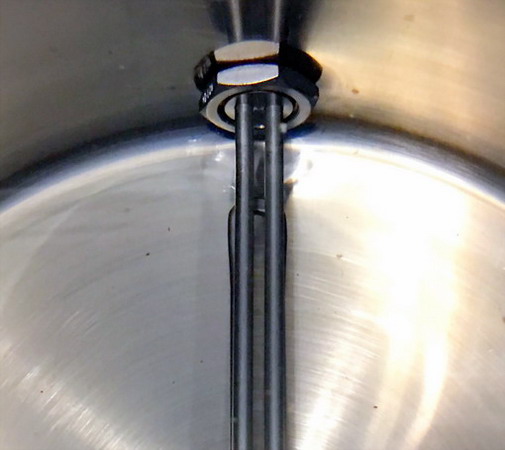


View media item 69920i just bought it from SS. for the money I'm pretty happy.
augiedoggy
Well-Known Member
Does the new one have a stainless base? looks like the old one did not..This summer I replaced the original heating element with a new 5500W SS Twist-Loc Plug w/Weldless kit element from High Gravity.
View attachment 603570View attachment 603571View attachment 603572
Yes it does have a stainless steel base. It's a much-improved version of the element shipped with the original design. The picture shows how beat up the old element was after finally getting it unscrewed from the kettle.Does the new one have a stainless base? looks like the old one did not..
runs4beer
Well-Known Member
- Joined
- Feb 9, 2010
- Messages
- 412
- Reaction score
- 22
Can you separate the housing from element on High Gravity's setup if needed.Yes it does have a stainless steel base. It's a much-improved version of the element shipped with the original design. The picture shows how beat up the old element was after finally getting it unscrewed from the kettle.
I would ask Dave Knott of High Gravity for more detail before going forward. Although I have never tried to it looks like you can. Logically how else would they put the assembly together in the first place?Can you separate the housing from element on High Gravity's setup if needed.
ajf1994
Member
- Joined
- Dec 30, 2018
- Messages
- 12
- Reaction score
- 4
Is there any reason not to use one of these and skip the housing? I’m still using propane, but am trying to research the best way about converting to electric.
https://www.brewhardware.com/product_p/element5500_ripple_tc.htm
https://www.brewhardware.com/product_p/element5500_ripple_tc.htm
I like the idea of being able to unplug the element because it makes cleaning so much easier. Other than that I can't think of a reason not to use that one.Is there any reason not to use one of these and skip the housing? I’m still using propane, but am trying to research the best way about converting to electric.
https://www.brewhardware.com/product_p/element5500_ripple_tc.htm
Is there any reason not to use one of these and skip the housing?
https://www.brewhardware.com/product_p/element5500_ripple_tc.htm
That's what I use, but I put electrical tape over the small gap left between the plug and the element connector to keep splashed wort out. Cheap and easy insurance against tripping my GCFI (or worse...). Some housings do provide a watertight connection from the cable to the element.
Powercat
Well-Known Member
I used a Blichman Boil coil. It was very easy to install and simple to unplug for cleaning. (2 small holes rather than one large one.) I do BIAB and have never scorched a bag when maintaining mash temp. without a false bottom. The bag touches the coil directly.
runs4beer
Well-Known Member
- Joined
- Feb 9, 2010
- Messages
- 412
- Reaction score
- 22
Anybody have experience with these?
Dernord 240V 5500W Ripple Water Heater Element Screw-In Lime Life - Ultra Low Watt Density https://www.amazon.com/dp/B01M0PBSHX/ref=cm_sw_r_cp_apa_i_XvdNCbYPJCJT7
Dernord 240V 5500W Ripple Water Heater Element Screw-In Lime Life - Ultra Low Watt Density https://www.amazon.com/dp/B01M0PBSHX/ref=cm_sw_r_cp_apa_i_XvdNCbYPJCJT7
augiedoggy
Well-Known Member
there are a lot of folks using them here... Im fairly sure Dernold is the manufacturer that ebrew supply uses.. I know of two suppliers of these that look similar, yuling and dernold.I use a bunch of yuling elements myself.Anybody have experience with these?
Dernord 240V 5500W Ripple Water Heater Element Screw-In Lime Life - Ultra Low Watt Density https://www.amazon.com/dp/B01M0PBSHX/ref=cm_sw_r_cp_apa_i_XvdNCbYPJCJT7
processhead
Well-Known Member
I am using this element setup in my HLT.
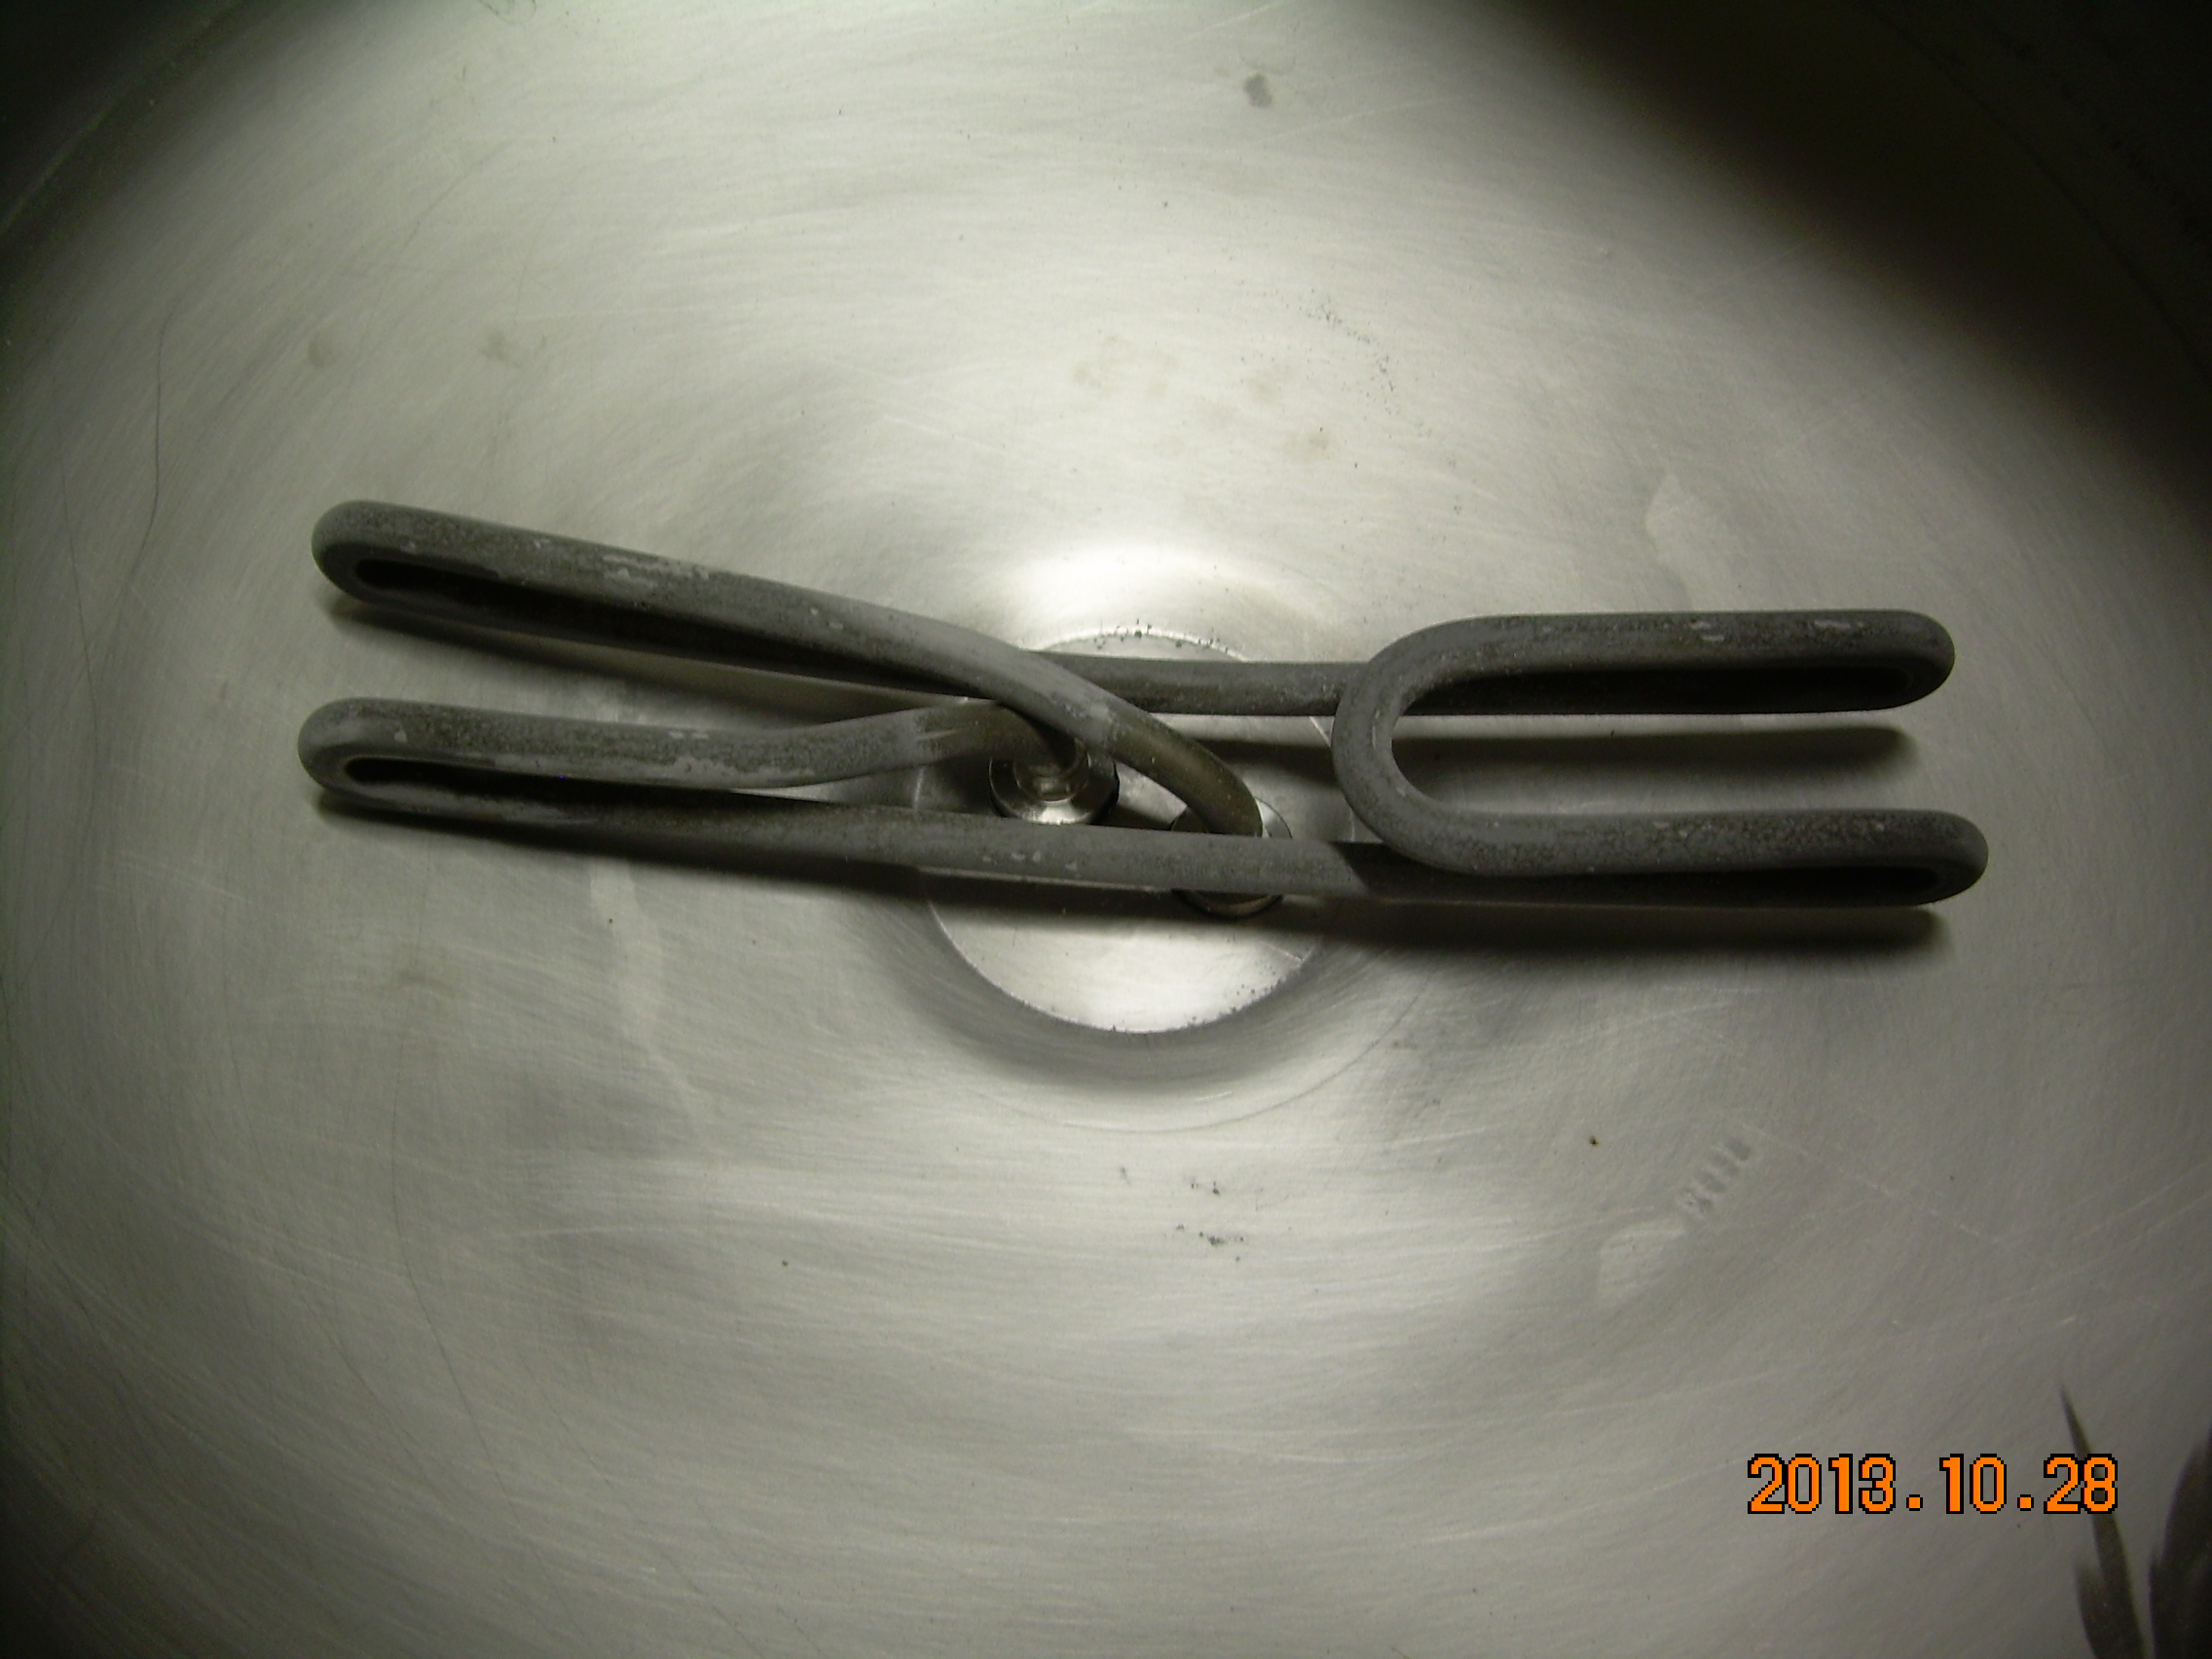
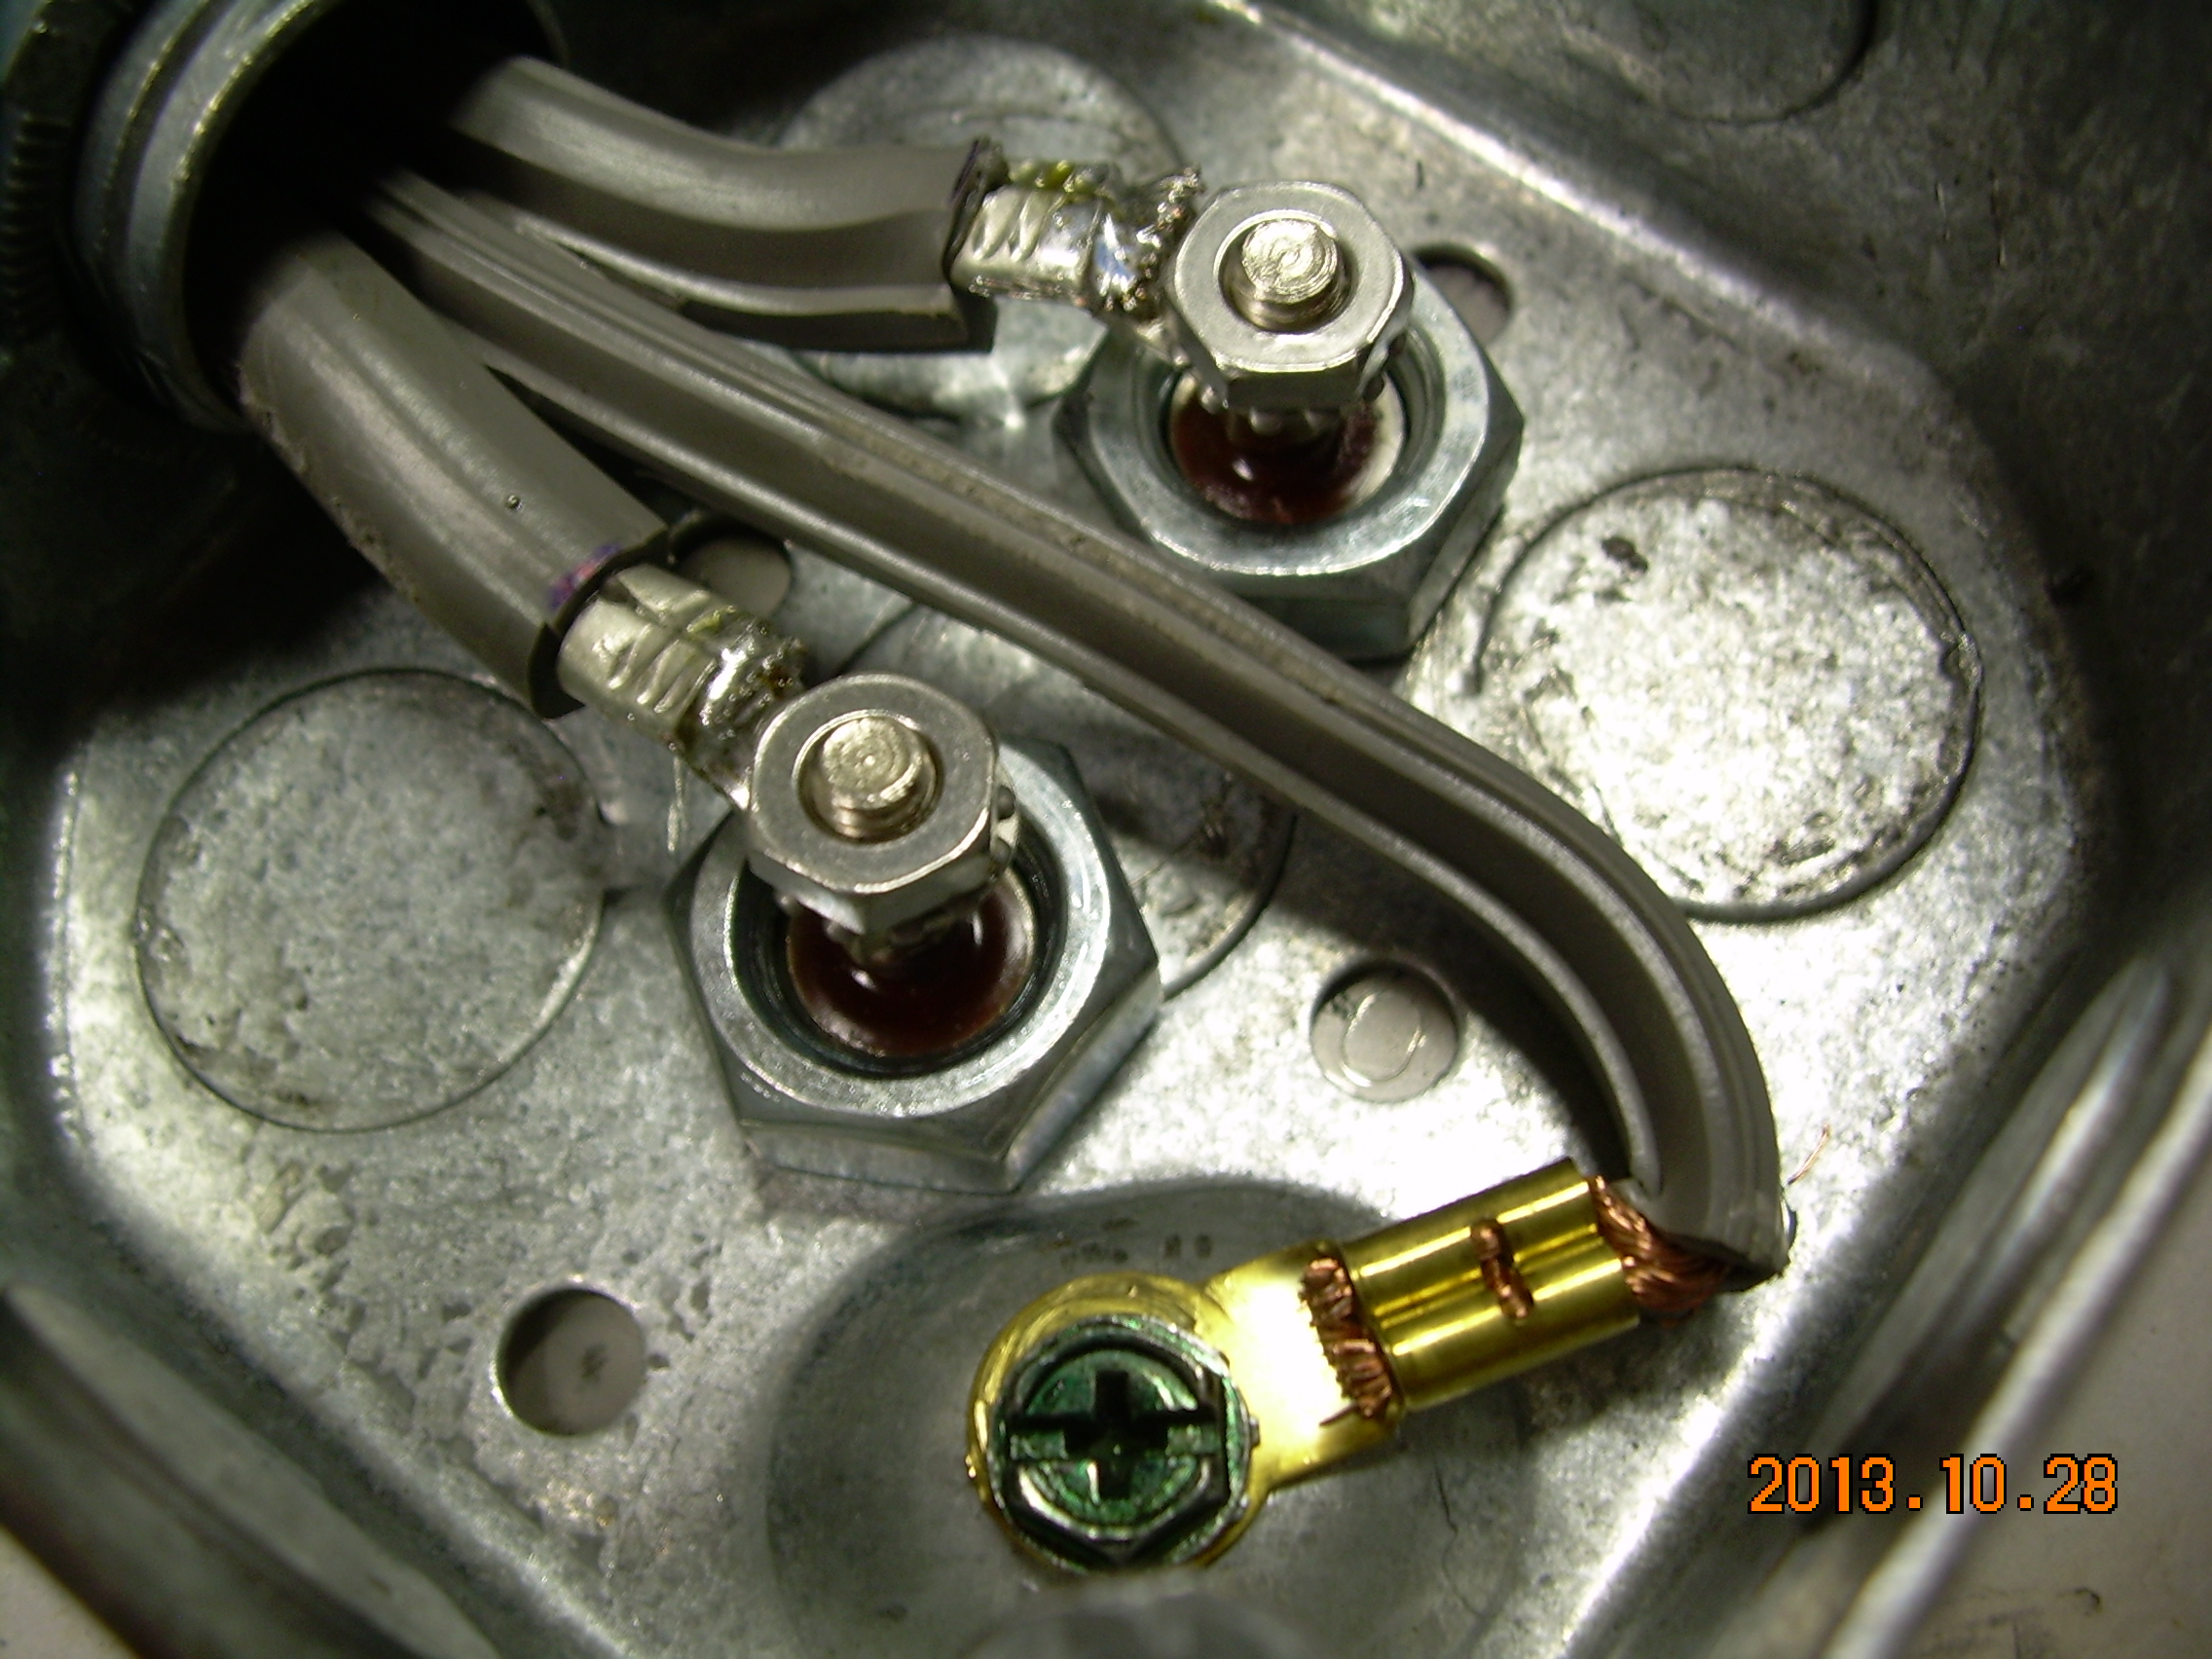
5500 watt spa element installed in the bottom of a keggle. The spa element has self contained o-ring seals that have not leaked at all over the last 6+ years of use. Pluses: Only requires two 1/2 inch holes to be drilled in the kettle. Negatives: Due to the clearance requirement of the J-box, the keggle needs
three welded angle iron legs. Other than that, it works very well. Not sure of the watt-density of the element but since it is being used for HL, it really doesn't matter. Bonus, it also doubles as a low temperature water bath for processing sausages!


Last edited:
Yes I use this exact one. I like it, and the clean look and ease of install. Only used it once so far, so good.Anybody have experience with these?
Dernord 240V 5500W Ripple Water Heater Element Screw-In Lime Life - Ultra Low Watt Density https://www.amazon.com/dp/B01M0PBSHX/ref=cm_sw_r_cp_apa_i_XvdNCbYPJCJT7


