• Please visit and share your knowledge at our sister communities:
  • If you have not, please join our official Homebrewing Facebook Group!

    Homebrewing Facebook Group

Show Me Your Wood Brew Sculpture/Rig

Homebrew Talk

Help Support Homebrew Talk:

This site may earn a commission from merchant affiliate links, including eBay, Amazon, and others.
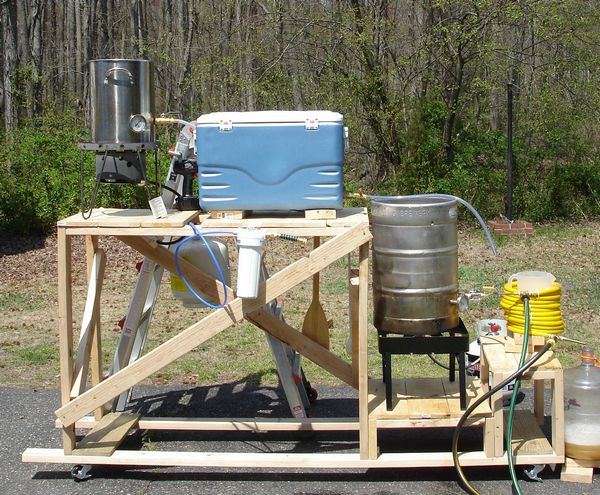
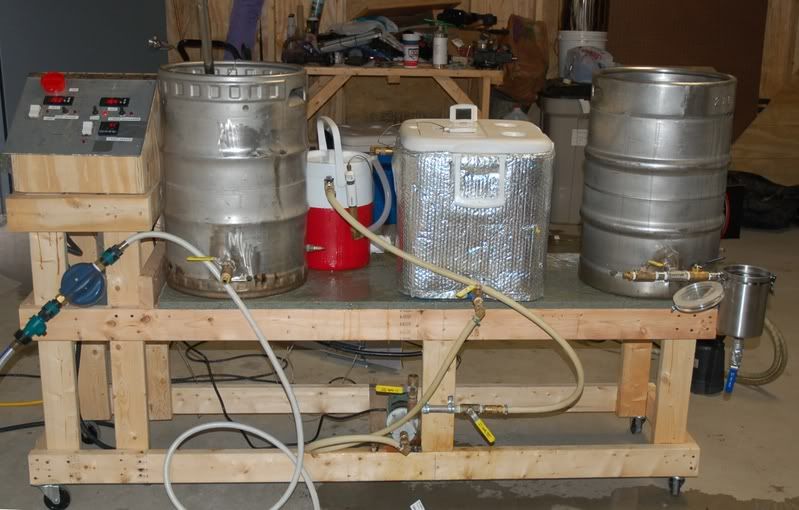
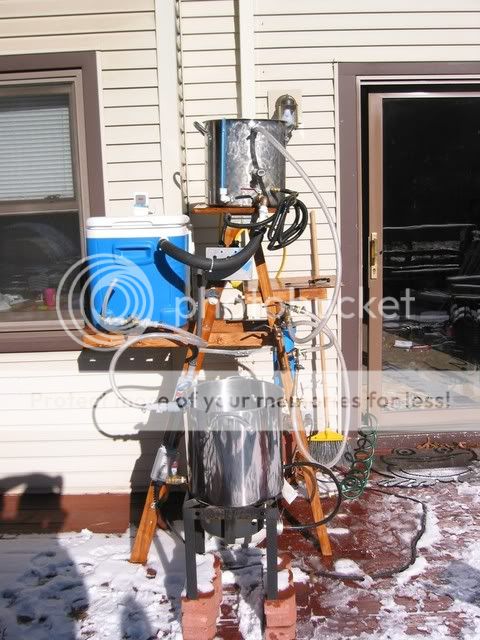
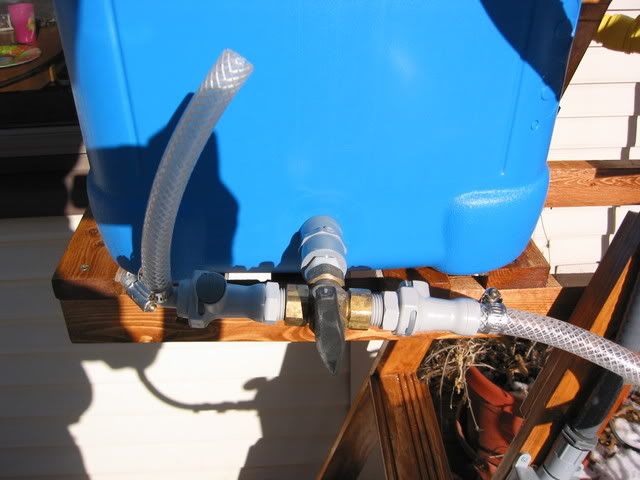
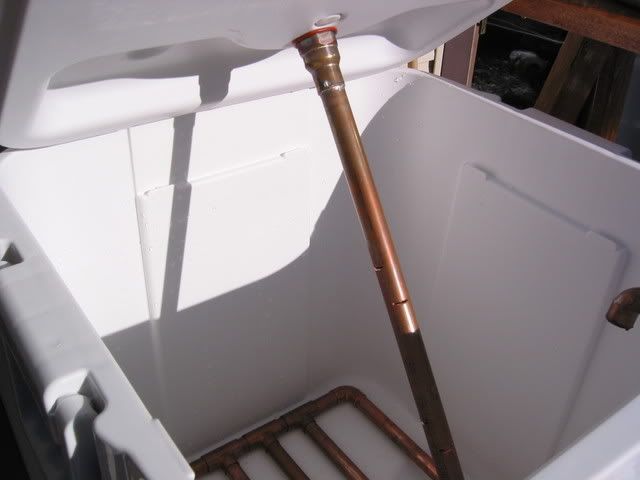
Yep. I use a graduated bucket to move sparge water to my cooler MLT and gravity to the Boilermaker, then gravity to 2 bucket fermenters for a 10 gallon batch. Pretty simple, but it is a chore to put in place and put away.

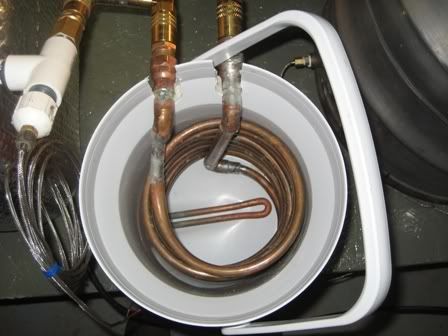
yeah, that is what i wanna do but i need a second burner, i have had thoughts of changing my brewpot that i use now which is a converted keg into a hlt, and buying a megapot for my brew kettle, one of the big reasons being obviously staying outside the whole time and having everything i need out there, and two i believe that my immersion chiller would work way better in a mega pot bc it is really not that effcient in the keg bc most of it sticks over the top of the wort. but, that is another 300 hundred bucks so unless goodwill starts selling brewing supplies i will have to wait....bummmer
 
Nice work Mike C! I like that setup, and may have to do something like that myself...I just need to find a keggle or another big brewpot. Oh, BTW is that a Dell D800 laptop?

Nope, it's a big, bad Inspiron 1100 circa 2002. :)
 
Recently completed wood rig with two burners and two pumps.

brewrig.jpg
 
My ghetotastic brew rig:

brewrig.jpg


I have since added some more wheels and got rid of that bad bowing problem. I've brewed with it 11 times this summer and so far it's been outstanding. I also added a single pump since this picture (pump through the CFC, works a LOT faster.)
 
SIB57: ghetto indeed....but still way cool. As long as it does what you need it to do
 
yeah, this is def what i'm havin' in mind....looks cool

Sorry to have lagged getting back on this thread.

I don't have any other pictures here at work and the home computer is a bit under the weather right now. I'll be sure to post some more later. The idea for the rig actually came from photos of Scubasteve's from HBT. There are a couple of images of a recent brewday here.

The insulation doesn't have any problems with scorching b/c there is no burner under that container (the MLT). It has a bit of a non-standard layout, the middle kettle is the HLT with the MLT on the right and the boil kettle on the left. Doesn't really matter where they are when you are pumping your liquids everywhere!

It took quite a while to get everything together and built up and I learned a lot along the way, if anyone wants more info or a simple diagram let me know.

Cheers
 
Here is my single tier all electric stand.
stand.jpg


Still need to mount the water filter and shorten the hoses.

Mike
 
Question for ya: Whats the small red and white cooler for? And what is the small SS bucket thing on the right end of the stand for?


The SS canister is my hop-back. There are more pictures of under the Hopback 101 thread. The red cooler is my heat exchanger for my HERMS. I did not want to have my heat exchanger inside my HLT so instead I put a 1500 watt element inside a 2 gallon cooler. I also have inside there a coil of 1/2 copper. This allows me to adjust the mash temperature or just have it set to maintain a specific temperature. I can preheat the cooler and it is able to raise the temperature pretty fast.

Any more questions please ask.

Mike
 
love to see the details (guts) on that!!

Here you go!

IMG_3873.jpg


IMG_3872.jpg


IMG_3871.jpg


The tee you can see(in the first picture I posted) has a thermocouple on the top that extends 6" down. The wort is pumped through the coil comes out and hits the thermocouple before entering back into the MLT. If the temperature is at or greater than the set point (love TS controller) the element turns off but the wort continues to recirculate the entire time. this sets the grain bed for me and allows me to have crystal clear wort head to the boil kettle. I have done 4 or 5 brews on this since I finished it and I love it.
 
Hey, thanks... Yeah, it folds up nicely for storage, but mostly so I can take it over to my buddy's house to brew. I only wish I could've figured out a way to integrate a burner stand. Oh well. One of these days I'll get around to extending the legs on that cajun cooker so I don't need the bricks.
 
If you insist I suppose I will toot my own horn a bit...

Mash tun:
IMG_0973.jpg

IMG_0972.jpg


Water filtration and distribution:
IMG_0963.jpg


HLT temp controller:
IMG_0950.jpg
 
Back
Top