• Please visit and share your knowledge at our sister communities:
  • If you have not, please join our official Homebrewing Facebook Group!

    Homebrewing Facebook Group

Show Me Your Wood Brew Sculpture/Rig

Homebrew Talk

Help Support Homebrew Talk:

This site may earn a commission from merchant affiliate links, including eBay, Amazon, and others.
Awesome... Thank you so much for all the images and info! I think you have just completely changed the design of my upcoming brewstand... I batch sparge now and love it but have been toying with the idea of fly sparging now that I have a 2nd burner. I too only have 1 pump and someday (when the rugrats are older and I have more time to brew) will likely get another pump, so single tier is preferred for future expansion.

I have the same water filter as you, and have been planning on plumbing some PVC to fill my HLT as well.

I love the setup with all the thermocouples and the RPi as well. Definitely will be on my To Do list.

I've been looking all over for short runs of the yellow gas tubing, but can't find it anywhere? Where'd you get yours?

Thanks again for all the ideas!

No problem at all, glad to share info! I hear you about the rug rats, I only have one but he's 19 months old and gets into everything. Brewing is either done very early in the AM or starting around 8PM when he goes to bed, either way I'm tired.

As far as the gas tubing, these are the ones that I got. The picture makes them look like 6" long, but they are 18". They are advertised at 1/2" FIP to 1/2" MIP but they are adapted to that. The actual tube has 3/8" female flare on both sides which was perfect for me, left one side 1/2" MIP to screw on to my ball valve from manifold and the other side as 3/8" flare which connected to the oriface on the burner. They are 1/4" ID, which I was worried about at first, but so far I have had no problems on high pressure LP. I do have plans to eventually convert over to NG (everything else in my home is NG), but I'll cross that bridge when I get there.
 
Last edited by a moderator:
Should be finished this weekend! 2 blichman burners sit inside. Will have 2 chugger pumps and still trying to decide on a plate chiller or a counter flow.

1416435099200.jpg
 
Thanks again, Noah! I too pretty much brew when my little ones are sleeping. In my current setup everything is stored seperately and it takes time to even get setup. If my stand could just house everything I need and all I have to do is wheel it out of the garage if save doe good time. I'll definitely have something to post here someday soon! (Soon being a very relative term here... ;) )
 
Thanks Stealthcruiser. They lift out. They are blichmann floor models and do lift out. Not a lot of room under them, but the cooler/mashtun will sit on a wood shelf leaving a small amount of room for storage. Hoping to have it finished an a week or 2
 
Thanks guys. It has been an on going project. Had all the stuff then downsized to biab.
Now want to finally finish. Wife likes it because, I can put the pots in the shed and hide rest. Out of sight out of mind.
 
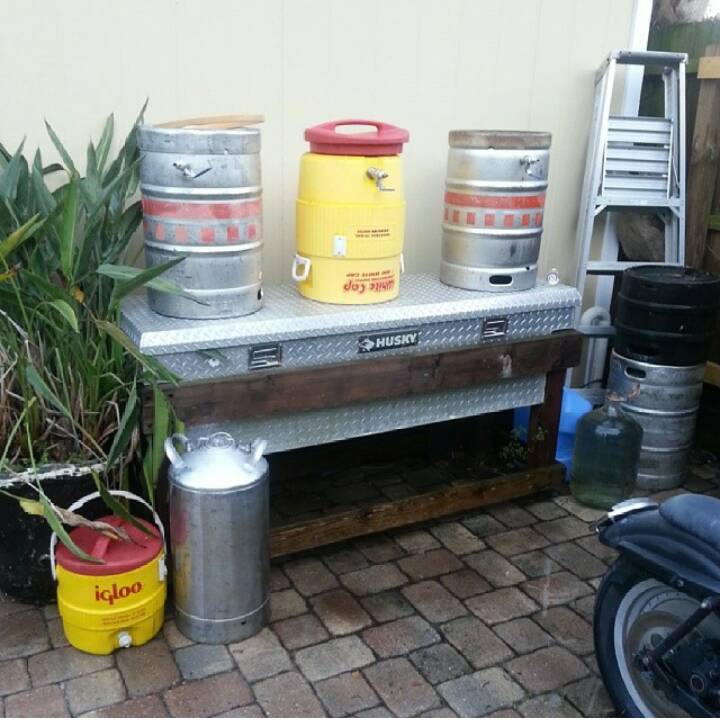
Yes yea....actually browsed craigslist a minute ago...you can by a fairly nice pre owned aluminum full size truck tool box for 50 bucks....perfect size for a brew table.

Genius idea....not sure I need a project. Thanks!


Wilserbrewer
Http://biabbags.webs.com/
 
Running the Maiden brew on it tonight. Almost 100% still need to install the pump switches and put my hot rod together. Sight gauges, thermometers, cam locks, and hot rod purchased from Bobby M. Great quality stuff!
 

This is exactly the type of setup I needed as well and your example is the first I've seen anywhere. Where were you when I planned mine? (would have eased the planning ...:p ).

I mean the exact same configuration: Mash tun on a pedestal with the HLT on the left and BK on the right, with pump for the water and gravity feed the wort through a plate chiller to the carboy.
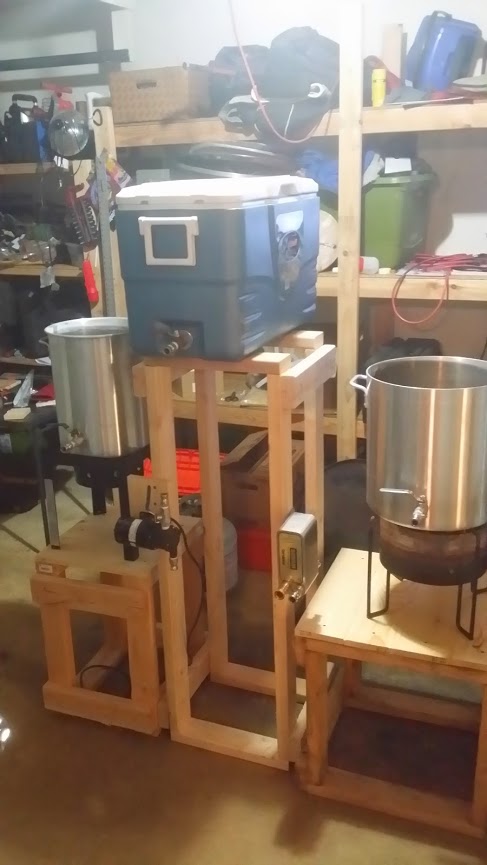
I opted for a 2 piece configuration, where I have a shelf that goes through the pillar to supports the two burners. Easy to take apart and to setup. I'll post some pictures of the final thing once done, in the meantime, I figured I could at least post a picture of the pillar as it stands today (finished the first coat of Polyurethane yesterday).

2014-12-29 23.28.23.jpg
 
I'll post some pictures of the final thing once done, in the meantime, I figured I could at least post a picture of the pillar as it stands today (finished the first coat of Polyurethane yesterday).


Nice! Like the way the grain came out. Dark walnut stain, scrubbed? And then clear coat?


Sent from my iPad using Home Brew
 
Dark walnut stain, scrubbed? And then clear coat?

I added one layer of stain made by Minwax (will check the can for what it is exactly but I think it's red oak) and once dried, I added 2 coats of polyurethane, sanding lightly with 220 between the coats.

While I complete the bride/shelf, this pillar is now inside the house being used by my two children as a climbing rig, pretend store and many other things. I call this quality control since if it hold up during this time, it will definitely work for brewing.
 
Here's my kal-inspired stand.... first coat of stain on, going to add a second coat and then a bunch of poly.

IMG_0048.jpg
 
This is exactly the type of setup I needed as well and your example is the first I've seen anywhere. Where were you when I planned mine? (would have eased the planning ...:p ).

I mean the exact same configuration: Mash tun on a pedestal with the HLT on the left and BK on the right, with pump for the water and gravity feed the wort through a plate chiller to the carboy.
I opted for a 2 piece configuration, where I have a shelf that goes through the pillar to supports the two burners. Easy to take apart and to setup. I'll post some pictures of the final thing once done, in the meantime, I figured I could at least post a picture of the pillar as it stands today (finished the first coat of Polyurethane yesterday).

Did you use the minwax helmsman polyurethane? Im staining mine today and am trying to figure out the best clear coat that will stand heat and liquid
 
I like spar urethane. It's very good with water and temperature.


I used Minwax Fast-Drying Polyurethane - Clear Semi-Gloss. Used the structure for the first time yesterday and I could not see and Ill effects. Plenty of spillage and it wiped right off, nor did I detect any odors due to heat. On the other hand, I don't use wood where the burners are, but the frame is and it's fairly close.
 
Back
Top