• Please visit and share your knowledge at our sister communities:
  • If you have not, please join our official Homebrewing Facebook Group!

    Homebrewing Facebook Group

Show Me Your Wood Brew Sculpture/Rig

Homebrew Talk

Help Support Homebrew Talk:

This site may earn a commission from merchant affiliate links, including eBay, Amazon, and others.
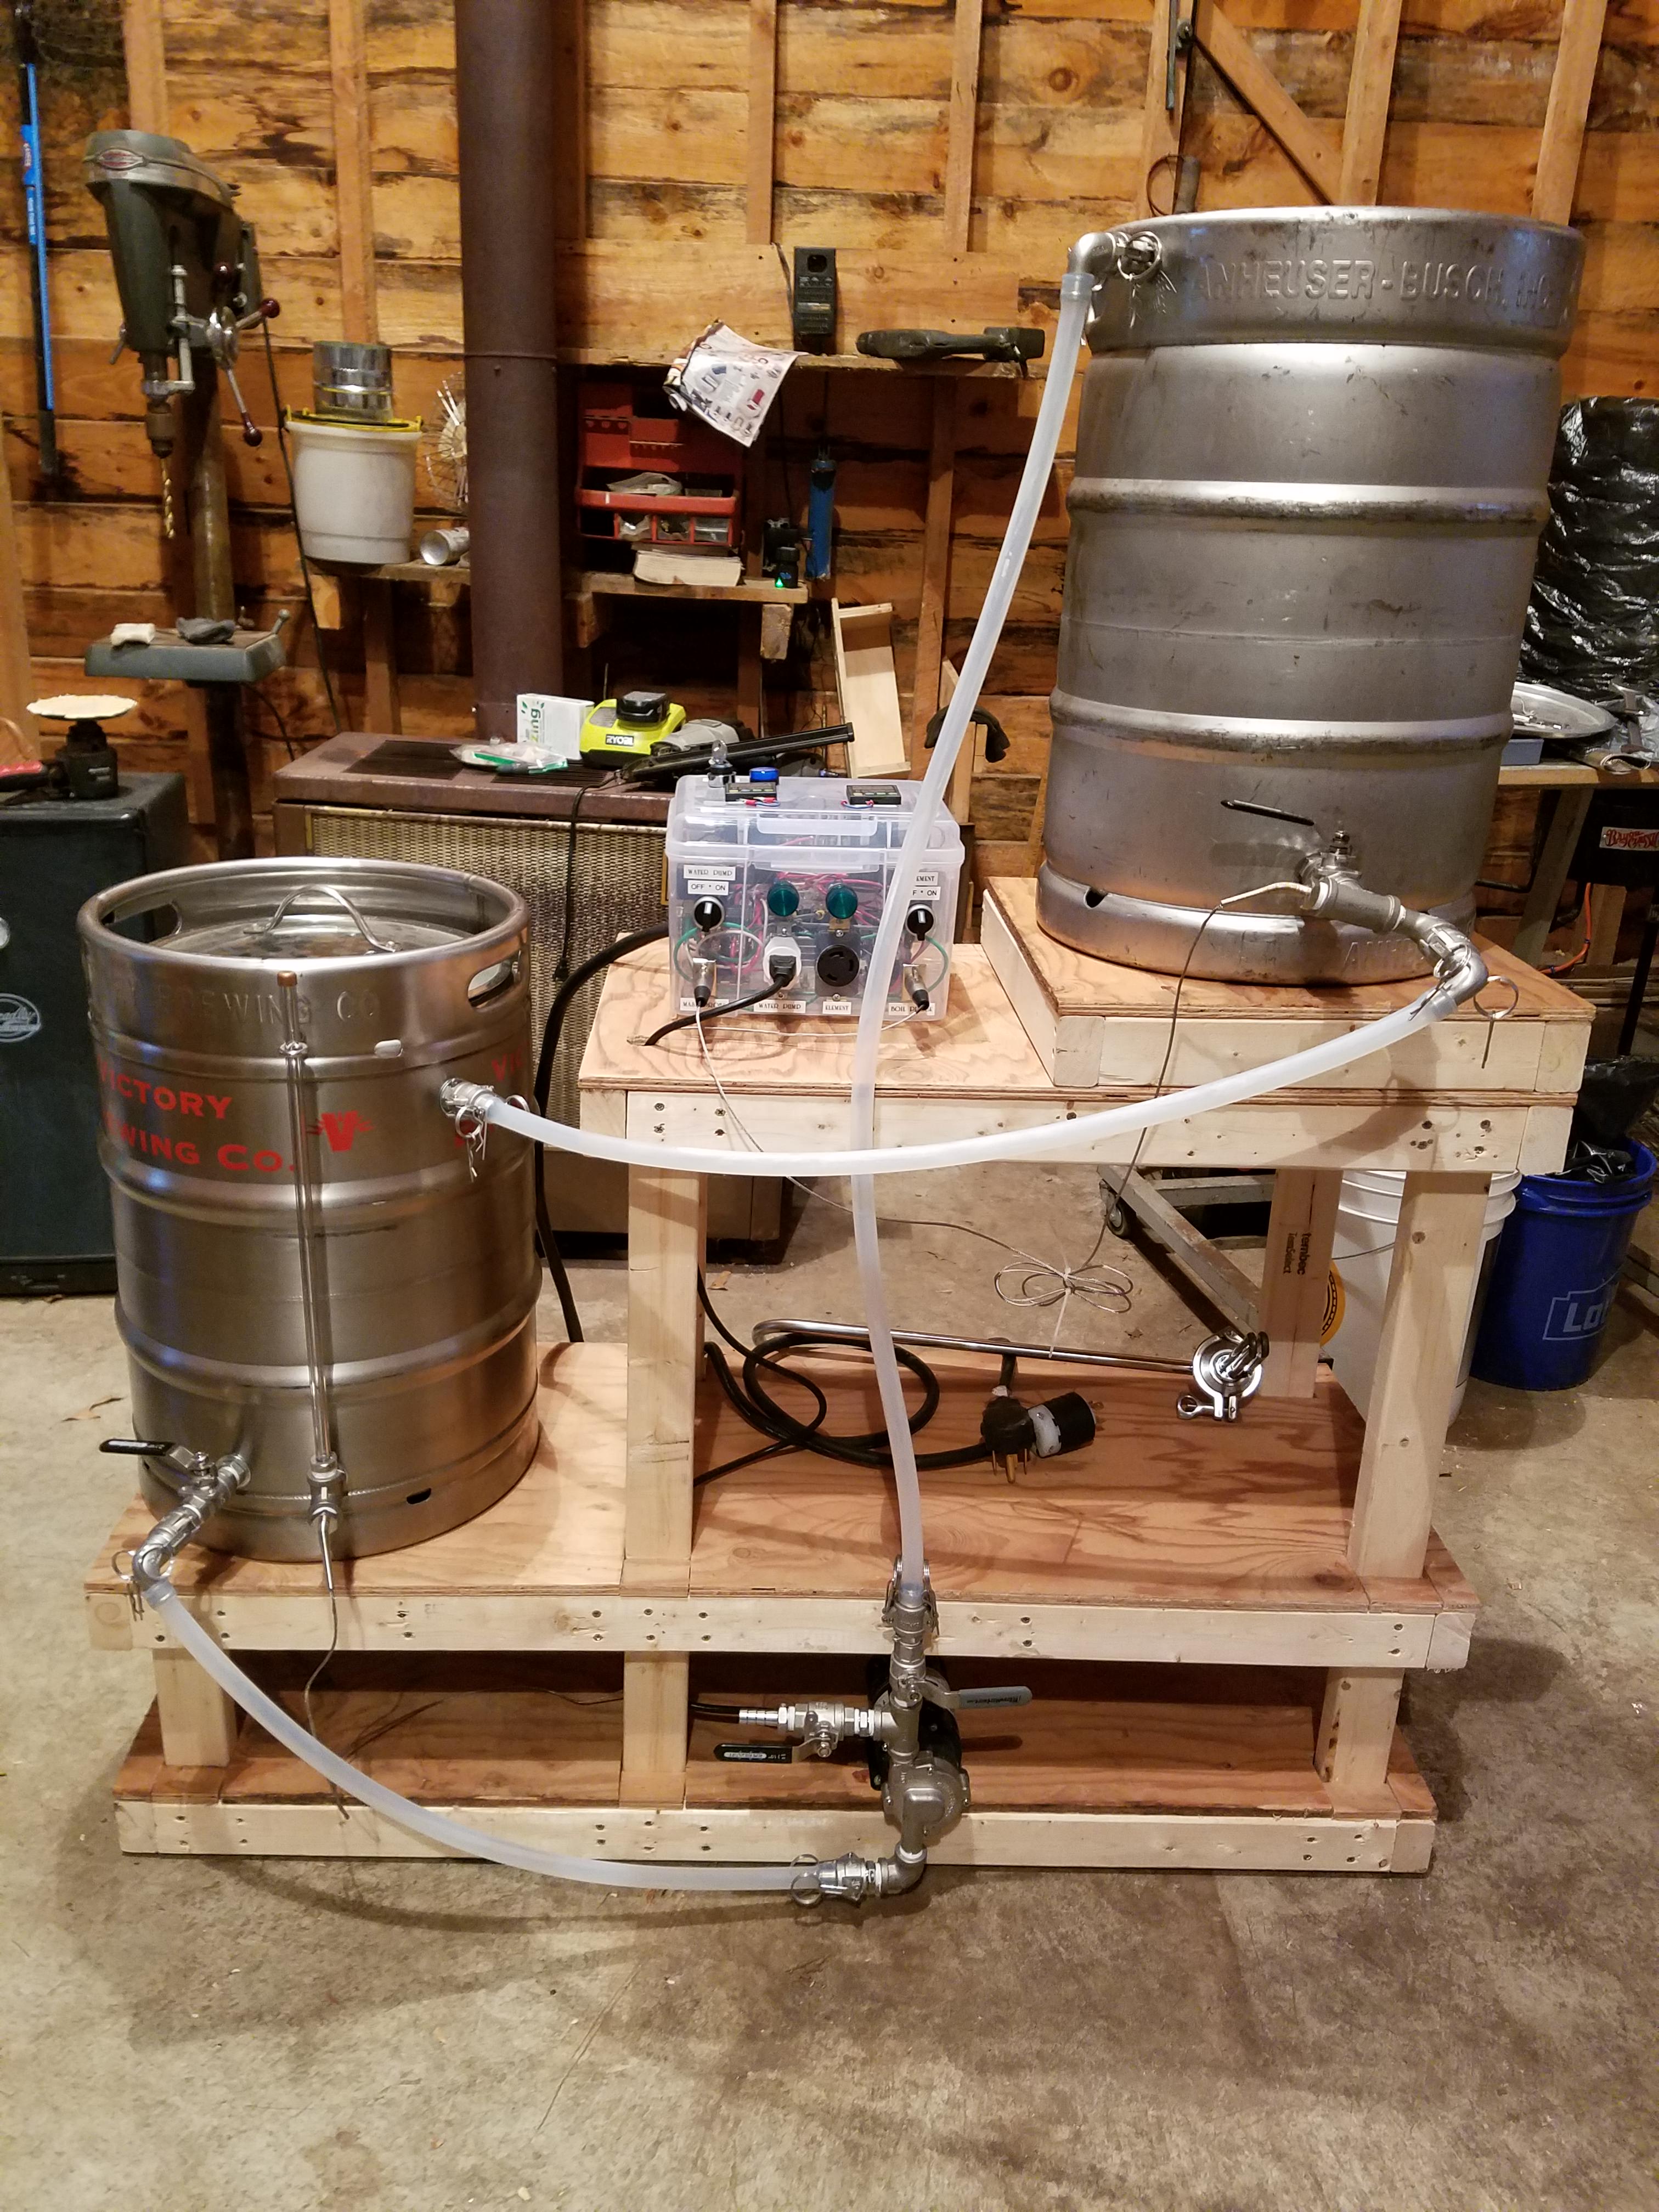
More of a brewery than a brew stand, but, it is wood!

27368682_10109600845794998_3998372827146782459_o.jpg
 
Here is mine. SSBrewtech 15 Gal Boil Kettle, 20 Gal Mash Tun (with temp control), 15 Gal HLT/HERMS/PreChiller; ExChillerator CounterFlowChiller (just got, used to use a Plate Chiller - can't wait to try this); 2 pumps (remote controlled), 2 Edelmetall burners. The stand was a recycle of one of my workbenches with waterproofing deck paint. I put a left over tile under the burners to help keep heat off the wood and some sheet metal covered in automotive fireproof insulation on the sides next to the mash tun. Works amazing for 5-10 gallon batches and have no issues with the burners heating up the wood.
QZdUi6jI6GXSdiE-0oWpL85IJ85RRc5G7CL3AT3IQsaOYVFztUgU3Sv97vCBZvFlbh3jQ-rAT37Jt1jdZ7eqKQKC_qp3nkGgUMjvbj4ZO3IP4Mb8awdNytcp7qH6Tfm8uXdm-ImU7rlLPmD0aFgybljbp0Go3gH2xVuGuRARPAxpAwchwUTLf1l3Bmzx3LJjYcBgTjylpiL-wLtamYMAMba4w1InRc8kgzTTcYqdyAUv_kTfPMachZESVw9qWFa_CpbLy1dZrq3SyT8pOGtPCSR70RMDr-QYdPd3TBhsC87_LJJPEZXc7rNP0anNGpEyYyOK19nIk_px9oZ1T-4gqaumGjLgbar8PolV8Hi5FYE3HM0kzAPmkMIM0Q_LE1JgxvAtSQ7Y7heO7VbBs1fHnSBNM82aj5W_l2v6wif5TS_RNTXQW3h_0b2sAiNK6ONrPCKdYo4goHaeJq4SHdWQBBWyqeDt1N4Xa7xmyQlM6QOmTZ7pu1laeNYnQfiBwE1XOwgWmtLQ8Jr9P3CPBBBrP1VOn0e7Z5oL0sIonVeVNpDUCtzSpE8HIhpkXLKJVrR7E0gCWcinQJ5_krIoqlmCXoogEX0smTOpnwYvGZQ=w1104-h828-no
 
Sorry I'm a bit late to this thread. I built a brewstand two weeks ago out of 2x4s and some laminate countertop.

I made the plans with Google's sketchup:

BrewStand07.png


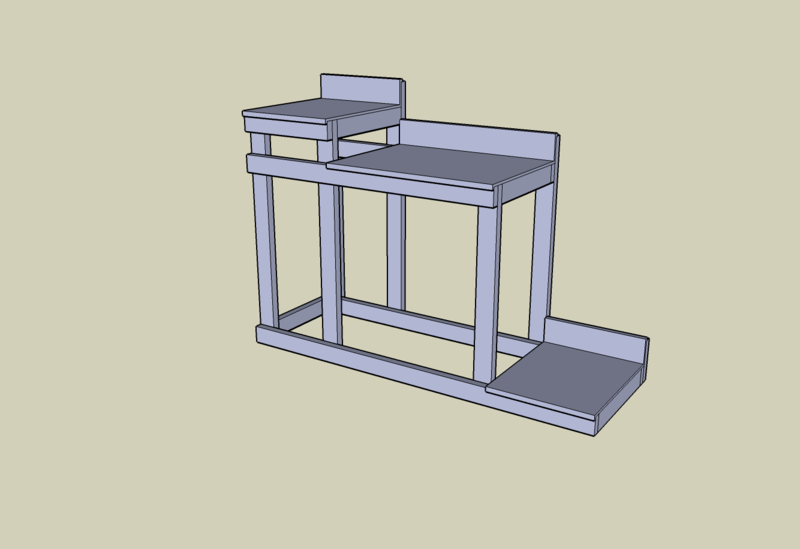
and here it is, in action:

IMG_0659.jpg

IMG_0664.jpg

IMG_0666.jpg


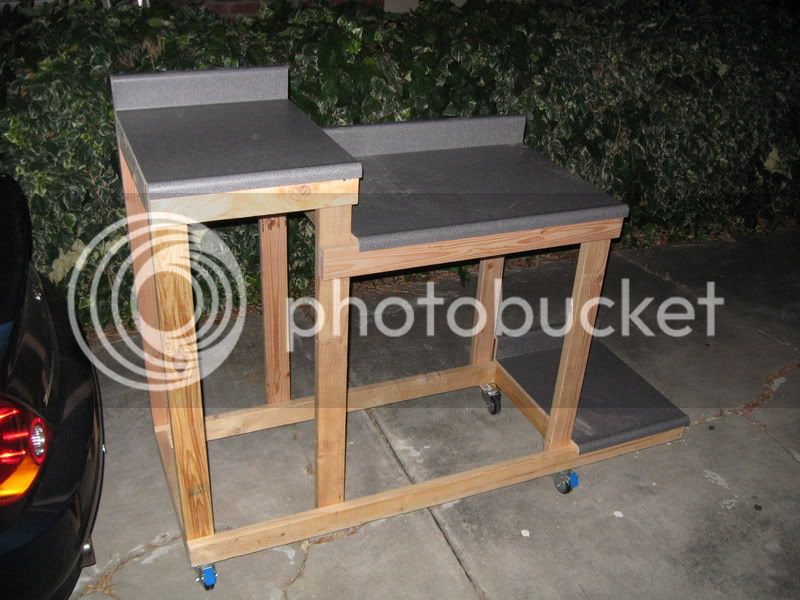
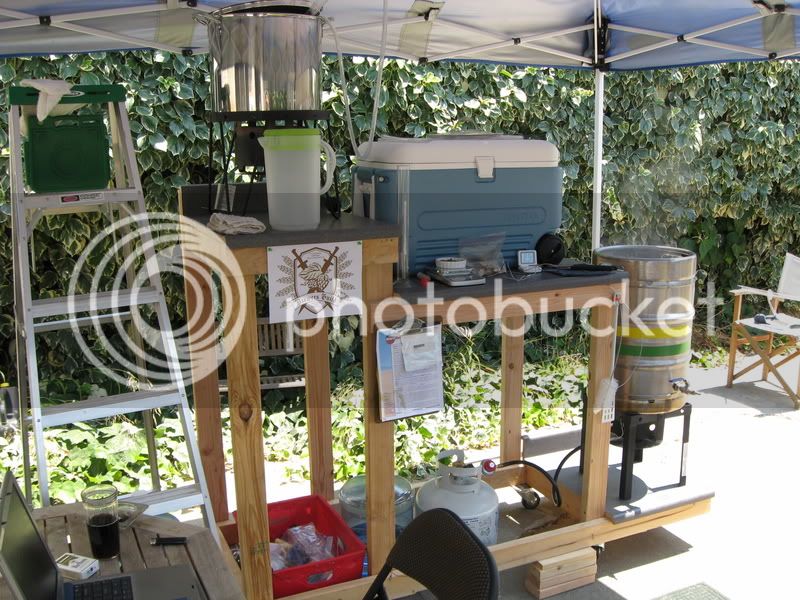
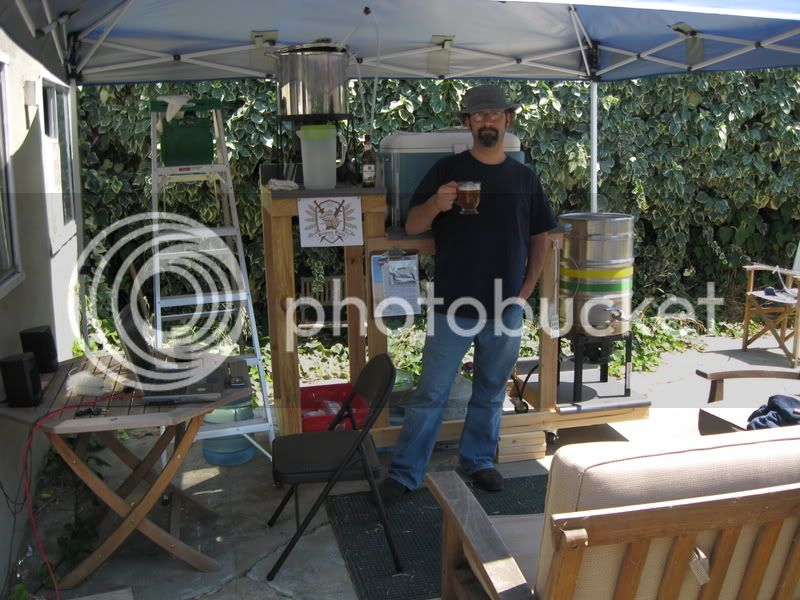
Since then I've already built a shelf in the high part to hold the propane tank, and I intend to fully enclose it with some nice cabinetry. Cheers~
Hey Mike C, I'm getting really close to building my own rig and yours looks very close to my own idea ,and as gravity fed as possible. Tell me please, how has it held up as far as - 1) would you build it the same way again?
2) how many brew batches have you done on it and has anything had to be changed or modified since this build.?
3) I do have a small pump I bought for sparging ,and Im thinking of using it for sparging but do you actually need it with your setup or do you just gravity feed your strike water to your mash tun and so on to your boil kettle? and then basically repeat to batch sparge?
4) I also have a small dorm sized electric stove that works I just dont need the oven portion, I'm thinking of removing the stovetop and separating the burners to run the strike/sparge burner and the large one to run the boil kettle. ideas please.
I just need to figure out the bottom tier height to gravity fill my carboy ,and then work my way up in height until I reach the height where my top burner needs to be so everything flows downhill nicely.
Looks like a very nice neat ,simple set up . I like that . Just need some feedback ,thanks very much.
 
Finally started to build mine. Ran out of screws. Need to pick that up and some plywood for the top.
IMG_3113.jpg
IMG_3114.jpg
IMG_3115.jpg


I also just wired in my longer power cord to my controller. I’m planning on mounting my controller in between the vessels and using s bracket to have it at a 45 degree angle. Hopefully I’ll be able to have it finished this weekend!
 
Here's mine, 4 pretty successful brews so far and can't think of anything to change yet. Although, I did add a shelf after this picture was taken and I'm working on plans to add a collapsible milling station to one end eventually.

B-Rig.jpg
 
559EF217-3797-4C1F-828F-AC47751C4C86.jpeg
Finally completed mine. Here’s a couple photos of hoses connected and then put away. I wanted to have hidden wiring for the Controller, pump and element so it has a clean install.
 
Last edited:
I know i’m going to get some flack for this question, but for the price of all that equipment, not to mention the space it takes up, why not just go for a more efficient and compact all in one brew system? Having used both for some time now I find a boiler with temp controller and circulation pump to be way better than a mash tun cooler, and using a grain basket is so much easier than transferring the wort from one large pot to another. It also makes for easier cleaning.

So what’s the benefit? is it about the aesthetic, and just a personal preference for how you like to brew? Or do you see a substantial difference in the quality of your brews ?
 
For some, the tinkering is half the fun.
Also, for a lot of people not in the US (myself included), the price for an all-in-one system far exceeds the price of the components of their sculptures (I spent about 600€ on my stuff, vs. at least 2.5k for a system of comparable capacity).
And then of course some people might feel all-in-one systems put them too much out of touch with the actual process of brewing.
There probably are more reasons, but since it’s off topic, I’ll stop right here.
 
I know i’m going to get some flack for this question, but for the price of all that equipment, not to mention the space it takes up, why not just go for a more efficient and compact all in one brew system? Having used both for some time now I find a boiler with temp controller and circulation pump to be way better than a mash tun cooler, and using a grain basket is so much easier than transferring the wort from one large pot to another. It also makes for easier cleaning.

So what’s the benefit? is it about the aesthetic, and just a personal preference for how you like to brew? Or do you see a substantial difference in the quality of your brews ?
My main issue is that.....I really don't want to lift the basket.....hahah
 
My main issue is that.....I really don't want to lift the basket.....hahah

Lol. Fair enough.

And for the whole style of brewing, I get the craft of it as well. It's fun, and gives more control (or at least the feeling of more control, I'm not really sure). They do look satisfying. Maybe if I had a garage I'd be there with you. But it looks like so much more work, especially the clean up.

With the Clawhammer Supply and like systems, I came close to just going with that. The only issue was the 110v and how long it takes and again, the basket. Every time I watch videos of it, I’d be afraid of knocking over everything. Then I saw the brew easy, and a guy on YouTube with a recirculating kettle rims, I thought it was the perfect solution to recirculate, cost less age used less gear, less water, etc
 
Can't remember if I posted it here already. It's a temporary stand with some leftover wood I had. Eventually when I move I'll do something better
20180904_201622.jpeg
 
How have you guys treated the plywood tops of your stands to keep spillovers from staining and soaking into the wood? And do you also coat it to protect it from the heat of the kettle?
 
How have you guys treated the plywood tops of your stands to keep spillovers from staining and soaking into the wood? And do you also coat it to protect it from the heat of the kettle?
I have mine covered with 1/2 inch of tile backer .it can take some heat and its designed for use in high moisture applications. I'm not eating off of it so right now its not sealed. Might cover it with tile some time for cleaning ease and appearance.
 
I'm liking the spar urethane idea, and then I can just use a 12"x12" silicone mat under the kettle to help protect the surface from direct heat.
 
1535713407-picsay.jpg
all I did was stain my whole sculpture and used cement backerboard wrapped in aluminum flashing between the burners, nothing on the tops, and havnt seen a single issue. I have ran 2 hour boils before as well with no issues, this is using both a blinchman as well as an edlemetal burner. I liked the idea of being able to take everything off and spraying it down or scrubbing it with a little bit of dawn if I have a boil over.
 
How did this end up...did you add casters? Its has given me several ideas along the same type of design.
Mike
image-1118491857-jpg.76669

Just built mine today. Most of my inspiration came from harten74's rig in this thread. I still need to add casters.

I don't use a separate burner for a lauter tun, so I didn't feel the need to make the third tier permanently fixed. Plus, I was able to make it a little smaller for storage.

The angled braces for the third tier simply pull out from some dowels allowing the whole tier to collapse.

View attachment 76667

View attachment 76668

View attachment 76669
 
here is my ghetto set up...I've just always made one on the fly every time I brewed...just grab whatever is around to make everything flow by gravity...it has progressed from 3 to 4 levels to go from HLT to fermenter w/o moving anything.

But I will be making a stand of some type this weekend...probably a half stand to sit on the wood spool pictured...

BTW...I always hear about "3 tier" but don't we really need 4 levels? or does "3 tier" mean 3 levels "above"?
56839560001__CB10A46E-229E-45A6-BF36-3F35367B8397.JPG
IMG_3435.JPG
IMG_3472.JPG
 
Back
Top