BadNewsBrewery
Well-Known Member
Details on that fridge? Very nice.


- they can't be under-the-counter, and you have to have clearance above them to open them.
2. do you have need to heat these? If so, how to you accomplish this?
Keith

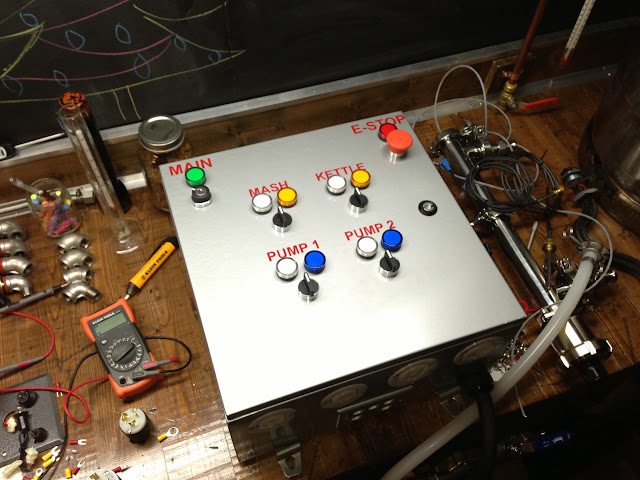
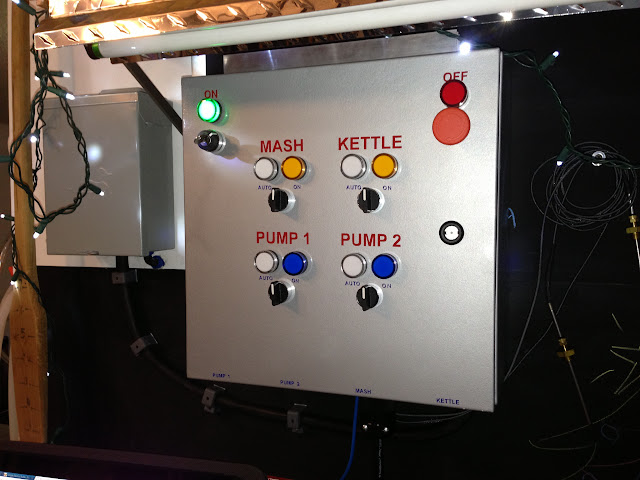
Why 2 lights per control?
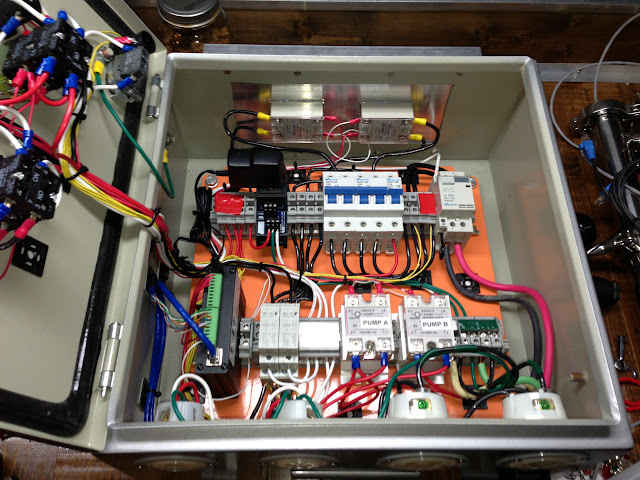
With your breakers - the double pole ones show two black wires coming out. Did you give up on standard wire convention (one red, one black), or is there a reason you are using a double pole breaker with only one hot leg split between both sides?
Otherwise, very clean panel. I couldn't bundle all my wires as nicely, that's for sure!
Are you an actual garbage man?
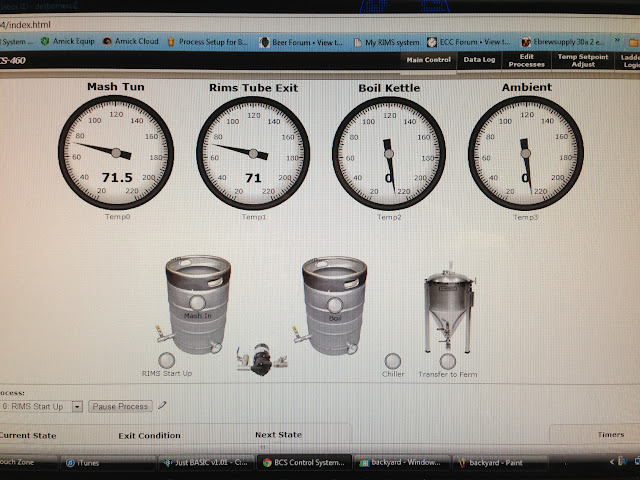


garbageman said:I control RIMS element by probe at end of RIMS tube. Add 7 degrees to set point to equalize temp in Mash Tun. IE: RIMS exit temp 158 = 151 in grain bed.


![Craft A Brew - Safale BE-256 Yeast - Fermentis - Belgian Ale Dry Yeast - For Belgian & Strong Ales - Ingredients for Home Brewing - Beer Making Supplies - [3 Pack]](https://m.media-amazon.com/images/I/51bcKEwQmWL._SL500_.jpg)


