• Please visit and share your knowledge at our sister communities:
  • If you have not, please join our official Homebrewing Facebook Group!

    Homebrewing Facebook Group

North Wall Brewing Electric Brewery Build

Homebrew Talk

Help Support Homebrew Talk:

This site may earn a commission from merchant affiliate links, including eBay, Amazon, and others.
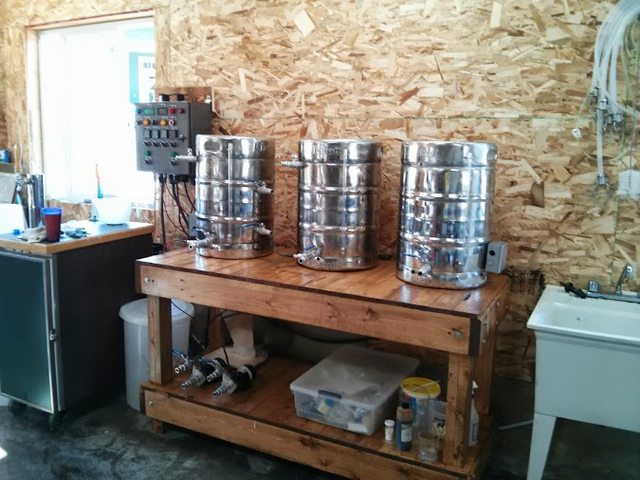
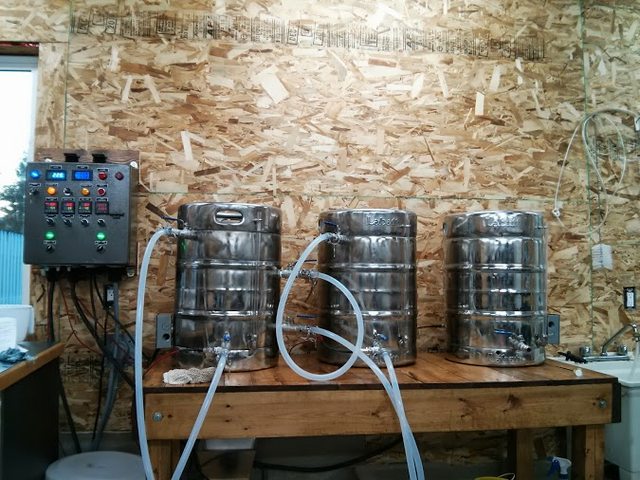
Today I finished wiring up the PIDs, timer, alarm (buzzer, lights and switches).

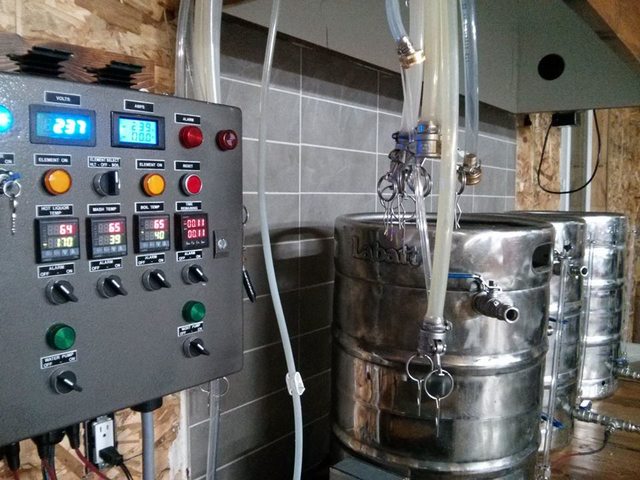
Here is a pic of the panel powered up. The volt meter does work, I just knocked a wire loose and didn't bother to hook it back up. Still waiting on a replacement ammeter/voltage converter.

S4LO9Ga.jpg


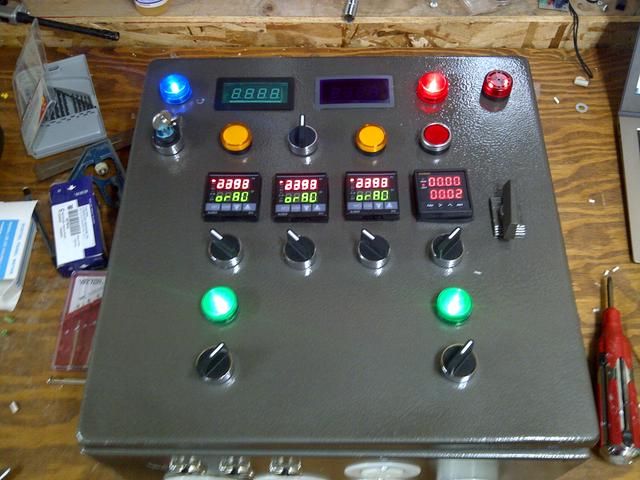
Here, the alarm is going off after the timer counted down - it's awesome to see it working!

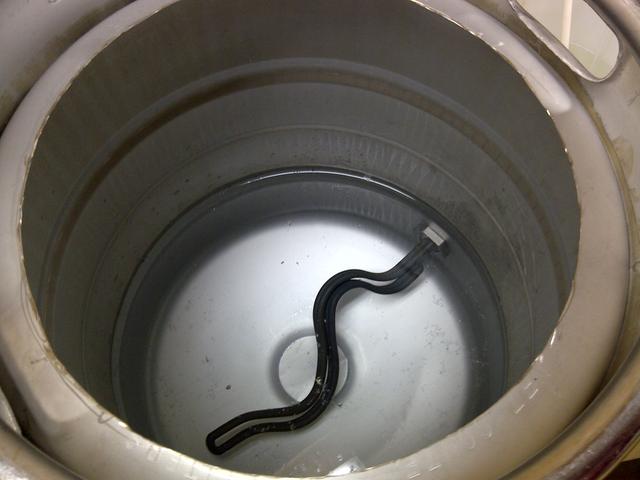
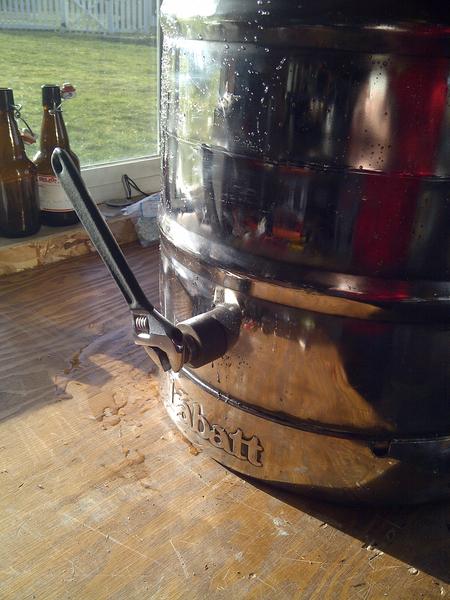
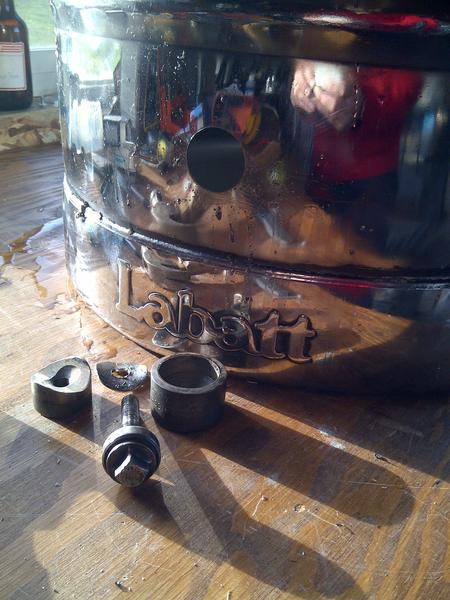
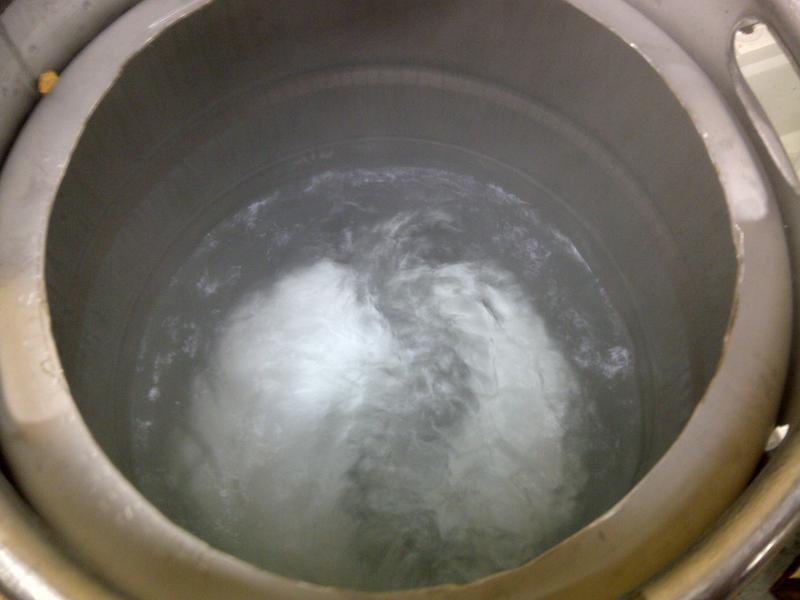
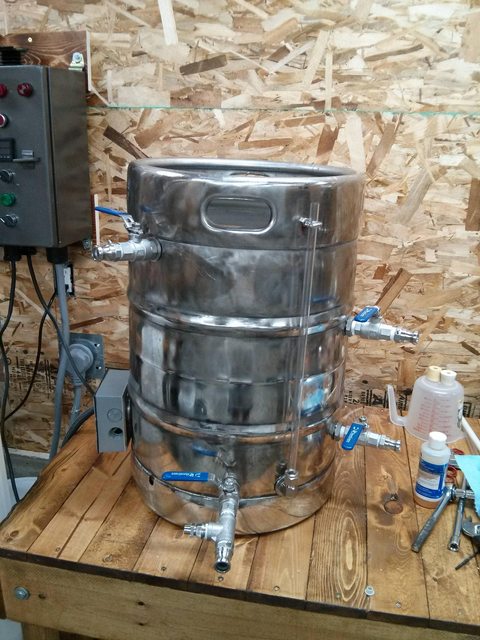
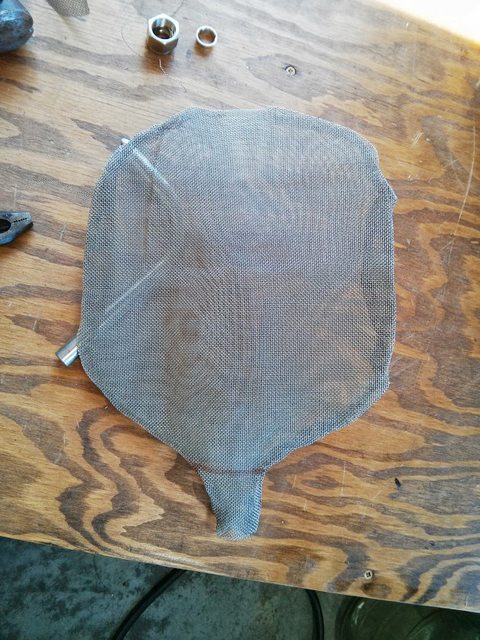
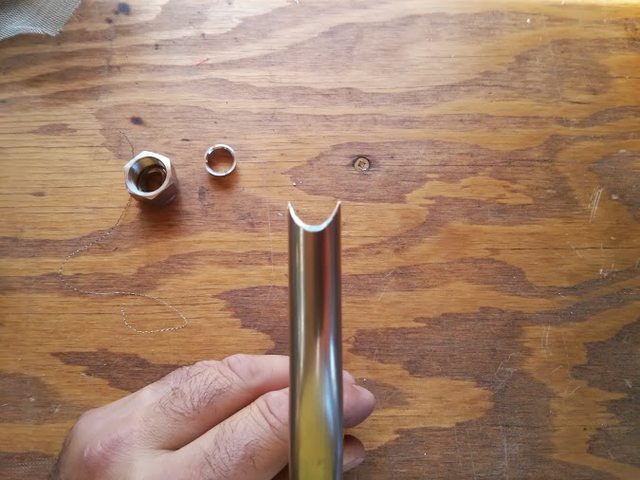
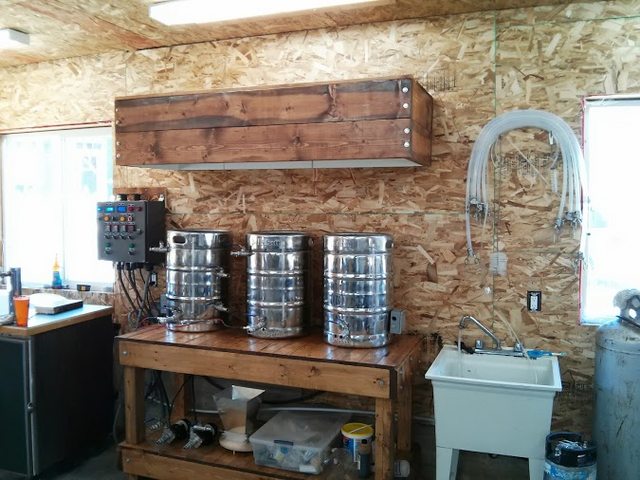
I also received the stainless lock nuts and shims and the high-temp O-rings for my elements. I had one keggle punched and ready so I attached it (unbelievably simple, by the way). I filled it up with water and there are no leaks after a few hours.

dCgNaJr.jpg


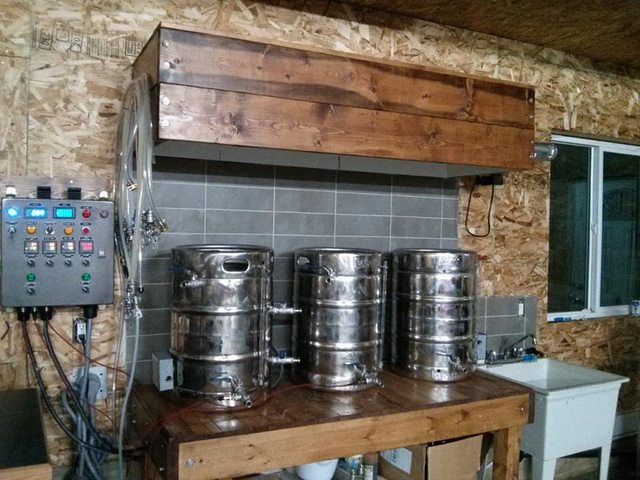
If I can figure out how to use my PIDs without a temperature probe (still waiting to order those) I will be able to use my panel to fire my boil and HLT as early as next week!

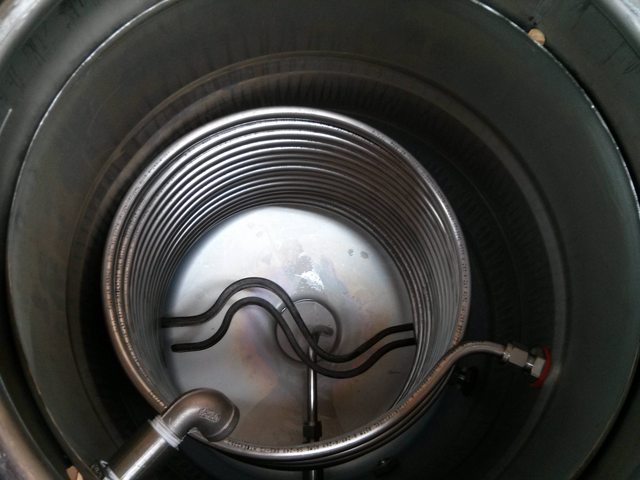
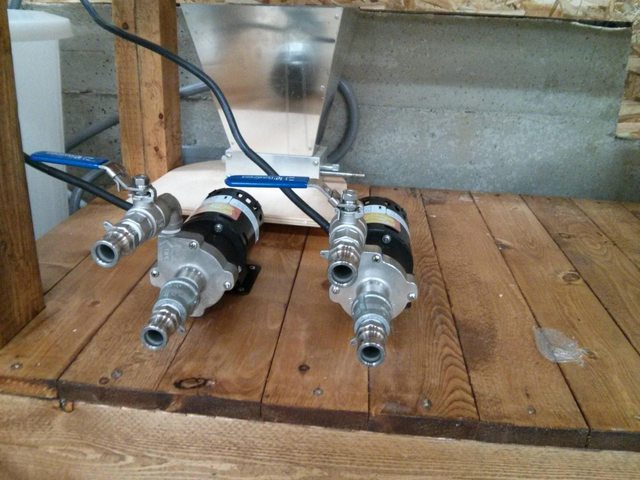
I will still have to mash in the cooler, since I don't have the HERMS coil/pumps/fittings yet, but it will be fun to brew without that loud propane burner.
 
Big day today! I completed the wiring of the panel and everything checks out! I also polished, punched and secured the second kettle and heating element.

jPCKIPI.jpg


XjD79Hw.jpg


IEF1jlZ.jpg


I finished the element housing and cord with the expandable braided sleeving.

JomGzDG.jpg


I set up the other kettle, but I ran out of ring terminals so I couldn't finish it completely.

I tested the completed kettle - it worked quickly and with no leaks. Very exciting!

We have boil!

TrXPmoY.jpg


The ammeter I thought was fried seems to work fine, although I'm unsure of the readings. Powered up, according to the meter, the panel draws about 4 or 5 amps. With the element on, it draws about 19. Do these sound right to you guys? The replacement ammeter came today and it had identical readings.

I believe my volt meter was a DC unit, so I've ordered a new one.

I think I'm going to do a brew tomorrow on the new system - can't wait until it's totally complete, but for now I'm just glad that I can heat and boil with electricity instead of propane!

Also - if anyone cares - this is how you can use your PIDs in Manual Mode without temperature probes - great for testing your system before your probes are in, or if you're like me, waiting to purchase the rest of the system after building the control panel.

It was very simple - I simply soldered a resistor (I used 40 and 100 Ohm) to pins 2 and 3 on the XLR plug-ins (the female ones) which correspond to pins 4 and 5 on the Auber PIDs. I set the PIDs to use a 2-wire TC probe (see the manual to set this, it's easy). Then you can set manual mode to whatever you want and off you go.

I can't wait to place a big order for stainless steel tubing, valves and fittings and a couple of pumps!
 
MEGA UPDATE - NEARLY DONE!

I've been busily putting together stainless steel bits and pieces and finishing the ventilation hood. I built it out of wood and lined it with fibreglass panel, caulked at the seams. My fan and pumps arrived also.

No issues punching holes in my kegs and all my weldless fittings (BargainFittings and BrewHardware) have been easy to install and leak free.

Here's a pic of the completed HLT:

GujmDjcl.jpg


ln2SUj5l.jpg


Just a note about the HERMS coil - I had to spend an hour or so cutting the opening to the keggle wider since the coil I ordered (StainlessBrewing) (12.5" with 2 90 degree bends) was too big to fit in. However, I think the additional effort was worth it since the coil is already tall enough as it is.

My panel is now mounted on the wall and it looks great. Just missing those panel tags. (have since arrived and look awesome)

9SqxnNal.jpg


And I mounted the pumps to the brew stand. My only complaint about the Chugger pumps is their terribly short cords! I need to re-do the plumbing on those - I can't seem to get them to face the way I need them to. During my first brew I noticed a leak or two so I had to tighten them down further, but now they're not facing outwards and it looks/feels awkward to use.

LKzHiNkl.jpg


Next up - complete the boil kettle and mount the hood and ventilation fan.

A member of my home brew club works for a local manufacturer and was able to score me some stainless steel mesh on the cheap so I thought I would try and fashion my own hop stopper. It turned out alright - it does work, but I still need to get my process dialed in (only 2 brews on the system so far). If you choose to make your own hop stopper, the one piece of advice I can give is to make sure there is some kind of fold/pinch in it to give it some depth to accommodate the dip tube. I thought the mesh would be flexible enough but it wasn't - this caused numerous problems.

9bMjMjSl.jpg


I notched the dip tube for better flow:

PQGgxOZl.jpg


Once it was installed in the kettle it was time to hook everything up and test it.

WIQ5wh3l.jpg


It's ALIIIIIVE!

KuN63TKl.jpg


Next up was the ventilation hood. I built it out of 2x8s (really should have tried harder to find 1x8s - thing is super heavy!) Once I got it into place it was a snap to install - I bolted it to the wall with some big-ass lag bolts into the studs.

tewdu5gl.jpg


I lined the hood with fibreglass panelling - similar to what you'd use in a commercial washroom or shower stall. I recessed the lag bolts beneath the surface of the back of the hood and covered them up with circles cut out of spare panelling, caulked into place.

I6f08NBl.jpg


Just yesterday I finally installed my ventilation system. Here is the fan I used. I found it on Amazon at about 1/3 the price that I could buy a Vortex locally. Apparently these are the choice of -ahem- other indoor production enthusiasts.

tjyIX0Hl.jpg


Because my run is especially short and 6" ventilation stuff was harder to find and more expensive, I reduced the fan to 4 inches from 6.

mhltwQHl.jpg


Here are the holes cut for the fan:

u7w59Srl.jpg


sPdVYnNl.jpg


Then the fan was mounted, duct was measured and cut, and a hole cut through the wall of the garage. You can't really see it, but the fan is lag bolted to the hood using L-brackets and the fan's mounting bracket.

qIlIuU1l.jpg


hz31sBbl.jpg


Right now it just plugs into the wall at high speed, but I will be building a speed control for it. My hardware store had all the parts but the cord grip for the electrical box.

It works!

LgJ9NAil.jpg


Now all that is left to do is to prep and tile the wall behind it!

I've already brewed a couple of times on the new system, and aside from a few process-related fine tuning that needs to occur, it was a joy to brew on - gravities hit, etc. Brews number 1 and 2 are nearing completion - can't wait to try them!
 
Badass! Keep up the great work. The whole build looks awesome so far. Can't wait to see the final touches. Cheers!
 
Hey. Sweet space man. Can you do me a huge favor and take a photo of how that volt/amp meter was installed? Did you extend the wires on the little coil doohicky and just run one main hot leg through it? I guess if you answer my questions I don't really need the photo... My panel is nearly wired and I want to be sure these last pieces are done correctly. Thanks!
 
Hey. Sweet space man. Can you do me a huge favor and take a photo of how that volt/amp meter was installed? Did you extend the wires on the little coil doohicky and just run one main hot leg through it? I guess if you answer my questions I don't really need the photo... My panel is nearly wired and I want to be sure these last pieces are done correctly. Thanks!

Sorry for the late reply - and maybe you've already done yours, but it was really easy. Just put the donut (you'll have to extend the wires if you got the same one as I did) around the HOT wire coming out of the MAIN power relay. There is a good picture here (not mine):

http://www.theelectricbrewery.com/forum/viewtopic.php?p=300001#300001

Anyway - it's a great little meter - works well and east to install. The fact that it doesn't match my standalone meter doesn't even bother me anymore.
 
Success! I completed the tile work over the last week or two and my electric brewery is officially, officially complete.

qObjORel.jpg


Er3DVPXl.jpg


wvTyS9El.jpg


This project was a lot of fun to put together over the past year (almost to the day). I brewed my first "official" beer with the completed system last night and it is just a dream to brew on. My workshop has never been so clean because instead of stressing over temperatures and manually sparging, I had a lot of spare time!

Big thanks to Kal and all of you forum folk for the plans and advice and answers to my many question

CHEERS!
 
Do you have any issues with water condensing on your hood and dripping?

It condensed a little bit, but only in one corner where it dripped harmlessly on the concrete floor. Where I have a real condensation issue is in the fan itself. It drips like Niagara Falls when the boil is on. And it's still summer and my garage is warm. I understand this is pretty common though.

I also reduced the vent from 6" to 4" (have you ever priced out a 6" hole saw?!) but I am thinking I may have to redo this to get more flow, as there was a good bit of steam that escaped the hood as I was boiling.
 
Back
Top