My Keezer Project

Homebrew Talk - Beer, Wine, Mead, & Cider Brewing Discussion Forum

Help Support Homebrew Talk - Beer, Wine, Mead, & Cider Brewing Discussion Forum:

This site may earn a commission from merchant affiliate links, including eBay, Amazon, and others.

TylerAI

Well-Known Member
Joined
Nov 10, 2009
Messages
109
Reaction score
22
Location
Tyler
I am not a big poster, but I wanted to try posting my keezer project. It started just over a year ago when I lucked across a new chest freezer. Initially I just put a collar and three taps on it and used it for about 10 months. I always planned to finish it "later". Well BigFloyd, a neighbor, inspired me to finish it. So, photo by photo, here it is.

These first two shots are of the first stage, which I refer to as:
"Getting cold beer".
It is nothing more than a 2x10 collar heald together with screws and locked in place with calk.

IMG_1920.jpg
[/URL][/IMG]

 
This served good beer :mug: 
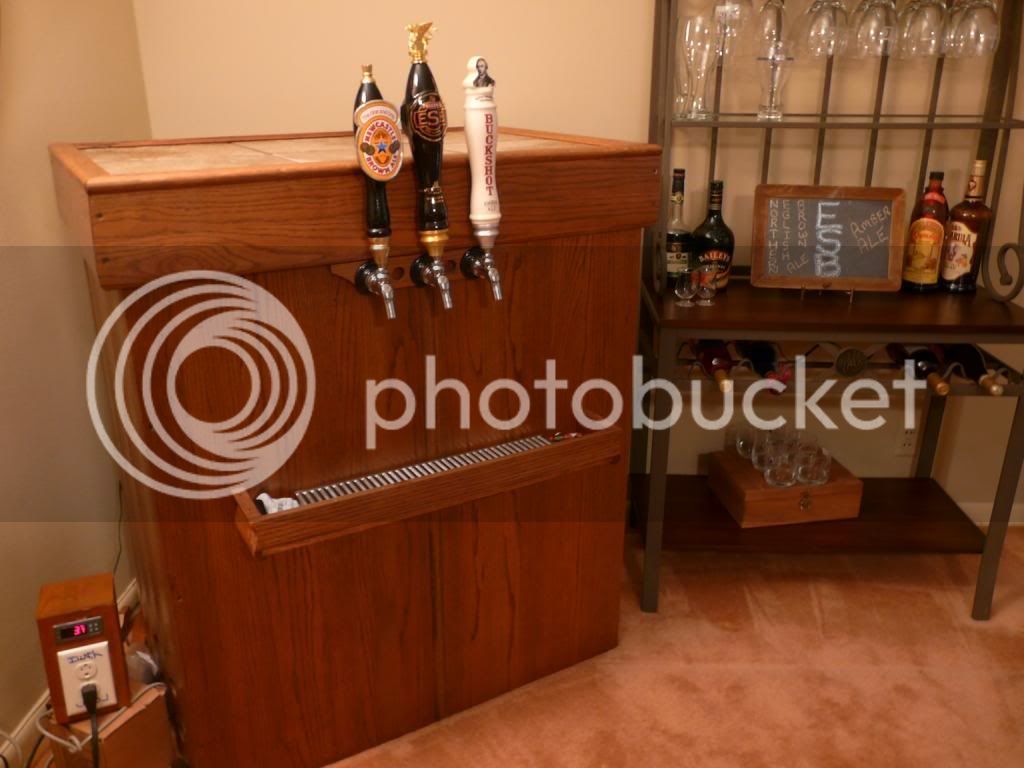
for about 10 months. Then I took it to stage two. The hardest part being not to screw into the freezer. I started by encasing the freezer in oak paneling with some screws in the collar and glue holding the rest to the freezer. Since I could screw to the lid, It has a collar of pine that will be covered in oak for reasons I will show later. To keep things consistent, I also placed an oak collar around the base. The holes simply match the originals. I didn't know about standard spacing when I first started this so the taps are centered and spaced to what I thought would look good.


20130305_070854.jpg
[/URL][/IMG]
 
Next, time to start making it pretty. Corners were added with a little custom tounge and groove cutting to keep them straight. Due to construction of the freezer, there was a plastic strip around the original top edge of the chest. This made a ridge around the middle of my keezer instead of a solid flat surface. The corners allowed me to hide the slight bowing of the panels.

Incidentally, I do not like to stain or paint anything. I did miss a couple of glue spots. Close inspection will find areas the stain did not take real well.

 
Now I had the brilliant idea of having a granite backsplash. I also was not sure how to mount a tray that would support weight and not use screws. It also needed to fit through a door.

Backsplash was easy, scrap granite from a local company was free, just paid for the cutting and polishing. Fortunately I had bought longer than needed shanks during stage one.

The drip tray was tricky. I finally decided two run two boards beside the backsplash that would be bolted to the freezer, from the inside through the collar. These strips support the tray bracket. Removing the bolts removes the entire tray assembly and makes going through doors a breeze. The tray actually sits on two small boards with the wood you see as just a casing to keep it from sliding off. The tray pops right out to be washed and the small board behind it runs from the tray, underneath the granite. It is held in place by the tray and can be slipped out to be wiped clean in case of spills.

Finding the stainless ring to go around the shank made a big difference in appearances.

 
The final step was placing about 1 billion bottlecaps on the lid. The earlier mentioned collar and oak strips created an top edge and lip in which to slide caps under. These were encased in epoxy. The epoxy was the only real problem in building this. I bought a brand carried by Lowes. DO NOT USE THIS BRAND. I followed the instructions exactly and it is inconsistent in setting solid. Thankfully, I applied thin layers and I realized the stuff was patchwork setting before I had the caps completely covered. Some areas would be rock hard and some ares remained sticky for weeks. I tried some test coats on scrap lumber and bricks with the same results. Sometimes it just wont set.

After about 4 weeks allowing this stuff to set, and it didn't, I bought a different brand. Worked like a charm. I put 4 thin coats over the whole sticky mess and encased it in hard epoxy. Aside from some bubbles deep in the original coats, you cant tell.


That turned out really well (especially the caps in the lid) and the beer that gets dispensed out of that keezer is top-notch.

Here's the build that, along with his wife, inspired TylerAI to finish his up and make it into a nice piece of furniture. Mine's made out of an old oak church pew, so he dubbed it the "holy keezer".

handleson_zpsd8d6d2ad.jpg
 
I still need to make some decent tap handles. Just haven't had the right design to inspire me yet.
 
i like that natty greenes buckshot tap handle!! thats some good ol NC local beer right there!
 
Looks great! I was wanting to do the same type of top on mine when I build. Mind if I ask the brand of epoxy that worked well and where it came from?
 
Back
Top