• Please visit and share your knowledge at our sister communities:
  • If you have not, please join our official Homebrewing Facebook Group!

    Homebrewing Facebook Group

My Frigidaire 7.2 cu ft Chest Freezer Build

Homebrew Talk

Help Support Homebrew Talk:

This site may earn a commission from merchant affiliate links, including eBay, Amazon, and others.

boralyl

Well-Known Member
Joined
Dec 20, 2009
Messages
96
Reaction score
11
Location
Pennsylvania
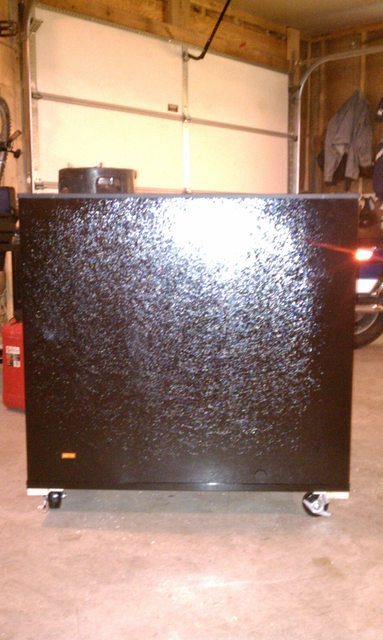
I was inspired by Quaffer's build and decided to begin my own Keezer project using the Black Frigidaire 7.2 cu ft Chest Freezer.

I bought the freezer new from Lowes. If you go to the post office and ask for a change of address form package a 10% off coupon is included within. This got me 25$ off the price, even thought the expiration date was 3 months ago.

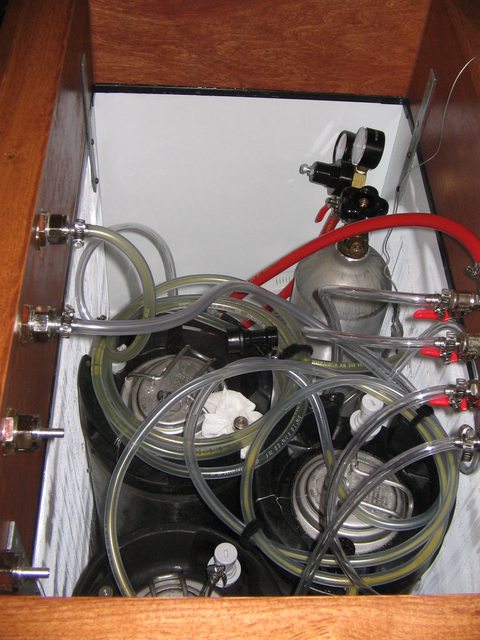
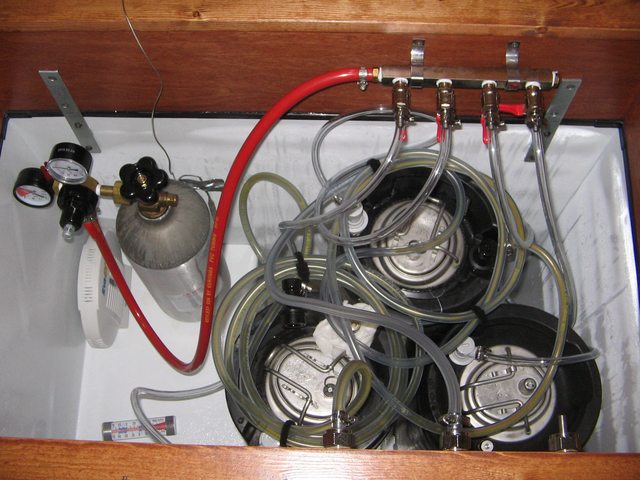
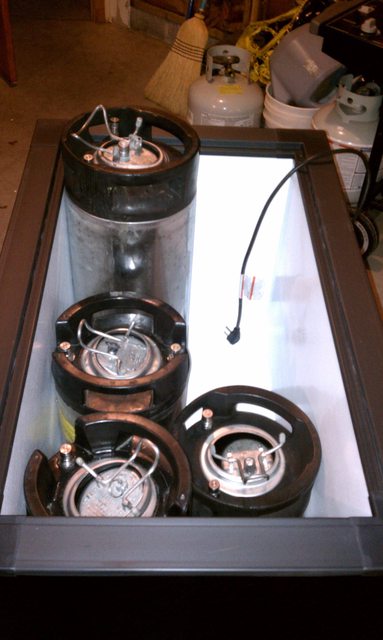
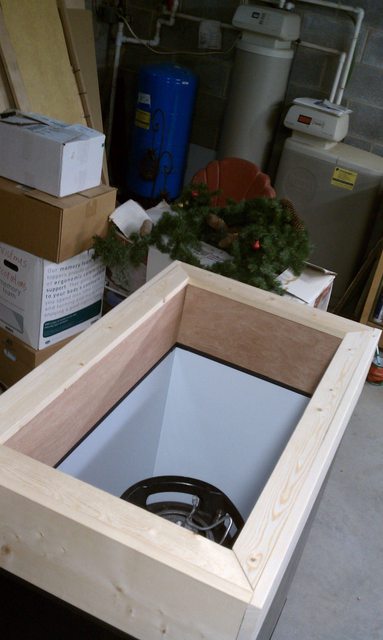
The first item of business was removing the lid and testing to make sure all 4 kegs would fit. I had 2 pepsi style kegs(tall/skinny) and 2 coke style kegs(short/fat). I was able to fit 3 on the floor and one on the hump with room for a CO2 tank.

YElgfl.jpg


The next step was to add casters to the bottom to make it easier to move around. I picked up 4 2" casters at Lowes. I attached some wood to the bottom on 4 corners in order to mount the casters.

YB5Pel.jpg


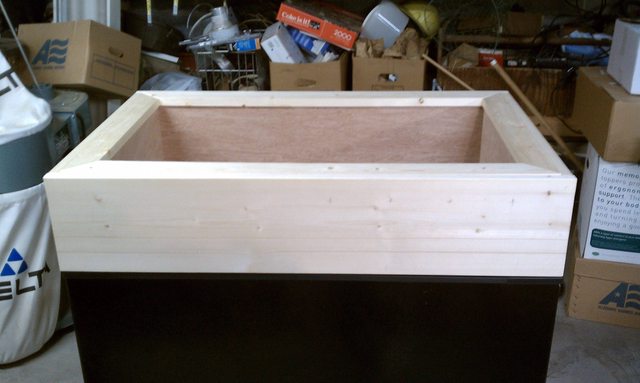
Construction of the collar began next. I went with pine for the wood. After measuring it out I came up with the bare bones version seen below.

rQy10l.jpg


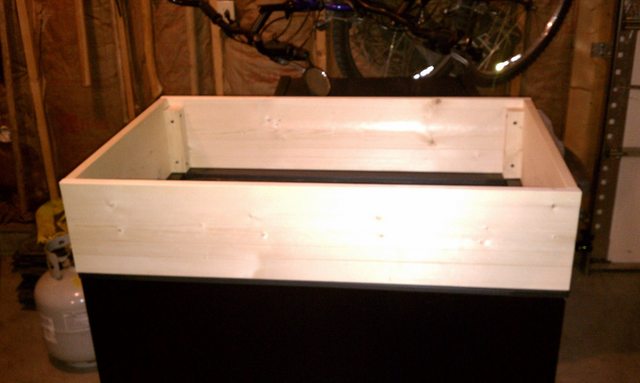
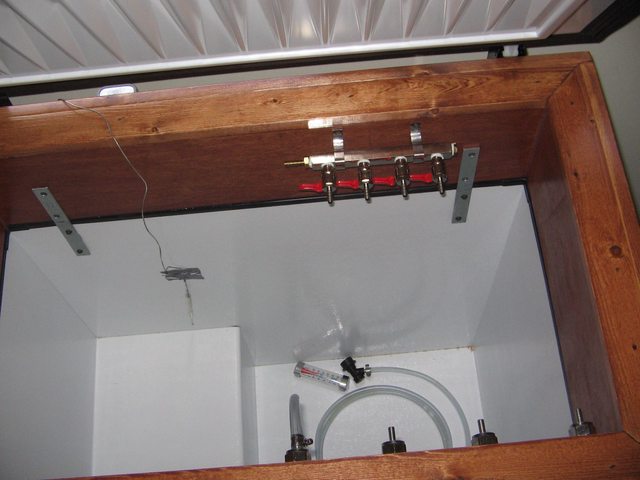
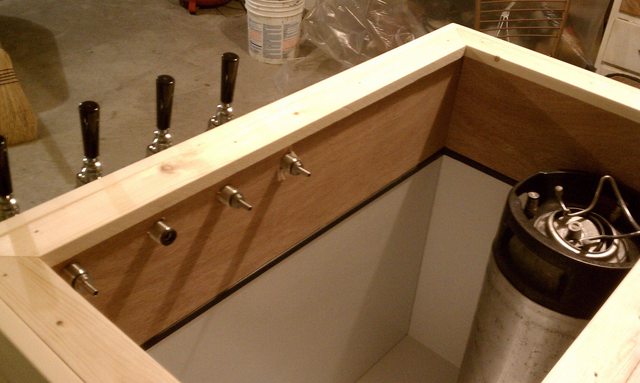
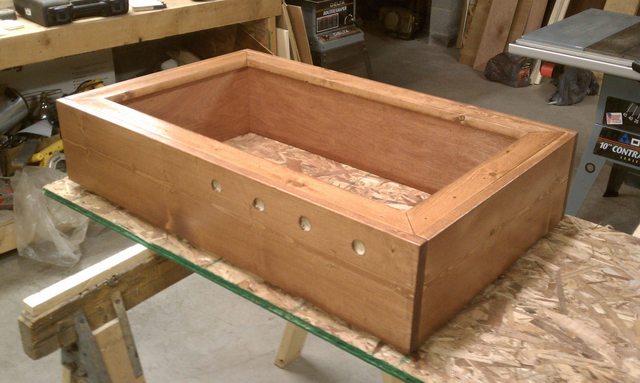
Instead of of using foam board for insulation I made the collar solid wood and used a thinner board on the insides to hide the wood. Running around the top is some more pine that sticks out slightly over the edge. The edges were cut at a 45 degree angle for presentation. All wood was glued and screwed fast with 2" screws.

JrIull.jpg


WlZekl.jpg


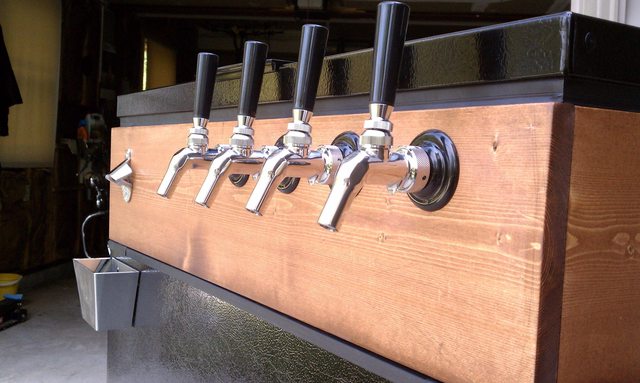
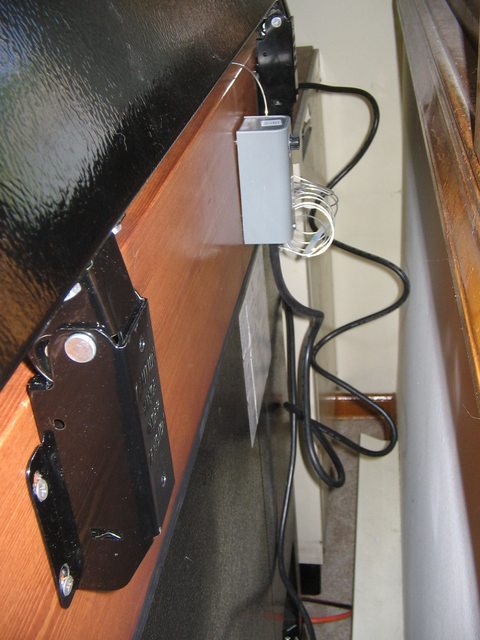
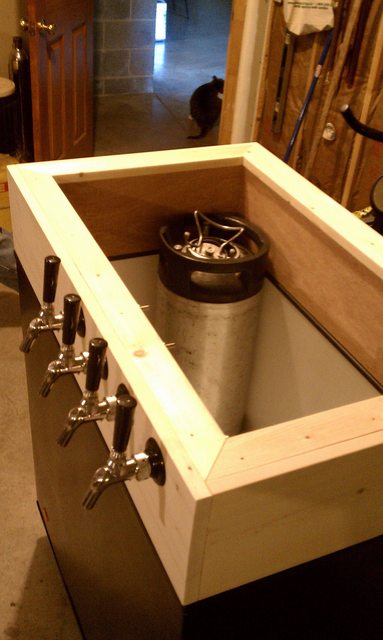
Now that the collar was constructed I measured where the holes would be and drilled 4 holes with a 7/8" bit. Below are some pictures with the faucets and shanks 'test mounted'.

DlF8Tl.jpg


ayrxwl.jpg


0kypPl.jpg


UNfmxl.jpg


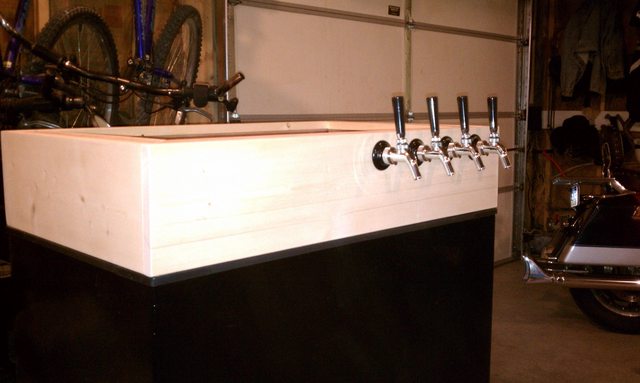
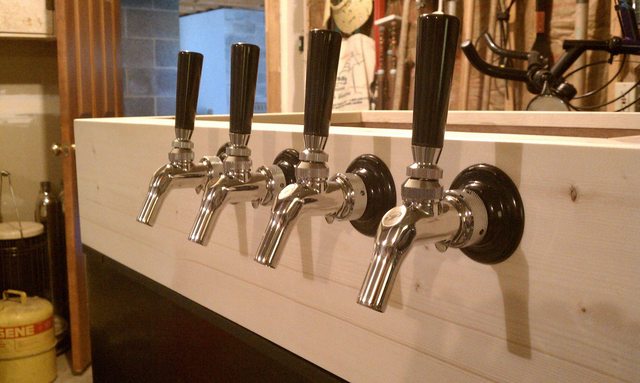
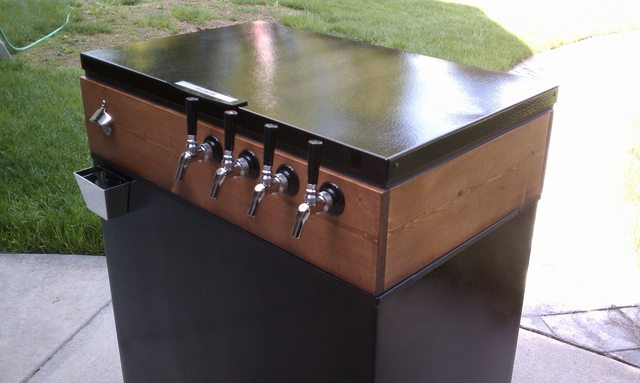
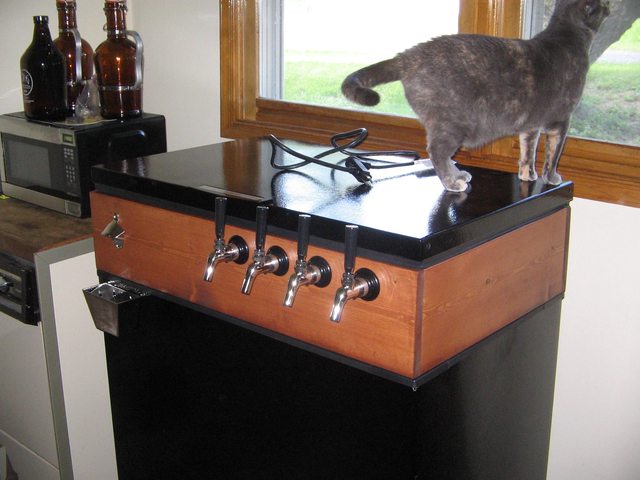
It is now time to stain the collar. The pictures below have 2 coats applied with poly coming next.

veaPMl.jpg


I should hopefully have the collar and lid attached next week along with the bottle cap opener/catcher and drip tray. I'm using the Johnson/Johnson analog temperature controller which will be mounted in the back.
 
I'm not following your method of not using foam board at all. You said you used a thinner board to hide the inside of the wood. Why would you want to do that. I'm not knocking your build but just trying to understand it. I'm building the same thing now and I'm about to make the collar, if I don't have to use foam board then that makes me happy =). Do you think not using any foam board will have any effect on the system? I would think even if you used "solid wood" that you would still need. Most builds you see on this forum, everyone is using solid wood with foam.
 
I'm not following your method of not using foam board at all. You said you used a thinner board to hide the inside of the wood. Why would you want to do that. I'm not knocking your build but just trying to understand it. I'm building the same thing now and I'm about to make the collar, if I don't have to use foam board then that makes me happy =). Do you think not using any foam board will have any effect on the system? I would think even if you used "solid wood" that you would still need. Most builds you see on this forum, everyone is using solid wood with foam.
Maybe that was just a poor choice of words on my part. The way I built the collar, there would have hardly been any room for foam insulation, so I just didn't include it. It should work fine, although may not be as efficient as some other builds. Cold air tends to stay at the bottom anyway, which is why some install fans to blow it up towards the top. Here is a thread that somewhat addresses the collar issue: https://www.homebrewtalk.com/f51/do-collars-cause-freezer-less-efficient-126199/index2.html
 
Looking good!
If you run the fan continuously then there should not be an issue with no foam board in the collar. You will lose some efficiency, but oh well.
 
Looks good. I would give the collar a test run fitting by placing it on top on the freezer before you apply the caulk. My collar was just a little out of level after construction, but the aluminum brackets/screws in addition to the caulk helped to drive it into square and keep it level and secured.
 
Looks good. I would give the collar a test run fitting by placing it on top on the freezer before you apply the caulk. My collar was just a little out of level after construction, but the aluminum brackets/screws in addition to the caulk helped to drive it into square and keep it level and secured.

Yes, I did notice it's not quite level on one side, but the brackets along with the silicone will fix that.
 
Where are you guys getting those aluminum L brakcets to mount the collar to the freezer?
 
I got almost everything completed this weekend. The only remaining items are mounting the drip tray and mounting the fan to the freezer lid. I applied 2 coats of poly and then attached the lid with silicone and some brackets. The screws that enter the inside of the freezer are at nearly the same position as the ones on the outside that mounted the hinge, and they were also very short, so as to make sure I wasn't hitting anything important.

I then re-attached the lid and mounted a few items on the inside/outside, namely: bottle cap opener and catcher(just used automotive double sided mounting tape for this), gas manifold, and temperature regulator.

wLPjUl.jpg


bQOqdl.jpg


2yuZPl.jpg


igoVrl.jpg


yLlfFl.jpg


xcVsQl.jpg


I also still want to use some chalkboard paint on the lid so I can mark which tap is serving which beer. Getting close to completion... In about 2 weeks I"ll have 3 kegs ready to go, 2 IPAs and a brown ale.
 
Wow that is very nice! make sure to post pics after you have everything hooked up inside.
 
Here are some updated pictures with 3 kegs loaded. One is ready to drink and the other 2 are carbonating.

CbJChl.jpg


RwEhUl.jpg


I should hopefully get around to installing the drip tray in another week or two, then I"m going to figure out how I'm going to use the chalkboard paint.

I can't comment yet on energy usage, but I only hear it kick on every 30 minutes and it turns off after 5 minutes.
 
Whats the white thing sitting next to the co2 tank and what's it's function?

Looks good man.
 
Get that Kitty a beer! :rockin:

Looks great; this kind of aesthetic--the black with stained wood--is definitely what I want to go for if and when I get to build mine. But first I got to move, and get the money, and convince the better half...
 
To prevent mold and mildew due to excess condensation. Despite having my temperature set around ~38 some spots on the wall of the freezer will freeze and melt.

I just finished building a keezer just like your but I never thought about it. Do you have a link to where I can purchase it?
 
Last edited by a moderator:
It's not actually powered. It's a big pack of dessicant, like the stuff in vitamin bottles.

Just sucks up the humidity right from the air.

Then, when the indicator (or whatever) suggests it's "full", you pull it out of the fridge and plug it in. This warms it slightly and dries it back out "recharging" it.

Come to think of it, I should ge tone of htese for our deep freeze. Starting to get some ice in it.
 
Just a different method, I used construction adhesive and applied it to the bottom of the collar, set that in place and then i purchased 4 corner brackets that are small and shaped like a triangle with lips. In the center of the triangle there is a hole, you screw that to the freezer and then on the lips there is a hole in each one so you screw the lips to the collar. Then I applied silicone to the inside and outside of the bottom edges of the collar to prevent air from entering or escaping.
 
Are those mending plates on the back wall screwed in??? :eek:

if they are, you were extremely lucky - the refrigerant lines wrap around the inside wall and could easily have been pierced with a screw, rendering the entire device unusable.

I noticed that too. Lucky or skilled? I have seen how people locate refrigerant tubes with alcohol and corn starch elsewhere on this forum. Otherwise I am with Hang Glider. There would have been no recovery from puncturing a line here.
 
Back
Top