So you know those projects that you begin with full intentions of being a simple, quick project but then somewhere, somehow its becomes much more than you originally thought. Yeah, this is one of those projects for me!
I picked up a Insignia 7.0cf chest freezer at Best Buy when they were on super sale back during their 4th of July sale. My initial plan began with just wanting to build a collar and be done with it. I starting looking around on the internet for general ideas... this is where everything changed. I got the general build from a YouTube video by Regular Dude's Garage.
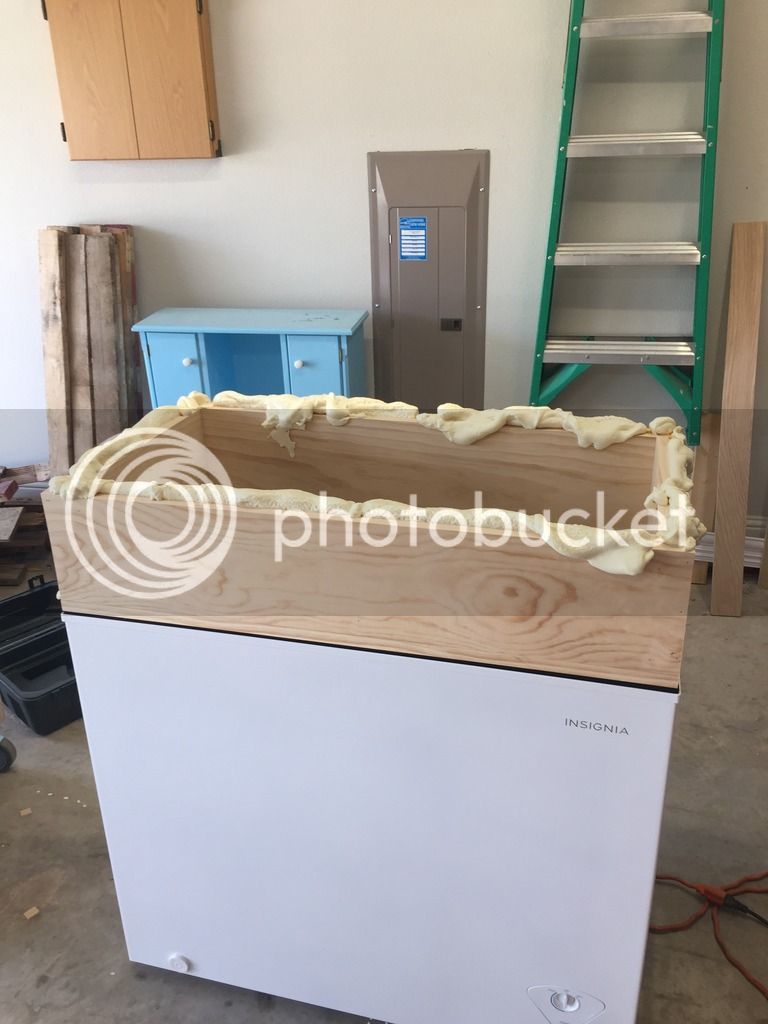
The collar was built by two 1x8 pine board boxes that were set into one another, capped and then injected with expandable foam. The collar is set on some neoprene weatherstripping that has adhesive on one side.
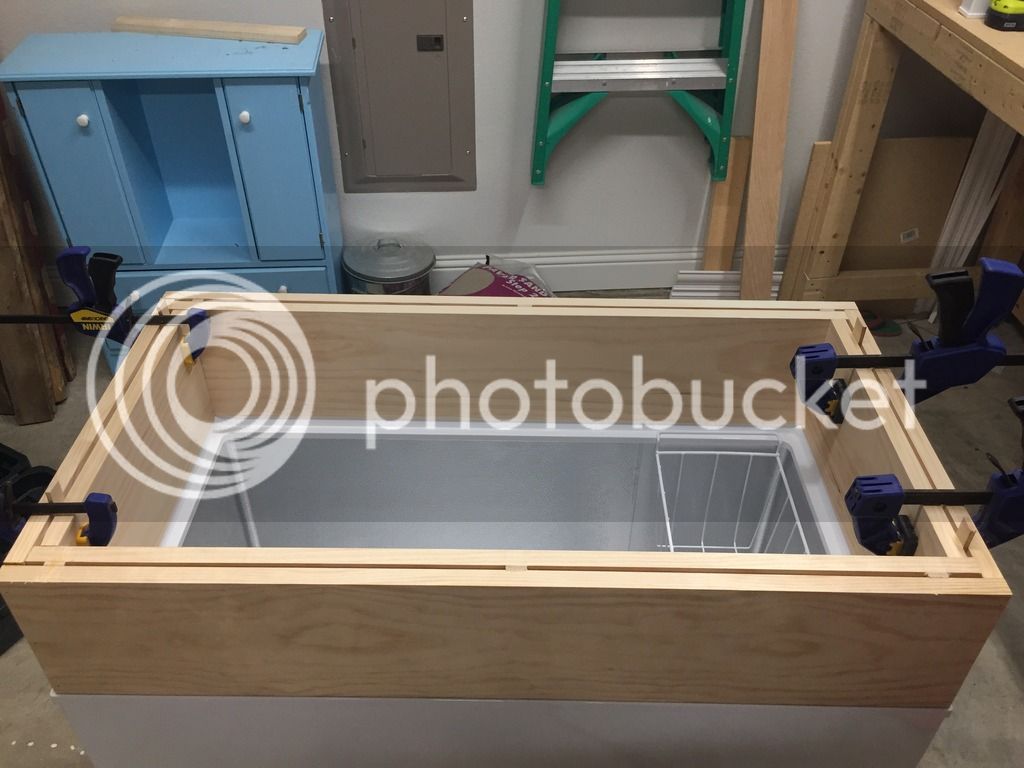
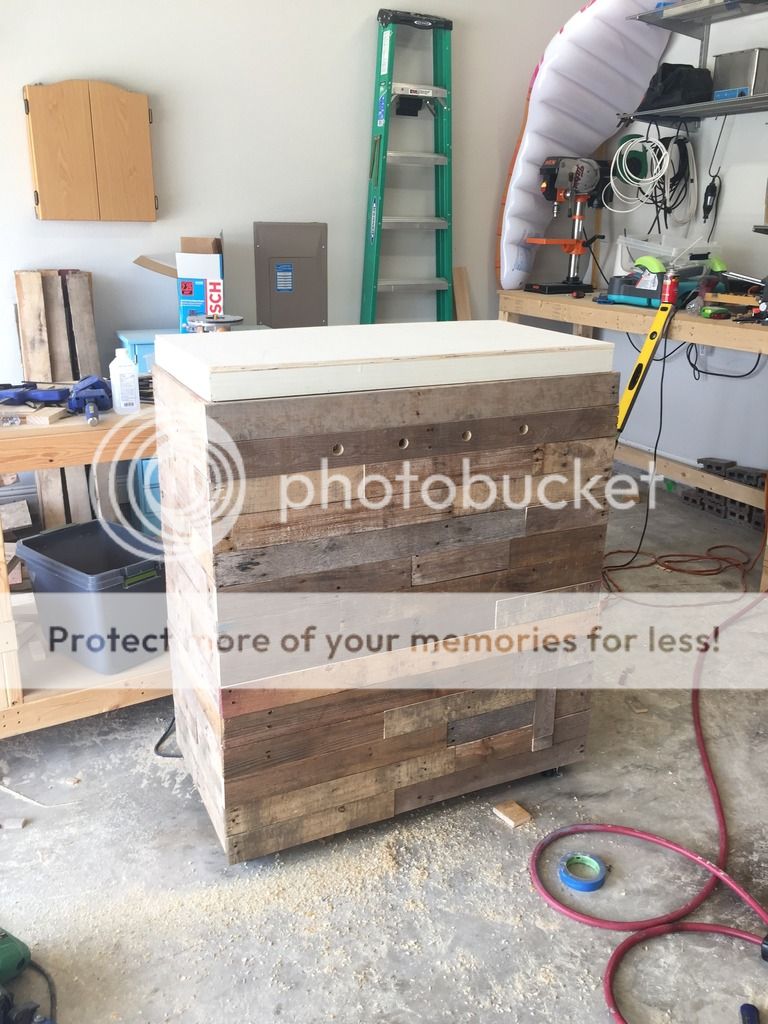
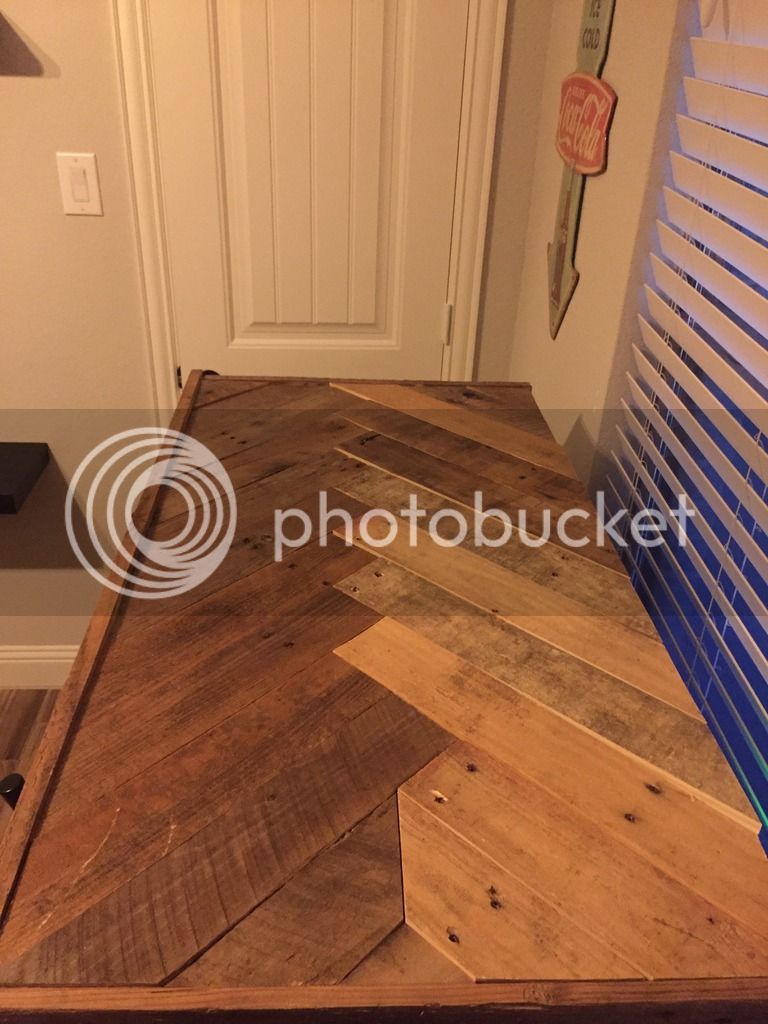
I picked up some 1/2" plywood to be used for a surrounding 3 sided shell. The back is still open. I made a caster base so the whole unit could be wheeled wherever I want it to go. This will be placed in my office, but I can easy bring it out to our living area during get-togethers. I picked up about 4 pallets and cut each board down to a 3" width at various lengths. Once the body was finished I drilled through the collar to handle 4 taps. I then attached the pallet wood to the plywood shell with glue and pin nails. I did the same for the lid, but chose to do a herringbone pattern at the top.
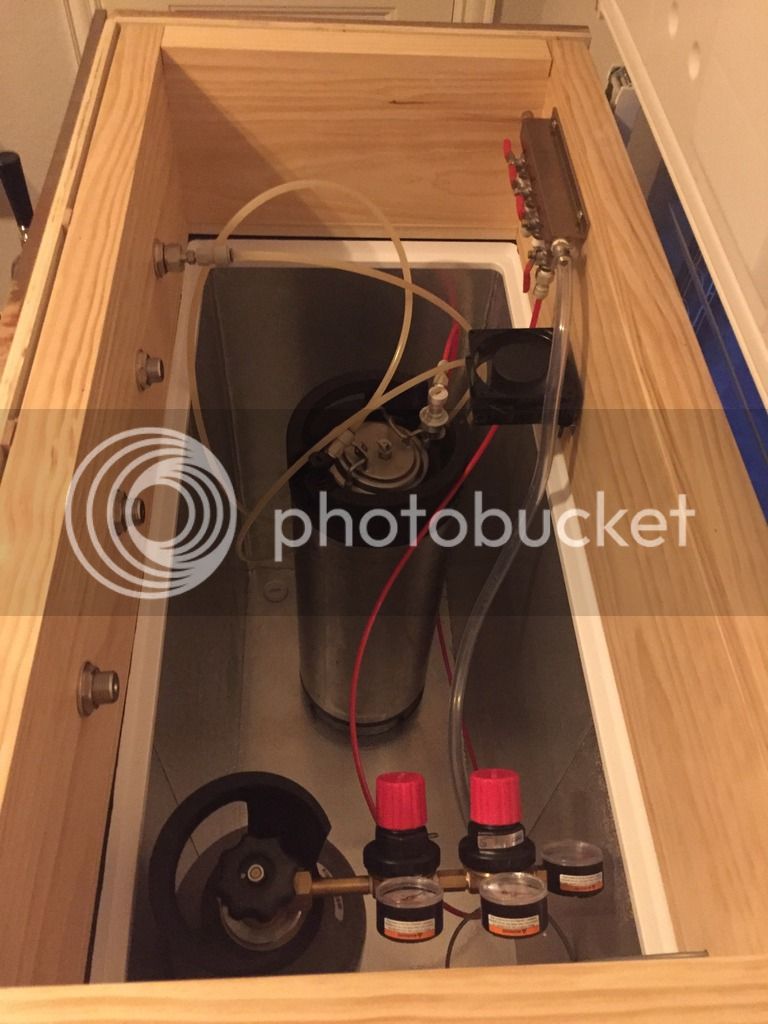
I mounted a 4-way manifold and a fan that came with an AC plug-in I got off of Amazon. To control the temperature, I installed a Johnson Controller. Most of the gas and beer connections are made with John Guest fittings.
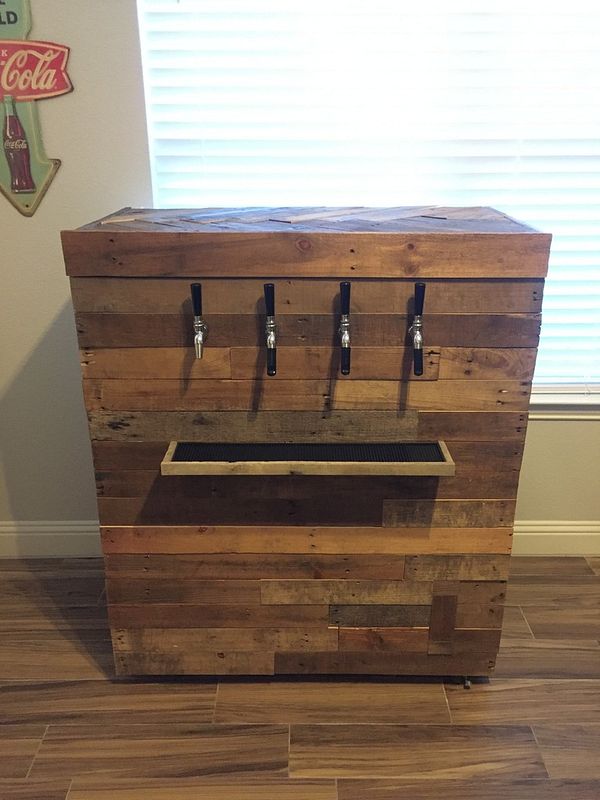
Here's the final product. I'm pretty pleased with it overall. I think if I were to change anything, it would be to have a 4" or 6" collar, as the wheels and 1x3 caps added to the height. It's not crazy big, but it is a little taller than I would like. Now time to fill 'er up!!!!
I picked up a Insignia 7.0cf chest freezer at Best Buy when they were on super sale back during their 4th of July sale. My initial plan began with just wanting to build a collar and be done with it. I starting looking around on the internet for general ideas... this is where everything changed. I got the general build from a YouTube video by Regular Dude's Garage.
The collar was built by two 1x8 pine board boxes that were set into one another, capped and then injected with expandable foam. The collar is set on some neoprene weatherstripping that has adhesive on one side.
I picked up some 1/2" plywood to be used for a surrounding 3 sided shell. The back is still open. I made a caster base so the whole unit could be wheeled wherever I want it to go. This will be placed in my office, but I can easy bring it out to our living area during get-togethers. I picked up about 4 pallets and cut each board down to a 3" width at various lengths. Once the body was finished I drilled through the collar to handle 4 taps. I then attached the pallet wood to the plywood shell with glue and pin nails. I did the same for the lid, but chose to do a herringbone pattern at the top.
I mounted a 4-way manifold and a fan that came with an AC plug-in I got off of Amazon. To control the temperature, I installed a Johnson Controller. Most of the gas and beer connections are made with John Guest fittings.
Here's the final product. I'm pretty pleased with it overall. I think if I were to change anything, it would be to have a 4" or 6" collar, as the wheels and 1x3 caps added to the height. It's not crazy big, but it is a little taller than I would like. Now time to fill 'er up!!!!