• Please visit and share your knowledge at our sister communities:
  • If you have not, please join our official Homebrewing Facebook Group!

    Homebrewing Facebook Group

Kegerator restoration...new to this...

Homebrew Talk

Help Support Homebrew Talk:

This site may earn a commission from merchant affiliate links, including eBay, Amazon, and others.

AMH_

Well-Known Member
Joined
Nov 22, 2015
Messages
49
Reaction score
3
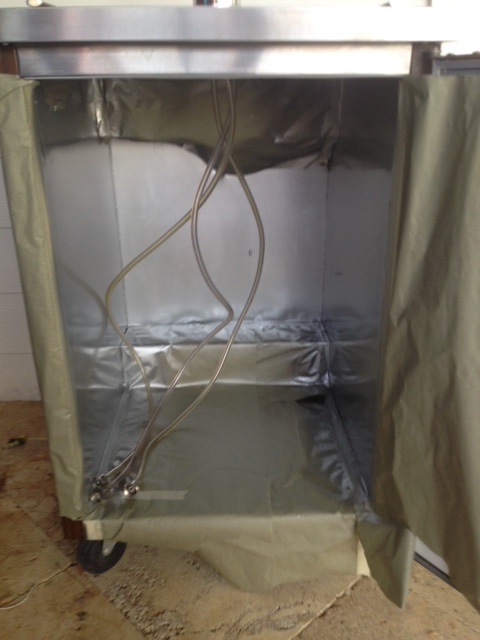
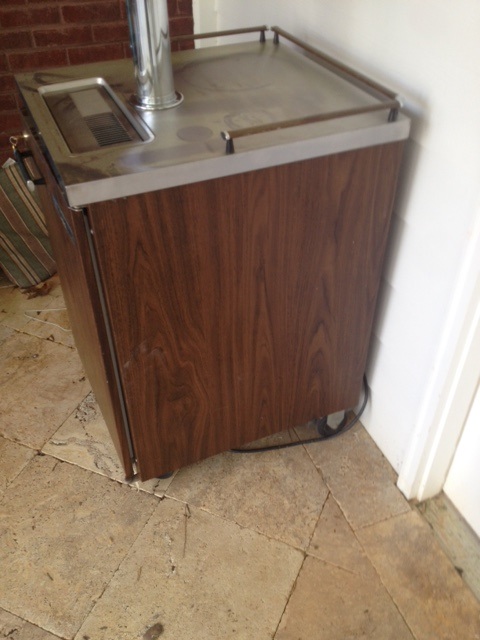
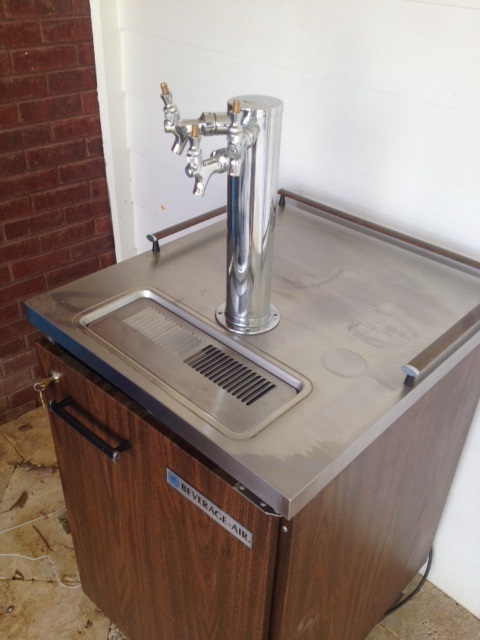
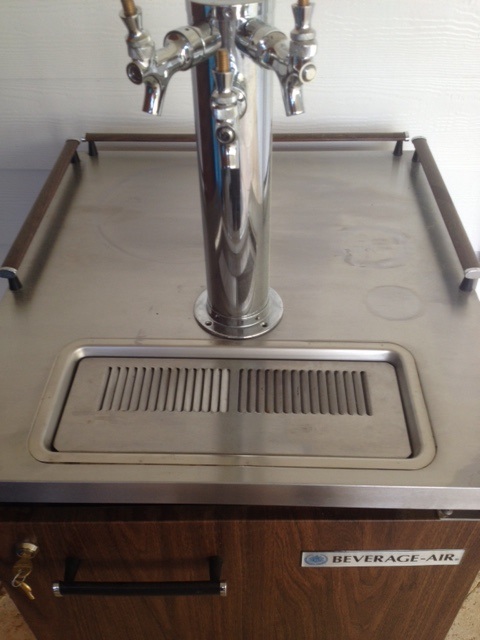
After a bit of a hunt, I've re-acquired my grandfathers Kegerator.

It's been unused for years, and is currently in rough shape. Looking for some tips and general knowledge on a restoration. I've yet to plug it in to see how it works as a fridge.

Overall. Looking to clean it up, install a 2-3 tap system and possibly build it into an enclosure.


I'll update this thread with my progress.

Cheers
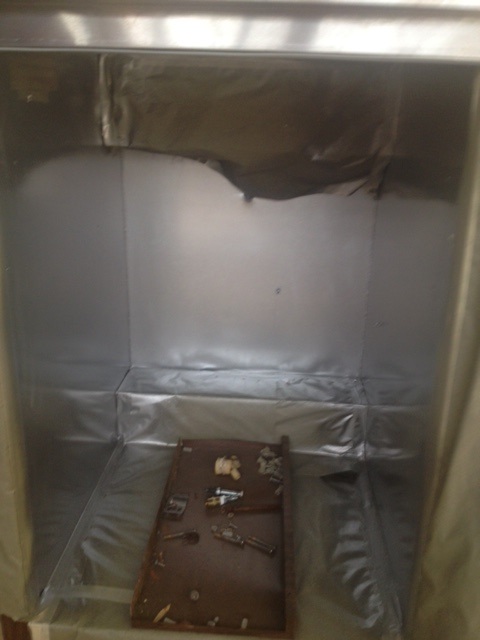
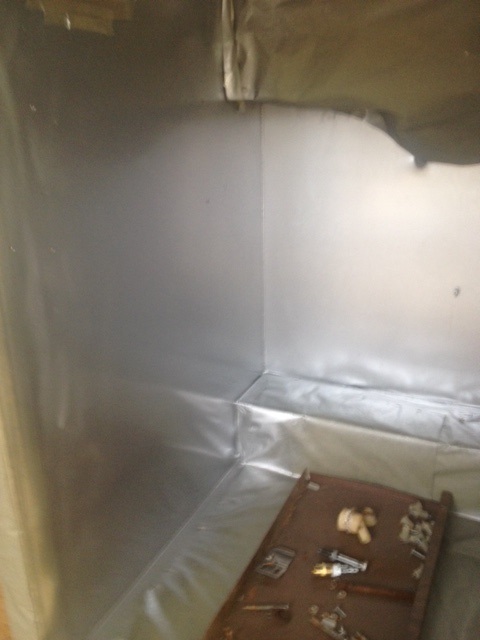
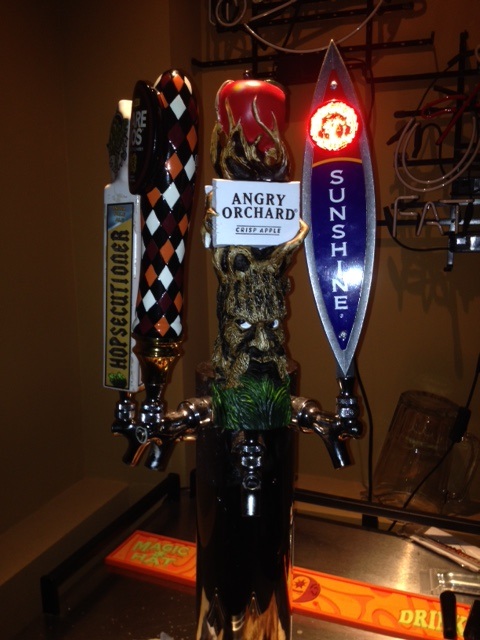
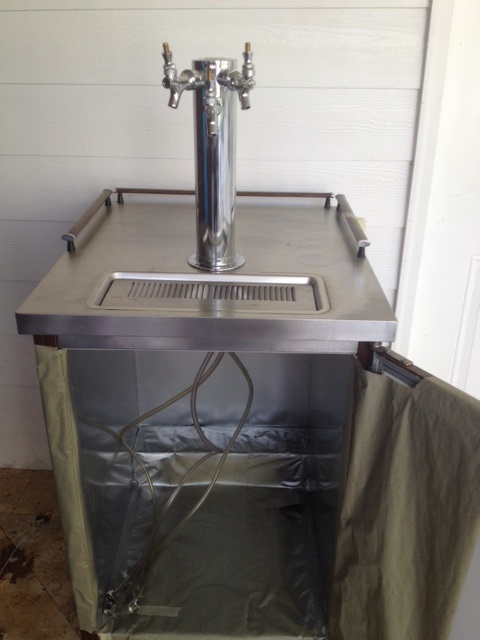
View attachment ImageUploadedByHome Brew1461704931.946312.jpgView attachment ImageUploadedByHome Brew1461704976.261915.jpgView attachment ImageUploadedByHome Brew1461704997.147323.jpgView attachment ImageUploadedByHome Brew1461705017.263970.jpgView attachment ImageUploadedByHome Brew1461705029.900781.jpg
 
I would do absolutely nothing to that unit until it has been run and fully demonstrated it is up to the task.

An old refrigeration unit is bad enough, but one that hasn't been run in years may no longer hold pressure in the lines...

Cheers! (and good luck!)
 
I would do absolutely nothing to that unit until it has been run and fully demonstrated it is up to the task.


An old refrigeration unit is bad enough, but one that hasn't been run in years may no longer hold pressure in the lines...


Cheers! (and good luck!)


For sure, that's step one.
It has sentimental value otherwise it likely wouldn't be worth the effort.

It will be a few weeks likely before I can test it out. I'm moving so it's sadly not on the priority list.
 
Triple that! do nothing until you plug it in and make sure it gets cold. I would also leave it plugged in while you do your research, this will put it though the paces for a few days at the very least.
 
I have a very similar kegerator, a BM-23 that looks almost identical except that it was sold as a Superior instead of a BeverageAir. If the compressor works, you should have a nice kegerator. Mine cleaned up well. Good luck!
 
Any idea what that yellow pool hose looking tube coming from the top back?
 
That's the tower cooler. The evap fan creates enough pressure in the plenum that they can plumb some of it up the tower column to help keep the faucet cool. When the beer line got stripped the cooler hose got pulled out, too...

Cheers!
 
IMHO if it was stored in a decent environment without any food inside it's likely ok. I tried to rescue an old stand up freezer from my grandparents old house. It had been unplugged for a few years with food inside. (My fault) I spent an hour or more cleaning only to find that the lines inside rusted and leaked the freon out.

I'll be watching this because I just picked up a kegerator that hasn't run in six years or so, and has a lot of mold inside.
 
If it fires up and gets kinda cold but not enough it could just be the thermostat that your going to override anyway.I thought I bought a dud fridge but using an Inkbird I can get it freeze if I wanted.
 
That's the tower cooler. The evap fan creates enough pressure in the plenum that they can plumb some of it up the tower column to help keep the faucet cool. When the beer line got stripped the cooler hose got pulled out, too...


Cheers!


Perfect thanks.
 
Quick update.

It works well as a refrigerator. Plugged it in for the first time today in my hot and humid garage (about 85f)
And put a bottle of water in it that was room temp.

Few hours later the bottle is perfectly cold. Didn't get specific with temps or test the temperature control as I will likely add a new controller.

Moving in about a month. Once that happens this becomes more of a priority.

Good news so far.

Total cost to date : $0
 
Finally started. Today was restoration day 1.

Started with removal of all old hoses, interior shelves and any aftermarket additions my uncle or grandfather may have installed.

After that I noticed the drip tray's internal drain system was pretty mouldy. I took out the catch pan, broke the drain spout in the process.
Found a pile of mouldy foam insulation under the pan, so I cut all of that out.

Rounded out the day with removing the dented bars on the top and taking out the tower.

Did some sanding on the inside and some rust removal on the outside too.

I'll have more time tomorrow. View attachment ImageUploadedByHome Brew1474142002.440071.jpgView attachment ImageUploadedByHome Brew1474142019.453874.jpgView attachment ImageUploadedByHome Brew1474142029.088926.jpgView attachment ImageUploadedByHome Brew1474142056.473338.jpgView attachment ImageUploadedByHome Brew1474142071.540741.jpgView attachment ImageUploadedByHome Brew1474142081.776785.jpgView attachment ImageUploadedByHome Brew1474142093.477081.jpg
 
FWIW The hole in the drip tray is useless.If for whatever reason it becomes an issue abandon it.The 3 drips at most that come out of a finished pour will evaporate LONG before it needs to drain somewhere.The sticky bug magnet tray left behind will need to be cleaned long before the drain comes into play.
 
I picked up a vintage 1983 Superior kegerator (rebranded Beverage Air BM23C) for free on Craig's List 3 weeks ago. The Seller said it needed a new compressor.
I got it home and took the rear cover off. First think I noticed was the condenser fan was not working so I unplugged it. Next I checked the resistance on the 3 compressor pins and all was good. I plugged it back in and let it run for 5 minutes and the right parts were getting cool and the right ones were getting hot. I decided to replace the condenser fan motor for $42.
OK 3 days later the motor arrives and I replace the bad one. Now I ran it for an hour with a refrigerator thermometer and after an hour it was down to 40 degrees, so I let it run for 3hrs and it was down to 33 degrees.
I have since purchased a new door gasket $24, new draft tower air tube $21 and a new lock assembly for $32.
I used baking soda and a scotchbrite pad to clean the inside and the SS top. My interior was not extremely rusted just a little bit along the side walls 1/4 inch up and at the front by the door maybe 3/4 inch high.
I am expanding the 2.5 inch draft column hole to 3 inches and changing out the column to a standard 3 inch with 3 draft spouts.
I will also be painting the interior walls with Rust-oleum Titanium Silver as it is as close to SS as I can get.

IMG_1900.JPG


IMG_1898.JPG
 
Dang this is looking cool! Cant wait to see the finished product. Definitely along for the ride
 
OK. So I have about $120 into this kegerator plus the 3 spout draft tower from a previous upgrade to my other Beverage Air BM23.
My first BM23 kegerator had the original 3 inch single spout and I upgraded it to a 3 inch 3 spout tower and then later upgraded it again to a 4 inch 4 spout tower. I also converted from Sankey connectors to Ball Lock connectors. I'll post more photos tomorrow. I found a photo of my current BM23 with the 4 spout tower.

IMG_1902.JPG
 
After a bit of a hunt, I've re-acquired my grandfathers Kegerator.

It's been unused for years, and is currently in rough shape. Looking for some tips and general knowledge on a restoration. I've yet to plug it in to see how it works as a fridge.

Overall. Looking to clean it up, install a 2-3 tap system and possibly build it into an enclosure.


I'll update this thread with my progress.

Cheers
View attachment 351968View attachment 351969View attachment 351970View attachment 351971View attachment 351972

Your system has been recharged in the past as evidenced by the recharge ports. It has R12 Freon.
 
Here are the additional photos. My project BM23C seems to be pristine as compared to AMH's project.
Before you spend any money and minimal time on a restoration please take the time to check the health of the compressor. This can be done with a multimeter either analog or digital. On the side of the compressor there will be a place that contains the starter relay, thermal protection and possibly the start capacitor. There are 3 pins on the side of the compressor and you need to take a resistance/continuity reading - common (usually the top pin), loop 1 and loop2. There should be 3 different ohms readings - c to L1 2.9 ohms, c to L2 9 ohms and L1 to L2 11.9 ohms (readings are from my compressor). I also checked the continuity first as my multimeter has a tone for continuity. If the continuity or resistance measurement fails you have a bad compressor. Start looking for another project.
Next look for the signs of a refrigerant leak - wet oily spots, new shinny spots on the copper, corrosion of the copper components and refrigerant recharge ports. Most refrigerators do not have installed recharge ports. If it does then it has likely been recharged. It may have a slow leak. Any compressor from 1994 or older is using R12 refrigerant and it is quite expensive to recharge since it was outlawed in 1994. Conversion to a newer refrigerant is expensive also.
If everything checks out then proceed to see if the unit cools making sure all fans are working. Check the thermostat by setting it to the warmest and turn to coldest while plugged in. You should here the compressor kick on. If not you may have a bad starter relay or capacitor. Be careful with the capacitors as they can hold voltage for quite some time. I do not recommend shorting across the capacitor terminals as I have seen that ruin perfectly good capacitors. Let it sit or ground 1 leg of the capacitor to ground.
To test cooling the best way is to place a 5 gal bucket of water in the kegerator and let it run and take temp measurements at set periods of time 1hr, 2hr, 3hr to see if it is cooling properly. If it does not get cold enough (34 - 38) you may have a bad thermostat. There should be minimal to no frost build up on the external components while the compressor is running. If there is you may have a low refrigerant problem.
Also when transporting any refrigerator or freezer try to keep it upright. If it has to be transported on its side let it sit for at least 24hrs in an upright position. There are several things that can and do happen - oil can flow out of the compressor into other areas of the system and debris can be carried into other parts causing a failure. For instance debris can enter the capillary tube or dryer tube thereby blocking the flow of refrigerants and now you have a costly repair job.

IMG_1903.JPG


IMG_1904.JPG


IMG_1905.JPG


IMG_1906.JPG


IMG_1907.JPG


IMG_1908.JPG
 

Latest posts

Back
Top