
I know this has been done a few times, but I thought I would put these pictures to good use by showing how I polished the metal. I haven't been brewing long and I think this is my first or second post, but I'm very capable and have done something like this before. This will be my first keg and I hope to have another soon and eventually have them on display via a wine fridge conversion that I'm hoping to do in the future. The kegs being polished will add a very nice look to the setup... more to follow on that. With out further a due.
First you need a Corney Keg.
Tools/Materials:
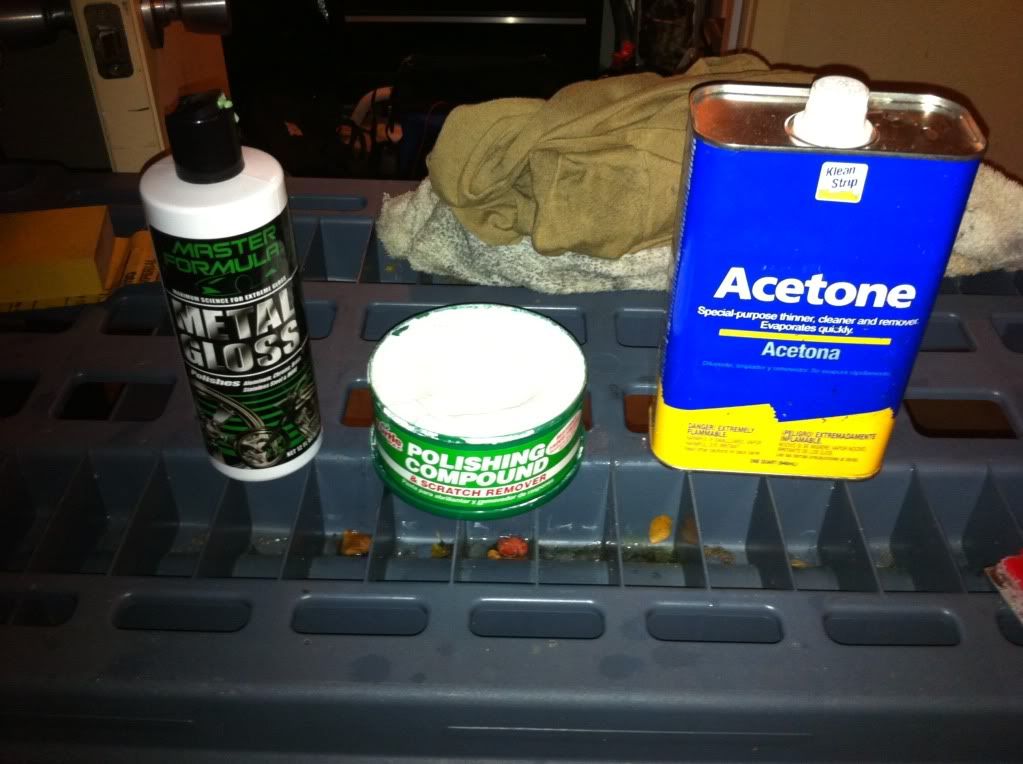
Heat gun or Hair dryer - removing stickers
Acetone
Towels - for clean up and polishing
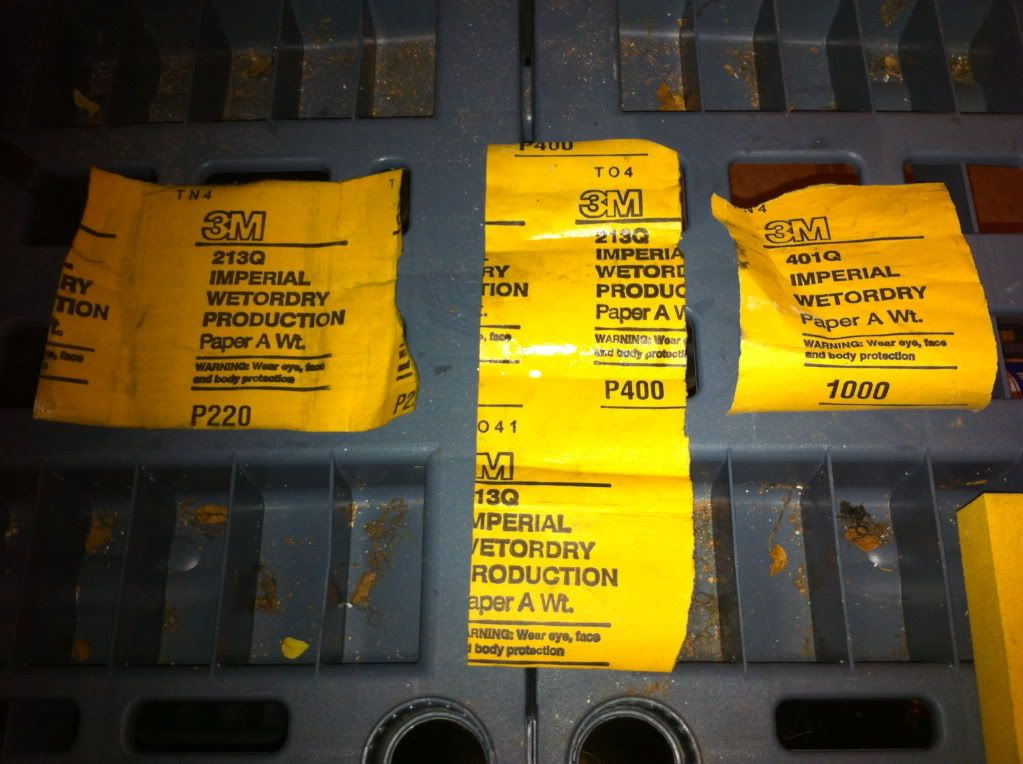
200/220 grit wet/dry sand paper
400 grit wet/dry sand paper
1000 grit wet/dry sand paper
bucket
dish soap
Sanding block
Polishing Compound
Metal Polish

This is how the keg looked after I striped the stickers off using a heat gun and the acetone to remove any remaining residue from the stickers. You'll notice that the right side of the keg is very shiny in a small area, that was a test area to motivate me to keep polishing.")
The following images show the products that I used to accomplish the end result.
Step 1:
Using a heat gun or hair dryer, move the heat back and fourth across any stickers to aid in releasing the adhesive. While heating, using the flat edge of a paint stirrer or a razor blade, gently scrap the material away from the metal. Don't worry about getting all on the residue off with the scrapper, that is where the acetone comes in to play. Once the stickers are removed, soak an old towel or shop towel with acetone and wipe the areas where the stickers used to be to remove any remaining adhesive.

Step 2:
Fill a bucket with approx half a gallon of warm water and a few drops of dish soap. This will allow the sand paper to polish the surface without gouging it, acts as a lubricant, and cleans the metal. Fold one of the sheets of 220 grit in half twice so you can divide it into 4 strips. Place a strip of 220 in the bucket and get it good and wet, wrap it around a block or sponge and get to sanding. IMPORTANT, sand in a back a fourth motion, not in circles.
When you have sanded the entire keg and it has a brushed appearance you will repeat with a 400 grit and finally with 1000. It is also important to frequently dip the sand paper into the soap water to clean off the paper and also to add water back to the work surface. When you begin with the 1000 grit, you will begin to notice your reflection becoming clear. Have a beer and take your time through each step so it is easier in the end to get a mirror shine.
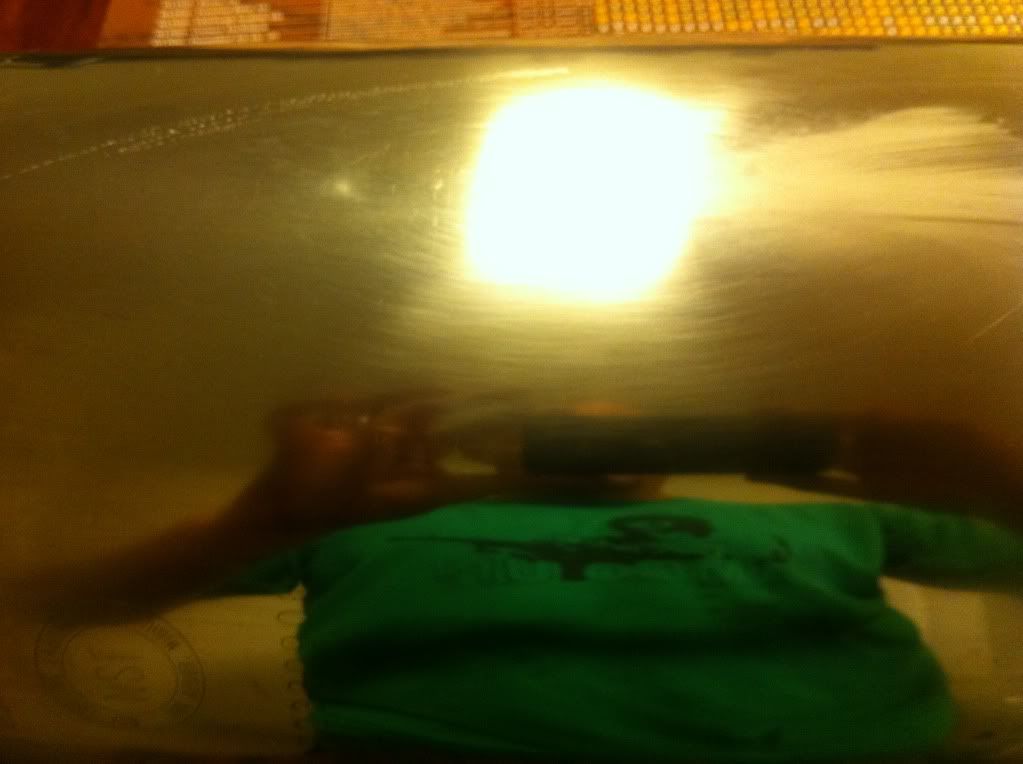
This picture shows a gradual change from 200 to a 1000 then a highly polished area.
Step 3:
Now that you have gotten the keg shining nicely with the 1000 grit paper and it feels as though there is little resistance while sanding, you can now use polish to bring out the mirror shine. Wipe down the entire surface with clean water to remove any remaining grit left over from sanding. Using micro fiber or t-shirt material, apply the polishing compound and work it in little circles, I always focus on a 6" x 6" area at a time. When polishing in the small circles, work the 6" x 6" area in a box like pattern and over lap it several times until it begins to turn gray or black, ten wipe away with a clean microfiber cloth or t-shirt material. Do this for the entire surface. Finally, using the metal polish or even liquid/paste car polish, following the same 6"x6" box pattern, in small circles, complete the final polish. Approximate time is 3 hours from start to finish. Using a grinder with polishing wheels or high speed buffer will also improve the shine and can help to speed the process along.
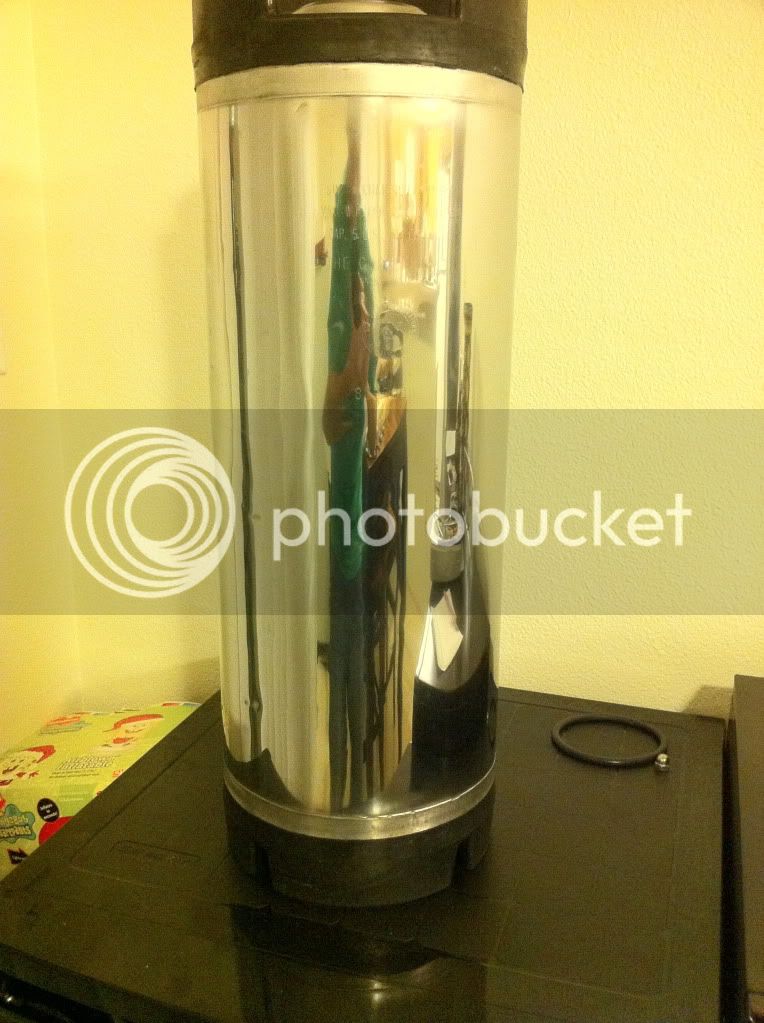
I did it all by hand and this is the result. I will go over it again with a polishing wheel, but as you can see, besides the dings from it being used over the years, it is a mirror!
Tell me what you think!
First you need a Corney Keg.
Tools/Materials:
Heat gun or Hair dryer - removing stickers
Acetone
Towels - for clean up and polishing
200/220 grit wet/dry sand paper
400 grit wet/dry sand paper
1000 grit wet/dry sand paper
bucket
dish soap
Sanding block
Polishing Compound
Metal Polish
This is how the keg looked after I striped the stickers off using a heat gun and the acetone to remove any remaining residue from the stickers. You'll notice that the right side of the keg is very shiny in a small area, that was a test area to motivate me to keep polishing.
The following images show the products that I used to accomplish the end result.
Step 1:
Using a heat gun or hair dryer, move the heat back and fourth across any stickers to aid in releasing the adhesive. While heating, using the flat edge of a paint stirrer or a razor blade, gently scrap the material away from the metal. Don't worry about getting all on the residue off with the scrapper, that is where the acetone comes in to play. Once the stickers are removed, soak an old towel or shop towel with acetone and wipe the areas where the stickers used to be to remove any remaining adhesive.
Step 2:
Fill a bucket with approx half a gallon of warm water and a few drops of dish soap. This will allow the sand paper to polish the surface without gouging it, acts as a lubricant, and cleans the metal. Fold one of the sheets of 220 grit in half twice so you can divide it into 4 strips. Place a strip of 220 in the bucket and get it good and wet, wrap it around a block or sponge and get to sanding. IMPORTANT, sand in a back a fourth motion, not in circles.
When you have sanded the entire keg and it has a brushed appearance you will repeat with a 400 grit and finally with 1000. It is also important to frequently dip the sand paper into the soap water to clean off the paper and also to add water back to the work surface. When you begin with the 1000 grit, you will begin to notice your reflection becoming clear. Have a beer and take your time through each step so it is easier in the end to get a mirror shine.
This picture shows a gradual change from 200 to a 1000 then a highly polished area.
Step 3:
Now that you have gotten the keg shining nicely with the 1000 grit paper and it feels as though there is little resistance while sanding, you can now use polish to bring out the mirror shine. Wipe down the entire surface with clean water to remove any remaining grit left over from sanding. Using micro fiber or t-shirt material, apply the polishing compound and work it in little circles, I always focus on a 6" x 6" area at a time. When polishing in the small circles, work the 6" x 6" area in a box like pattern and over lap it several times until it begins to turn gray or black, ten wipe away with a clean microfiber cloth or t-shirt material. Do this for the entire surface. Finally, using the metal polish or even liquid/paste car polish, following the same 6"x6" box pattern, in small circles, complete the final polish. Approximate time is 3 hours from start to finish. Using a grinder with polishing wheels or high speed buffer will also improve the shine and can help to speed the process along.
I did it all by hand and this is the result. I will go over it again with a polishing wheel, but as you can see, besides the dings from it being used over the years, it is a mirror!
Tell me what you think!


![Craft A Brew - Safale S-04 Dry Yeast - Fermentis - English Ale Dry Yeast - For English and American Ales and Hard Apple Ciders - Ingredients for Home Brewing - Beer Making Supplies - [1 Pack]](https://m.media-amazon.com/images/I/41fVGNh6JfL._SL500_.jpg)


