• Please visit and share your knowledge at our sister communities:
  • If you have not, please join our official Homebrewing Facebook Group!

    Homebrewing Facebook Group

"Keezer Soze" (yet another keezer build)

Homebrew Talk

Help Support Homebrew Talk:

This site may earn a commission from merchant affiliate links, including eBay, Amazon, and others.
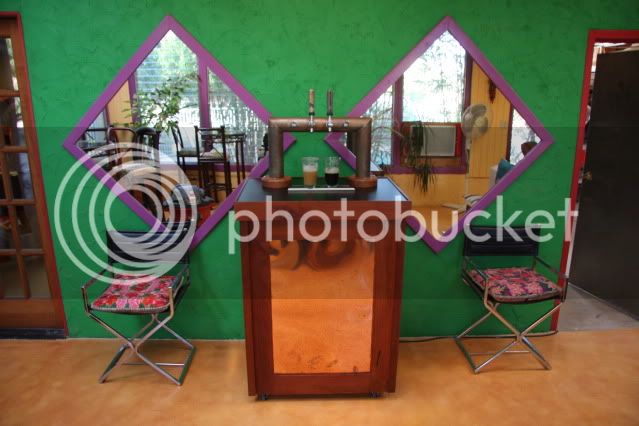
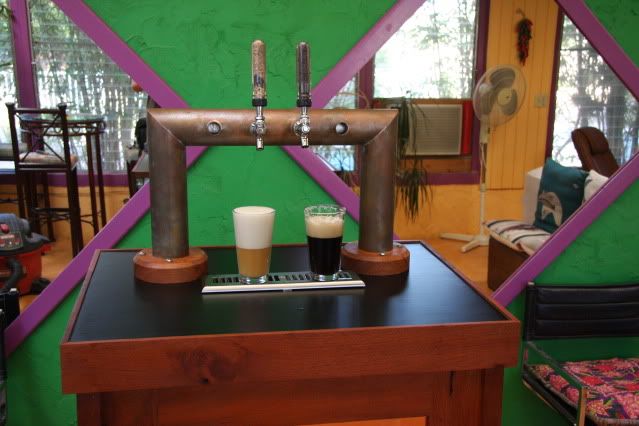
Looks Great! Not to be a downer, but won't the copper oxidize pretty quickly from condensation?

We still haven't decided if we want to let the copper patina naturally, or if we should polish it up and then seal it. I'm leaning towards the polished look.
 
Do you happen to know/remember what the brand of antique mini fridge that you gave to your friend was? It looks pretty cool.

It was made by Indesit which I believe is an Italian company. It looked like maybe it was made in the 50's or 60's, but it's hard to tell for sure. There is an appliance guy near me that specializes in retro applicances, and he has the coolest old Philco fridge from the 40's that I would love to convert into a kegerator. I'm trying to talk my brewing partner into buying it.
 
Haven't really had any time to finish the keezer, but I did at least get it functional for an upcoming party. Here are pics of the first pours in it's temporary home at my Dads (where the party's being held). Hefe on the left, and Black IPA on the right. Still need to balance the lines and install the tower cooling fan before the party. Got some porter and IPA that should be ready to go in soon to make use of all four taps. I hope the polish the tower, re-shape the tower base rings, pour the bar-top epoxy, and get 4 perlick faucets next month. Still not sure what I'm going to do for tap handles. The yeast vials full of malt (idea stolen from here) work fine for now.

Keezer011.jpg


Keezer005.jpg
 
Awesome! It is beautiful as is, but a little more cleaning up will make it amazing!
 
awesome build my friend! love the pass-through, even in it's current non-polished state. i'm sure polished would be bling sweet too
 
Haven't really had any time to finish the keezer, but I did at least get it functional for an upcoming party. Here are pics of the first pours in it's temporary home at my Dads (where the party's being held). Hefe on the left, and Black IPA on the right. Still need to balance the lines and install the tower cooling fan before the party. Got some porter and IPA that should be ready to go in soon to make use of all four taps. I hope the polish the tower, re-shape the tower base rings, pour the bar-top epoxy, and get 4 perlick faucets next month. Still not sure what I'm going to do for tap handles. The yeast vials full of malt (idea stolen from here) work fine for now.

Keezer011.jpg


Keezer005.jpg


the one on the right looks great

the left looks like a shook up Hefeweizen keg! Lol

what is the beer on the left?
 
the one on the right looks great

the left looks like a shook up Hefeweizen keg! Lol

what is the beer on the left?

It's a Widmere Hefe clone which was my compromise for the BMC drinkers who'll be at the party. I was just seeing if they poured halfway decent, and I'm sure that was mostly the yeast from the bottom of the keg.
 
Nice build! I hope that one day I can put together something that looks half as good.

BTW, The Usual Suspects is a great movie. :rockin:
 
Very nice looking build! Keep the pics coming. Is that the ebay temp controller or a Love? :tank:

It's the e-bay model, and it works great so far. I think I might get another one to replace the single stage ranco I have on my fermentation fridge.
 
I clicked on the thread because of the keezer name. +1.

The copper rocks, btw. A tip in the future is to use regular white-out (the bottle kind) to stop the solder from going where you don't want it. After you solder you can wash it off. It makes cleanup a lot easier.

B
 
AMAZING build, Im jealous of this build.

Im still in the planning stages of mine, need a house before I can even think more about getting one.
 
*bump*

pics of Keezer Soze in it's permanent home with polish 3" copper?

-=Jason=-
 
*bump*

pics of Keezer Soze in it's permanent home with polish 3" copper?

-=Jason=-

Unfortunately Keezer Soze is currently in storage while I'm building an addition on my tiny house to make room for the upcoming addition to our family. I'll make sure to post some pics in a couple months when it gets moved back home. I'm also hoping that Santa will bring me some perlick faucets to install in time for the coming home party.
 
Congrats on the wee one. I have a son who just turned a year old and its the best thing that could have happened to me.

-=Jason=-
 
LOVE IT!!!

quick question - what is the distance between centers of the shanks (ie - spacing of taps - center to center)
 
LOVE IT!!!

quick question - what is the distance between centers of the shanks (ie - spacing of taps - center to center)

I wanted to be able to set glasses side by side on the drip tray under the faucets, so I measured the width of my most often used pint glasses and added a little for space between them. I think they ended up either 3.5" or 3.75" OC. I'd have to measure them to be able to say for sure.

My wife gave me a custom plaque for my birthday yesterday that says "Keezer Soze". I'd like to get it mounted and get some pics of it posted sometime soon.
 
How'd you make those sweet tap handles...yeast vials filled with malt??

Yep, idea stolen from someone else here. I just epoxied a nut to the inside of the cap, filled vial with malt, and screwed on to faucet. One of these days I'll find time to turn some nice handles on the lathe.
 
Awesome Tower! I was looking for a little more info on what shanks you used and how you attached them. Did you just sandwich the 1" copper pipe and tighten the shank / nut?
Hopefully that makes sense. Thanks!
 
Awesome Tower! I was looking for a little more info on what shanks you used and how you attached them. Did you just sandwich the 1" copper pipe and tighten the shank / nut?
Hopefully that makes sense. Thanks!

On the outside the shoulder of the shank (next to the faucet coupling nut) sits against the end of the 1" copper. The faucet coupling nut does rub against the copper some when being tightened or loosened. On the inside there is a "washer" type of thing I made from scraps of 3" ABS that fits the contour of the tower on the faucet side, and is flat on the other side for the shank nut to tighten against. Rather than making 4 of these "washers", I made two longer ones which each have two holes and serve two faucets. This way they can't spin and get out of alignment with the contour of the tower. I used cheap chrome plated brass shanks that came in a box of spare parts I picked up at a yard sale. I custom cut all of them to length. Hope that helps.
 
I just noticed this thread today. I am actually in the middle of my keezer build and am making the sides of my collar similar to yours. I am using 1x12 poplar for the outside. 1/2" blue installation board in the middle, and 1/8" sheet of birch on the inside. I am just planning on painting mine white because the freezer is in my garage and my time is limited. Where my shanks will go through, I may add some 1/2 strips of poplar to stiffen it up there. I geuss i am worried my system will not be very energy efficient because overall it will end up being like an 1 1/2" thick. That and the installation board only has an R value of 3.

What do you think?
 
I just noticed this thread today. I am actually in the middle of my keezer build and am making the sides of my collar similar to yours. I am using 1x12 poplar for the outside. 1/2" blue installation board in the middle, and 1/8" sheet of birch on the inside. I am just planning on painting mine white because the freezer is in my garage and my tiame is limited. Where my shanks will go through, I may add some 1/2 strips of poplar to stiffen it up there. I geuss i am worried my system will not be very energy efficient because overall it will end up being like an 1 1/2" thick. That and the installation board only has an R value of 3.

What do you think?

Sounds fine to me. A lot of people here use just a 2x without any insulation at all (~1.5 R value?). I haven't heard any complaints of major inefficiency issues, and what you're describing would have 2-3 times the R value. I'm no expert, but I'd think making it airtight is just as if not more important than the R value of the collar.

If you really wanted to you could use some aluminum foil. It would help reduce radiant heat transfer, and might help a little. You could staple it to the poplar and/or plywood, or tape it to the foam before assembly.
 
Back
Top