• Please visit and share your knowledge at our sister communities:
  • If you have not, please join our official Homebrewing Facebook Group!

    Homebrewing Facebook Group

Keezer is pretty much finished - Lots of 3d printed parts

Homebrew Talk

Help Support Homebrew Talk:

This site may earn a commission from merchant affiliate links, including eBay, Amazon, and others.
Really nice.
Would love to get into the 3D printing stuff. Out of curiosity, how much material (off the roll) does the average part take? like you're tap handles... I realize this would be different for each part made but wondering how long a roll lasts, looks like a roll of material varies in price with the price around 30-40? not sure really.
Just some thoughts as to the cost effectiveness of printing parts really. I can think of lots of parts I could use a 3D printer for, most not related to brewing.
how about the time aspect, how long did it take to print the tap handle or the keezer collars you made?

Good questions. The tap handle bodies (without the hops/barley/yeast/water pieces) take about 5 to 6 hours each to print, and are about 75 to 90 grams each, depending on a lot of variables (how many solid bottom and top layers, how many perimeters, and what % infill I use). Each spool is 1000 grams, so I can get about 11 to 13 tap handle bodies per spool. Each spool is about $22 shipped on amazon. (I mostly use "hatchbox pla".) This means that at 80 grams, each tap handle is around $1.75.

The hops, water, and flasks take about 7 to 15 minutes each and are about 3 grams each. The barley takes a little longer at 30 minutes (because it has a lot of perimeters), and weighs 6 grams. At an average weight of 3.75 grams, thats about 32 cents for a full set.

A full set of 3 placards takes about an hour, and they are a little over 4 grams each, or 13 grams for the full set of 3, which would cost 28 cents for a full set.

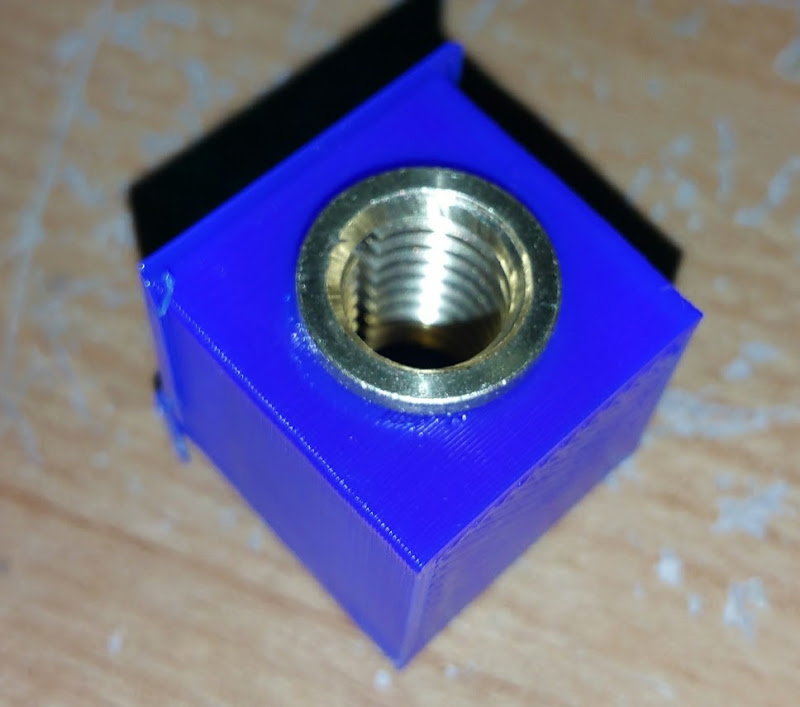
The faucet spacers take about 1.5 hours and are about 25 grams each, or 55 cents each.

The 1" hole plugs take about 12 minutes and are 3 grams each, or 7 cents.

The stc1000 enclosure is really bigger and thicker than it needs to be, but here are the details on that:
-Bottom - 11 hours and 186 grams
-Top - 7 hours and 110 grams
-Front and Back plates - 2.5 hours and 37 grams

The stc1000 enclosure was the largest print I have done, but with all of the parts added together it only used around 250 to 350 grams, which puts a total cost to about 6 or 7 bucks.


One thing to keep in mind also is that all these estimates are for quality prints, which are at pretty high infill, for structural integrity, and at 35mm/s which is pretty slow, for quality. I could probably lower infill and increase to 45mm/s and be fine, and get faster prints, and save a dollar here and there.

I hope this gives you a good idea on time and cost. It does take a good bit of time, but its mostly just starting the print, then going and doing other stuff around the house, like brewing ;) Cost wise... its super cheap...
 
Good questions....

I really appreciate all the info and I don't mean to highjack the thread, but as you did use 3D printing to do a lot of parts... :D

I was looking at the printer you recommended and I will assume yours uses the same software, which I'm wondering how you like... depending on what you're using. I don't recognize any of the software listed, or the file type.

I work in AutoCAD (2D and 3D drawings) every day and just finished school on Inventor for 3D, we are supposed to make that switch at some point... but that's another story.

If you're familiar, how does the software you use compare?

You really have me wanting to pull the trigger on an I3 printer!
 
Are you in Memphis or just a fan of the team(s)?

Born and raised. I grew up in the hickory hood, moved to germantown in middle school, then out to southaven in college and have been out here for about 10 years.
 
I really appreciate all the info and I don't mean to highjack the thread, but as you did use 3D printing to do a lot of parts... :D

I was looking at the printer you recommended and I will assume yours uses the same software, which I'm wondering how you like... depending on what you're using. I don't recognize any of the software listed, or the file type.

I work in AutoCAD (2D and 3D drawings) every day and just finished school on Inventor for 3D, we are supposed to make that switch at some point... but that's another story.

If you're familiar, how does the software you use compare?

You really have me wanting to pull the trigger on an I3 printer!

Sure no worries at all. For 3d modeling, I am a google sketchup newb. Pretty much all of the reprap printers, and other printers as well, can use slic3r and pronterface. Slic3r is what you import the .stl file to (standard 3d printing file type), and set the print settings (layer height, speed, peremeters, infill%, etc...). You then export a gcode file which is the file that tells the printer what to do to print the object (essentially a bunch of x,y,z coordinates). You use pronterface to send commands to the printer, so you load the gcode file into there to print it. Its all free.

Odds are you can use inventor, and export an STL file just fine.

Pretty cool... I didn't even know sketchup would do 3D, and you're right about inventor, it will export a .stl file.

I'm going to have to do some reading on all this. I really appreciate the info.
 
Pretty cool... I didn't even know sketchup would do 3D, and you're right about inventor, it will export a .stl file.

I'm going to have to do some reading on all this. I really appreciate the info.

Yea for some reason there is a misnomer that sketchup doesnt do solids, but not only does it do them, it does them well and is extremely user friendly. I watched like 2 x 10 minute intro tutorials and have been making stuff ever since. I just had to install a plugin to be able to import and export STL's. A lot of other 3d modeling programs will only export, while sketchup can import.
 
The hephestos is nice, but not worth that much in my opinion. It is, afterall, just an i3. I would recommend the duplicator i3

http://wanhaousa.com/products/duplicator-i3-steel-frame

Its the same design as mine, but pre built, steel frame, and hardly costs more than mine, especially after you consider it already has tr8*8 z axis screws, and an lcd.

Just pulled the trigger on that, should be here sometime next week. It's all your fault... :mug:

Cheers,
-Th
 
nice, been into brewing for a year, and 3d printing for a few months. just got a wanhao i3. you have me beat on both counts, i have some learning to do, but want to do a bunch of builds. Ive started thinking about a print to collect my 3 tap system. :) fun stuff
 
I got the monoprice version of the wanhao i3.

I have to check out those sketchup videos you mentioned so I can start designing my own stuff!

Thanks for all the tips you gave in this thread, and great looking build!
 
Keep us posted!!!

Heh, I had the thing now for a good week, and it's been printing ever since :)

I did a few enclosures that I had for projects in the pipeline, they're in the 1st 2 pics attached. One is a enclosure for a pool controller based on a RasPi, the other is a enclosure for a 20Mhz DSO based on a BitScope Micro, RasPi and the RasPi touch screen. They're printed in PLA.

As with any of those printers, it's basically a starting point for improvements. The remaining pics are what I've done so far. First was the OctoPi print server enclosure to offload printing from the laptop. It's based (what else) on a RasPi with a sainsmart mini touch screen. OctoPrint is a really cool piece of software to control those printers. Also installed the RasPi cam module in a small enclosure that attaches to the side of the printer.

Next was the leveling dials, an absolute must for this printer. I also upgraded the printing platform to a glass platform, the little corner pieces are to hold that in place. And finally, I replaced the stock fan with a beefier radial fan and a shroud that provides cooling air from all sides (not just the front). The shroud was my first foray into PETG printing for better temperature resistance, turned out pretty good.

Cheers,
-Th

File Feb 04, 13 52 28.jpg


File Feb 04, 13 48 03.jpg


File Feb 04, 13 51 57.jpg


File Feb 04, 13 52 16.jpg


File Feb 04, 14 18 27.jpg


File Feb 04, 13 52 54.jpg


File Feb 04, 14 19 33.jpg
 
Heh, I had the thing now for a good week, and it's been printing ever since :)

I did a few enclosures that I had for projects in the pipeline, they're in the 1st 2 pics attached. One is a enclosure for a pool controller based on a RasPi, the other is a enclosure for a 20Mhz DSO based on a BitScope Micro, RasPi and the RasPi touch screen. They're printed in PLA.

As with any of those printers, it's basically a starting point for improvements. The remaining pics are what I've done so far. First was the OctoPi print server enclosure to offload printing from the laptop. It's based (what else) on a RasPi with a sainsmart mini touch screen. OctoPrint is a really cool piece of software to control those printers. Also installed the RasPi cam module in a small enclosure that attaches to the side of the printer.

Next was the leveling dials, an absolute must for this printer. I also upgraded the printing platform to a glass platform, the little corner pieces are to hold that in place. And finally, I replaced the stock fan with a beefier radial fan and a shroud that provides cooling air from all sides (not just the front). The shroud was my first foray into PETG printing for better temperature resistance, turned out pretty good.

Cheers,
-Th

Very nice. I just started using octoprint a few weeks ago and love it.
 
wow all those electronics boxes are over the top. :) more modding on the electrical side than Ive seen on the facebook group.

but it looks like you dont have the z brace mods. Im pretty new the wanhao, but that seems to be the go to thing in the group. leveling and squaring fixes this 'eh' slightly rickety machine, into something rock solid.

yes, definitely on top of my list. I have a friend making me stainless rods instead of using the threaded stock. I haven't had anything to print that's that tall where it would make a large impact, but it'll be there shortly. It takes some 30+ hours to print that stuff tho...

Cheers,
-Th
 
Heh, I had the thing now for a good week, and it's been printing ever since :)

I did a few enclosures that I had for projects in the pipeline, they're in the 1st 2 pics attached. One is a enclosure for a pool controller based on a RasPi, the other is a enclosure for a 20Mhz DSO based on a BitScope Micro, RasPi and the RasPi touch screen. They're printed in PLA.

As with any of those printers, it's basically a starting point for improvements. The remaining pics are what I've done so far. First was the OctoPi print server enclosure to offload printing from the laptop. It's based (what else) on a RasPi with a sainsmart mini touch screen. OctoPrint is a really cool piece of software to control those printers. Also installed the RasPi cam module in a small enclosure that attaches to the side of the printer.

Next was the leveling dials, an absolute must for this printer. I also upgraded the printing platform to a glass platform, the little corner pieces are to hold that in place. And finally, I replaced the stock fan with a beefier radial fan and a shroud that provides cooling air from all sides (not just the front). The shroud was my first foray into PETG printing for better temperature resistance, turned out pretty good.

Cheers,
-Th

That's awesome. As stated earlier I'm trying to get into it but higher priority items keep popping up. Sooner or later I'll get one, hope it's sooner... I don't know what the Octoprint is, guess I have some research to do.
 
That's awesome. As stated earlier I'm trying to get into it but higher priority items keep popping up. Sooner or later I'll get one, hope it's sooner... I don't know what the Octoprint is, guess I have some research to do.

Basically you install it on a raspberry pi, then you plug your printer into that, as well as a webcam. You then use your browser on any pc on your network (or outside your network if you forward the ports) to control your printer, and you can monitor it with the webcam, and it also automatically makes time lapses of prints.
 
Something a bit more on topic for this forum: I printed a few pieces for my fermentation chamber, pics are below:

(1), (2) + (3): a shelf that fits the little Lasko space heaters I use in my fermentation chambers (link). They're out of the way now...
(4), (5) + (6): a holder for my aeration wand, along with a holder for the fridge temp thermo couple (for the brewpi).

I put the sketchup and stl files up on Github, if anyone has a need for them.
heater shelf
aeration wand holder

Cheers,
-Th

File Feb 11, 21 30 36.jpg


File Feb 11, 21 30 20.jpg


File Feb 11, 21 30 08.jpg


File Feb 11, 21 29 53.jpg


File Feb 11, 21 28 37.jpg


File Feb 11, 22 06 39.jpg
 
Last edited by a moderator:
Ohhhhhh You cruel sick Ba$tard$ Highjacking a thread with 3D Printing....:D
Love the Tap Handels...Especially The Name Plates...I think I would like some.. Think intead of the Little Hops and Such I would prefer a Name plate on just the front side...

Anyone care to mock up a design for me...I think it would be cool to have a Name plate made up off of a Logo
 
Back
Top