• Please visit and share your knowledge at our sister communities:
  • If you have not, please join our official Homebrewing Facebook Group!

    Homebrewing Facebook Group

Kal Clone and New Brewshed

Homebrew Talk

Help Support Homebrew Talk:

This site may earn a commission from merchant affiliate links, including eBay, Amazon, and others.

anonymousbrew

Well-Known Member
Joined
Aug 17, 2010
Messages
110
Reaction score
15
Location
Tomball, TX
So the time has finally come to stop drooling and start building!
Without too much background, we recently moved into a new house, and of course one of my requirements was to have a dedicated brewing space...(to be honest, it was one of SWMBO's top requirements:mug:)

Our new house has a 10x16 building in back that the new brewery will be going into, but not before the new system gets built and ready to go.

So lets get to it!


Need to upgrade my existing 3 vessel hybrid system to all electric. I've been lusting after Kal's Electric Brewery for a long time, and pulled the trigger on the DIY kit. Needed a few other things (HERMS coil, bulkheads, sight glasses etc) that we'll discuss along the way.

The purpose of this thread is to give some insight on time and effort and maybe some tricks (and hopefully not too many mistakes)

Here's a look at the "BEFORE" brewery. Hybrid Propane/elect. Keggle MT and BK with the electric water cooler HLT. Its worked great and made some good beer.

Photo 2013-06-21 06.58.49.jpg
 
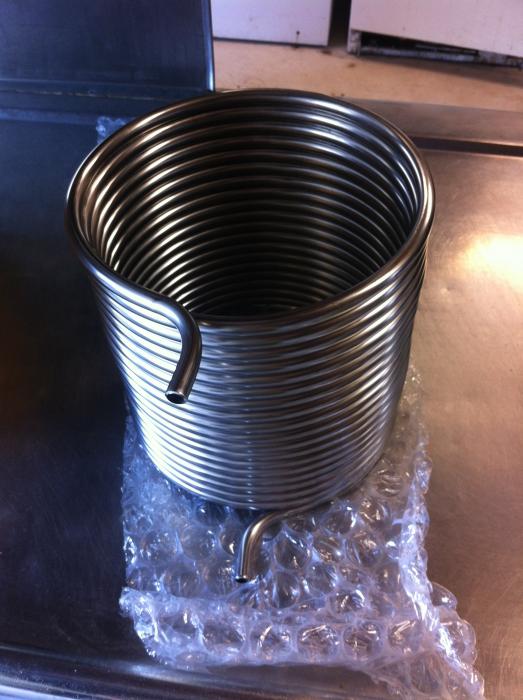
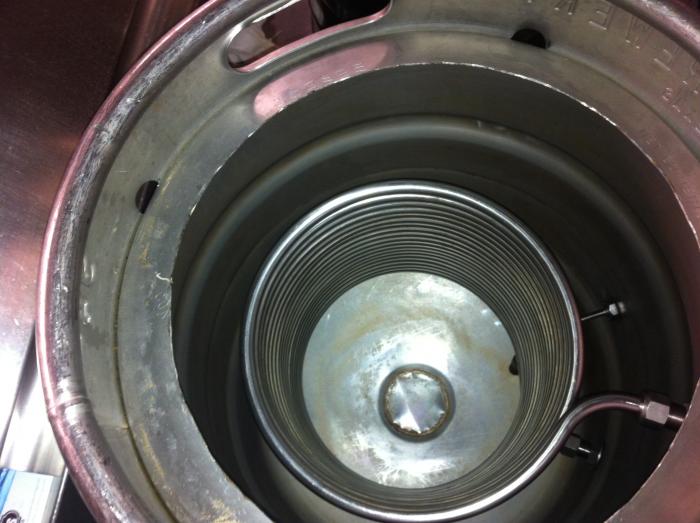
So day minus one. The HERMS coil showed up first, so i figured i get that out of the way.
Ordered the 50' coil from Stainlessbrewing.com and 2 of their compression fitting bulkheads.
I have to say i could not be any happier with the way that turned out!

Price was right, shipping was fast, i literally eyeballed and marked where the fittings should go, drilled my holes, installed the coil and bam.
leaktest on the HLT for an hour and then leaktest on the coil for an hour running pump.

need to scrub out the bottom of my hlt (used to be BK) and the hose barbs will be changed to stainless

Time 4hrs
Total 4hrs

Photo 2013-06-21 06.41.56.jpg


Photo 2013-06-21 06.42.11.jpg


Photo 2013-06-21 06.43.37.jpg


Photo 2013-06-21 06.43.45.jpg
 
ITS HERE!!!!
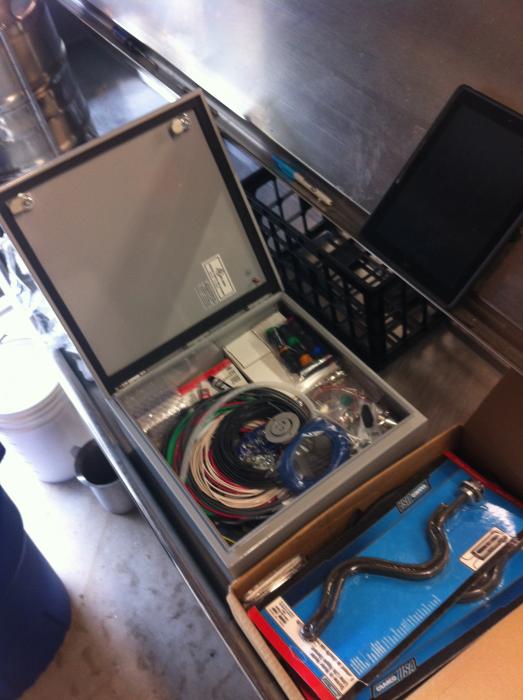
The entire family has been awaiting the arrival of the UPS man like kids at Christmas. The doorbell finally rang, and there it was!

Opening the packages, i have to say, i am VERY happy i went through theelectricbrewery.com to source all the stuff. There is a TON of parts and pieces that would have taken FOREVER for me to source on my own. I unpacked and organized all the pieces and started setting up some work space.

one of the first things i noticed was that the box itself is a little different than the one Kal has, this one has two closure latches and no removable cable tray. I actually like it a little better. (very nice not having to mess with sealing that bit up)

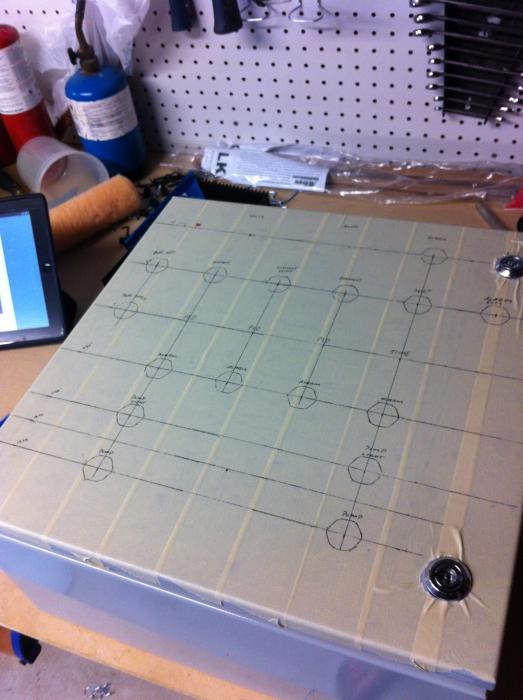
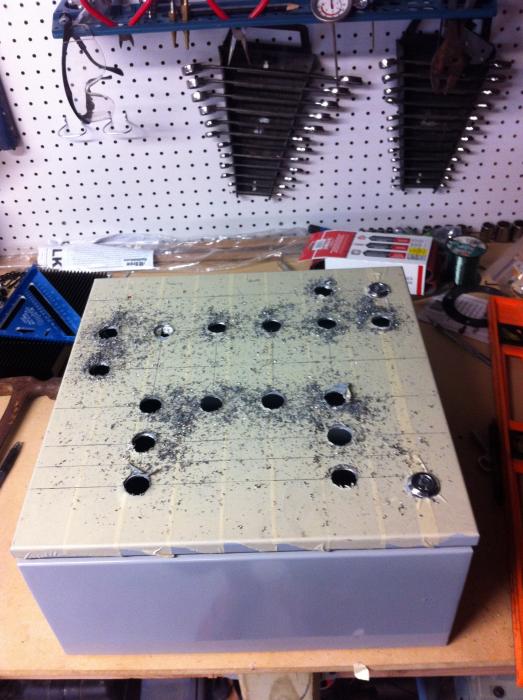
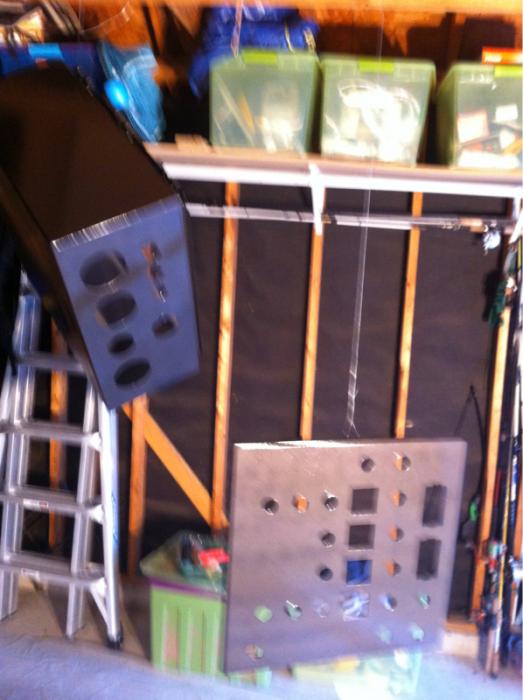
Grabbed the tape and started laying all the front panel holes out. The two latches meant that i needed to move the buzzer, but that was ok, cause i meant i needed to move the Power indicator as well to balance it out, meaning i didnt need to cut off and move the door ground post.

once all the holes were marked out, i used a nail set to dimple for my pilot holes and got to drilling.

Drilling went well, everything right where i wanted it.

After some dry fitting for instant gratification, i got to cutting square holes.
Not as bad as i had read. One note - for jigsawing, make your marks directly on the metal, as the masking tape tends to come up as your cutting.

Progress for the day -
-unpacked / inventoried
-holes laid out and marked
-front panel circles cut
-volt and amp meter cut
-temp probe holes cut

Time - 4.5hrs
Total - 8.5hrs

Photo 2013-06-21 06.42.37.jpg


Photo 2013-06-21 06.42.57.jpg


Photo 2013-06-21 06.43.11.jpg


Photo 2013-06-21 06.43.29.jpg


Photo 2013-06-21 06.43.18.jpg
 
Looks fantastic. I live in an urban environment, fortunately I have a back patio I can brew on. But I really don't have the space/storage room for more than a propane burner. I never saw myself moving out of a city, until I started brewing. Now I think... I need a shed, a truck, a garden to grow hops, a compost pile for my grain and I can water my plants with IC run off. I need a house with a big basement so I can have a fermentation closet. I've basically decide to adopt a whole new lifestyle that will enable me to brew beer. And I can thank my first brewer's best extract kit, my dad, and of course my yeast buddies.

Anyway -- your new set up looks awesome, Im jelous.:D
 
sub'd. I sure do enjoy watching these builds. I'm in the same boat. Once we move to a bigger place (with dedicated brew space) I'm pulling the trigger on a kal clone (with a couple mods, because why not...)
 
I am planning on building an all electric brewery but I am going with a BCS-460 as the heart. Still, I want to see how your's turns out. Looks great so far.
 
Progress report -

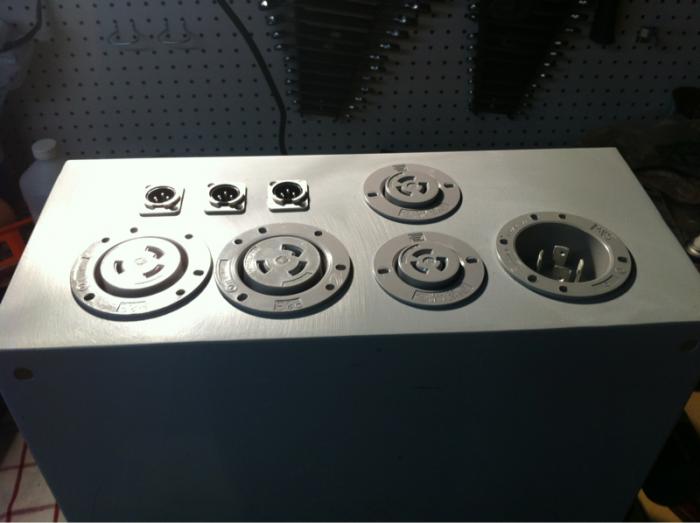
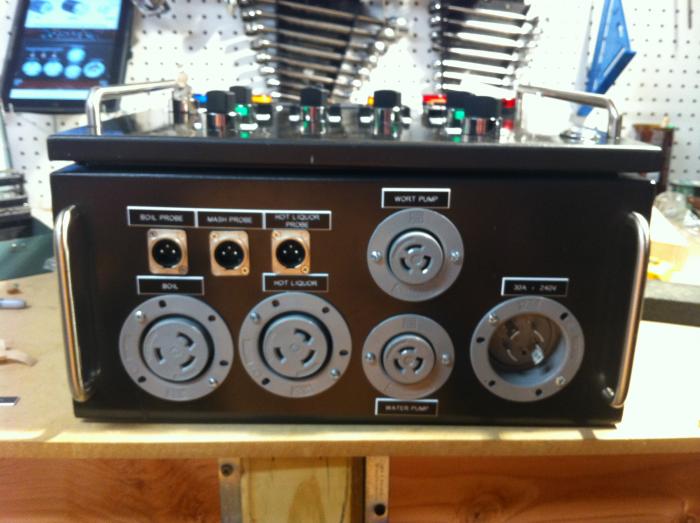
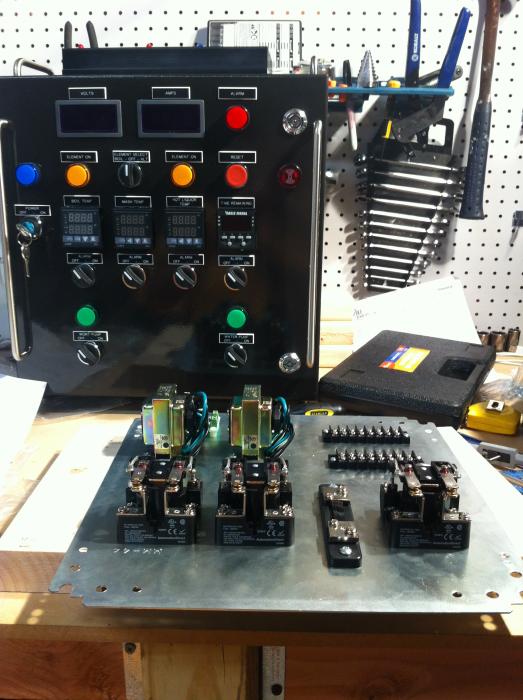
Finished out PID, volt meter, amp meter, heat sink and receptacle plugs.

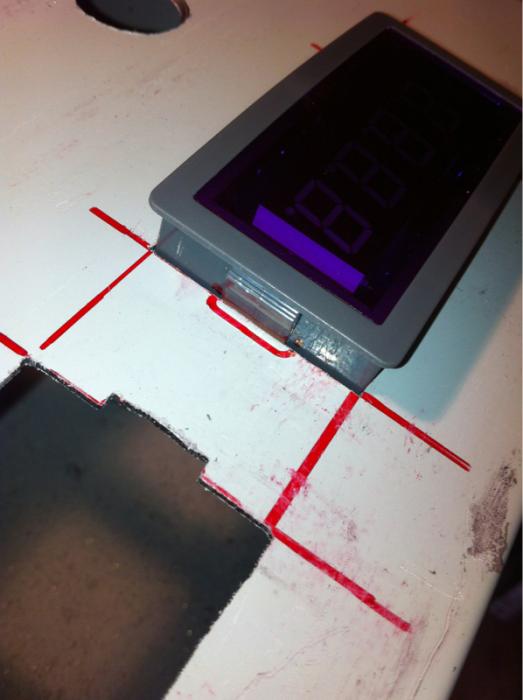
Quick tip - to cut out the tab for volt and amp meter - fit in and draw the outline. Get up under the tab - gives just enough to clip in. (See pic)

Dry fit all parts to ensure clearances.

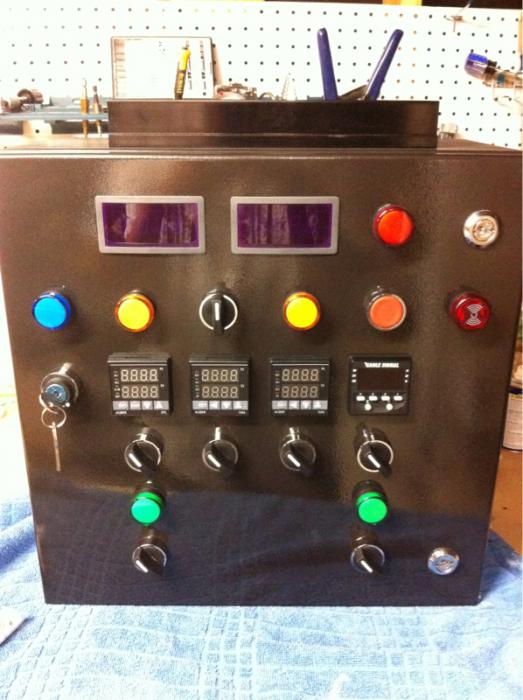
Sanded, wiped down with acetone, primed and painted. Went with black hammer finish.
Should look clean and mean.

Time - 5hrs
Total - 14.5hrs

Time for a beer!

image-3381480885.jpg


image-3261946490.jpg


image-3663786009.jpg


image-4100572151.jpg
 
Well - not a lot of progress today. SWMBO proclaimed that today was the day that the living room and kitchen shall be painted.

Worked out ok though, paint took until this evening to cure.

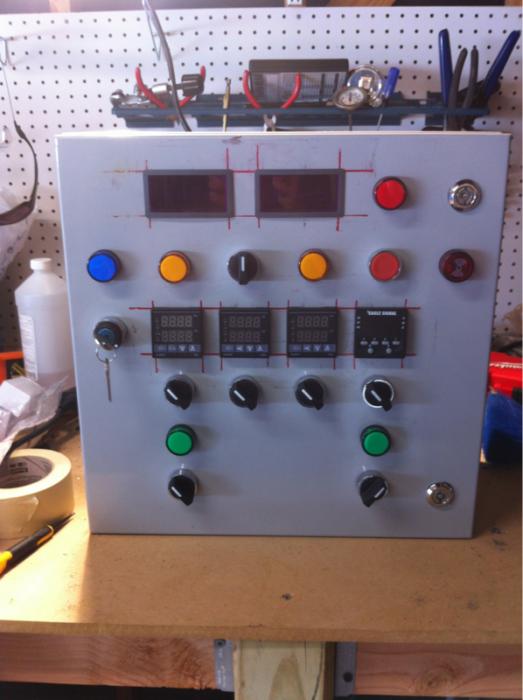
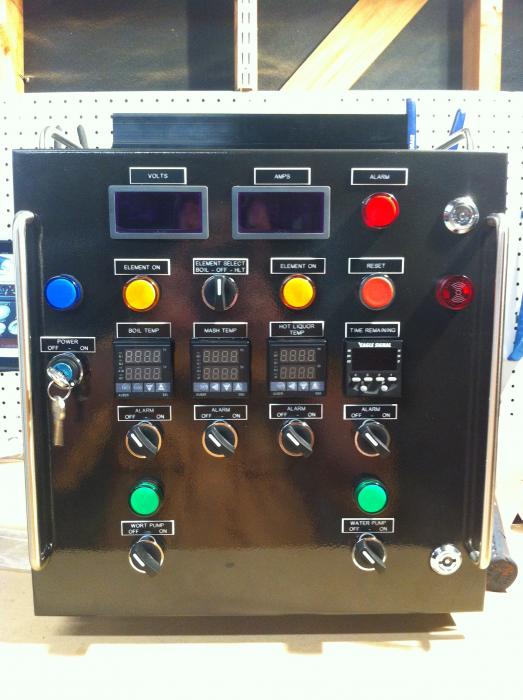
With the help of Action Jackson - 4 yr old QA manager extraordinaire - we got all the front panel components installed. Everything went well except my package came up one PID collar short. No fault of theelectricbrewery.com, the PIDs are all prepackaged. I have it secured in there good enough for now, I'll look and see if I can find a collar on the interwebs.

Hopefully tomorrow I can finish the painting early ;)
Want to get the bottom components installed and MAYBE start getting some wire run.

I'm really happy with the black hammer finish, looks great!

Time today - 1hr
Total - 15.5hrs

image-1062589366.jpg


image-129272116.jpg
 
Great timing on this thread. I just cut the tops off my kegs for an electric herms setup but I'm still in the planning stages. Nice job on the control panel. I'll be following.
 
Looks good so far ! Nice progress. I just built my brew room/eHerms starting Oct. of 2012 and was officially completed in Feb. 2013. You're going to love the accuracy, efficiency, and ease of system when you are done.
 
well- painting did NOT finish early, but the good news is that it is finished. And I have hidden the paint brushes and paint chips. We took some family time Sunday evening, so i just spent about an hour installing the receptacles on the bottom. pretty non eventful - don't know how i missed it, but i definitely should have drilled the holes for mounting bolts before painting.

Planning to get the handles and maybe the heatsink/SSRs on tonight.
I havent used a tap and die set in probably 20 yrs - for some reason they're just really cool to me.

time - 1.5hr
total time - 17hrs
 
Looks fantastic. I live in an urban environment, fortunately I have a back patio I can brew on. But I really don't have the space/storage room for more than a propane burner. I never saw myself moving out of a city, until I started brewing. Now I think... I need a shed, a truck, a garden to grow hops, a compost pile for my grain and I can water my plants with IC run off. I need a house with a big basement so I can have a fermentation closet. I've basically decide to adopt a whole new lifestyle that will enable me to brew beer. And I can thank my first brewer's best extract kit, my dad, and of course my yeast buddies.

Anyway -- your new set up looks awesome, Im jelous.:D

Pretty sure the need to brew is basically to blame for the dawn of civilization and society - people working together to grow the grains and collect water - what better to bring people together than beer? :mug:

anonymousbrew, - Have you checked out the Electric sub here? You'll find a lot of tips and advice and people doing similar projects over there. A good place to go if you run into headaches or problems. Kal chimes in from time to time - hit him up with a PM, he'd probably get you a new PID collar in no time.

Looks good - on to the fun part - wiring!

-Kevin
 
BADNEWSBREWERY -
Yeah i've been lurking over there for awhile. Also on the forum at theelectricbrewery.com has lots of info specific to this system.

Cant wait to start running wires!
 
Last night's progress report

Items completed
- handles installed
- heat sink installed
- SSRs mounted
- Tags applied
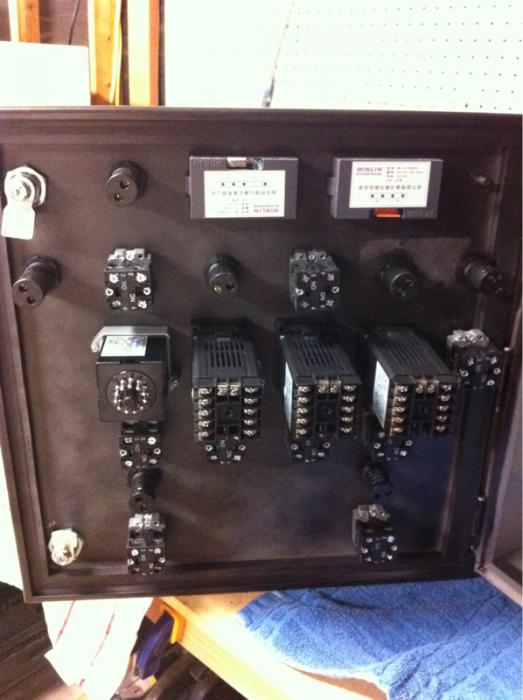
- Internal components mounted on back plate
- backplate installed
- Wired hot and neutral powersupply

A couple of tips -
Handles - drill mounting holes before paint
Backplate - Take the extra time - maybe 20 mins at most and tap the mount holes in the back plate. Makes mounting so easy, and will make it TONS easier to replace components WHEN something fails down the road.

I'm having a ton of fun working on this!

Hoping to get the grounds all run tonight.

Time - 7.5
Total 24.5

Photo 2013-06-25 00.43.04.jpg


Photo 2013-06-25 00.43.16.jpg


Photo 2013-06-25 00.43.28.jpg


Photo 2013-06-25 00.44.09.jpg


Photo 2013-06-25 00.44.44.jpg
 
So day minus one. The HERMS coil showed up first, so i figured i get that out of the way.
Ordered the 50' coil from Stainlessbrewing.com and 2 of their compression fitting bulkheads.
I have to say i could not be any happier with the way that turned out!

Price was right, shipping was fast, i literally eyeballed and marked where the fittings should go, drilled my holes, installed the coil and bam.
leaktest on the HLT for an hour and then leaktest on the coil for an hour running pump.

need to scrub out the bottom of my hlt (used to be BK) and the hose barbs will be changed to stainless
Time 4hrs
Total 4hrs

What diameter coil did you get? Looks like its a perfect fit
 
I am totally wishing I had seen the coil from stainlessbrewing first as I'm getting 50' of 1/2" in the mail today that I now have to coil myself. Looks like I'll save ~$10 to inflict >$10 of headache upon myself...

Looking good though
 
What diameter coil did you get? Looks like its a perfect fit

I got the 10.5" Dia coil. once they were in stock, it shipped within 2 days, and I had it a few days after that.

And the compression bulkheads are sweet too. VERY happy with that purchase
 
I am totally wishing I had seen the coil from stainlessbrewing first as I'm getting 50' of 1/2" in the mail today that I now have to coil myself. Looks like I'll save ~$10 to inflict >$10 of headache upon myself...

Looking good though

Yeah, I'm a staunch DIYer, but after coiling a copper IC and a copper CFC, i was NOT going to coil 50' of stainless that I could have coiled to spec for $10 more than i could buy the tube. Good luck! Take your time!
 
Last night's progress -
- wired in Grounds
- Tested Power Pilot light (YAY!)
- wired up Amp meter (once)
- wired up volt meter (4 x's)
- Tested amp and volt meter (YAY!)

Might get a chance to wire up the pump switches tonight - we'll see - for some reason, other thigns in the house seem to want to break while i'm doing this ;)

time - 3.5 hrs
total time - 28 hrs

Photo 2013-06-26 09.35.42.jpg


Photo 2013-06-26 09.35.56.jpg
 
+1 on this build! Im out in Katy and noticed the Divine Reserve in the first picture you posted. Can't wait to see it completed.
 
Back
Top