• Please visit and share your knowledge at our sister communities:
  • If you have not, please join our official Homebrewing Facebook Group!

    Homebrewing Facebook Group

Just to piss the lil brother off keezer build

Homebrew Talk

Help Support Homebrew Talk:

This site may earn a commission from merchant affiliate links, including eBay, Amazon, and others.

purplehaze

Supporting Member
HBT Supporter
Joined
Mar 2, 2011
Messages
414
Reaction score
57
Its been a minute since I have posted a build. I have built other keezers for raffles, friends and relatives numbering is the double digits. My old faithful finally succumbed to corrosion so it was time for an upgrade. At the same time my lil brothers keezer compressor threw in the towel. Somehow he thought it had a lifetime warranty because his brother built it. "The road to hell is paved with good intentions" rings true here. He called an HVAC tech for a repair estimate and was quoted $1500 LOL. Of course I will fix it his but I figure I will have a bit of fun with my sports loving brother.

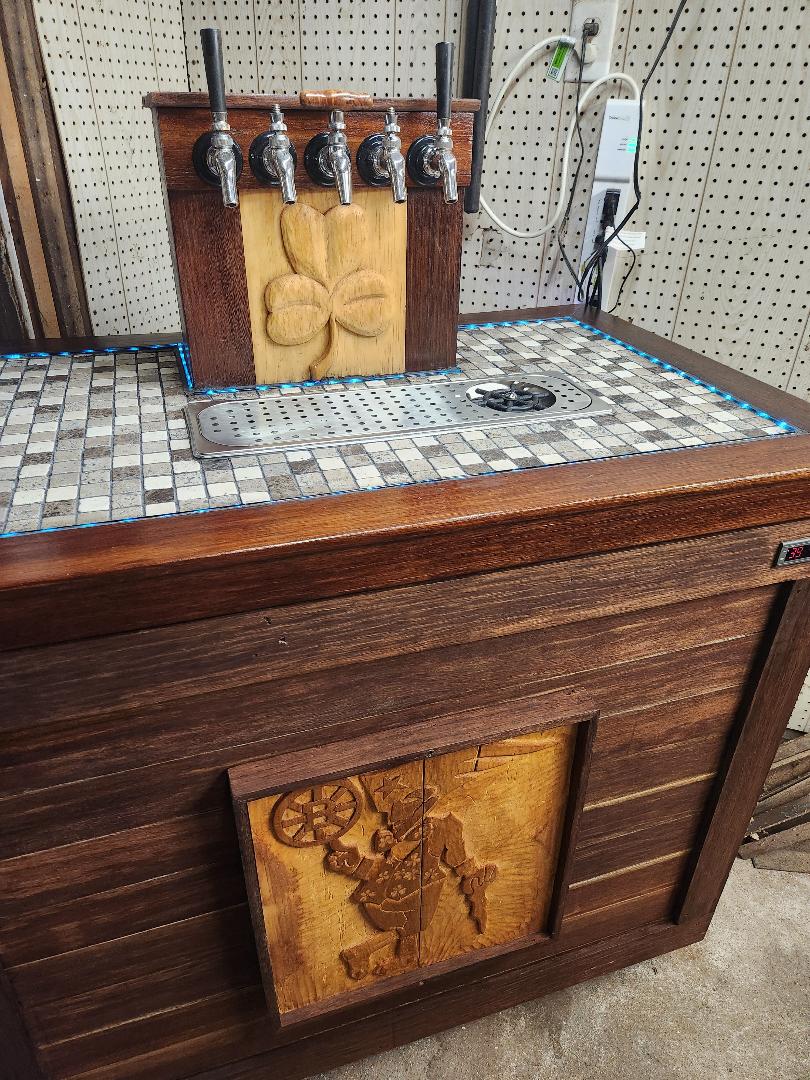
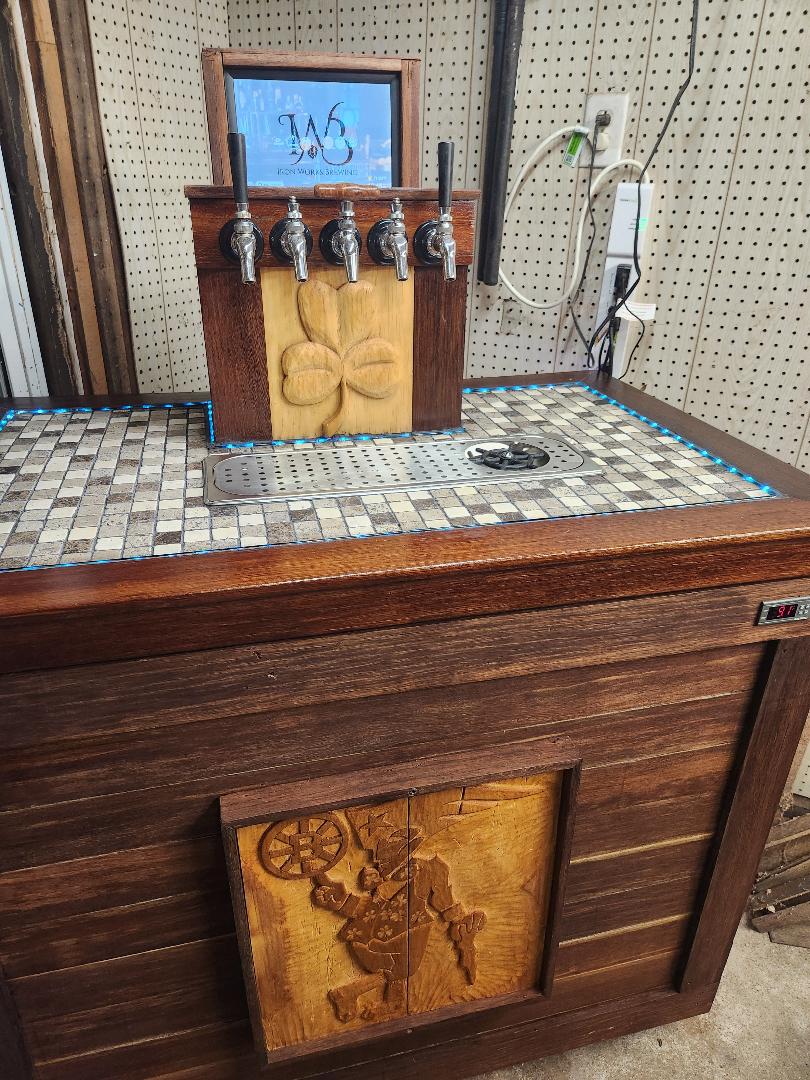
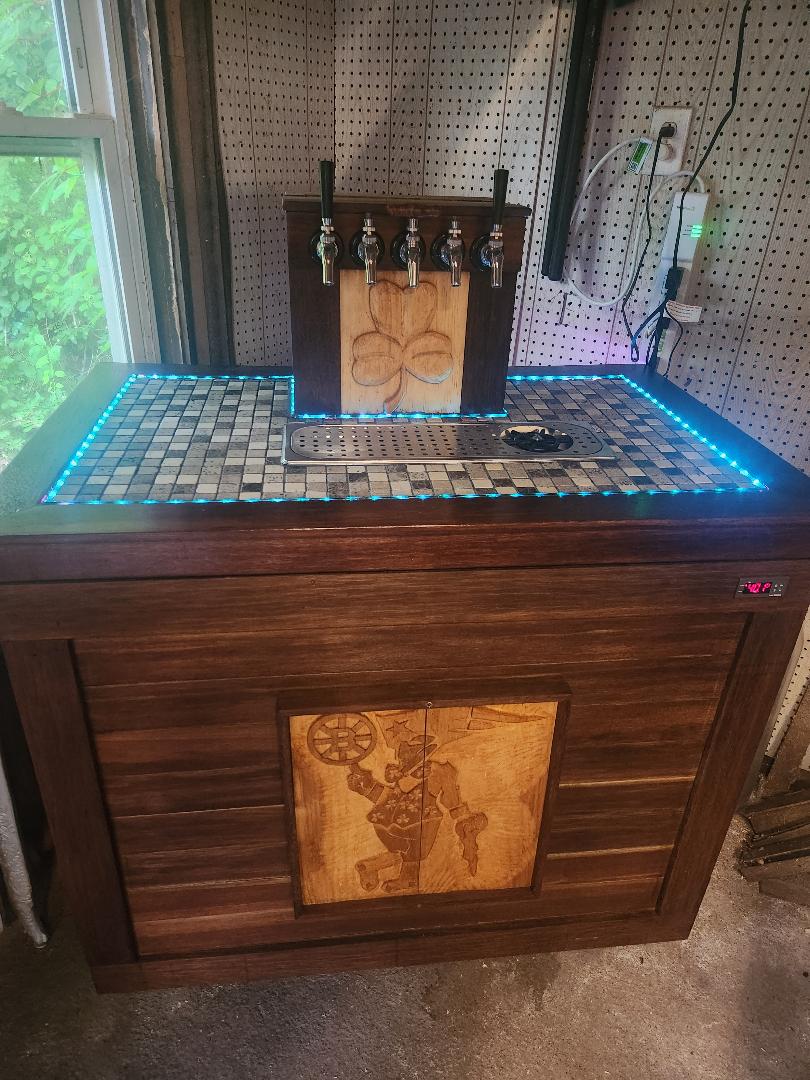
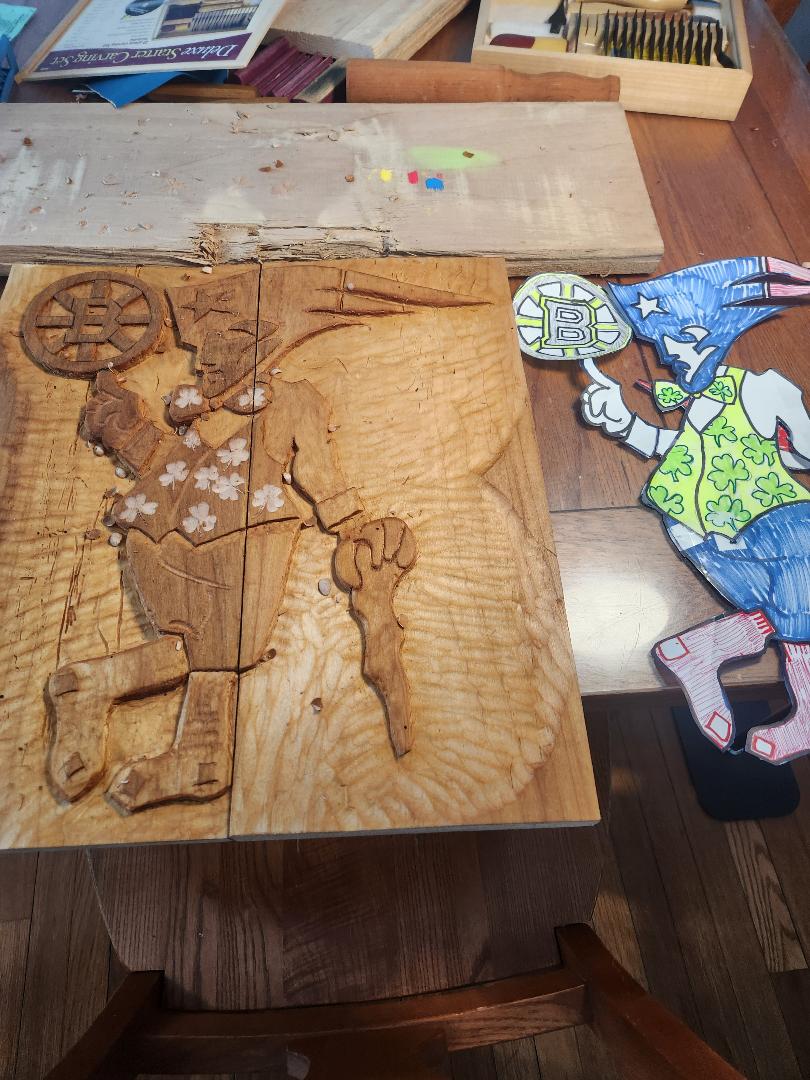
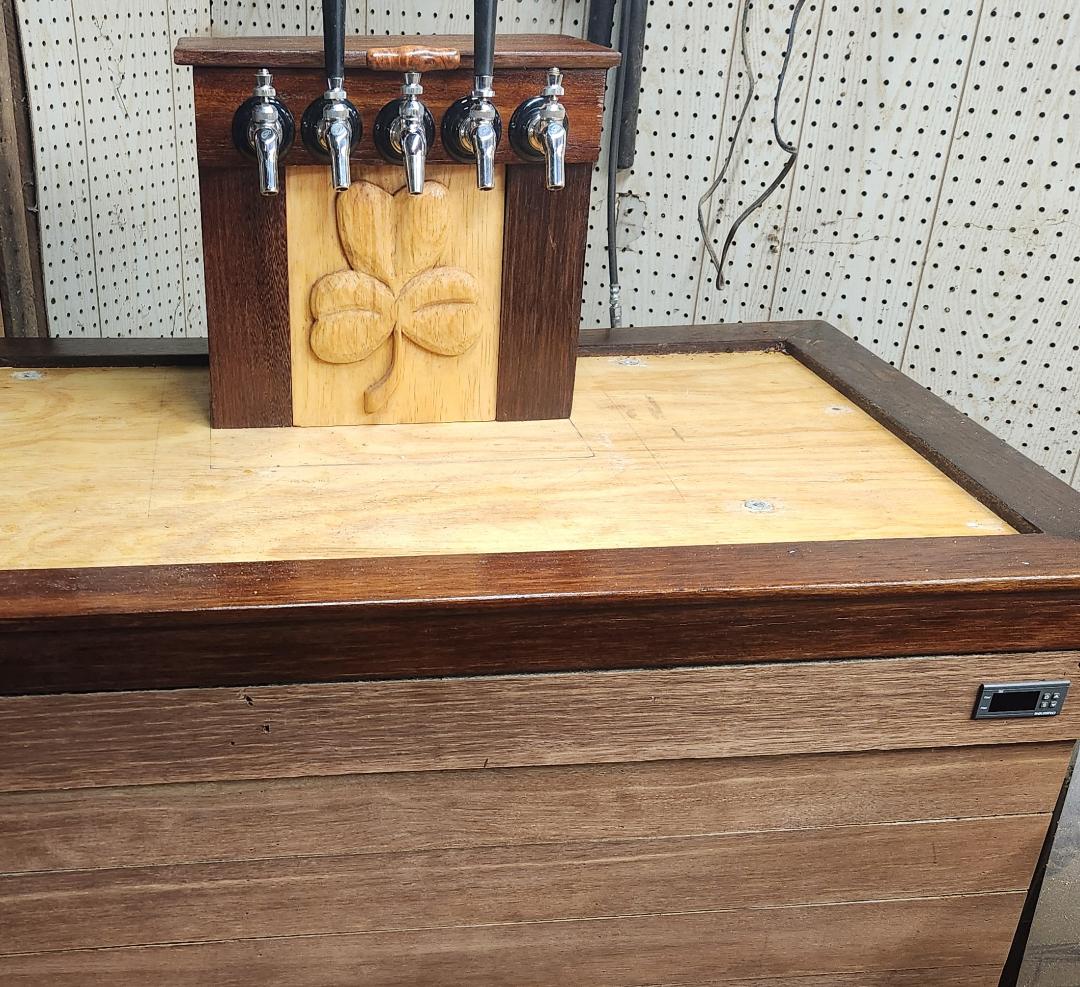
I am not a sports fan. I would rather mow my lawn than spend all weekend watching sports on TV. Weird I know but thats just me. Now its time to build one for myself with all of the upgrades he would want. I'll start with the centerpiece a New England sports AIO. I was going to paint it but i think it would take away from the look. This will be mounted front and center.

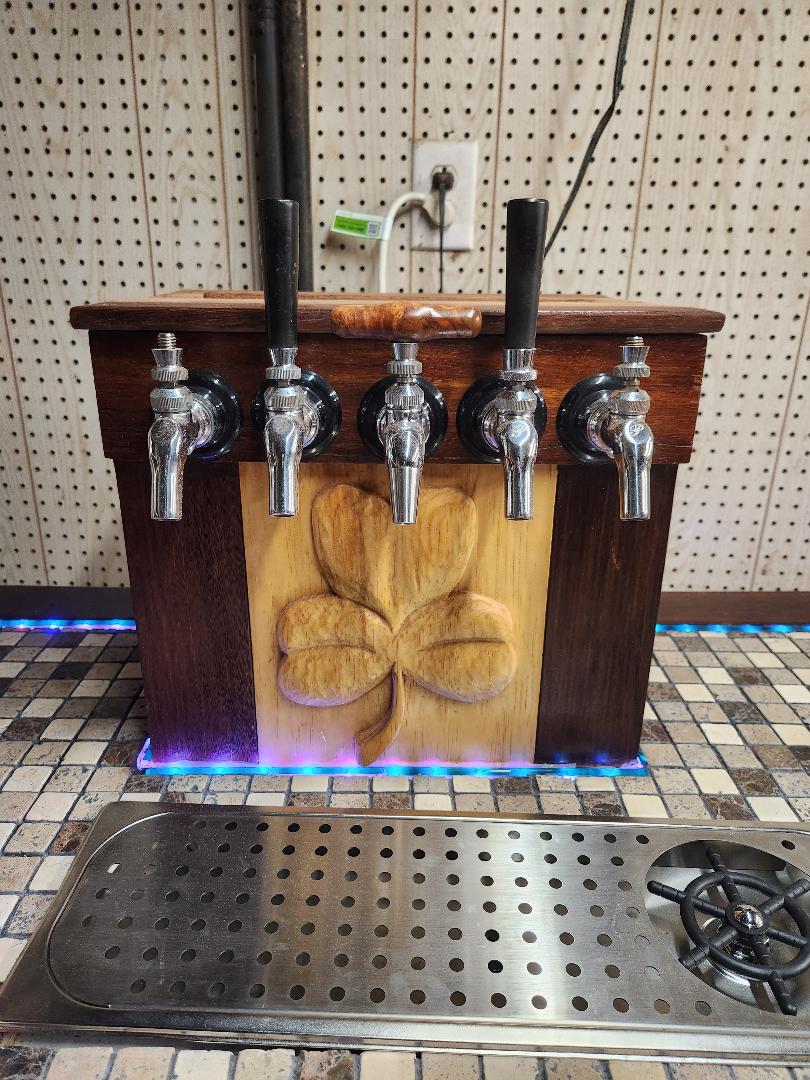
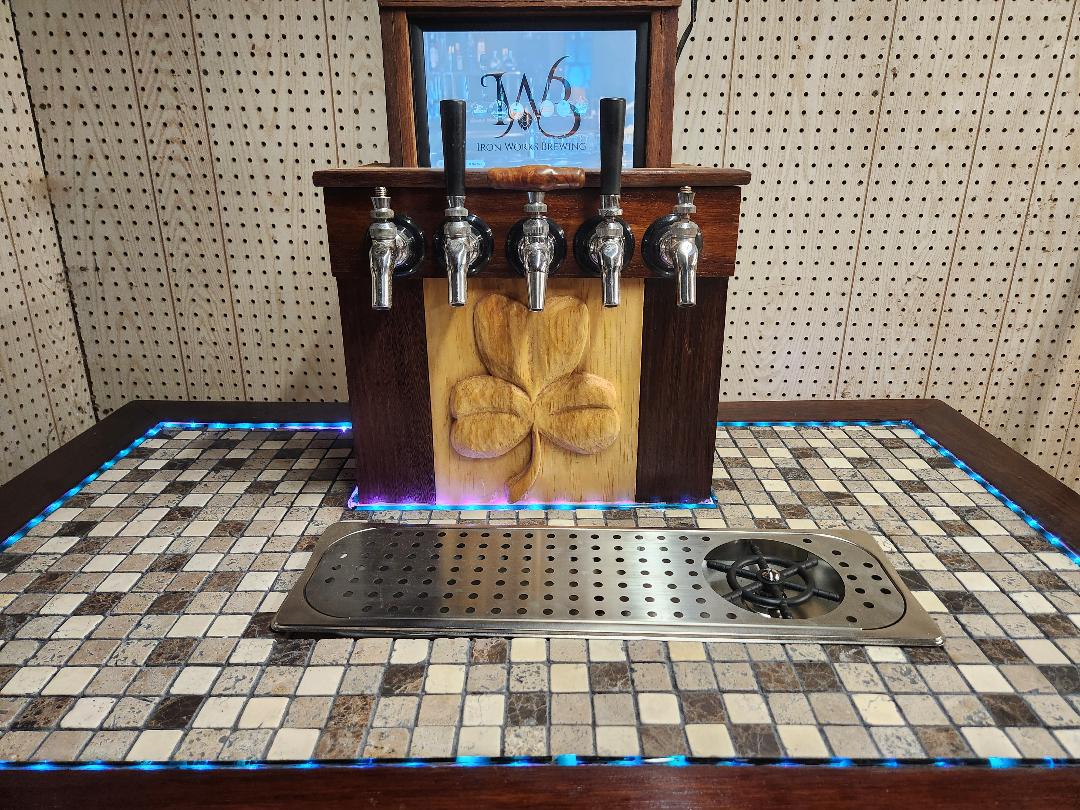
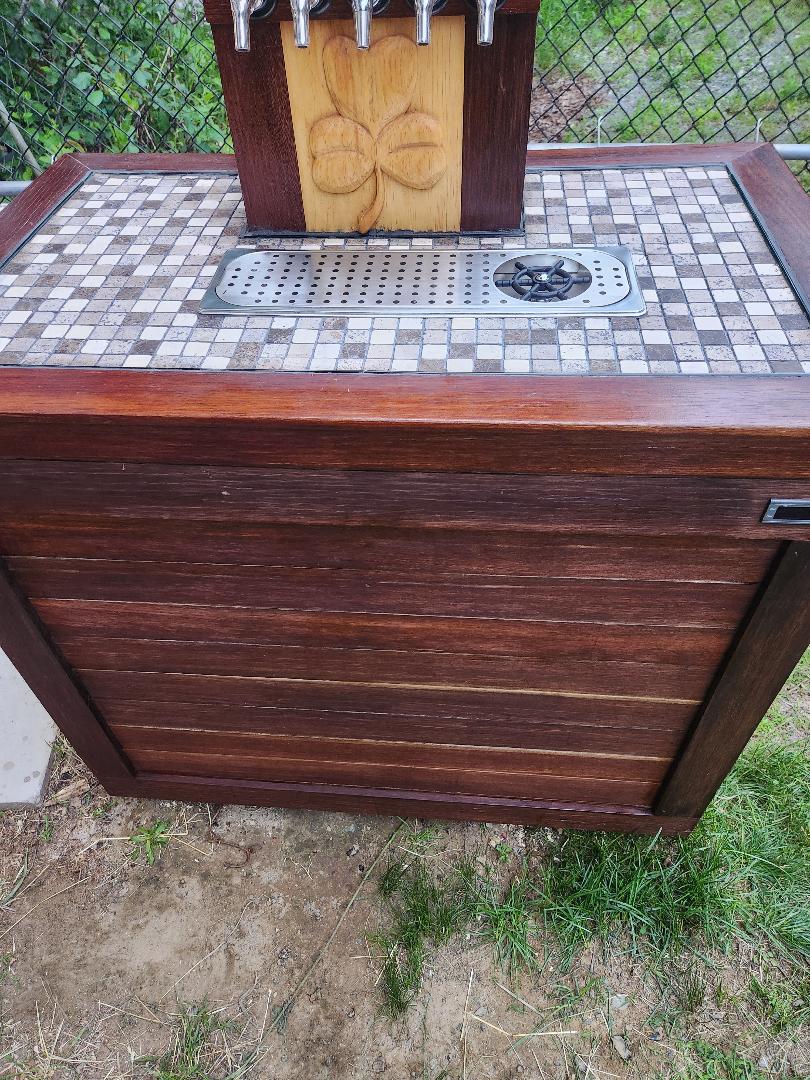
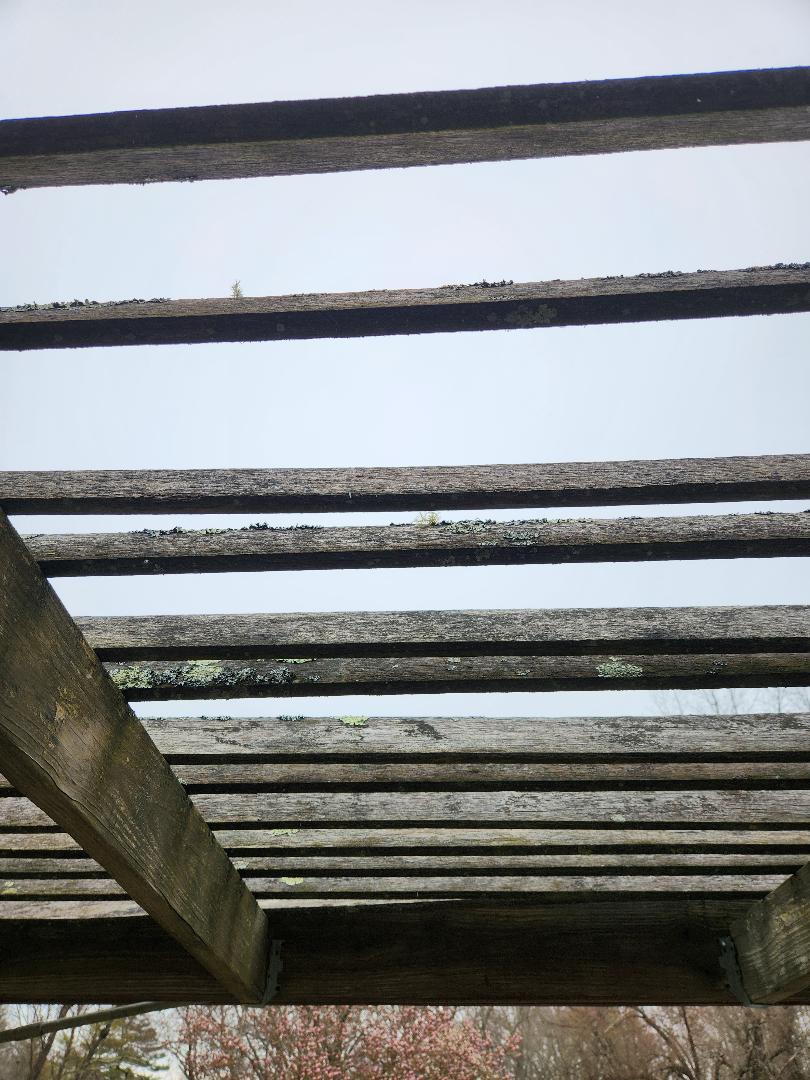
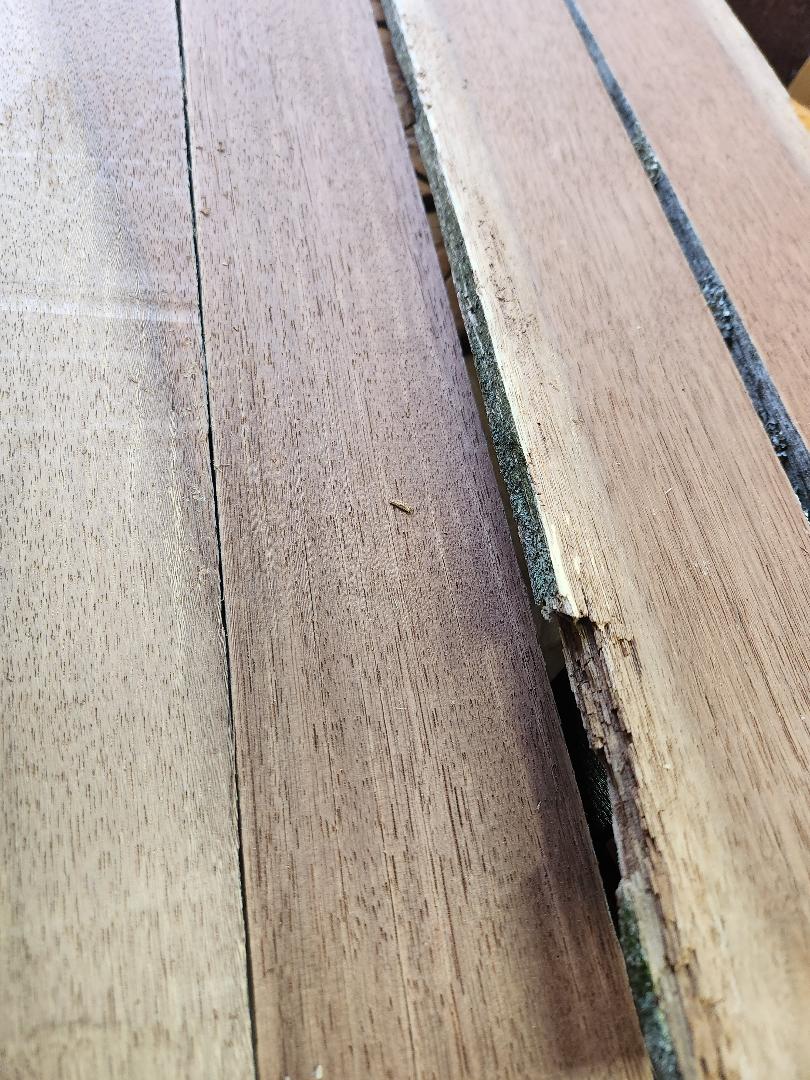
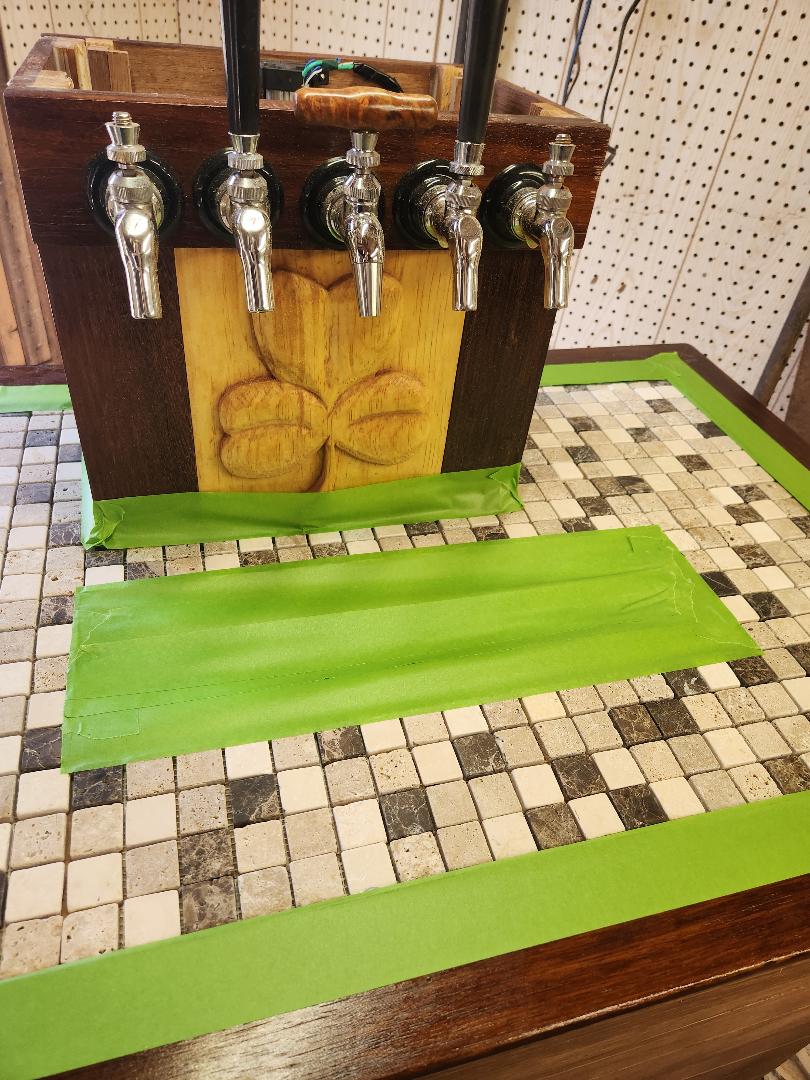
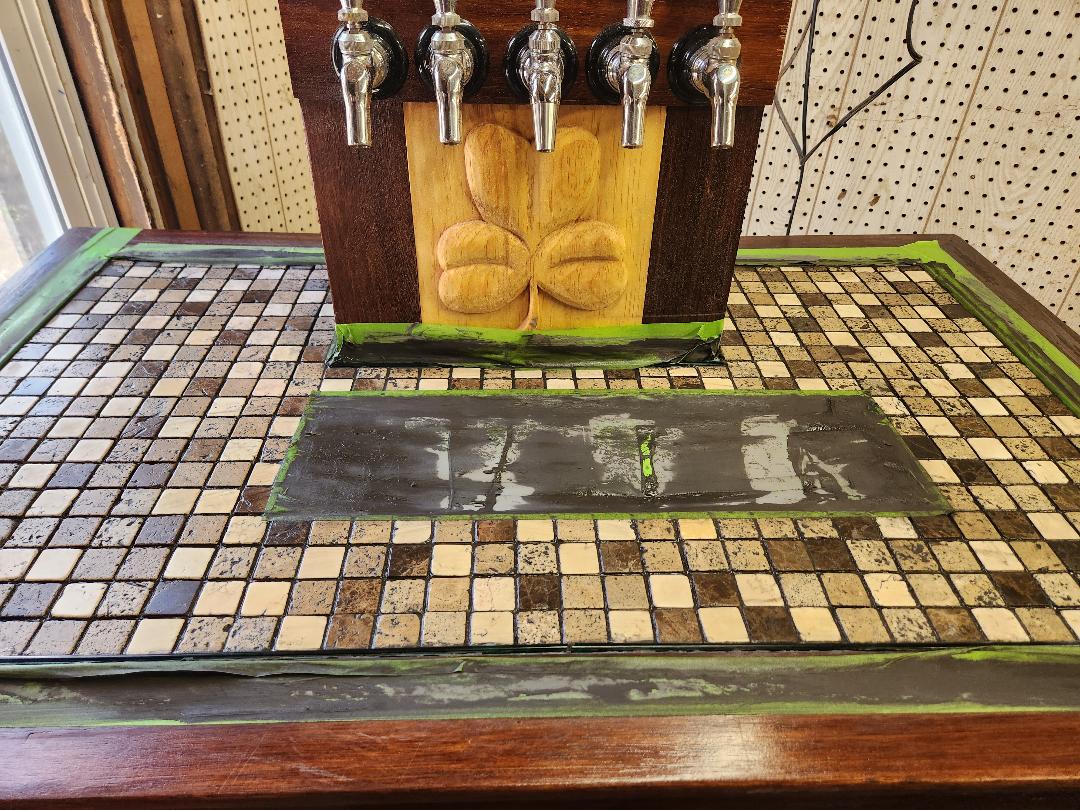
I will use some 30+ year old repurposed mahogany decking for the surround and incorporate as many used parts as possible from the old build.
 

Attachments

  • thumbnail.jpeg
    thumbnail.jpeg
    151.5 KB
The repurposed mahogany was an angled patio slatted roof to filter out the sun. It looks like I will be able to save the majority of the wood for at least a couple of projects. I ran the slats through a planer and it turned out acceptable but with lots of warpage. I have to continually remind myself that it is just a kegerator.


Add ons that are not on lil bros:
-Shocks to hold the lid open.
-Temp controller that can be viewed from the front that has the ability to read in Freedom units.
-LED lights around the tiled top to shine through the the green glass perimeter.
-Regulator within easy reach for adjustments with digital gauges.
-Drip tray/glass washer.
-Fan to limit temp stratification.
-Some duotight fittings.
-Backsplash with a shamrock carving to accent the AIO sports theme.
-Scavenged linear actuator that will lift and hide a digital picture frame from the coffin. The frame will display the tap list. I am looking into other options but this will do for now cause he wont know the difference.

Im open to suggestions.
 

Attachments

  • thumbnail (13).jpeg
    thumbnail (13).jpeg
    141 KB
  • thumbnail (14).jpeg
    thumbnail (14).jpeg
    193.9 KB
LOL

I cut down the old 8 way CO2 manifold. I can use the remainder for another build.


The actuator was shortened for the height of the coffin and the limit switches were adjusted. Some unnecessary wiring and 2 circuit boards were removed and discarded.
 

Attachments

  • thumbnail (3).jpeg
    thumbnail (3).jpeg
    155.7 KB
  • thumbnail (4).jpeg
    thumbnail (4).jpeg
    163.2 KB
  • thumbnail (5).jpeg
    thumbnail (5).jpeg
    104 KB
I actually carved the backsplash a while back but I had to resize it for more boarder. Finishing is not my favorite thing to do but it is easier with equal parts of BLO, Mineral spirits and Shellac. While this finish is not as durable it drys a lot quicker than poly and can be touched up without much effort.

The drip tray/glass washer I found fairly cheap $60 on Amazon. The fit and finish leaves a lot to be desired but its acceptable. Its also bit taller than expected because of the drain slope.
 

Attachments

  • thumbnail (17).jpeg
    thumbnail (17).jpeg
    99.5 KB
  • thumbnail (16).jpeg
    thumbnail (16).jpeg
    171.7 KB
  • thumbnail (15).jpeg
    thumbnail (15).jpeg
    213.9 KB
Here are a few more pics. The tile is pretty much done I just have to wait a couple of days for the grout to cure fully. I didnt use any thinset to adhere the tile to the plywood. Just like my other builds I used a sticky membrane for that. Its available at big box stores. No waiting just stick and grout. Once cured I will use a color matched silicon for the edge. Funny thing is I never knew they had color matched caulk for grout. I look at it as insurance in case the lights burn out they will be easier to be replaced. A note about LED strips. The water proof ones have thick silicone coating on them which makes them a lot harder to use in corners. I had a couple of epic verbal moments getting them to cooperate.
 

Attachments

  • thumbnail (18).jpeg
    thumbnail (18).jpeg
    213.9 KB
  • thumbnail (19).jpeg
    thumbnail (19).jpeg
    167.4 KB
  • thumbnail (20).jpeg
    thumbnail (20).jpeg
    231.9 KB
Finally got the display ironed out. I just have to figure out the trim around the top so its sort of hidden. I spent too much time on this with a few different approaches.

Still have to caulk around the LED lights. The lights look blue in the pic but they are actually white shining through green glass.

Drilled out and tapped the CO2 manifold with the HF 1/4" NPT tap set

In other builds I have either mounted the regulator on the tank inside the keezer or on the back. This time I wanted it to look a part of the keezer and mounted it behind the temp controller. Ran the air lines from the dual stage regulator to the digital remote gauges. The regulator and gauges are mounted so I can see/adjust pressures when I open the lid. Low pressure for the kegs and higher pressure to burst carb kegs.

I am having trouble sourcing fittings to connect the glass washer 1/2" straight thread to a ball lock 1/4" flare. No luck at the big box stores. Im sure they are out there I just have to find the time to look.
 

Attachments

  • thumbnail(21).jpeg
    thumbnail(21).jpeg
    177.7 KB
  • thumbnail (21).jpeg
    thumbnail (21).jpeg
    228.2 KB
I might have converted 1/2" threads on my glass washer, I think that's what I have on my jockey box stand. I will try to check later this evening. It might have been a spare adapter I had from a faucet.

A tip my tile store employee gave me is to sprinkle the grout on to wet silicone (clear) to match the color. It's what I recall doing to match the color where the tile met the hardwood floor on my fireplace hearth.
Your threads are likely 1/2" compression on the glass washer. I ended up using a 1/2"x 3/8" faucet supply line, then went to 3/8" compression to 1/4" NPT adapter, then a 1/4"NPT X 1/4" flare adapter. That's not an elegant solution but it was the NPT x flare adapter I had. Not sure if that was just for expediency or because I couldn't find a 1/2"compression x 1/4" flare adapter. I may have had the supply hose already too. Since it is brass I may have just picked up the middle adapter at Lowes.

What was there before and why did you tap out the regulator? It's a little harder to find 1/4" NPT x ptc adapters. Duotight sells a 1/4" BSP thread x ptc adapter. You can get a 1/4" NPT x ptc adapter but not always available from all HB stores. I then connected an old gas line I had.

1745279036539.jpeg
 
Thanks for the tips and comments. No luck at the big box stores. The plumbing supply stores knew less than I do. I found some fittings on Amazon that will probably work. The threads are NPT but they are the same number and pitch plus the rubber washer in the hose should stop any leaks.

I didnt tap threads into a regulator it was a CO2 manifold that was too long. The manifold had 2 unneeded connections so I cut them off, drilled and tapped the cut portion and added a plug. The spare section was also drilled and tapped to be used on another build.

Sprinkling the grout powder on the caulk is a great idea but I already bought the colored caulk.

Added a cover plate to the regulator and fan control just for looks. I am planning on using some magnets to hold them in place so I can easily deal with leaks. I still need to create a few more openings for heat dissipation.
 

Attachments

  • thumbnail (22).jpeg
    thumbnail (22).jpeg
    81.3 KB
  • thumbnail (23).jpeg
    thumbnail (23).jpeg
    96 KB
Got a little busy so not much to post on this build other than I received the fittings for the glass washer/drip tray. Two are male threaded straight fittings and two are 90 degree fittings. I am using the male threaded ones. They fit and appear to seal. I added some silicone to the drains on the drip tray because I have no confidence in the vinyl gasket they supplied. I'll wait until tomorrow for a leak test before I silicone the tray into place.

Still fine tuning the cedar covers over the edges.

The shocks I used are a little too short but they work for now.

Finished the color matched silicone and all I can say is what a mess. I sprayed the area with water before I used the grout tool but I foresee some additional time scraping if off the glass, wood and tile.
 

Attachments

  • thumbnail (24).jpeg
    thumbnail (24).jpeg
    110.6 KB
  • thumbnail (25).jpeg
    thumbnail (25).jpeg
    124.8 KB
  • thumbnail (26).jpeg
    thumbnail (26).jpeg
    65.3 KB
  • thumbnail 24.jpeg
    thumbnail 24.jpeg
    88.8 KB
The grout looks ok until I turned the lights on. There are areas I will need to touch up tomorrow
 

Attachments

  • thumbnail 26.jpeg
    thumbnail 26.jpeg
    151.5 KB
  • thumbnail (27).jpeg
    thumbnail (27).jpeg
    160 KB
  • thumbnail (28).jpeg
    thumbnail (28).jpeg
    152.1 KB
Leak tested and tightened CO2 fittings where needed.

Tested, leak checked and siliconed the drip tray in place.

Added beer lines to the coffin only to find out that I had miscalculated the available space. Two of the shanks were too long and interfered with the display. I could have modified the coffin to get things to clear but there are just too many other projects that need attention. I ordered two shorter shanks to make it work.

I am using duotight fittings where I can for ease of installation. I have read differing reviews but the fittings seem to be holding without leaks.

I was excited today when two brand new and expensive 3 gallon kegs arrived. I have always bought used kegs which I cleaned and sort of rebuilt. Unfortunately I could not find anything local. One is slated for the washer and the second is for the grey water. While shiny and new I was disappointed that the supplied white gaskets did not seal even with keg lube. The instructions supplied even says that they may dry out during shipment and may not seal. The solution is to replace them LOL. Good thing I had spares. I wanted to check the poppets in case they had the same white o-rings but the instructions stated that the warranty would be voided if I disassembled the posts (BUY USED). I was toying with the idea of routing the drain line out through an adjacent wall using gravity to drain the grey water. However since this will hopefully be a long lasting personal build I chose a second keg for this. When cleaned it can also double as a portable source of beer for gatherings.
 

Attachments

  • thumbnail (29).jpeg
    thumbnail (29).jpeg
    176.3 KB
  • thumbnail (30).jpeg
    thumbnail (30).jpeg
    129.6 KB
  • thumbnail (31).jpeg
    thumbnail (31).jpeg
    182.2 KB
  • thumbnail (32).jpeg
    thumbnail (32).jpeg
    136.3 KB

Latest posts

Back
Top