• Please visit and share your knowledge at our sister communities:
  • If you have not, please join our official Homebrewing Facebook Group!

    Homebrewing Facebook Group

Just another electric brewery build thread.

Homebrew Talk

Help Support Homebrew Talk:

This site may earn a commission from merchant affiliate links, including eBay, Amazon, and others.

sethhobrin

Well-Known Member
Joined
Jan 26, 2012
Messages
135
Reaction score
3
Location
Oak Creek
I can't handle carrying full carboys up and down from my garage and I'm tired of using propane so it is time to move this hobby to the basement. I also live in Wisconsin so it will be very nice for winter brewing.

I may move in a few years so I didn't want to build something permanent. The goal of this build will be to have everything modular and moveable to a new location only leaving a 50A breaker and outlet behind.

I decided to go with a 50A breaker in the main panel with an outlet right next to the main. My Spa panel will be built on to a wooden frame that will also contain the control boxes. The entire unit will be able to be unplugged when not in use from the main panel. I am still plotting everything out... I will likely call PJ again soon to bounce some ideas off him before I go further.

I will be updating photos in the facebook album. I'll post in this thread when there are updates.

My Electric Brewery Build:
http://www.facebook.com/media/set/?set=a.10150651836576958.394419.609036957&type=1&l=fea2ecd889


...and although off topic here is a Keezer build i recently completed:
http://www.facebook.com/media/set/?set=a.10150490803466958.372852.609036957&type=3&l=67e51d56ed
 
Subscribed. Where abouts in WI? I'm about to start working on my ebuild too, just waiting on panel switches and amp meter.
 
PHOTOS ADDED TO MAIN ALBUM ON POST 1

You guys have all seen these fans a million times but here is mine anyways. I figured a good place to start would be putting in a 50A breaker in my main moving the 120v receptacle closer to the main panel out of my brewing area where it could get splashed, and working on my exhaust system....

So what do you guys think about mounting the exhaust fan in the vertical section of the tubing so that the fan is facing up down instead of horizontal near the outlet? I'm not sure I can get it on the horizontal section of right before the outlet. The other option would be to mount it directly on the hood.

I think I may just get a nice rubbermaid tub of the correct size and hang it from the ceiling. I would cut a 6" hole in the side for the 6" duct.

Also I would like to put on a reducer to 4" right before leaving the house as I would prefer to cut a 4" hole in my exterior wall rather than a 6" hole. Is that an issue?


How would you mount the exhaust fan vertical, how would you secure it in place? I know the rubbermaid tote is quick, easy, and cheap(I was using one in the garage), but I made this for around $7. Excluding the bath surround, I had it left over from another project. Also here is a pic of the exhaust fan mounted right before it leaves the house.

hood.jpg


hood3.jpg


exhaust.jpg
 
I figured i would use wire, chains, etc like you used to mount it. Vertically might be tricky but I am sure I could think of something.

I saw another thread this morning where guy made a nice stainless looking hood but used the silver colored insulation from HD/Lowes. Seems like a good surface to wipe dry and evaporate off.

My original plan was to do exactly what you did. build a box. But the rubbermaid tote or even this insulation idea sounds good enough for my needs and the people that tried them seem to have good results. I have a baby and anything I can do to save time or money is helpful.

Here is what i was thinking with the 2 possible fan mount locations.

I am not good at drawing a backwards bending tube hahah but the hole over the spray foamed rim joists is where the hole would be cut for the exhaust. I just can't get the fan up in the rim joist so it cannot be mounted right at the outlet horizontally. It has to be earlier in the exhaust system.

 
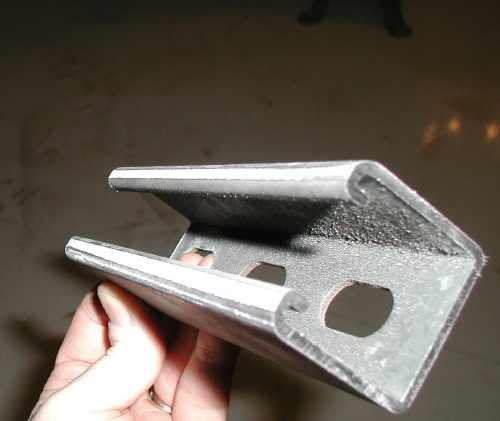
Its hard to see in the pic but I used uni-strut and threaded rod to mount the fan right on the joist. Looks like your best(easiest) bet is to do the same. I have some uni-strut and rod left over if you want it. I see we are in the same neck of the woods.
 
Its hard to see in the pic but I used uni-strut and threaded rod to mount the fan right on the joist. Looks like your best(easiest) bet is to do the same. I have some uni-strut and rod left over if you want it. I see we are in the same neck of the woods.

Possibly. I had to google uni-strut and I am trying to picture what you are referring to. Can you provide a pic of your example?

I was shopping around at menards and lowes the other day looking at ducting... This would be so easy with flexible ducting. But everyone says don't use that stuff....

Also I'm leaning back towards building a wooden hood of some kind instead of rubbermaid. I keep going back and forth on this.
 
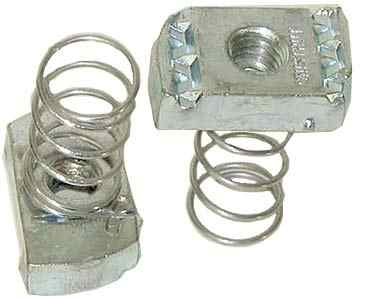
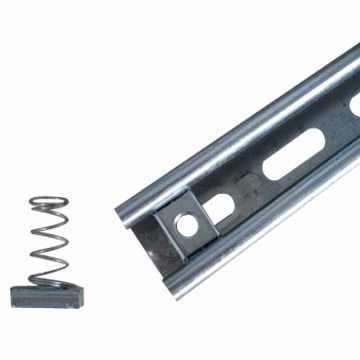
Not at home now but I will take some better shots later. I built a pump stand out of unistrut too, it is some cool stuff. But basically I used the unistrut as a mounting structure secured to the floor joist, slid in 2 spring nuts, turned in 6" 1/4-20 threaded rod into the spring nuts and ran the rods through the holes in the exhaust fan mount plate and tightened down with nuts. The good thing about doing it this way is, that it is fully adjustable up/down, back/fourth, when installing ducting and hood.

unistrut1.jpg


Unistrut_3-8_16_Spring_Nut.jpg


Uni-Strut-Channal.jpg
 
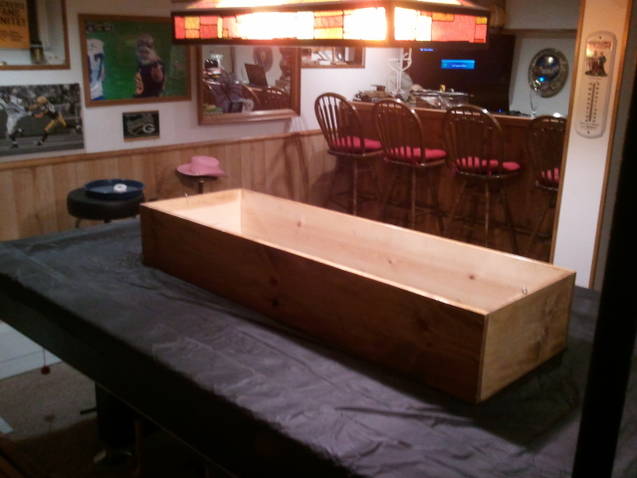
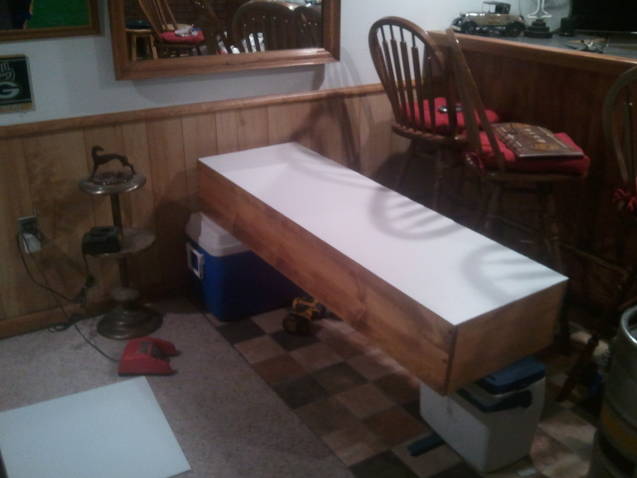
I finished building the frame of my stand. still needs to be sanded, stained, and sealed but it helps add a visual of what I am trying to accomplish. took some measurements tonight and I am now thinking i might just put an insulation panel over the window and cut a 6" hole through it for the exhaust duct to attach to the fan which would be mounted right at the outlet. This way I won't have to drill any holes in my rim joists or exterior walls! All I'll need is a 90 elbow to attack to the hood which I will be building out of wood, stain and seal to match the stand. I keep going back on forth on this.. One of these days I will decide....

Picked up a bunch of more parts today at HD. some switches, cables, etc...

On Thursday I will be installing the 50A circuit, range outlet, and moving the 120V receptacle away from the brewing area and installing a switch so i don't have to plug and unplug the exhaust fan. If I am still alive on Friday that will be a good sign! I haven't really done much electric work in my life so this project will really be pushing me to the limits of my experience which is exciting!

Since the HLT will always be covered when heated I see no reason to put the hood above it. The hood will function better for its purpose if it is smaller and directed over the MT and BK.

BK | MT | HLT

 
Well I made some progress today. 50A circuit is live with a new box/receptacle installed. The 110v box has been moved away from the brewing area above the 50a box.

I think i will get started on building a wooden hood, sand, stain and seal both the stand and hood next. After that I will finish the exhaust. I also want to paint the basement walls in that area a satin bright white so they don't look so dingy and dark in that area.

Then on to the electrical and control boxes which I am still figuring out....

photo16qz.jpg


photo15gs.jpg
 
Got some more work done today. mounted the 6" inline vortex fan. Installed all 6" ducting. Cauked the cracks. There is a removeable exhaust cap. The nice thing is I didn't have to drill any holes in my house. Tge exhaust is also hidden in the window well and covered both with a cap as well as window well cover when not in use.

Also installed an overhead utility light in the brewing area. Cords will be organized later. I will be painting the wall bright white this weekend.

56219610150679520831958.jpg

53273010150679522676958.jpg

52277910150679520296958.jpg

15627310150679521861958.jpg
 
I was originally going to stain and seal the brew stand and hood however I decided to try and spray paint it as the wood for the stand was just leftover project wood and not the greatest of quality. I put on 4 coats of primer and decided to try a Rustoleum Universal Glossy Black Hammered Finish spray paint. I ran out of time after priming so I will do the black later this week or next weekend.

I am debating whether or not to do both the hood and stand in black hammered or just the stand and then spray paint the hood a metallic silver.


Can anyone tell me if I need 6 gauge wire for the length of wire between the 50a spa panel and the power terminals where the power gets split across the breakers?

Or can I just use 12 gauge since I will never be using more than 18.75a across either of the 25a breakers with the 4500watt/240v elements.

Also does anyone know a good source online for stranded electric wiring in different colors? None of my local stores have different colored/gauged wire by the foot.


Say you have a short in the section of the wire between the 50A breaker and where you are splitting off each circuit (maybe a sharp piece of metal accidently punctures the sheathing and make a connection between the two hots). The breaker will not shut off until it sees 50 amps, so the wiring needs to be rated at 50 amps to ensure that the insulation doesn’t melt and/or catch fire.
 
Say you have a short in the section of the wire between the 50A breaker and where you are splitting off each circuit (maybe a sharp piece of metal accidently punctures the sheathing and make a connection between the two hots). The breaker will not shut off until it sees 50 amps, so the wiring needs to be rated at 50 amps to ensure that the insulation doesn’t melt and/or catch fire.

I will for sure use 6 gauge wire between the power terminal strips and the 50A GFCI as you said but what about from the power terminal strips to the sub protecting breakers? those breakers are only 25/25/25/15.
 
sethhobrin said:
I will for sure use 6 gauge wire between the power terminal strips and the 50A GFCI as you said but what about from the power terminal strips to the sub protecting breakers? those breakers are only 25/25/25/15.

Same thing, until you get to the other side of the breaker, you need to be able to support the max that could possibly be supplied on it. After the 25A breaker, you can drop down to 10 or higher.
 
Same thing, until you get to the other side of the breaker, you need to be able to support the max that could possibly be supplied on it. After the 25A breaker, you can drop down to 10 or higher.

Thanks! Now I need to source some wire. Having one hell of a time finding colored stranded wire :(
 
Thanks! Now I need to source some wire. Having one hell of a time finding colored stranded wire :(

Home Depot/Lowe's/etc should sell that stuff by the foot. I went to Home Depot over the weekend and picked up a 5' of black, white, red, green, and blue in 10 gauge, and all those colors except blue in 14 gauge. I'm going to strip some colored wire out of cat5 cable for the really low voltage stuff.

If you hit a place like that, and you need the heavier stuff, ask if they have anything precut that they'll cut you a break on. I picked up 70' of 6 gauge wire to run to my outlet, for the price of 55'. I didn't need all 70 ft, but it was a deal compared to just buying 50'. They chopped the price because it's pretty rare someone is going to need that short of a length of that type of wire. Worth a shot...after my 10% discount, it saved me almost $25 on that wire alone.
 
Also, Radioshack has 14 gauge wire in pretty much all the colors you need. I used it in my control panel for all the 110 wiring (PID, pump outlets, indicators, switches). They have some 10 gauge stuff too but I’m pretty sure its only red and black, at least that’s all I’ve seen.

Radioshack is pretty overpriced, but it was still cheaper than buying the 50 foot rolls at HD/Lowes if you can’t get what you need by the foot.
 
looks like my biggest issue is going to be the 6 gauge wire going from the terminal blocks to the sub protecting breakers 25/25/25/15. That is a lot of small runs of 6 gauge wire.... I didn't realize that would need to be 6 gauge.... What are other people doing in this type of situation???

I was planning on just buying a 20 dollar 50A cord and cutting it up to go from the spa panel to the main panel with the terminal blocks and sub protecting breakers but I hadn't planned to have to use 6 gauge from the terminal strips to the breakers.. yikes...

According to the wiring plan I'll need 7 pieces of 6 gauge wire to connect to the sub protecting breakers... I think my best bet for the 6 gauge stuff is still to buy a 6 foot 50A cable and then cut it up.

thanks for all the additional suggestions. This weekend I'll be done with the furniture and hood and exhaust and it will be on to the electrical!

6 gauge wire, in aluminum, is just over $1.13 a foot...that's with both hots, ground, and a neutral...so really, it's 28.25 cents per foot, per wire.

If you buy a $20-$30 6' 50A range cord, you're wasting the plug and out that money compared to 10' x $1.13/ft = $11.30.
 
6 gauge wire, in aluminum, is just over $1.13 a foot...that's with both hots, ground, and a neutral...so really, it's 28.25 cents per foot, per wire.

If you buy a $20-$30 6' 50A range cord, you're wasting the plug and out that money compared to 10' x $1.13/ft = $11.30.

You guys must have much better lowes/HD than the ones in my area. They don't carry **** for wire by the foot. I would kill to find 6 gauge aluminum with both hots, ground and neutral.

I couldn't find ANYTHING at lowes larger than 12 gauge. Looks like I need to poke around some more stores or look again or something.

This store has it in copper for $2.56/foot.

The Home Depot - MilwaukeeAddress:‎
150 West Holt Avenue
Milwaukee, WI 53207‎
(414) 481-8770


Call the store and ask for electrical. They're box stores and should similar inventory. The stores around here have the wire by the foot on a floor to ceiling machine. It's not a help yourself item since they have to measure it, and tag it with item and length so it can be rung up at the register, but they're in there somewhere.

It is quite possible I walked right by it. When I was there i couldn't find anyone to help me at the time. Thanks again for all the help! Looks like i have shopping to do this weekend!
 
sethhobrin,

You do not need to use heavy gauge wire on the input side of the breakers.Use #10 for the element breakers and #14 for the pumps etc.

No problem.
 

Latest posts

Back
Top