I built mine today for $56. Alaska prices = lower 48 + 20%.
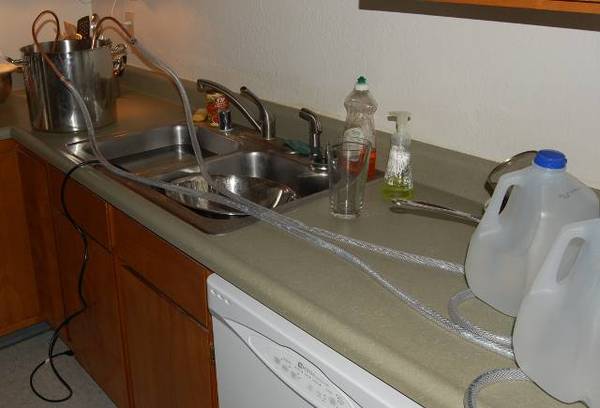
Since I PM on my stove top anyway all I need to do is cool 2.5 gallons.
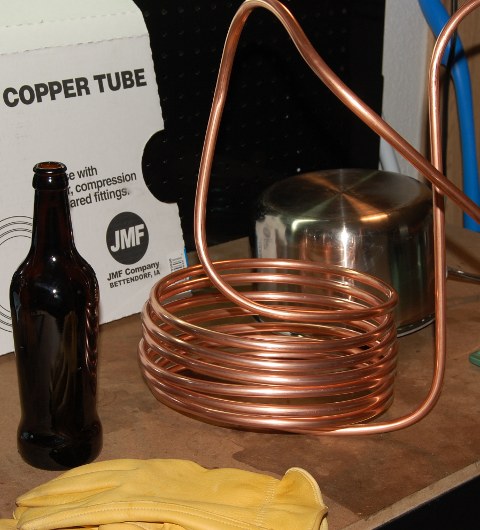
I started with 20 feet of 3/8" OD tubing. I uncoiled it just enough to get close to what I wanted and then started tightening it back down.
Used a Young's bottle as my bending guide.
The rest of the spool of the plastic tubing I wanted was 14 feet of 3/8 ID x 1/2 OD with the string encased in the plastic, the clear vinyl stuff says beware of heat.
2 of 3/8 to 5/8 inch hose clamps included in price.
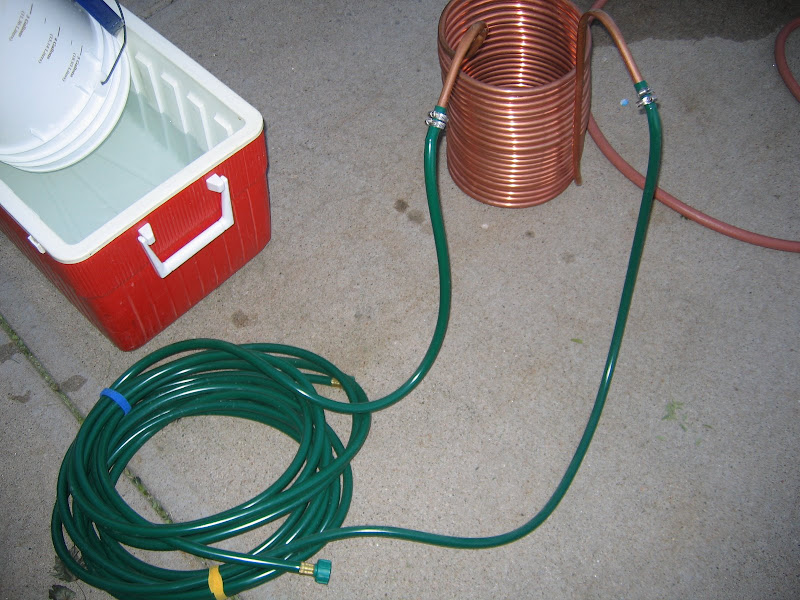
155 gallon per hour pond pump included in price.
Add one sink of ice water, plug in pump.
Imma boil it in some vinegar tomorrow and then do a 2.5gal AG batch of EdWorts Haus on Tuesday to celebrate. Maybe tear open some Romex to lash the coils down.
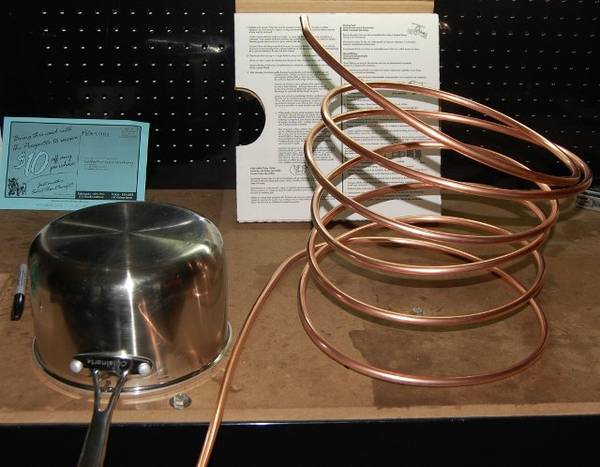
Just relaxed enough out of the box to start making a the chiller:
The only tools I used were a sauce pan to bend around, a Young's bottle as a bending guide, some gloves to protect my hands, and a screwdriver on the hose clamps:
The tubing I got was from the middle of the spool, wrapped pretty tight. I ran hot water through the system with the pump and then cooled the tubing in a relaxed position:
If you have never fooled with soft copper tubing before, 3/8OD is a nice compromise between able to do by hand, but sturdy enough to not kink easy. Just take your time. You want to open the coil from the box just enough to stack it as a single helix, you will probably find a double or triple layer in the box.
Once you have your straight ends and your coil established, roll the guide forward along the curves/corners you need to get out of the kettle as you go. If you hold the guide still and try to just pull the tubing around the corner, the tubing will collapse. Bend a little, roll a little, bend a little, roll a little, RDWHAHB.
Total took me under an hour, but I have some experience with the fussy sizes of soft copper under 3/8OD.


![Craft A Brew - Safale BE-256 Yeast - Fermentis - Belgian Ale Dry Yeast - For Belgian & Strong Ales - Ingredients for Home Brewing - Beer Making Supplies - [3 Pack]](https://m.media-amazon.com/images/I/51bcKEwQmWL._SL500_.jpg)


